Subjective assumptions for riding wild waters gnded
WW 1:
. A knowledge of all basic strokes, both forwards and
backtvards, steering and control of the kayak.
The ability to realistically evaluate the difficulty posed and
the actual state of the river's waters. A knowledge of ele-
mentary life-saving techniques. Physical fitness and
swimming skills are necessary during long trips.
Technical equipment for WW 1:
. All types of open boats; flotation life-jackets with
a minimum displacement of 7.5 kg.
CAUTION
Pay extra attention to your choice of flotation lite-jac-
ket. The flotation life-lacket should have a tag bearing
details ot its flotation capabilities and safety certificati-
on.
5. FOLDING THE KAYAK
Prior to folding the kayak, clean it and dry it. By pressing
down on the valve-stems and turning them, open the val-
ves and release the air. The boat can be deflated more
quickly by rolling it in the direclion of the valves or by
exhausting the air.
Lay out the deflated kayak on a clean suface and straigh-
ten all its parts.
Then fold both sidewall cylinders to thirds over the boitom
of the kayak and then fold the kayak from the bow towards
the valves. Fasten the folded kayak with the enclosed strap
and insert it together with its accessories into the transpor-
tation bag.
6. USING THE UALVES
The GUMOTEX filling valves allow the kayak to be inflated
by means of a piston pump or a foot pump with the appro-
priate adapter to fit the hose end to the valve opening.
Opening the valves
Remove the valve caps by turning them in a counter-clock-
wise direction. Press down on the orange valve-stem, gent-
ly rotate and release your finger so that the stem "seats"
itself in the lower position. Repeat this step if necessary.
Closing the valves
Press down on the orange valve-stem and gently rotate it.
When you release your finger, the spring-loaded stem
should pop up and stay in the upper position. Mount the
valve cap and gently tighten it in a clockwise direction.
CAUTION
When using the kayak, always close the valves with
their valve caps. This will keep dirt out of the valves.
Dirt can cause leaky valve seals.
7. TREATMENT AND STORAGE
The rubber surface coating of the kayak is sensitive to oil,
petrol, toluene, acetone, kerosene and similar thinning
agents. Prior to storing a didy kayak, wash it down with
warm soapy waten Rinse the kayak with fresh water after
using the kayak in seawater. lt is recommended to check
the state of the inflation valves. lf a valve is not air-tight, it
is possible to unscrew lhe valve body from the kayak with
the use of a special valve-key and clean its membrane
under a strong jet of water or compressed air. Prior to sto-
ring the kayak, it is recommended to rub the surface of the
kayak with an agent intended for the treatment of such sur-
faces which has cleaning properties and which impregna-
tes the material against further soiling or is capable of for-
ming a protective Uv-filter. Never use agents containing
silicon when treating your kayak. Store the cleaned and
dried boat in a dark and dry place at temperatures of (10-
25) 'C. During long-term storage, it is recommended to
inflate the boat for 24 hours from time to iime to avoid fati-
guing the fold lines. lt is also recommended to have the
kayak serviced by the manufacturer or an authorized servi-
ce station at least once every two or three years.
Proper care and treatment of the kayak will prolong its ser-
vice life.
8. GUARANTEE CONDITIONS
The guarantee period is 24 months and is calculated from
the date of sale.
The manufacturer provides cost-free repairs or replace-
ment of faulty components with respect to material faults or
production faults.
You can easily repair a damaged kayak yourself using the
supplied gluing kit.
How to glue:
. mark out the damaged area on the kayak and choose an
appropriately sized patch
. the surfaces of the patch and the spot to be glued
should be clean, dry and free of residual old glue
. we recommend degreasing both surfaces with acetone
in order to achieve a perfect bond
. spread a thin layer of glue on both surfaces to be glued
and repeat this step once the first layer has dried
. when the second layer is almost dry, apply the patch
onto the damaged spot, press it down firmly and weight
it down or roll it over with a roller on a flat surface
With minor repairs (punctures), it is enough to wait for 30
minutes before you re-inflate the boat and continue using
3 (4)
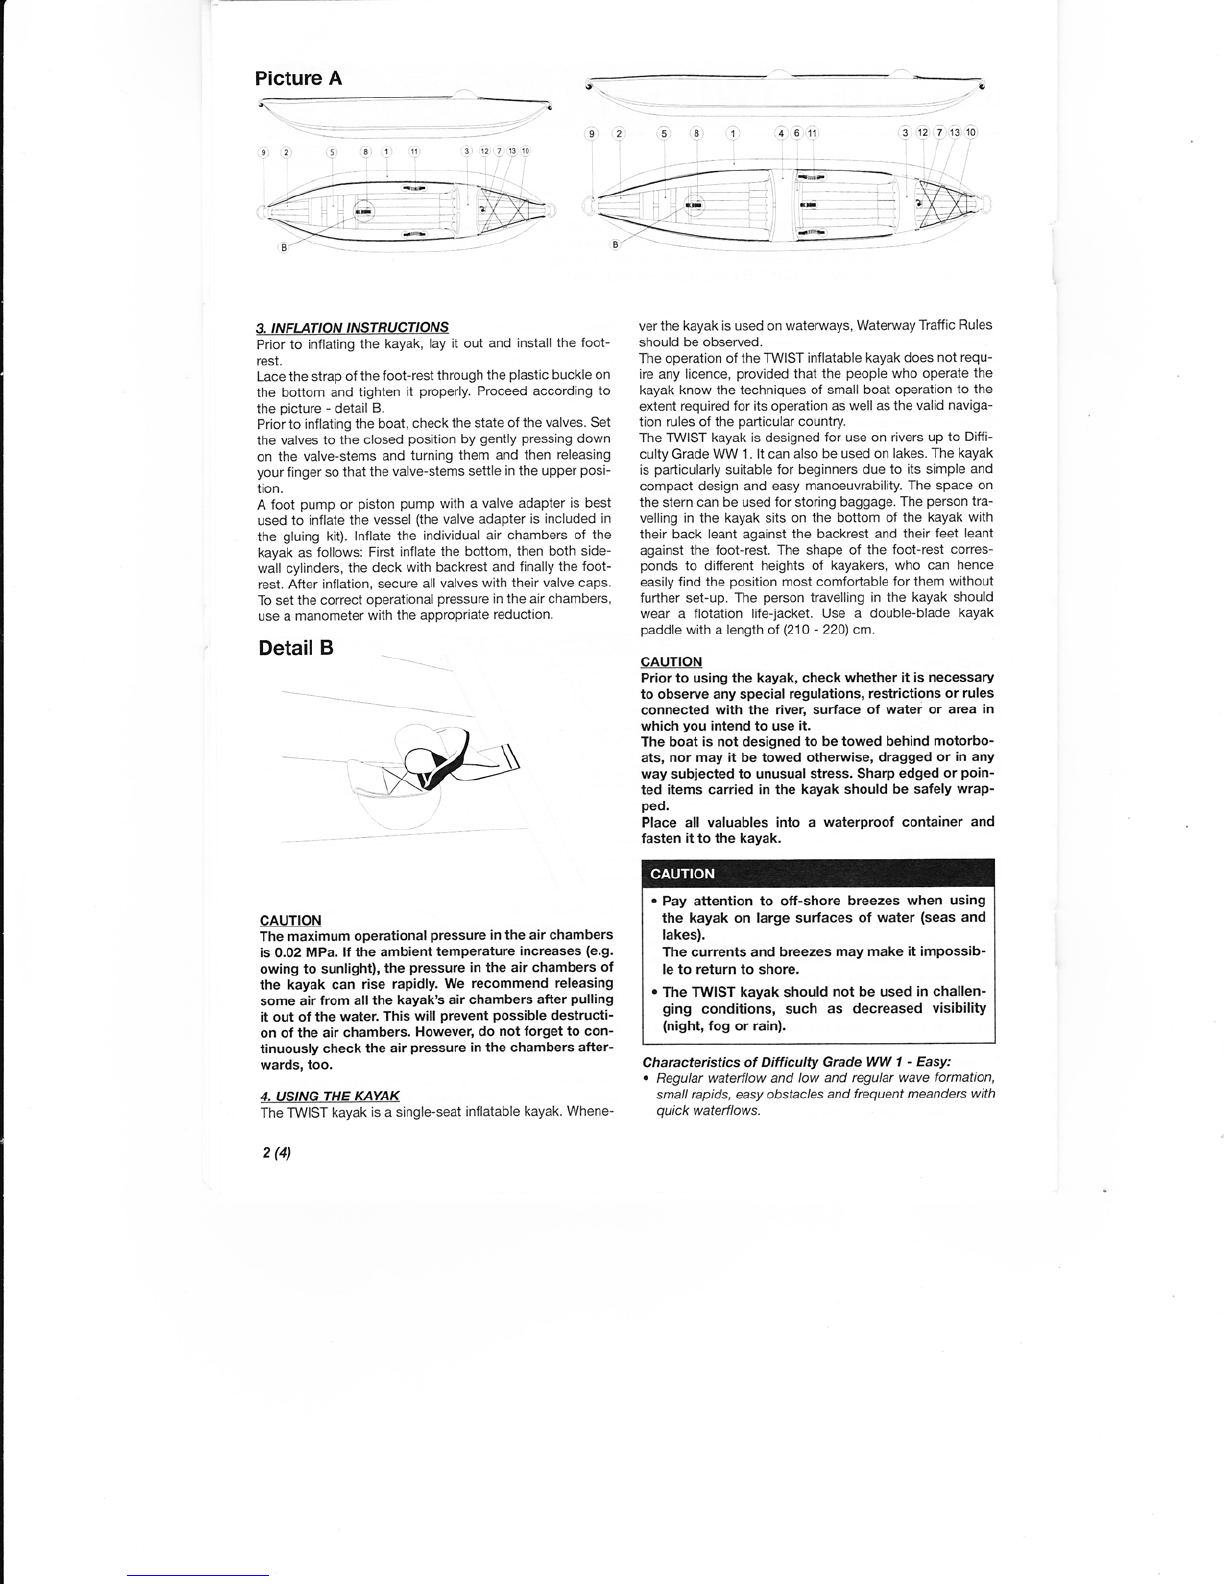
Opening
the valves
r@
@'
/ -:B-
r4.R\
ffi
@"
W closins the valves
M6ry '@tr