TO USE TO REMOVE
CONTACT DETAILS
Tee-Zed acknowledges that its customers may be entitled to statutory consumer guarantees and does not seek
to exclude or limit them. These guarantees include that Tee-Zed’s products are of acceptable quality.
This Tee-Zed product is for the specific purpose detailed in the instructions and packaging and Tee-Zed
considers use outside of that purpose to be abnormal use. To the maximum extent permitted by law, Tee-Zed
does not accept any liability for damage:
• arising from abnormal use of the products;
• caused by installation or removal of the products other than in accordance with the supplied installation and
removal instructions; or
• arising under the law of tort or contract.
Made in Shenzhen, China.
©2019 Tee-Zed Products Pty Ltd
Dreambaby
®
products by
Slide Cover (B) from Top of Casing (L).
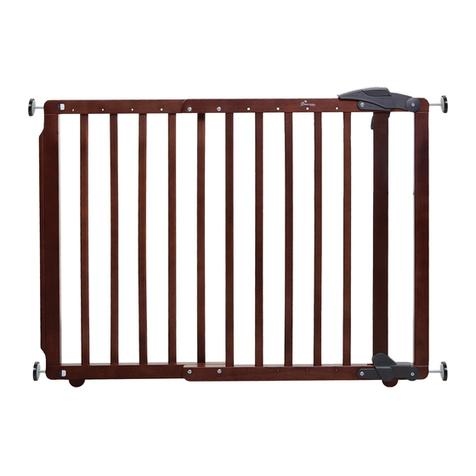
Press dismount Latch on Upper Bracket (C) and slide gate up.
• Gate must be fitted according to instructions, to ensure it works correctly.
• Regularly check gate to ensure it is fitted properly and securely. Adjust as required.
• Regularly check that brackets and hooks are securely in place.
• If gate is used outdoors, bring inside and keep out of rain, hail, snow or below freezing conditions.
• Do not use the safety gate if any components are damaged or missing.
• To clean, wipe surface with a damp cloth or sponge using mild detergent and warm water.
Never clean with abrasive, ammonia based bleach based or spirit type cleaners.
• Any additional and replacement parts should be obtained from Tee-Zed Products.
MAINTENANCE & CARE
To close the gate:
Press Release Button and twist clock-wise,
then pull the gate handle and without
stopping fit Locking Rod (G) into lower and
upper Hooks (E, F).
To open gate:
Press
Release Button
and twist
clock-wise then pull the gate handle out
from lower and upper Hooks (E, F).
NOTE: The noise you hear while the gate
retracts is designed to alert you, letting
you know that the gate is being opened.
For silent operation, hold Release Button down when retracting gate.
press
dismount
latch
B
C
C
L
L
F
4-1 4-2
*
conceals
latch
tab
notch
*
press
dismount
latch
*
reveal
latch
5a 5b
Checked the
direction you
want the gate
to open / close.
Align the notch
on Top of
Casing (L) with
the arrow on
the Upper
Bracket (C) in
desired open /
close direction.
wallwallwall
wallwallwall
conceals
Latch
Top view of gate Side view of gate
tab
arrow
notch
mount gate
on brackets
click
5c
Align the lower
part of gate to
Lower Bracket
(D) and top of
gate to Upper
Bracket (C).
Push down gently
to click into
place.
5d
Slide Cover (B) over
Upper Bracket (C)
until it covers
dismount Latch.
The Cover locks
the gate in place.
It must be securely
installed at all times.
1
click
2
C C
C
D
B
C
L
notch
L
To mount gate
5.
wall
4
Composition
The plastic parts are made of fibreglass-armed
polyamide, Polypropylene and Polyester.
Plastic parts: Nylon & Polyoxymethylene (POM)
materials.
Mesh fabric made of 40% polyester and 60% non-toxic
PVC coating.
Other components are made of steel and aluminium.
The materials are used for their durability and
resistance.
Spacers made of ABS (Acrylonitrile Butadiene Styrene).
INSTALLATION
Tee-Zed Products Pty Ltd, PO Box 2022
Bondi Junction NSW 1355
Australia
+61 (0)2 9386 4000
info@tee-zed.com.au
www.dreambaby.com.au
Tee-Zed Products (N.Z.) Ltd, PO Box 64013
Botany Town Centre Auckland
New Zealand
+64 (0)9 274 8788
info@tee-zed.co.nz
www.dreambaby.co.nz
Tee-Zed Products Ltd, PO Box 29227
Dunfermline, KY12 2DN
United Kingdom
+44 (0)844 800 9445
info@tee-zed.co.uk
www.dreambaby.co.uk

