inoclar vivadent bluephase C5 User manual
bluephase®C5
Operating Instructions
Page 2
Bedienungsanleitung
Seite 12
Mode d’emploi
Page 22
Istruzioni d’uso
Pagina 32
Instrucciones de uso
Pagina 42
Instruções Operacionais
Página 52
For dental use only!
Caution: U.S. Federal Law restricts this device to sale by or on the order of a licensed dentist
Made in Austria
Ivoclar Vivadent AG, FL-9494 Schaan / Liechtenstein

32
Dear Customer,
Optimum polymerization is an important
requirement for all light-cured materials in order
to consistently produce high-quality restorations.
The polymerization light selected also plays a
decisive role in this respect.
Therefore, we would like to thank you for
having purchased bluephase C5. This light is a
high-quality medical device that has been designed
according to the latest standard of science and
technology in compliance with the relevant
industry standards.
These Operating Instructions will help you to safely
start up the device, make full use of its capabilities,
and ensure a long service life.
Should you have any further questions, please do
not hesitate to contact us (see addresses on the
reverse page).
Your Ivoclar Vivadent Team
Product overview ...........................................................................4
List of parts ....................................................................................4
Indicators on the handpiece holder ............................................................5
Indicators on the handpiece ...................................................................5
Safety ........................................................................................6
Intended use ...................................................................................6
Indication ......................................................................................6
Contraindication ...............................................................................6
Signs and symbols .............................................................................6
Safety notes ...................................................................................6
Start-up ......................................................................................7
Handpiece holder ..............................................................................7
Handpiece .....................................................................................7
Operation ....................................................................................8
Start ...........................................................................................8
Selecting the curing time ......................................................................8
Acoustic signals ................................................................................8
Light output ...................................................................................8
Measuring the light output ....................................................................8
Maintenance and cleaning...................................................................9
Housing ........................................................................................9
Light probe ....................................................................................9
What if …? .................................................................................10
Warranty....................................................................................11
Procedurein case of repair.................................................................11
Product specifications ......................................................................11
Delivery form .................................................................................11
Accessories ...................................................................................11
Technical data ................................................................................11
Declaration of conformity ..................................................................62
Table of Contents
English
54
Product overview Indicators on the handpiece holder
Indicators on the handpiece
Indicator Colour Meaning
Light output 1 x green ≥200 mW/cm2
2 x green ≥400 mW/cm2
3 x green ≥600 mW/cm2
4 x green ≥800 mW/cm2
5 x green ≥1,000 mW/cm2
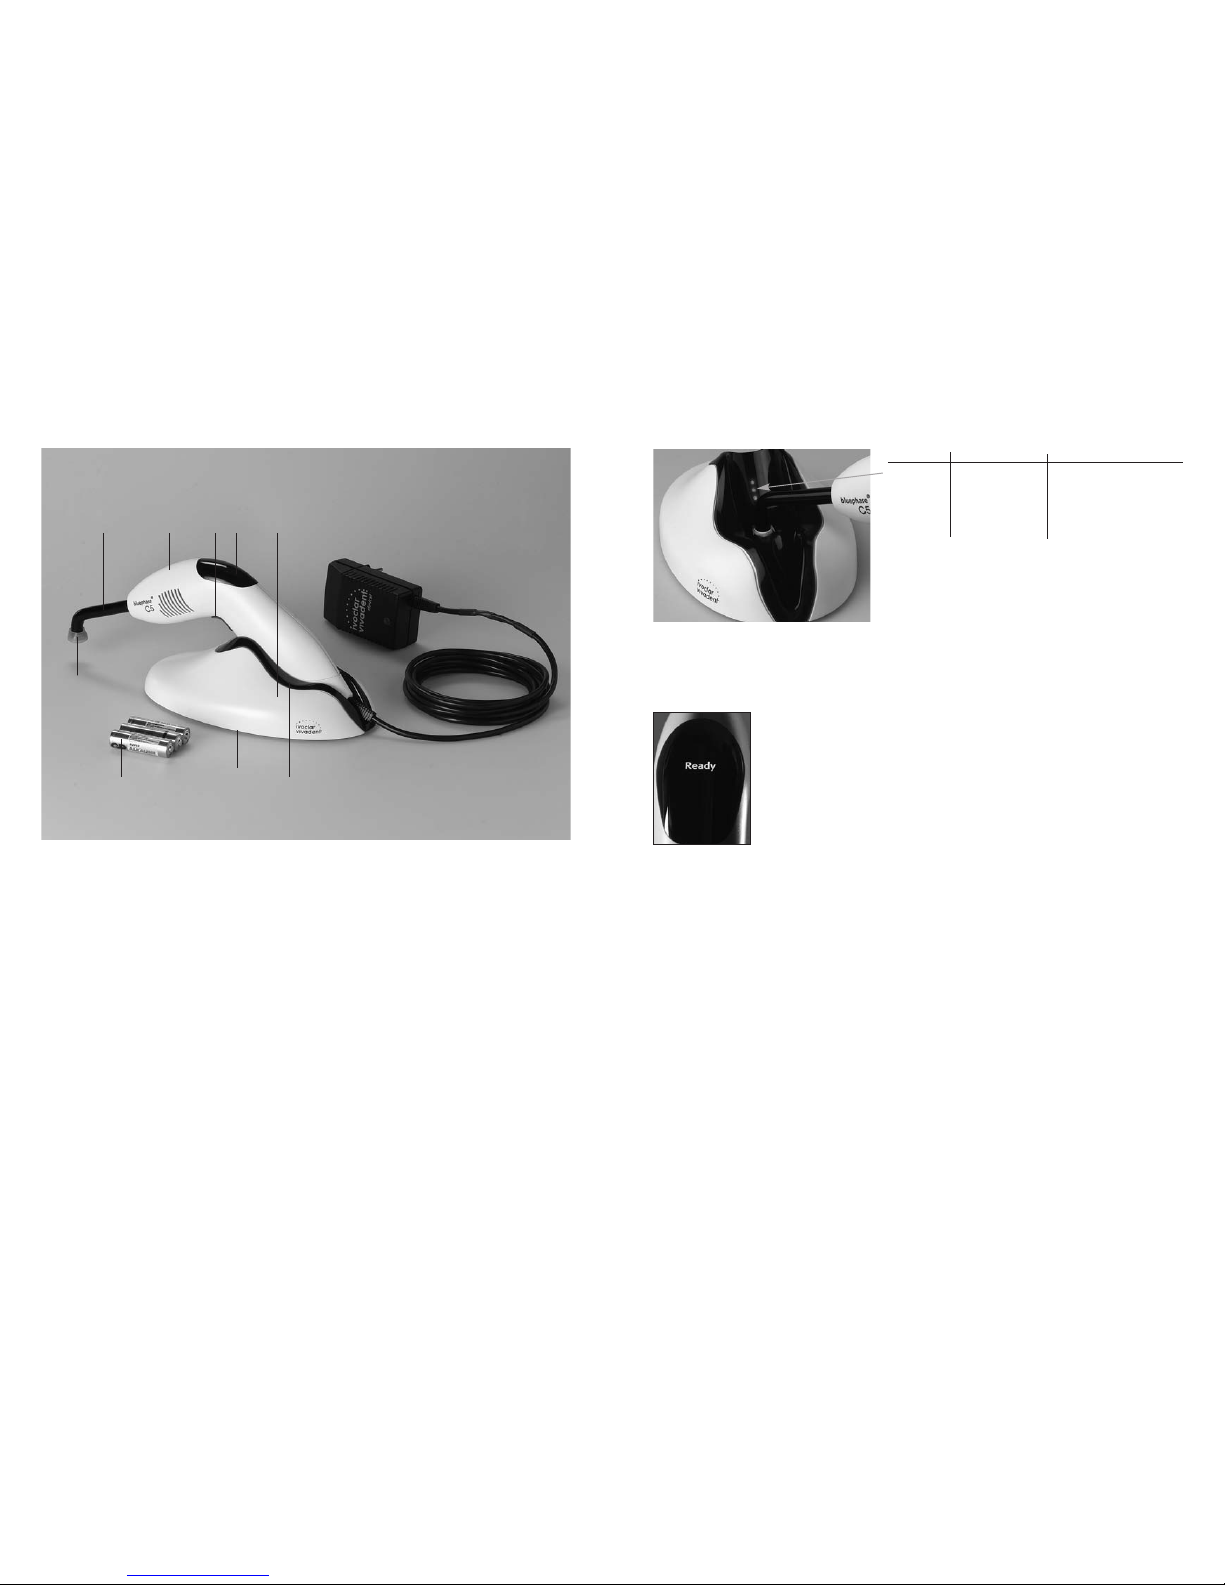
List of parts
1 Handpiece with power cord and power pack
2 Start button
3 Display
4 Handpiece holder
5 Light meter
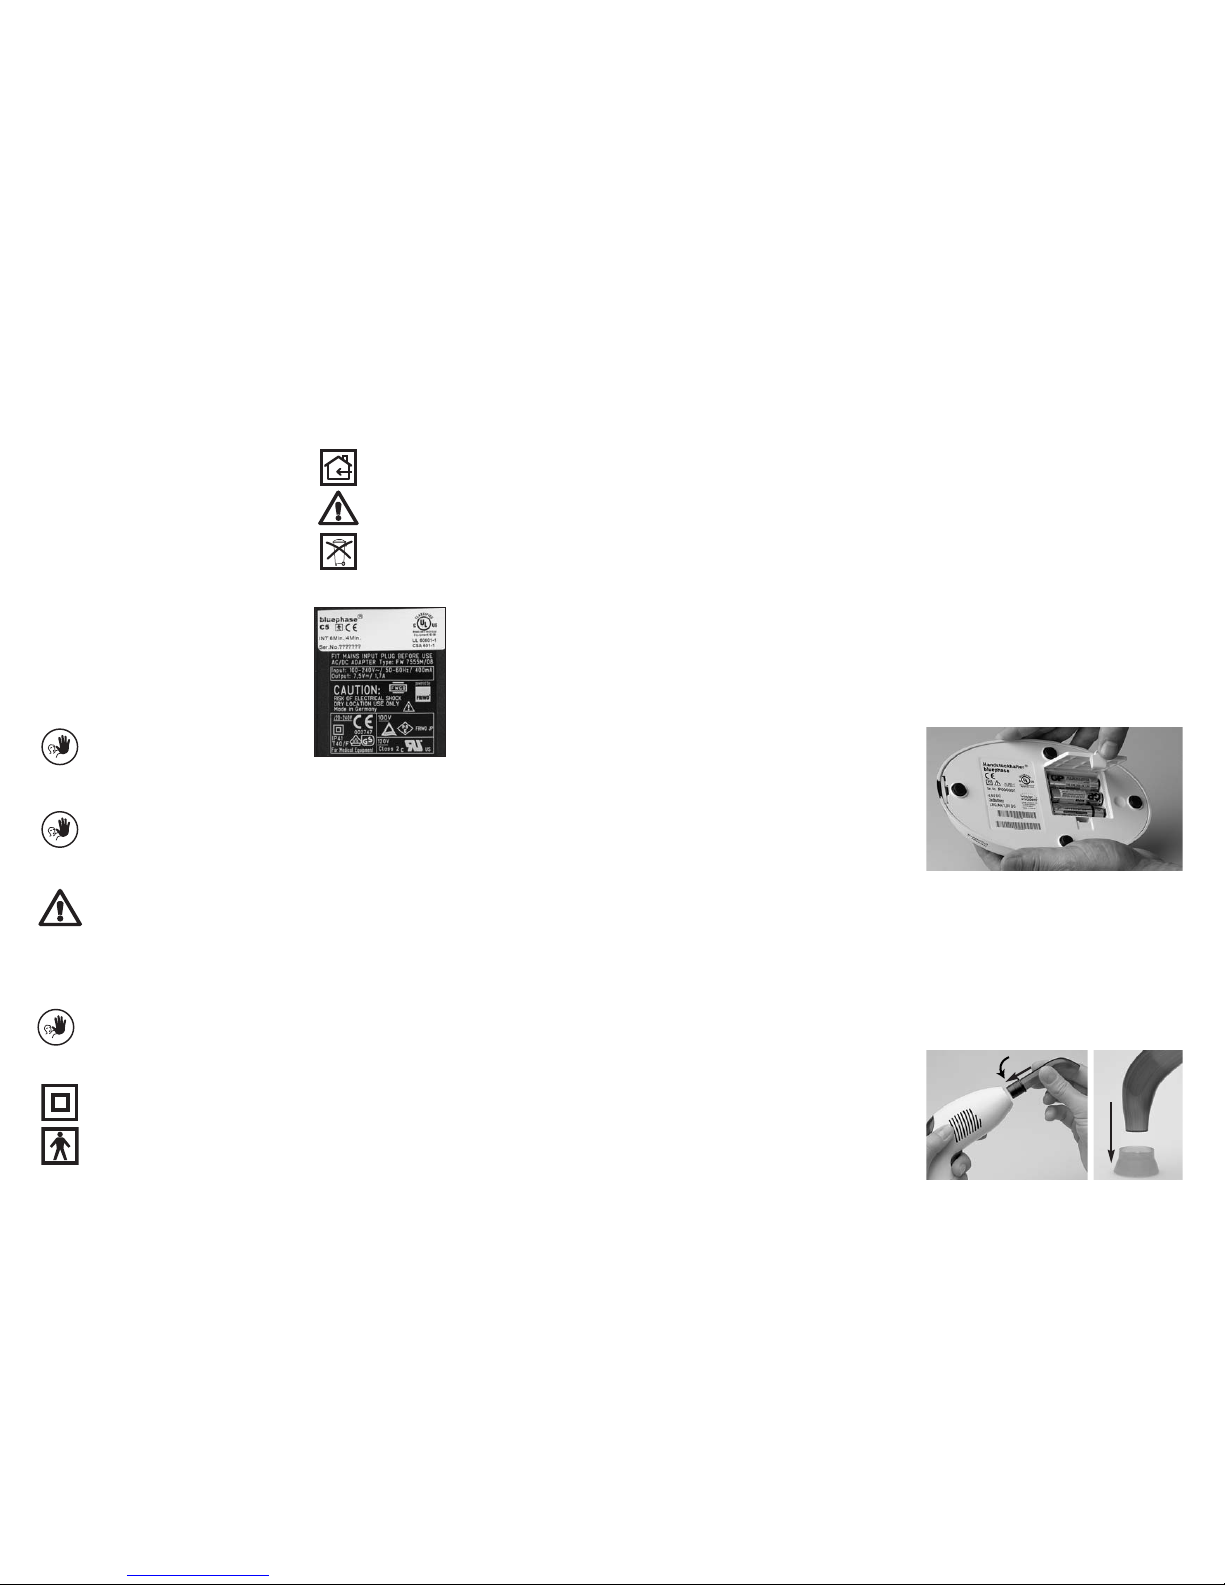
6 Rating plate
7 Battery compartment
8 Batteries (LR6 AA 1.5 VDC)
9 Anti-glare cone
10 Light probe 10 mm
Ready for operation
Correct power supply
110 2 3 4
5
7,6
8
9
76
Safety
Intended use
bluephase C5 is an LED polymerization light that
produces energy-rich blue light. It is used for the poly-
merization of light-curing dental materials directly at
the dental unit. These Operating Instructions provide
recommendations and guidelines for the intended use
of the light. Please read them carefully.
Indication
bluephase C5 is particularly suitable for the polymeri-
zation of light-curing dental materials activated in the
wavelength range of 430 – 490 nm. These materials
include restoratives, bondings/adhesives, bases, liners,
fissure sealants, temporary materials, as well as
adhesives for brackets and dental-lab materials, e.g.
ceramic inlays.
Contraindication
Materials, the polymerization of which is
activated outside the wavelength range of
430 – 490 nm. If you are not sure about certain
products, please ask the manufacturer of the
corresponding material.
This unit should not be used near a flammable
anaesthetic mixture with air, oxygen or nitrous
oxide.
Portable and mobile HF communication devices
may interfere with medical equipment. The use
of mobile phones during operation is not allowed.
Signs and symbols
Contraindication
Symbols on the curing light
Double insulation (Apparatus complies
with safety class II)
Protection against electrical shock
(BF type apparatus)
Use only in protected areas
Observe Operating Instructions
Do not dispose of the apparatus with
normal domestic waste
Safety notes
bluephase C5 has been designed according to IEC 601-1
(EN 60601-1), complies with the relevant EU regulations,
and has been certified by UL/CUL as an internationally
accredited testing body. The apparatus has been shipped
from the manufacturer in a safe and technically sound
condition. In order to maintain it in this condition and to
ensure risk-free operation, the notes and guidelines in
these Operating Instructions have to be observed.
To prevent damage to equipment and protect patients,
users and third parties from risks, the following safety
instructions have to be observed:
1. Usage and liability
bluephase C5 must be employed solely for the intended
use. Any other uses are contraindicated.
Liability cannot be accepted for damage resulting from
misuse or failure to observe the Operating Instructions.
Furthermore, the user is responsible for testing bluephase
C5 for its use and suitability for the intended purposes.
This is particularly important if other equipment is
utilized in the immediate vicinity of the apparatus at
the same time as the curing light is being used. Use only
original spare parts and accessories from Ivoclar Vivadent
(see Accessories). The manufacturer does not accept any
liability for damage resulting from the use of other spare
parts or accessories.
2. Operating voltage
Before switching on the unit, make sure that
a) the local power supply complies with the voltage
indicated on the rating plate,and
b) the unit has acquired ambient temperature.
3. Indications of compromised safety
If there is any doubt about safe operation being certain,
the unit must be disconnected from the power supply
and secured against accidental operation. Safe operation
may be impaired if, for example, the apparatus is visibly
damaged or no longer works correctly. The unit is only
completely disconnected from the power supply if the
power cord has been pulled out of the plug-in socket.
4. Disinfection and sterilization
Contaminated surfaces of the apparatus, light probes and
anti-glare cone must be disinfected or autoclaved before
each use.
5. Light output
Before each use, make sure that the light output permits
adequate curing. For this purpose, check the light probe
for contamination and damage and use the cleaned light
meter to test the light output, if necessary.
6. Heat development
As it is the case with all polymerization lights, the high
light output results in a certain development of heat.
Prolonged exposure of the pulp and soft tissues may
result in damage.Therefore, the corresponding curing
recommendations have to be observed. Furthermore,
uninterrupted curing times of more than 40 seconds in
the same area, as well as direct contact with the gingiva,
oral mucous membrane, or skin have to be prevented.
Prevent heat accumulation when polymerizing with a
rubber dam in place.
7. Eye protection
Direct or indirect exposure of the eyes must be prevented.
Prolonged exposure to the light is unpleasant for the
eyes and may result in injury. It is therefore advisable to
use the anti-glare cones provided. Individuals who are
generally sensitive to light, who take photosensitizing
drugs, or who have undergone surgery and people who
work with the apparatus or in its vicinity for long periods
of time should not be exposed to the light of this device
and wear protective goggles that absorb light below
500 nm.
8. Maintenance and cleaning
Any repair work must only be performed by a certified
Ivoclar Vivadent Service Center. Liquids or foreign sub-
stances must not enter the handpiece during cleaning
(electrical shock hazard).
9. Disposal
Do not dispose of the apparatus with normal domestic
waste.Dispose of curing lights and batteries according to
the corresponding national rules and regulations.
Check the delivery for completeness and any possible
transportation damage (see Delivery form). If components
are missing or damaged, immediately contact your dealer
or local Service Center.
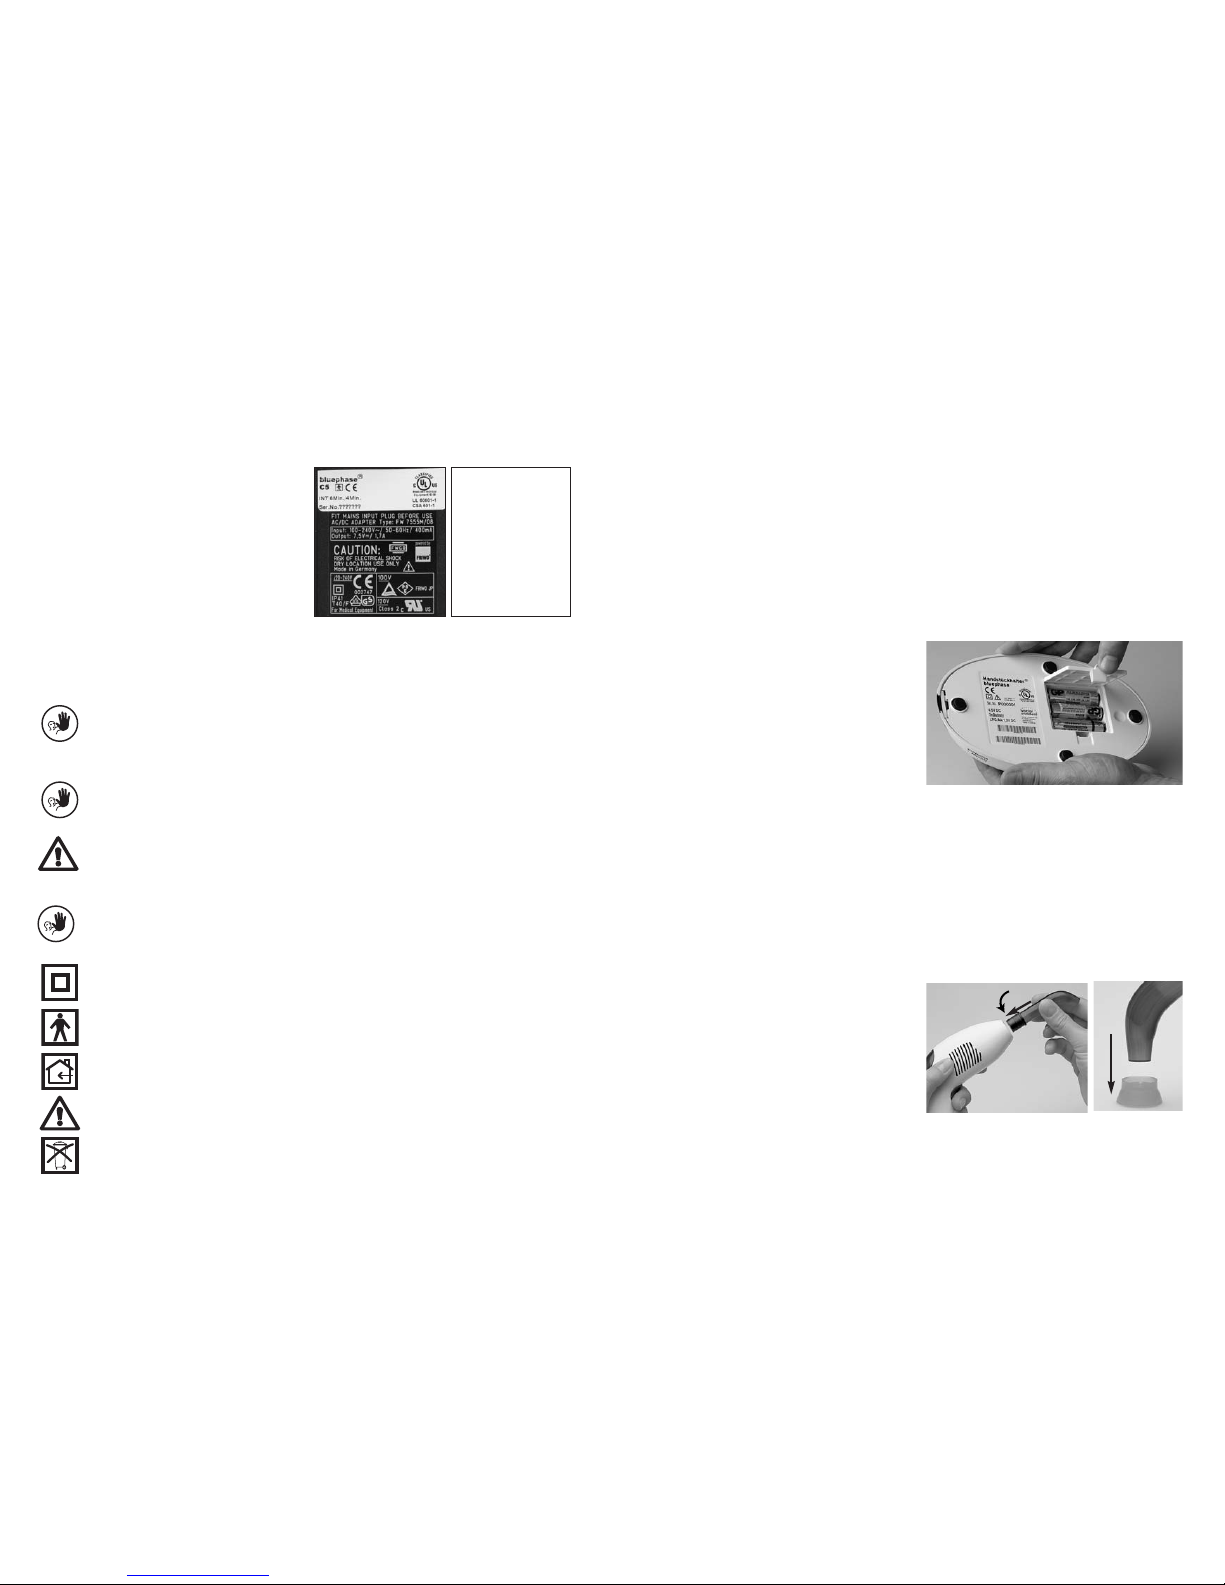
Handpiece holder
Open the battery compartment, which is located on the
underside of the handpiece holder. Insert the batteries
supplied with the kit according to the polarity indicated
and then close the compartment. Place the handpiece
holder on a suitable flat surface.The handpiece holder
switches on automatically when the light meter is
activated by blue light (see Measuring the light output).
Handpiece
Before switching on the unit, make sure that the voltage
of the local power supply complies with the voltage
indicated on the rating plate.The rating plate is attached
to the underside of the power pack.
After that, connect the power pack to the power supply.
The display is automatically activated at the same time.
Before you insert the light probe, remove the protective
foil from the corresponding opening of the handpiece.
Slightly rotate the light probe while attaching it to the
handpiece.After that, mount the anti-glare cone on the
light probe.
Classified by under-
writers Laboratories Inc.
with Respect to electric
shock;
fire and mechanical
hazards only in
accordance with:
UL2601-1 and CAN/CSA
C22.2 NO.601.1
Start-up

Disinfect or autoclave contaminated surfaces of the
curing light, light probe and anti-glare cone before each
use. Furthermore, make sure that the light output permits
adequate polymerization. For this purpose, check the
light probe for dirt or damage and test the light ouput
with the integrated light meter.
Start
The light is activated by pressing the start button and
switches off automatically after 2 minutes. If you wish
to switch off the light before the set curing time has
elapsed, press the start button again.The fan is switched
on at the same time as the light is activated. After the
curing cycle has ended, the fan continues to run for some
more time.The power pack must not be disconnected
from the power supply as long as the fan is running.
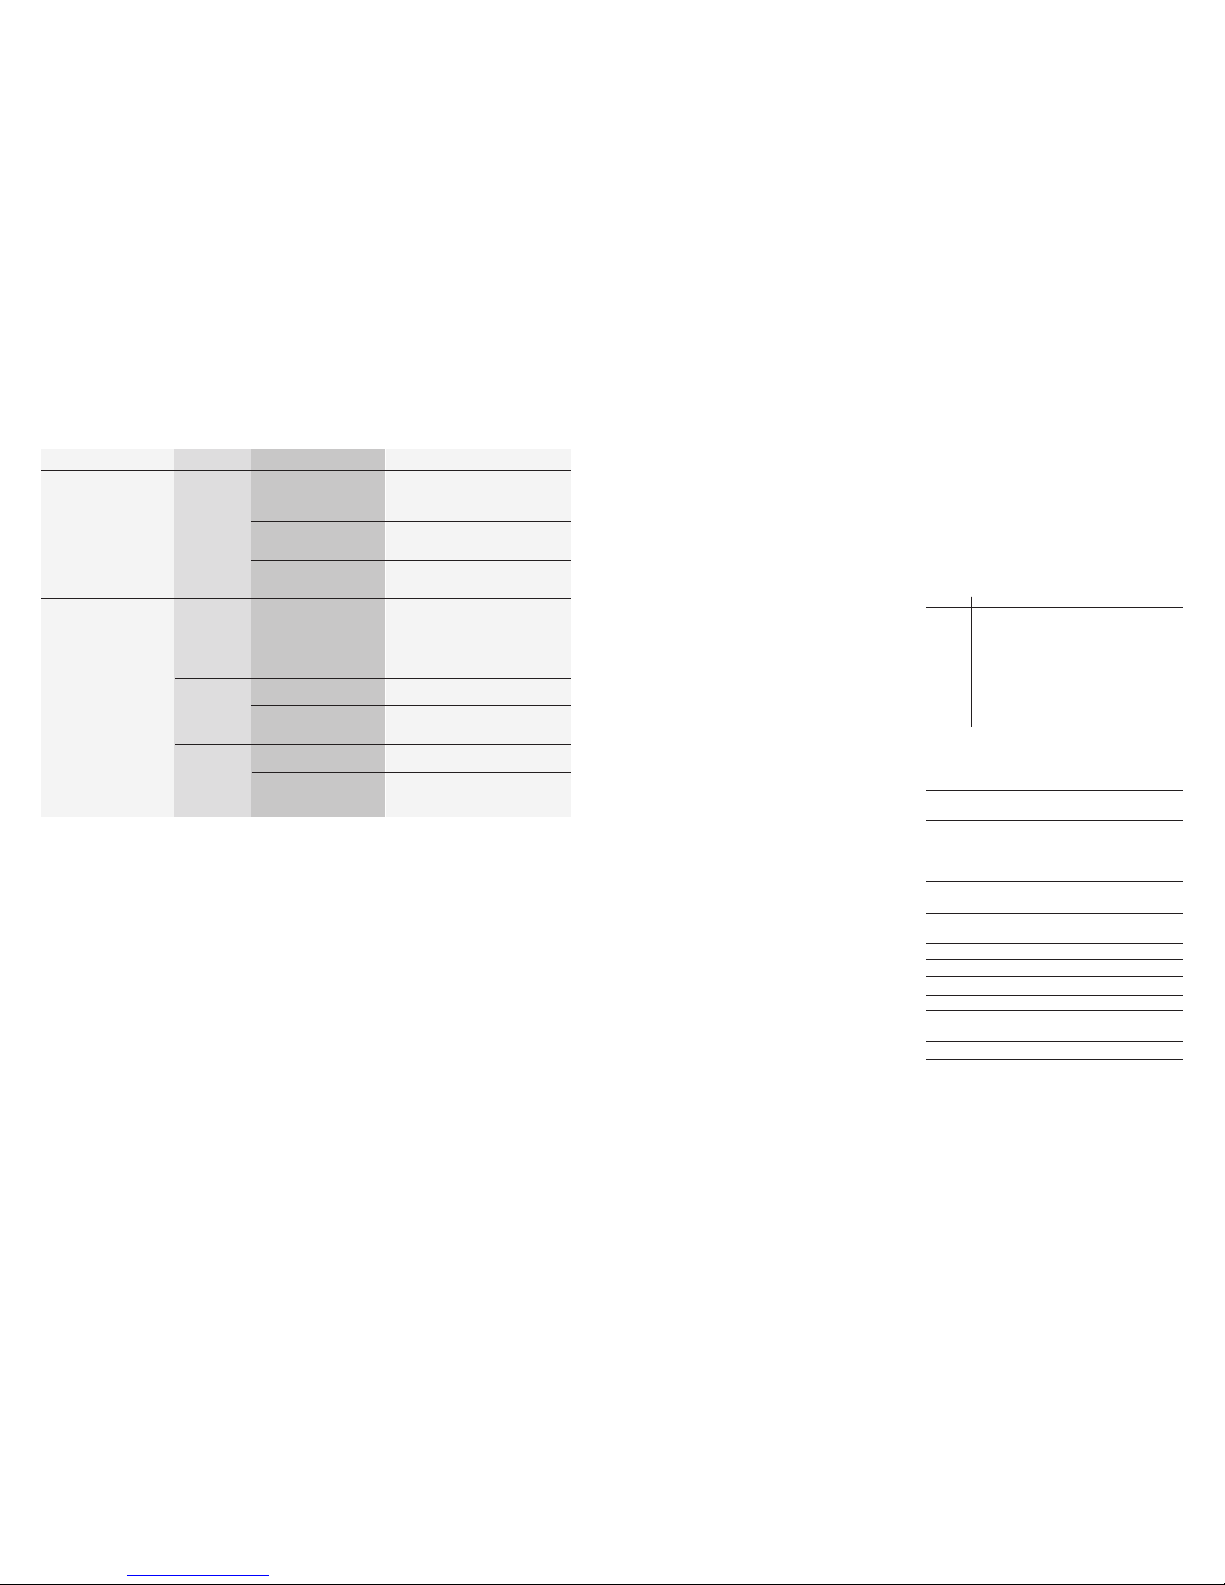
Selecting the curing time
Observe the Instructions for Use of the material applied
when selecting the curing time.The following curing
recommendations are valid for selected materials:
The curing recommendations for composite materials
apply to all colours and, if not mentioned otherwise in
the Instructions for Use of the relevant material, apply to
amaximum layer thickness of 2 mm.
Generally, these recommendations apply to situations
where the emission window of the light probe is placed
directly over the material to be polyermized. Increasing
the distance between the light source and the material
will require the curing time to be extended accordingly.
For instance, if the distance to the material is 9 mm, the
effective light output is reduced by approximately 50%.
In this case, the recommended curing time has to be
doubled.
Acoustic signals
Start (Stop) 1 beep
After 10 seconds 1 long beep
After 20 and 80 seconds 1 short beep
After 40 and 100 seconds 2 short beeps
After 60 and 120 seconds 3 short beeps
If preferred, the acoustic signals can be turned off. To turn
off the acoustic signals, press and hold the start button
for approximately 30 seconds while the light is off.
To turn the acoustic signals back on, press and hold the
start button for another 30 seconds while the light is off.
Light output
If the 10-mm light probe supplied with the kit is used,
the light output is at minimum 500 mW/cm2.If one of
the light probes which are additionally available is used
(i.e. 8-mm light probe and 13>8 mm Power-Booster light
probe), the light output changes by such a small degree
that the above mentioned curing times remain unaffec-
ted.
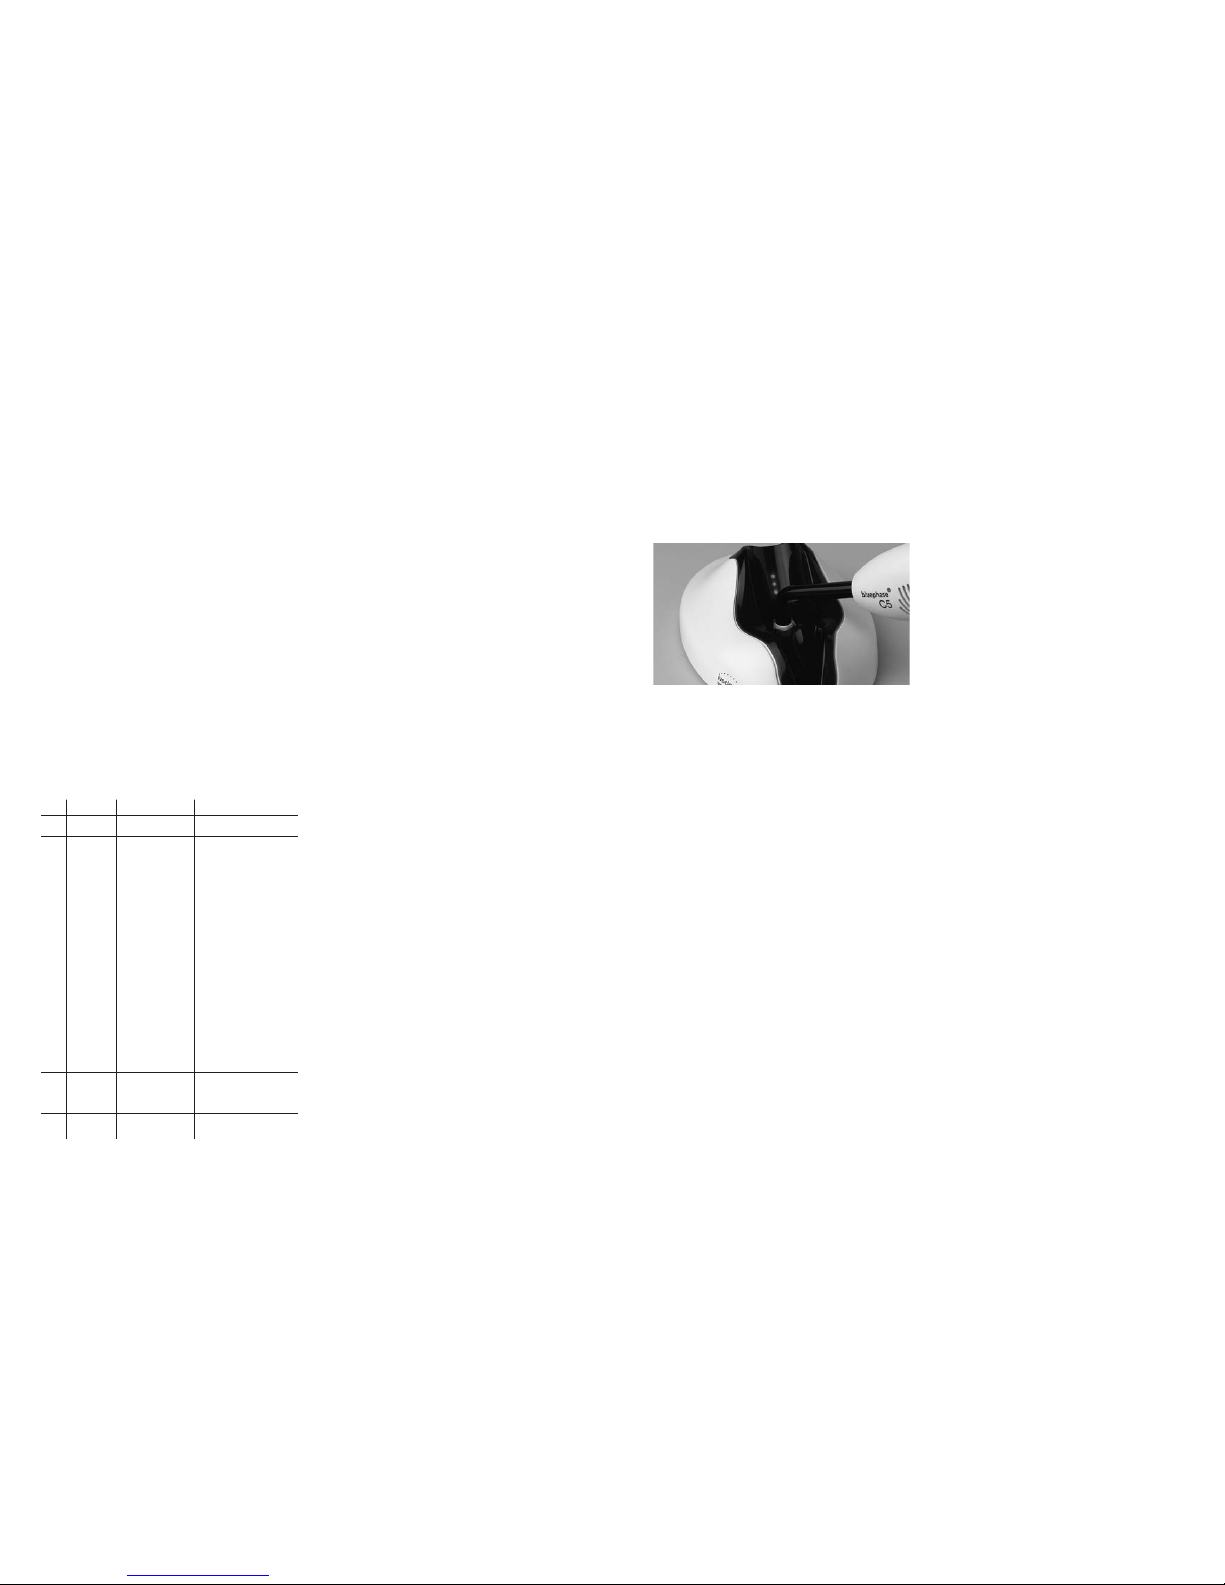
Measuring the light output
The light output of bluephase C5 and the 10-mm light
probe supplied with the kit can be checked with the light
meter, which is integrated in the handpiece holder. For
this purpose, remove the anti-glare cone and place the
tip of the light probe in contact with the light meter
without applying pressure.
98
Maintenance and cleaning
The indicator above the light meter lights up green
according to the light output measured. Each lamp
indicates a light output of approximately 200 mW/cm2
(see Indicators on the handpiece holder). If the value
measured does not correspond with the expected light
output, proceed as follows:
– Check the curing program selected
– Clean the light meter with a moist cloth
– Clean any dirty light probes which may be dirty (see
Maintenance and cleaning)
– Replace any damaged light probe with a new one
If these measures do not improve the readings, please
contact your dealer or local Service Center.
The light meter is not suitable for measuring the light
output of other light-emitting devices or light probes.
Liquids or foreign substances must not enter the hand-
piece during cleaning (electrical shock hazard). Dis-
connect the handpiece from the power supply when
cleaning it.
Housing
Wipe the handpiece and handpiece holder with a
standard aldehyde-free disinfecting solution. Do not
clean with highly aggressive solutions (e.g. solutions
containing orange oil or solutions with an ethanol
content of more than 50 %), solvents (e.g. acetone) or
pointed instruments, which may damage or scratch the
plastic. Clean dirty plastic parts with a soap solution.
Light probe
Clean light probes with a disinfectant and a soft cloth.
Carefully remove any possible material residue, such as
composite material, from the light probe with e.g. finger-
nails or a plastic spatula. Do not use sharp or pointed
instruments, as they may scratch the surface of the light
probe and thus reduce light transmission. Light probes
and anti-glare cones may be autoclaved (e.g. 134 °C,
3bar, 5 minutes).
Check light probes for damage. If the light probe is held
against a light source and certain segments appear
black, then the glass fibres are broken. In this case, the
light probe has to be replaced with a new one.
Operation
10 sec
20 sec
30 sec
40 sec
Adhesives
AdheSE
Excite | DSC
Syntac
Heliobond
–
–
Composites
Adamant
Tetric EvoCeram
Tetric EvoFlow
Artemis | 4 Seasons
InTen-S
Tetric Ceram | HB
Tetric Flow Chroma
4Seasons Flow
Heliomolar HB
Tetric
Heliomolar | Flow
Helio Progress
–
Others
Systemp.inlay | onlay
Systemp.flow
Helioseal | F | Clear |Chroma
Indirect restorations with
dual cure cement
– Per segment:
occlusal, mesial, distal
Indirect restorations with
the light cure cements
Variolink II and
Variolink Veneer
– Per segment:
occlusal, mesial, distal
– Per millimeter thickness
of restoration
i.e.) 2 mm thick restoration,
base only (20 seconds x 2)
=40 seconds per segment
–
Compoglass F | Flow
1110
What if …?
Error Description
Handpiece holder
Light meter does not respond
Handpiece
Light cannot be activated
Error rectification
Check batteries and insert them according
to the polarity indicated.
Insert new batteries according to the
polarity indicated.
Please contact your dealer or local
Service Center
Allow the handpiece to cool down and try
again after a while. If the error reappears,
please contact your dealer or local Service
Center.
Check your local power supply.
Please contact your dealer or local
Service Center.
Check your local power supply.
Please contact your dealer or local
Service Center.
Causes
Batteries inserted incorrectly
Batteries empty
Electronic defect
Handpiece overheated
Power supply defective
Electronic defect
Power supply defective
Electronic defect
Error Indication
Blank display
Indicator is
blinking
Indicator is
blinking and
10 beeps are
emitted
Blank display
Warranty
The warranty of bluephase C5 is 3 years from the date of
purchase.The warranty includes an LED operating life of
300 hours.
Malfunctions resulting from faulty material or
manufacturing errors are repaired free of charge during
the warranty period. The warranty does not provide the
right to recover any mateiral or non-material damage
other than those mentioned.
The apparatus must only be employed for the
intended use.Any other uses are contraindicated.
The manufacturer does not accept any liability resulting
from misuse and warranty claims cannot be accepted in
such cases.This is particularly valid for
– damage resulting from improper handling;
– damage of components resulting from wear under
standard operating conditions;
– damage resulting from external factors, e.g. impact
damage, dropping to the floor
– damage resulting from incorrect set-up or installation;
– damage resulting from connecting the unit to a power
supply whose voltage and frequency does not comply
with those stated on the rating plate;
– damage resulting from improper repairs or modifications
that have not been carried out by certified Service
Centers.
In case of a claim under warranty, the complete
apparatus (handpiece, handpiece holder, light probe)
must be sent C+F to the dealer or directly to Ivoclar
Vivadent, together with the purchase documents.
Use the original packaging with the corresponding
inserts for transportation.
Procedure in case of repair
Repair work may only be carried out by a certified Ivoclar
Vivadent Service Center. If a defect cannot be rectified,
please contact your dealer or local Service Center (see
addresses on the reverse side). A clear description of the
defect or the conditions under which the defect occurred
will facilitate locating the problem. Please enclose this
description when returning the apparatus.
Delivery form
1Handpiece holder
3Batteries (LR6 AA 1.5 VDC)
1Handpiece with power cord and power pack
1Light probe 10mm
3 Anti-glare cones
1Set of Operating Instructions
Accessories
The following accessories are available for bluephase C5:
REF Description
592 458 bluephase handpiece holder
592 475 Light probe 10 mm, black
551 752 Light probe 8 mm
592 482 Power-Booster light probe 13>8 mm, black
599 452 Pin-point light probe 6>2 mm, black
551 756 Anti-glare cones
592 496 Anti-glare shield
533 654 1 Heliotest
Technical data
Operating voltage 7.5 VDC
of handpiece
Power pack 100-240 VAC / 50-60HZ / max. 0.4A
Output 7.5 VDC / 1.7A
Operating conditions Temperature +10°C to +40°C
(50 to 104 °F)
Relative humidity 30% to 75%
Ambient pressure 700 hPa to 1060 hPa
Dimensions of L = 200 mm, W = 120 mm
handpiece holder H = 70 mm
Weight of handpiece 245 g
holder
Light source 5W LED
Wavelength range 430 – 490 nm
Light output at minimum 500 mW/cm2
Operation 6 min. on / 4 min. off (intermittent)
Dimensions of L = 220 mm, W = 35 mm
handpiece H = 160 mm
Weight of handpiece 200 g
Transportation and Temperature –20°C to +70°C
storage conditions (–4 to158 °F)
Relative humidity 10% to 75%
Ambient pressure 500hPa to 1060hPa
Store bluephase C5 in a closed, roofed room.
Protect the device from severe jarring.
Product specifications

1312
Liebe Kundin, lieber Kunde,
eine optimale Aushärtung ist die Basis für eine
dauerhaft hohe Versorgungsqualität aller licht-
härtenden Materialien. Hierzu trägt auch ent-
scheidend das gewählte Polymerisationsgerät bei.
Deshalb freut es uns, dass Sie sich für die
bluephase C5 entschieden haben. Hierbei handelt
es sich um ein hochwertiges Medizinprodukt,
welches auf der Basis der gültigen Normen nach
dem heutigen Stand von Wissenschaft und
Technik gefertigt wird.
Die Bedienungsanleitung erklärt Ihnen, wie Sie
das Gerät sicher in Betrieb nehmen, seinen vollen
Leistungsumfang auf einfache Weise nutzen und
für eine lange Verwendung pflegen können.
Bei Fragen stehen wir Ihnen gerne zur Verfügung
(Adressen siehe hintere Umschlagseite).
Ihr Ivoclar Vivadent Team
Produktübersicht ........................................................................ 14
Teileverzeichnis .............................................................................14
Anzeige des Handstückhalters .............................................................15
Anzeige des Handstücks ...................................................................15
Sicherheit ................................................................................16
Bestimmungsgemässer Gebrauch ..........................................................16
Indikation ..................................................................................16
Kontraindikation ...........................................................................16
Zeichenerklärung ...........................................................................16
Sicherheitshinweise ........................................................................16
Inbetriebnahme ..........................................................................17
Handstückhalter ............................................................................17
Handstück ..................................................................................17
Bedienung ................................................................................18
Start ........................................................................................18
Wahl des Belichtungsprogrammes .........................................................18
Akustische Signale .........................................................................18
Lichtintensität ..............................................................................18
Messen der Lichtintensität .................................................................18
Wartung und Reinigung ..................................................................19
Gehäuse ....................................................................................19
Lichtleiter ..................................................................................19
Was ist, wenn …? ........................................................................20
Garantie ..................................................................................21
Vorgehen bei einem Reparaturfall .......................................................21
Produktspezifikation .....................................................................21
Lieferumfang ...............................................................................21
Zubehör ....................................................................................21
Technische Daten ..........................................................................21
Konformitätserklärung ...................................................................62
Inhaltsverzeichnis
Deutsch

1514
Produktübersicht Anzeige des Handstückhalters
Anzeige des Handstücks
Anzeige Farbe Bedeutung
Lichtintensität 1 x grün ≥200 mW/cm2
2 x grün ≥400 mW/cm2
3 x grün ≥600 mW/cm2
4 x grün ≥800 mW/cm2
5 x grün ≥1.000 mW/cm2
Teileverzeichnis
1 Handstück mit Netzkabel und Netzgerät
2 Starttaster
3 Betriebsanzeige
4 Handstückhalter
5 Lichtmesszelle
6 Typenschild
7 Batteriefach
8 Batterien (LR6 AA 1.5 VDC)
9 Blendschutz
10 Lichtleiter 10 mm
Betriebsbereitschaft
Netzanschluss korrekt
110 2 3 4
5
7,6
8
9
1716
Sicherheit
Bestimmungsgemässer Gebrauch
Die bluephase C5 ist ein LED-Polymerisationsgerät zur
Erzeugung von energiereichem Blaulicht und dient der
Polymerisation von lichthärtenden Dentalwerkstoffen
unmittelbar an der zahnärztlichen Behandlungseinheit.
Zum bestimmungsgemässen Gebrauch gehört auch die
Beachtung der Hinweise der vorliegenden Bedienungs-
anleitung.
Indikation
Die bluephase C5 eignet sich speziell für die Poly-
merisation von lichthärtenden Dentalwerkstoffen im
Wellenlängenbereich von 430 – 490 nm. Hierzu zählen
Füllungsmaterialien, Bondings/Adhäsive, Unterfüllungen,
Liner, Fissurenversiegler, Provisorien sowie Befestigungs-
materialien für Brackets und zahntechnische Werkstoffe
wie z.B. keramische Inlays.
Kontraindikation
Bei Materialien, deren Polymerisation ausser-
halb des Wellenlängenbereichs von 430–490nm
aktiviert wird. Bei fraglichen Produkten wird
empfohlen, sich diesbezüglich beim Material-
hersteller zu erkundigen.
Das Gerät nicht in der Nähe entflammbarer
Narkotika oder Mischungen von entflammbaren
Narkotika mit Luft, Sauerstoff oder Stickstoff-
monoxid verwenden.
Tragbare und mobile HF-Kommunikationsein-
richtungen können medizinische Geräte beein-
flussen. So ist eine gleichzeitige Verwendung
von Mobiltelefonen während des Betriebs
nicht zulässig.
Zeichenerklärung
Nicht zulässige Anwendung
Symbole am Gerät
Doppelt isoliert (Gerät der Schutzklasse II)
Schutz gegen elektrischen Schlag
(Gerätetyp BF)
Gebrauch nur im geschützten Raum
Bedienungsanleitung beachten
Das Gerät darf nicht über den normalen
Hausmüll entsorgt werden
Sicherheitshinweise
Die bluephase C5 ist nach
IEC 601-1 (EN 60601-1)
gebaut, erfüllt die gelten-
den EU-Richtlinien und
wurde von UL/CUL als
international akkreditierte
Prüfstelle zertifiziert. Das
Gerät hat das Werk im
sicheren und technisch
einwandfreien Zustand
verlassen. Um diesen
Zustand zu erhalten und einen sicheren Betrieb zu
ermöglichen, sind die Hinweise dieser Bedienungsanlei-
tung zu beachten. Zur Vermeidung von Schäden sowie
Gefahren für Patienten, Anwender und Dritte gehören
hierzu insbesondere folgende Sicherheitshinweise:
1. Verwendungs- und Haftungsumfang
Die bluephase C5 ist ausschliesslich nach dem bestim-
mungsgemässen Gebrauch zu verwenden. Eine andere
oder darüber hinausgehende Benutzung gilt als nicht
bestimmungsgemäss. Für Schäden, die sich aus einer
nicht bestimmungsgemässen Verwendung oder nicht
sachgemässen Handhabung ergeben, übernimmt der
Hersteller keine Haftung. Darüber hinaus ist der Benutzer
verpflichtet, die bluephase C5 eigenverantwortlich vor
Gebrauch auf Eignung und Einsetzbarkeit für die vorge-
sehenen Zwecke zu prüfen. Dies gilt insbesondere wenn
in unmittelbarer Nähe und gleichzeitig andere Geräte
betrieben werden. Es dürfen nur Originalersatzteile und
-zubehör von Ivoclar Vivadent eingesetzt werden (siehe
Zubehör). Bei Schäden, die auf Verwendung anderer
Ersatzteile sowie Zubehör zurückzuführen sind, über-
nimmt der Hersteller keine Haftung.
2. Betriebsspannung
Vor dem Einschalten ist sicherzustellen, dass
a) die angegebene Spannung des Typenschildes mit der
des Versorgungsnetzes übereinstimmt und
b) das Gerät die Umgebungstemperatur angenommen hat.
3. Annahme beeinträchtigter Sicherheit
Wenn anzunehmen ist, dass ein gefahrloser Betrieb nicht
mehr möglich ist, so ist das Gerät von der Netzspannung
zu trennen und gegen unabsichtlichen Gebrauch zu
sichern. Dies kann z.B. bei sichtbarer Beschädigung oder
eingeschränktem Betrieb der Fall sein. Eine vollständige
Trennung vom Versorgungsnetz ist nur bei aus der Steck-
dose gezogenem Netzkabel gewährleistet.
4. Desinfektion und Sterilisation
Kontaminierte Oberflächen des Gerätes sowie Lichtleiter
und Blendschutz sind vor jedem Gebrauch zu desinfizie-
ren bzw. zu autoklavieren.
5. Lichtintensität
Vor jeder Anwendung sicherstellen, dass die abgegebene
Lichtintensität eine ausreichende Aushärtung ermöglicht.
Dazu den Lichtleiter auf Verschmutzungen und Beschädi-
gungen prüfen sowie gegebenenfalls die gereinigte Licht-
messzelle verwenden.
6. Wärmeentwicklung
Wie bei allen Polymerisationsgeräten ist die hohe Licht-
intensität mit einer Wärmeentwicklung verbunden.
Bei längerer Bestrahlung von Pulpa oder Weichgewebe
können Schäden auftreten. Deshalb sind die genannten
Belichtungsempfehlungen zu beachten.
Darüber hinaus sind ununterbrochene Belichtungszeiten
von mehr als 40 Sekunden an derselben Stelle sowie ein
direkter Kontakt mit Gingiva, Mundschleimhaut oder
Haut zu vermeiden. Bei der Polymerisation unter Koffer-
dam Hitzestauung vermeiden.
7. Augenschutz
Eine indirekte oder gar direkte Bestrahlung der Augen ist
zu vermeiden. Längere Bestrahlungen sind für das Auge
unangenehm und können Schäden hervorrufen. Es wird
deshalb empfohlen, den mitgelieferten Blendschutz zu
verwenden. Personen, die allgemein lichtempfindlich
reagieren, Medikamente wegen Lichtempfindlichkeit oder
photosensibilisierende Medikamente einnehmen, eine
Augenoperation hinter sich haben oder die sich über
längere Zeit mit diesem Gerät oder in seiner Nähe
arbeiten, sollten dem Licht des Gerätes nicht ausgesetzt
werden und Schutzbrillen tragen, die Licht unterhalb
von 500 nm Wellenlänge absorbieren.
8. Wartung und Reinigung
Sämtliche Reparaturarbeiten dürfen nur von einer
qualifizierten Ivoclar Vivadent Servicestelle durchgeführt
werden. Bei Reinigungsarbeiten dürfen keine Flüssigkei-
ten oder andere Fremdmaterialien in das Handstück
gelangen (Stromschlaggefahr).
9. Entsorgung
Das Gerät darf nicht über den Hausmüll entsorgt werden.
Polymerisationsgeräte und Batterien sind den jeweiligen
nationalen gesetzlichen Bestimmungen entsprechend zu
entsorgen.
Prüfen Sie den Lieferumfang auf Vollständigkeit und
eventuelle Transportschäden (siehe Lieferumfang). Falls
Teile fehlen oder beschädigt sind, wenden Sie sich bitte
umgehend an Ihren Händler oder Ihre Service-Stelle.
Handstückhalter
Öffnen Sie das an der Unterseite des Handstückhalters
befindliche Batteriefach und setzen Sie die mitgelieferten
Batterien gemäss gekennzeichneter Polung in das Batterie-
fach ein. Anschliessend Batteriefach wieder verschliessen
und Handstückhalter auf eine geeignete, ebene Tisch-
fläche stellen. Das Einschalten des Handstückhalters er-
folgt automatisch mit der Aktivierung der Lichtmesszelle
durch das Blaulicht (siehe Messen der Lichtintensität).
Handstück
Vor dem Einschalten ist sicherzustellen, dass die angege-
bene Spannung des Typenschildes mit der des vorhande-
nen Versorgungsnetzes übereinstimmt. Das Typenschild
befindet sich an der Unterseite des Netzgerätes.
Anschliessend ist das Netzgerät an das Versorgungsnetz
anzuschliessen. Dabei wird automatisch die Betriebsan-
zeige aktiviert.
Vor der Montage des Lichtleiters ist die Schutzfolie an
der zugehörigen Öffnung des Handstücks zu entfernen.
Lichtleiter beim Einstecken in das Handstück leicht dre-
hen. Anschliessend Blendschutz auf Lichtleiter montieren.
Inbetriebnahme

Vor jedem Gebrauch sind kontaminierte Oberflächen des
Gerätes sowie Lichtleiter und Blendschutz zu desinfizie-
ren bzw. zu autoklavieren. Darüber hinaus ist sicher-
zustellen, dass die abgegebene Lichtintensität eine
ausreichende Aushärtung ermöglicht. Dazu den Lichtleiter
auf Verschmutzungen und Beschädigungen prüfen sowie
die integrierte Lichtmesszelle verwenden.
Start
Das Licht wird mit dem Starttaster eingeschaltet und
nach 2 Minuten automatisch abgeschaltet. Falls ge-
wünscht, kann das Licht vorzeitig durch nochmaliges
Betätigen des Starttasters ausgeschaltet werden.
Gleichzeitig zur Lichtaktivierung schaltet sich auch der
Ventilator ein. Nach dem Belichten läuft dieser zur
Kühlung des Gerätes nach. Solange der Ventilator läuft,
darf das Netzgerät nicht von der Versorgungsspannung
genommen werden.
Wahl des Belichtungsprogrammes
Bei der Wahl der Belichtungszeit ist die Gebrauchsinfor-
mation des verwendeten Materials zu beachten.
Für ausgewählte Materialien gelten folgende
Belichtungsempfehlungen:
Bei Compositen beziehen sich die genannten Belichtungs-
empfehlungen auf sämtliche Farben und – sofern die
Gebrauchsinformation des betroffenen Materials
keine abweichende Empfehlung aufweist – auf Schicht-
stärken von maximal 2 mm.
Diese Empfehlungen gelten allgemein für Belichtungen,
bei denen das Lichtaustrittsfenster des Lichtlichters direkt
auf dem zu bestrahlendem Material aufsitzt. Mit zuneh-
mendem Abstand sind die Belichtungszeiten entsprechend
zu verlängern. Bei einem Abstand von 9 mm reduziert
sich die effektive Lichtintensität auf ca. 50 %, so dass die
empfohlene Belichtungszeit zu verdoppeln ist.
Akustische Signale
Start (Stopp) 1 Piepston
Nach 10 Sekunden 1 langer Piepston
Nach 20 und 80 Sekunden 1 kurzer Piepston
Nach 40 und 100 Sekunden 2 kurze Piepstöne
Nach 60 und 120 Sekunden 3kurze Piepstöne
Falls gewünscht, können die akustischen Signale abge-
stellt werden. Dazu bei ausgeschaltetem Licht den
Starttaster ca. 30 Sekunden gedrückt halten. Sollen
die akustischen Signale wieder eingeschaltet werden,
den Starttaster bei ausgeschaltetem Licht erneut ca.
30 Sekunden gedrückt halten.
Lichtintensität
Bei Verwendung des mitgelieferten 10 mm Lichtleiters
beträgt die Lichtintensität mindestens 500 mW/cm2.
Bei Verwendung der zusätzlich erhältlichen Lichtleiter
(8 mm und Power-Booster Lichtleiter 13>8 mm) ver-
ändert sich die abgegebene Lichtleistung nur minimal, so
dass die vorgenannten Belichtungszeiten beibehalten
werden können.
10 Sek.
20 Sek.
30 Sek.
40 Sek.
Adhäsive
AdheSE
Excite | DSC
Syntac
Heliobond
–
–
Composite
Adamant
Tetric EvoCeram
Tetric EvoFlow
Artemis | 4 Seasons
InTen-S
Tetric Ceram | HB
Tetric Flow Chroma
4Seasons Flow
Heliomolar HB
Tetric
Heliomolar | Flow
Helio Progress
–
Sonstige
Systemp.inlay | onlay
Systemp.flow
Helioseal | F | Clear | Chroma
Indirekte Restaurationen mit
dualhärtenden Befestigungs-
compositen
–je Fläche:
okklusal, mesial, distal
Indirekte Restaurationen mit
den lichthärtenden Befesti-
gungscompositen Variolink II
und Variolink Veneer
–je Fläche:
okklusal, mesial, distal
–pro Millimeter Glaskeramik
z.B. 2 mm starke Keramik-
restauration, nur Basenpaste
(20 Sekunden x 2) =
40 Sekunden je Fläche
–
Compoglass F | Flow
1918
Wartung und Reinigung
Messen der Lichtintensität
Die Lichtintensität der bluephase C5 und des mitgeliefer-
ten 10 mm Lichtleiters kann mit der in den Handstück-
halter integrierten Lichtmesszelle überprüft werden.
Hierzu Lichtleiter ohne Blendschutz drucklos und bündig
aufsetzen.
Die Anzeige oberhalb der Lichtmesszelle leuchtet ent-
sprechend der gemessenen Lichtintensität grün auf.
Dabei entspricht jede Leuchte einer Lichtintensität von
ca. 200 mW/cm2(siehe Anzeigen Handstückhalter).
Falls der ermittelte Messwert nicht der erwarteten
Lichtintensität entspricht:
– Gewähltes Belichtungsprogramm prüfen
– Lichtmesszelle mit einem feuchten Tuch säubern
– Eventuell verschmutzten Lichtleiter reinigen (siehe
Wartung und Reinigung)
– Eventuell beschädigten Lichtleiter gegen einen neuen
austauschen
Falls diese Massnahmen keinen Erfolg bringen, wenden
Sie sich bitte an Ihren Händler oder Ihre Service-Stelle.
Die Lichtmesszelle ist nicht für die Bestimmung der
Lichtintensität anderer Lichtgeräte oder Lichtleiter
geeignet.
Bei Reinigungsarbeiten dürfen keine Flüssigkeiten oder
andere Fremdmaterialien in das Handstück gelangen
(Stromschlaggefahr). Bei Reinigung des Handstücks ist
dieses von der Netzspannung zu trennen.
Gehäuse
Handstück und Handstückhalter mit einer handelsübli-
chen und aldehydfreien Desinfektionslösung abwischen.
Keine hochaggressiven Desinfektionslösungen (z.B.
Lösungen auf Basis von Orangenöl oder Lösungen mit
einem Ethanolanteil von über 50 %), Lösungsmittel (z.B.
Aceton) oder spitze Gegenstände verwenden, die den
Kunststoff angreifen oder verkratzen können.Ver-
schmutzte Kunststoffteile mit Seifenlösung reinigen.
Lichtleiter
Lichtleiter mit einem Desinfektionsmittel und einem
weichen Tuch reinigen. Eventuell auf den Lichtleiter
gelangtes Material wie Compositereste vorsichtig – z. B.
mit Fingernagel oder Kunststoffspatel – entfernen. Keine
scharfen oder spitzen Gegenstände verwenden, diese
können die Oberfläche des Lichtleiters verkratzen und
damit die Lichttransmission vermindern. Lichtleitstab und
Blendschutz können autoklaviert werden (z.B. 134 °C,
3bar, 5 Minuten).
Lichtleiter auf Beschädigungen überprüfen. Erscheinen –
bei Halten des aus dem Handstück entnommenen Licht-
leiters gegen Licht – einzelne Segmente schwarz, sind
Glasfasern gebrochen. Aufgrund der verminderten Licht-
transmission ist der Lichtleiter gegen einen neuen auszu-
tauschen.
Bedienung

2120
Was ist, wenn …?
Fehlerbeschreibung
Handstückhalter
Lichtmesszelle reagiert nicht
Handstück
Licht lässt sich nicht starten
Fehlerbehebung
Batterien kontrollieren und gemäss
gekennzeichneter Polung neu einsetzen.
Neue Batterien gemäss gekennzeichneter
Polung einsetzen.
Bitte kontaktieren Sie Ihren Händler oder
Ihre Service-Stelle
Handstück auskühlen lassen und nach eini-
ger Zeit nochmals versuchen. Falls der Feh-
ler bestehen bleibt, kontaktieren Sie bitte
Ihren Händler oder Ihre Service-Stelle.
Kontrollieren Sie Ihr Versorgungsnetz.
Bitte kontaktieren Sie Ihren Händler oder
Ihre Service-Stelle.
Kontrollieren Sie Ihr Versorgungsnetz.
Bitte kontaktieren Sie Ihren Händler oder
Ihre Service-Stelle.
Problemursachen
Batterien falsch eingesetzt
Batterien leer
Elektronikdefekt
Handstück ist überhitzt
Netzversorgung defekt
Elektronikdefekt
Netzversorgung defekt
Elektronikdefekt
Fehleranzeige
Keine Anzeige
Anzeige blinkt
Anzeige blinkt
mit 10 Piepstönen
Keine Anzeige
Garantie
Die Garantie für die bluephase C5 beträgt ab Kaufdatum
3 Jahre. Zum Garantieumfang zählt auch eine Lebens-
dauer der LED Lichtquelle von 300 Betriebsstunden.
Bei auftretenden Störungen, die durch Material- und
Herstellungsfehler verursacht sind, umfasst die Garantie
die kostenlose Reparatur des Gerätes. Darüber hinaus
gibt die Garantie kein Anrecht auf Ersatz von eventuellen
materiellen oder ideellen Schäden.
Dabei ist das Gerät ausschliesslich nach dem bestim-
mungsgemässen Gebrauch zu verwenden. Eine andere
oder darüber hinausgehende Benutzung gilt als nicht
bestimmungsgemäss – für hieraus resultierende Schäden
wird jede Haftung bzw. Garantie ausgeschlossen. Hierzu
zählen insbesondere
– Schäden, die durch unsachgemässe Handhabung ver-
ursacht wurden.
– Schäden an Teilen, die während des normalen Betrie-
bes einer Abnützung unterliegen.
– Schäden durch äussere Einwirkungen, z. B. Schlag, Fall
zu Boden
– Schäden durch fehlerhafte Aufstellung bzw. Installation
– Schäden durch Anschluss an eine andere Spannung
oder Frequenz als auf dem Typenschild angegeben.
– Schäden durch unsachgemässe Reparaturen und
Änderungen, die von nicht autorisierten Stellen vor-
genommen wurden.
Bei einem Garantiefall ist das vollständige Gerät (Hand-
stück, Handstückhalter, Lichtleiter) zusammen mit dem
Kaufbeleg in der Original-Verpackung mit den entspre-
chenden Einlagen frachtfrei an das Lieferdepot oder
direkt an Ivoclar Vivadent zu schicken.
Vorgehen bei einem
Reparaturfall
Sämtliche Reparaturarbeiten dürfen nur von einer
qualifizierten Ivoclar Vivadent Servicestelle durchgeführt
werden. Bei einem Defekt, der nicht von Ihnen behoben
werden kann, wenden Sie sich bitte an Ihren Händler
oder Ihre Service-Stelle (Adressen siehe hintere Um-
schlagseite). Eine klare Beschreibung des Defektes oder
der Umstände, die zum Defekt geführt haben, erleichtert
die Fehlersuche. Bitte legen Sie diese Beschreibung Ihrem
Gerät bei.
Lieferumfang
1Handstückhalter
3Batterien (LR6 AA 1.5 VDC)
1Handstück mit Netzkabel und Netzgerät
1Lichtleiter 10mm
3Blendschutze
1Bedienungsanleitung
Zubehör
Für Ihre bluephase C5 ist folgendes Zubehör erhältlich:
REF Bezeichnung
592 458 bluephase Handstückhalter
592 475 Lichtleiter 10 mm schwarz
551 752 Lichtleiter 8 mm
592 482 Power-booster Lichtleiter 13>8 mm schwarz
599 452 Pin-point Lichtleiter 6>2 mm schwarz
551 756 Blendschutz(-kegel)
592 496 Blendschutzschild
533 654 1 Heliotest
Technische Daten
Betriebsspannung 7.5 VDC
Handstück
Netzgerät 100–240 VAC/50-60HZ/max. 0.4A
Output 7.5 VDC / 1.7A
Betriebsbedingungen Temperatur +10 °C bis +40 °C
Relative Feuchte 30 % bis 75 %
Luftdruck 700 hPa bis 1060 hPa
Abmessungen L = 200 mm, B = 120 mm
Handstückhalter H = 70 mm
Gewicht Handstückhalter 245 g
Lichtquelle 5W LED
Wellenlängenbereich 430 – 490 nm
Lichtintensität mindestens 500 mW/cm2
Betrieb 6Min. ein / 4 Min. aus
(intermittierend)
Abmessungen Handstück L = 220 mm, B = 35 mm
H = 160 mm
Gewicht Handstück 200 g
Transport- und Temperatur –20 °C bis +70 °C
Lagerbedingungen Relative Feuchte 10 % bis 75 %
Luftdruck 500hPa bis 1060hPa
Die bluephaseC5 in geschlossenen oder überdachten
Räumen lagern. Das Gerät keinen starken Erschütterungen
aussetzen.
Produktspezifikation

2322
Cher client,
Une polymérisation optimum est une condition
importante pour tous les matériaux photo-
polymérisables de manière à produire de façon
constante et reproductible des restaurations de
haute qualité. La lampe à polymériser choisie joue,
elle aussi, un rôle décisif de ce point de vue.
C'est pour cela que nous tenons à vous remercier
d'avoir acheté la lampe bluephase.
La lampe bluephase est un dispositif médical de
haute qualité correspondant aux dernières normes
scientifiques et technologiques ainsi qu'aux
normes industrielles.
Ce mode d'emploi va vous permettre de mettre
en marche votre appareil en toute sécurité, de
profiter de toutes ses possibilités, et de lui assurer
une longue durée de vie.
Pour une identification facile des composants
individuels, la vue générale du produit est
présentée sous la forme d'une carte.
Pour toute question supplémentaire, nous vous
remercions de nous contacter (adresse sur le
verso).
Votre équipe Ivoclar Vivadent
Vue générale................................................................................. 24
Liste des pièces ................................................................................ 24
Indicateurs sur le socle pour pièce à main .................................................... 25
Indicateurs sur la pièce à main ................................................................ 25
Sécurité...................................................................................... 26
Utilisation usuelle ............................................................................. 26
Indications .................................................................................... 26
Contre-indications ............................................................................. 26
Signes et symboles ............................................................................ 26
Notes de sécurité .............................................................................. 26
Première mise en marche ................................................................... 27
Socle pour pièce à main ....................................................................... 27
Pièce à main .................................................................................. 27
Fonctionnement ............................................................................. 28
Mise en marche ............................................................................... 28
Sélection du programme de polymérisation ................................................... 28
Signaux acoustiques .......................................................................... 28
Intensité lumineuse ........................................................................... 28
Mesure de l'intensité lumineuse .............................................................. 28
Entretien et nettoyage ...................................................................... 29
Logement ...................................................................................... 29
Conducteur de lumière ........................................................................ 29
Que faire en cas de …? ..................................................................... 30
Garantie ..................................................................................... 31
Procédureen cas réparation ................................................................ 31
Spécifications................................................................................ 31
Livraison ....................................................................................... 31
Accessoires .................................................................................... 31
Données techniques ........................................................................... 31
Déclaration de conformité .................................................................. 62
Sommaire
Francais

2524
Vue générale Indicateurs sur le socle
Indicateurs sur la pièce à main
Indicateur Couleur Signification
Intensité 1 x vert ≥200 mW/cm2
lumineuse 2 x vert ≥400 mW/cm2
3xvert ≥600 mW/cm2
4xvert ≥800 mW/cm2
5xvert ≥1.000 mW/cm2
Liste des pièces
1 Pièce à main avec cordon d'alimentation
2 Bouton de mise en marche
3 Affichage
4 Socle pour pièce à main
5 Radiomètre
6 Plaque d'identification
7 Compartiment à piles
8 Piles (LR6 AA 1.5 VDC)
9 Embout de protection oculaire
10 Conducteur de lumière 10 mm
Prêt à l'emploi
Alimentation correcte
110 2 3 4
5
7,6
8
9

2726
Sécurité
Utilisation usuelle
bluephase C5 est une lampe à polymériser LED qui
produit une lumière bleue dense de haute énergie.
Elle est utilisée pour la polymérisation des matériaux
dentaires photopolymérisables au fauteuil. L'utilisation
requise inclut aussi l'observation des recommandations
et réglementations du mode d'emploi.
Indications
bluephase C5 est particulièrement recommandée pour
la polymérisation de matériaux dentaires photopoly-
mérisables dans une longueur d'onde de 430–490 nm.
Ces matériaux incluent les matériaux de restauration, les
bondings/adhésifs, les bases, les liners, les scellements de
sillons et fissures, les matériaux temporaires ainsi que les
colles pour brackets orthodontiques, les matériaux de
laboratoire dentaire tels que les inlays céramiques.
Contre-indications
Les matériaux dont la polymérisation est
activée dans une longueur d'onde en dehors
de 430–490 nm. Si vous n'êtes pas sûr de cer-
tains produits, veuillez demander au fabricant
du matériau correspondant.
Ne pas utiliser l'appareil à proximité
d'anesthésiques ou mélanges anesthésiques
inflammables à l'air, à l'oxygène ou à l'oxyde
nitrique.
Les téléphones portables et autres appareils
de communication HF (Haute Fréquence)
peuvent interférer les équipements médicaux.
L'utilisation d'un téléphone portable pendant
le fonctionnement de la lampe est interdite.
Signes et symboles
Contre indication
Symboles sur la lampe à photopolymériser
Double protection (l'appareil répond aux
normes de sécurité de classe II)
Protection contre les décharges électriques
(type d'appareil BF)
Utiliser uniquement en environnement protégé
Respecter le mode d'emploi
Ne pas jeter l'appareil avec les ordures
ménagères
Notes de sécurité
Le design de la bluephase
C5 a été développé selon
la norme IEC 601-1 (EN
60601-1), conformément
aux réglementations de
l'UE et a été certifié
organisme accréditeur
international par UL/CUL.
L'appareil est expédié
depuis le fabricant dans
des conditions de sécurité
et des conditions techniques solides. Pour maintenir ces
conditions et assurer des opérations sans risque, il est
nécessaire de respecter les recommandations et les
réglementations du mode d'emploi. Pour prévenir les
dommages sur l'appareil et tout risque pour les patients,
les utilisateurs et les tiers doivent respecter les
instructions de sécurité suivantes :
1. Manipulation et responsabilité
bluephase C5 ne doit être utilisée que pour les usages
recommandés.Tout autre utilisation est contre-indiquée.
Nous rejetons toute responsabilité pour des dommages
liés à un usage inadapté ou une panne pour non-respect
du présent mode d'emploi. De plus, l'utilisateur est
responsable de l'usage de la lampe bluephase C5 de
façon appropriée en respectant les indications
recommandées, et ce particulièrement si d'autres
équipements sont utilisés à proximité pendant le
fonctionnement de la lampe. N'utiliser que les pièces
détachées et accessoires fournis par Ivoclar Vivadent
(voir Accessoires). Nous rejetons toute responsabilité
pour les dommages causés par l'utilisation d'autres
pièces détachées ou accessoires.
2. Voltage
Avant la mise en marche, assurez-vous que :
a) le voltage de la prise de courant est conforme au
voltage indiqué sur la plaque d'identification, et que
b) l'appareil est à température ambiante.
3. Indications de sécurité
Si un usage en toute sécurité ne peut être garanti,
débrancher la pièce à main pour éviter tout fonctionnement
accidentel. Ceci peut être le cas si l'appareil est visiblement
endommagé ou ne fonctionne plus correctement. La
déconnexion complète n'est assurée que lorsque le
cordon d'alimentation est débranché.
4. Désinfection et stérilisation
Les surfaces contaminées de l'appareil, ainsi que les
fibres de verres et les embouts de protection oculaire
doivent être désinfectés ou passés à l'autoclave avant
chaque utilisation.
5. Intensité lumineuse
Avant chaque utilisation, vérifier que l'intensité lumineuse
indiquée permet une polymérisation adéquate.
Pour cela, contrôler la fibre de verre pour éliminer toute
contamination de la surface ou tout dommage, et utiliser
un radiomètre propre si nécessaire.
6. Dégagement de chaleur
Comme cela est le cas avec toutes les lampes à haute
performance, une haute énergie lumineuse a pour
résultat un certain dégagement de chaleur. Une
exposition prolongée sur la pulpe ou sur les tissus mous
peut engendrer des dommages. Il est donc conseillé de
respecter les recommandations de polymérisation liées
aux programmes et aux temps de polymérisation. De
plus, une polymérisation continue de plus de 40 secondes
sur la même zone, ainsi qu'un contact direct sur la
gencive, les muqueuses, ou la peau doivent être évités.
Eviter l'accumulation de chaleur lors des polymérisations
sous digue.
7. Protection oculaire
Eviter toute exposition directe ou indirecte avec les
yeux. Une exposition prolongée à la lumière peut être
inconfortable et provoquer des dommages. C'est pour
cela, que l'utilisation des embouts de protection oculaire
est recommandée. Les personnes sensibles à la lumière,
qui prennent des médicaments photosensibles ou qui ont
subi une chirurgie oculaire, les personnes qui travaillent
avec l'appareil ou à proximité pendant de longues
périodes ne doivent pas être exposées à la lumière de
cette lampe et doivent porter des lunettes de protection
qui absorbent la lumière en dessous de 500 nm.
8. Entretien et nettoyage
Toute réparation doit être assurée par un service
certifiépar Ivoclar Vivadent. Pendant le nettoyage, aucun
liquide ni corps étranger ne doivent pénétrer dans la
pièce à main (risque d'électrocution).
9. Traitement des déchets
Ne pas jeter l'appareil avec les ordures ménagères.
Le recyclage des piles et des lampes hors d'usage doit
se faire conformément à la réglementation et aux
dispositions nationales.
Contrôler la livraison afin de vérifier qu'il ne manque rien
et qu'aucun dommage n'est survenu lors du transport
(voir livraison). Si des composants manquent ou sont
endommagés, contacter immédiatement votre revendeur
ou centre de service.
Socle
Ouvrir le compartiment à piles, situé sous le socle pour
pièce à main. Insérer les piles fournies dans le kit suivant
la polarité indiquée puis refermer le compartiment. Poser
le socle sur une surface plate et stable. Le socle se met
en marche automatiquement dès que le radiomètre est
activé par la lumière bleue (voir "Mesure de l'intensité
lumineuse").
Pièce à main
Avant de mettre en marche l'appareil, assurez-vous que
le voltage de la prise de courant est conforme au voltage
indiqué sur la plaque d'identification, située sous le
socle. Puis, connecter la pièce à main à la prise de
courant. L'écran s'allume automatiquement.
Avant de mettre en place le conducteur de lumière,
retirer le film de protection sur l'ouverture
correspondante sur la pièce à main. Tourner légèrement
le conducteur de lumière pour le mettre en place sur la
pièce à main. Puis, positionner l'embout de protection
oculaire.
Mise en marche
2928
Désinfecter ou passer à l'autoclave les différentes surfaces
de la lampe, le conducteur de lumière et l'embout de
protection oculaire avant chaque utilisation. Par ailleurs,
assurez-vous que l'intensité lumineuse obtenue permet
une polymérisation adéquate. Pour cela, vérifier que le
conducteur de lumière n'est ni sale ni endommagé, puis
contrôler l'intensité avec le radiomètre intégré.
Mise en marche
La lumière est activée en pressant le bouton de mise en
marche et s'éteint automatiquement après 2 minutes.
Pour éteindre la lampe manuellement, presser à nouveau
le bouton de mise en marche. Le ventilateur se déclenche
en même temps que la lumière. Une fois la polymérisation
terminée, le ventilateur continue de fonctionner un
certain temps pour refroidir la lampe. Ne pas débrancher
le cordon d'alimentation tant que le ventilateur continue
de fonctionner.
Sélection du programme de polymérisation
Respecter le mode d'emploi du matériau utilisé lors de
la sélection du temps de polymérisation.
Les recommandations suivantes s'appliquent pour :
Les recommandations de polymérisation des composites
s'appliquent à toutes les teintes. Sauf indication contraire
dans le mode d'emploi du matériau utilisé, photopoly-
mériser par couche de 2 mm maximum.
Généralement, ces recommandations s'appliquent dans
les situations où le conducteur de lumière est orienté
directement sur le matériau à polymériser. Augmenter la
distance entre la source de lumière et le matériau
demande d'augmenter le temps de polymérisation en
conséquence. Par exemple, si la distance avec le matériau
est de 9 mm, l'intensité lumineuse réelle est réduite
d'environ 50%. Dans ce cas, il convient de doubler le
temps de polymérisation.
Signaux acoustiques
Mise en marche (Stop) 1 bip
Après 10 secondes 1 bip long
Après 20 et 80 secondes 1 bip court
Après 40 et 100 secondes 2bips courts
Après 60 et 120 secondes 3 bips courts
Les signaux acoustiques peuvent être supprimés si vous
le souhaitez. Pour cela, presser et maintenir le bouton de
démarrage pendant environ 30 secondes jusqu'à ce que
la lumière s'éteigne.Appuyer sur le bouton de démarrage
pendant 30 autres secondes si vous voulez remettre les
signaux acoustiques.
Intensité lumineuse
Si le conducteur de lumière 10-mm fourni dans le kit
est utilisé, l'intensité lumineuse est au minimum de
500 mW/cm2.Si l'on utilise l'un des autres conducteurs
de lumière disponibles (ex. conducteurs de lumière 8-mm
et Power-Booster 13>8 mm), la variation de l'intensité
lumineuse est tellement faible que les temps de poly-
mérisation mentionnés ci-dessus ne changent pas.
10 sec.
20 sec.
30 sec.
40 sec.
Adhésifs
AdheSE
Excite | DSC
Syntac
Heliobond
–
–
Composites
Adamant
Tetric EvoCeram
Tetric EvoFlow
Artemis | 4 Seasons
InTen-S
Tetric Ceram | HB
Tetric Flow Chroma
4Seasons Flow
Heliomolar HB
Tetric
Heliomolar | Flow
Helio Progress
–
Autres
Systemp.inlay | onlay
Systemp.flow
Helioseal | F | Clear |Chroma
Collage des restaurations
indirectes avec un compo-
site de collage "dual"
– Par face :
occlusal, mesial, distal
Collage des restaurations
indirectes avec un compo-
site de collage photopolym-
érisable : Variolink II et
Variolink Veneer
– Par face:
occlusal, mesial, distal
– Par millimètre d'épaisseur
de restauration,
ex.: Base de la restauration,
d'une épaisseur de 2 mm :
(20 secondes x 2) =
40 secondes par couche
–
Compoglass F | Flow
Entretien et nettoyage
Mesure de l'intensité lumineuse
L'intensité lumineuse de la bluephase C5 et du conducteur
de lumière 10-mm fourni dans le kit peut être contrôlée
sur le radiomètre intégré sur le socle. Pour cela, placer le
conducteur de lumière sur le radiomètre, sans embout de
protection oculaire et sans exercer de pression.
L'indicateur situé au-dessus du radiomètre s'allume en
vert en rapport avec l'intensité lumineuse mesurée.
Chaque voyant indique une intensité lumineuse
d'approximativement 200 mW/cm2(voir "Indicateurs
sur le socle"). Si la valeur mesurée ne correspond pas
àl'intensité lumineuse attendue, procéder de la façon
suivante :
– Contrôler le programme de polymérisation sélectionné
– Nettoyer le radiomètre avec un chiffon humide
– Nettoyer si possible les conducteurs de lumières
souillés (voir “Maintenance et nettoyage”)
– Remplacer tout conducteur de lumière endommagé
par un nouveau
Si ces mesures n'améliorent pas le résultat, veuillez
contacter votre distributeur ou le service après-vente
Ivoclar Vivadent.
Le radiomètre ne convient pas pour la mesure d'intensité
d'autres appareils de polymérisation ou conducteurs de
lumière.
Pendant le nettoyage, aucun liquide ni corps étranger ne
doivent pénétrer dans la pièce à main (risque d'électro-
cution). Débrancher la pièce à main de la prise de cou-
rant lors des opérations de nettoyage.
Logement
Essuyer la pièce à main avec une solution usuelle sans
aldéhyde. Ne pas utiliser de solutions agressives (ex.
solutions à base d'essence d'orange ou contenant plus
de 50% d'éthanol), de solvants (ex. l'acétone), ou
d'instruments pointus, qui risqueraient d'endommager
ou d'abîmer le plastique. Nettoyer le plastique souillé
avec une solution savonneuse.
Conducteur de lumière
Nettoyer les conducteurs de lumière avec un désinfectant
et un chiffon doux. Retirer avec précaution tout résidu de
matériau tel que du matériau composite, du conducteur
de lumière, à l'aide de l'ongle ou d'une spatule en
plastique. Ne pas utiliser d'instrument aiguisé ou pointu,
car ils risquent d'abîmer la surface du conducteur de
lumière et ainsi réduire la transmission de lumière. Les
conducteurs de lumières et les embouts de protection
oculaire doivent être nettoyés à l'autoclave (ex. 134°C,
3bars, 5 Minutes). .
Contrôler que le conducteur de lumière n'est pas
endommagé. Si le conducteur de lumière est mis
contre une source lumineuse et que certaines parties
apparaissent noircies, cela veut dire que des fibres de
verres sont cassées. Il faut dans ce cas remplacer le
conducteur de lumière par un nouveau.
Utilisation

3130
Que faire en cas de …?
Description de l'erreur
Socle pour pièce à main
Le radiomètre ne répond pas
Pièce à main
La lampe ne peut être
activée
Rectification de l'erreur
Vérifier les piles et les insérer selon la
polarité indiquée.
Insérer de nouvelles piles selon la
polarité indiquée.
Veuillez contacter votre distributeur ou
le Service Après-vente local.
Laisser refroidir la lampe, puis essayer
ànouveau. Si l'erreur persiste, veuillez
contacter votre distributeur ou le
Service après-vente local.
Vérifier votre prise de courant. 10 bips
sont émis
Veuillez contacter votre distributeur ou
le Service Après-vente local.
Vérifier votre prise de courant.
Veuillez contacter votre distributeur ou
le Service Après-vente local.
Causes
Les piles ne sont pas insérées
correctement
Les piles sont vides
Défaut électronique
La pièce à main est en
surchauffe
Prise de courant défectueuse
Défaut électronique
Prise de courant défectueuse
Défaut électronique
Indication de
l'erreur
Pas d'affichage
L'indicateur
clignote
L'indicateur
clignote et
10 bips sont
émis
Pas d'affichage
10 bips sont
émis
Garantie
La lampe bluephase C5 est garantie 3 ans à partir de la
date d'achat. La garantie tient compte d'un cycle de
fonctionnement de 300 heures.
Des pannes dues à un matériel défectueux ou à des vices
de fabrication sont réparées gratuitement pendant la
durée de la garantie. La garantie ne couvre aucun
dommage, matériel ou non, autre que ceux mentionnés.
L'appareil doit être utilisé exclusivement pour les
indications définies.Tout autre usage est contre-indiqué.
Le fabricant rejette toute responsabilité quant à un
mauvais usage de l'appareil. Aucune demande de
garantie ne peut être acceptée dans ce genre de cas.
Ceci est particulièrement vrai dans le cas de :
– dommage lié à un usage inadapté;
– dommage de composant lié à l'usure dans les
conditions d'utilisation normale;
– dommage lié à des facteurs externes, exemple un
choc, une chute sur le sol;
– dommage lié à des réglages ou une installation
incorrectes;
– dommage survenant lors du branchement de la
lampe sur une source d'énergie dont le voltage et la
fréquence ne sont pas conformes à ceux inscrits sur
la plaque d'identification;
– dommage lié à des réparations inadaptées ou à des
modifications réalisées par des réparateurs non
certifiés.
En cas de réclamation sous garantie, la lampe complète
(pièce à main, socle, et cordon d'alimentation) doivent
être retournés en port dû au distributeur ou directement
àIvoclar Vivadent, avec la facture d'achat. Utiliser le
conditionnement d'origine et le carton correspondant
pour le transport.
Procédure en cas de réparation
Les réparations doivent être réalisées uniquement par
un service certifiépar le service après-vente Ivoclar
Vivadent. En cas de défaut ne pouvant être rectifié,
veuillez contacter votre distributeur ou le service
après-vente local (voir les adresses au dos). Une
description claire du défaut ou des conditions de sa
survenue pourra faciliter l'identification du problème.
Veuillez joindre ce descriptif quand vous retournez
l'appareil.
Livraison
1socle pour pièce à main
3piles (LR6 AA 1.5 VDC)
1pièce à main avec un cordon d'alimentation
1conducteur de lumière 10mm
3embouts de protection oculaire
1mode d'emploi
Accessoires
Les accessoires suivants sont disponibles pour la
bluephase C5:
REF Description
592 458 Socle pour pièce à main bluephase
592 475 Conducteur de lumière 10 mm, noir
551 752 Conducteur de lumière 8 mm
592 482 Conducteur de lumière Power-Booster
13>8 mm, noir
599 452 Conducteur de lumière Pin-point 6>2 mm, noir
551 756 Embout de protection oculaire
592 496 Disque de protection oculaire
533 654 1 Heliotest
Données techniques
Voltage de la pièce 7.5 VDC
àmain
Transformateur 100–240 VAC/50–60HZ/max.0.4A
Puissance 7.5 VDC / 1.7A
Conditions de Température +10 °C à +40 °C
fonctionnement (50 à 104 °F)
Humidité relative 30 % à 75 %
Pression ambiante 700hPa à 1060hPa
Dimensions du socle L= 200 mm; W= 120 mm; H= 70 mm
Poids du socle 245 g
Source lumineuse 5W LED
Spectre 430 – 490 nm
Intensité lumineuse minimum 500 mW/cm2
Utilisation 6min. on / 4 min. off (par intermittence)
Dimensions de la L= 220 mm; W= 35 mm; H= 160 mm
pièce à main
Poids de la pièce 200 g
àmain
Transport et Température –20 °C à +70 °C
conditions de (–4 à 158 °F)
stockage Humidité relative 10 % à 75 %
Pression ambiante 500hPa à 1060hPa
bluephase C5 doit être rangée en hauteur et dans une pièce
fermée. Protéger l'appareil des chocs sévères.
Spécifications

3332
Gentile Cliente,
Una polimerizzazione di qualità è requisito
importante per realizzare restauri d’eccellenza.
Anche la lampada fotopolimerizzatrice rappresenta
un elemento decisivo per il buon esito di un
restauro. La ringraziamo pertanto di aver scelto
bluephase C5. bluephase C5 è un’apparecchiatura
medicale ideata secondo i criteri tecnologici e
scientifici più innovativi e conforme alle normative
ed agli standard qualitativi piú elevati.
Le presenti Istruzioni d’uso La guideranno ad un
utilizzo sicuro dell’apparecchio, per consentirLe
di utilizzare appieno ogni sua caratteristica
assicurando al contempo la massima longevità
della lampada.
Per qualsiasi informazione, non esiti a contattarci
(indirizzi sul retro delle Istruzioni d’uso).
Il suo Team Ivoclar Vivadent
Presentazione prodotto..................................................................... 34
Elenco delle parti.............................................................................. 34
Indicatori sulla base del manipolo ............................................................ 35
Indicatori sul manipolo ....................................................................... 35
Sicurezza .................................................................................... 36
Utilizzo previsto .............................................................................. 36
Indicazioni .................................................................................... 36
Controindicazioni.............................................................................. 36
Segni e simboli ............................................................................... 36
Norme di sicurezza ........................................................................... 36
Messa in funzione........................................................................... 37
Base del manipolo ............................................................................ 37
Manipolo ...................................................................................... 37
Operazioni d’uso............................................................................ 38
Avvio .......................................................................................... 38
Selezione del programma di polimerizzazione ................................................ 38
Segnali acustici................................................................................ 38
Intensità luminosa ............................................................................ 38
Misurazione dell’intensità luminosa .......................................................... 38
Manutenzione e pulizia ..................................................................... 39
Alloggiamento ................................................................................ 39
Conduttore ottico ............................................................................. 39
Cosa fare se… ............................................................................. 40
Garanzia .................................................................................... 41
Procedurain caso di riparazione ........................................................... 41
Specifiche prodotto......................................................................... 41
Confezionamento ............................................................................. 41
Accessori ...................................................................................... 41
Dati tecnici .................................................................................... 41
Certificato di conformità ................................................................... 62
Indice
Italiano

3534
Presentazione prodotto Indicatori sulla base del manipolo
Indicatori sul manipolo
Indicatore Colore Significato
Resa luminosa 1 x verde ≥200 mW/cm2
2xverde ≥400 mW/cm2
3xverde ≥600 mW/cm2
4xverde ≥800 mW/cm2
5xverde ≥1.000 mW/cm2
Elenco parti
1 Manipolo con cavo di alimentazione e alimentatore
2 Tasto di accensione
3 Display
4 Base del manipolo
5 Radiometro
6 Targhetta modello
7 Alloggiamento batteria
8 Batterie (LR6 AA 1.5 VDC)
9 Cappuccio antiriflesso
10 Conduttore ottico 10mm
Pronto per l’uso
Collegamento a rete corretto
110 2 3 4
5
7,6
8
9

3736
Sicurezza
Utilizzo
bluephase C5 è una lampada LED fotopolimerizzatrice ad
alta intensità luminosa con luce blu ad elevata energia.
bluephase C5 è utilizzata per la polimerizzazione di
materiali dentali fotopolimerizzabili direttamente alla
poltrona. Le presenti istruzioni d’uso forniscono
raccomandazioni e norme per un utilizzo corretto di
questo apparecchio. Leggere con attenzione.
Indicazioni
bluephase C5 è particolarmente indicata per la poli-
merizzazione di materiali dentali fotopolimerizzabili
compresi nello spettro di lunghezza d’onda tra
430–490 nm: materiali da restauro, bonding/adesivi,
liner, basi, sigillanti per fessure, materiali per provvisori,
cementi di fissaggio per bracket ortodontici e per
manufatti di laboratorio come p.e. inlay ceramici.
Controindicazioni
Materiali fotopolimerizzabili che non poli-
merizzano ad una lunghezza d’onda tra
430-490 nm. In caso di dubbio, si consiglia di
informarsi presso la relativa casa produttrice.
Non usare l’apparecchiatura in vicinanza di
narcotici o miscele narcotiche infiammabili con
aria, ossigeno o monossido di azoto.
Dispositivi portatili e mobili HF possono
interferire con la strumentazione medica.
L’utilizzo del telefono cellulare quando si
utilizza questo apparecchio non è consentito.
Descrizione dei simboli
Controindicazione
Simboli sull’apparecchio
Doppio isolamento (Apparecchio conforme
alla Classe II di sicurezza)
Protezione da scossa elettrica
(Apparecchio tipo BF)
Utilizzare solo in zone protette
Osservare le istruzioni d’uso
Non smaltire l’apparecchio come normale
rifiuto domestico.
Norme di sicurezza
bluephase C5 è stata
realizzata secondo le
norme IEC 601-1 (EN
60601-1), in conformità
con le attuali direttive UE
ed è stata certificata da
UL/CUL quale ente di
testaggio accreditato a
livello internazionale.
L’apparecchio è inviato
dal Produttore in perfette
condizioni di funzionamento e di sicurezza. Per conservare
l’apparecchio in questo stato e garantire un’operatività
priva di rischi, osservare le note e le regole contenute
nelle presenti istruzioni d’uso. Per prevenire danni
all’attrezzatura e rischi a pazienti, utilizzatori e terzi,
osservare le presenti istruzioni di sicurezza.
1. Utilizzo e responsabilità
bluephase C5 deve essere utilizzata esclusivamente per
le indicazioni previste. Qualsiasi altro uso è controindicato.
Il Produttore non è responsabile per danni derivanti da
un utilizzo non conforme della lampada o dalla mancata
osservanza delle Istruzioni d’uso. E’ responsabilità
dell’utilizzatore provare l’idoneitá nell’impiego
dell’apparecchio per l’utilizzo e gli scopi previsti. Ciò è
di particolare importanza quando altri strumenti vengano
utilizzati nelle immediate vicinanze nello stesso momento
in cui la lampada fotopolimerizzatrice è in uso. Usare
solo parti di ricambio e accessori originali Ivoclar
Vivadent (vedere Accessori). Il Produttore non risponde
per danni derivanti dall’uso di parti di ricambio o
accessori di altra natura.
2. Voltaggio operativo
Prima di accendere, assicurarsi che
a) il voltaggio indicato sulla targhetta di alimentazione
dell’apparecchio corrisponda al voltaggio della
corrente locale;
b) che la lampada fotopolimerizzatrice si trovi a
temperatura ambiente.
3. Riconoscimento di condizioni di sicurezza
insufficiente
Se si ha il sospetto che non sia più possibile operare in
sicurezza, staccare la corrente per evitare operazioni
impreviste. L’uso della lampada può non risultare sicuro
se, per esempio, l’apparecchio è visibilmente danneggiato
onon funziona più correttamente. L’apparecchio è
completamente spento solo se il cavo dell’alimentazione
èstato staccato dalla presa di corrente.Indications of
compromised safety
4. Disinfezione e sterilizzazione
Le superfici contaminate dell’apparecchiatura, i
conduttori ottici ed il cappuccio antiriflesso devono
essere disinfettati o autoclavati prima di ogni uso.
5. Intensità luminosa
Prima di ogni utilizzo, assicurarsi che l’intensità luminosa
garantisca una polimerizzazione adeguata. A tale scopo,
controllare che il conduttore ottico non sia contaminato
odanneggiato. Se necessario eseguire una verifica
dell’intensità luminosa sul radiometro pulito.
6. Sviluppo di calore
Come accade con tutte le lampade ad elevata intensità
luminosa, l’utilizzo dell’apparecchio genera un certo
calore. Un’esposizione prolungata della polpa o dei
tessuti molli può causare danni. E’ pertanto importante
attenersi alle raccomandazioni su programma e tempi
di polimerizzazione. Inoltre, evitare di polimerizzare
ininterrottamente sullo stesso punto per tempi superiori
a40 secondi e soprattutto evitare il contatto diretto con
gengive, mucose orali o cute. Evitare l’accumulo di calore
quando si polimerizza con diga di gomma in situ.
7. Protezione degli occhi
Prevenire l’esposizione diretta o indiretta degli occhi alla
luce della lampada fotopolimerizzatrice. Un’esposizione
prolungata alla luce è fastidiosa e può causare danni.
E’ pertanto consigliato l’uso dello schermo antiriflesso
fornito con la confezione. I soggetti sensibili alla luce, in
cura con farmaci fotosensibili, o che sono stati sottoposti
ainterventi agli occhi, nonché i soggetti che operano con
l’apparecchiatura o in sua vicinanza per lunghi periodi di
tempo non dovrebbero esporsi direttamente alla luce
della lampada e dovrebbero indossare occhiali protettivi
con lenti ad assorbimento luminoso inferiore ai 500nm.
8. Manutenzione e pulizia
Qualsiasi riparazione dell’apparecchio deve essere realiz-
zata da un Centro Assistenza certificato e autorizzato
Ivoclar Vivadent. Durante la pulizia dell'apparecchio evita-
re assolutamente, che liquidi o altre sostanze entrino nel
manipolo (pericolo di scossa elettrica).
9. Smaltimento
Non smaltire l’apparecchio come normale rifiuto dome-
stico. Lo smaltimento delle batterie e lampade fotopoli-
merizzatrici deve avvenire secondo le disposizioni e le
norme nazionali previste.
Controllare che la confezione sia completa di ogni sua
parte e che durante il trasporto non siano stati arrecati
danni all’apparecchiatura (cfr. “Confezionamento”).
Qualora manchino delle parti o siano state danneggiate,
contattare immediatamente il proprio rivenditore o il
Centro Assistenza di fiducia.
Base del manipolo
Aprire l’alloggiamento batteria situato nella parte inferiore
della base del manipolo. Inserire le batterie fornite con il
kit secondo la polarità indicata e richiudere l’alloggia-
mento. Posizionare la base del manipolo su una super-
ficie piana idonea. La base del manipolo si accende
automaticamente quando il radiometro viene attivato
dalla luce blu (cfr. Misurazione dell’intensità luminosa).
Manipolo
Prima di accendere l’apparecchio, assicurarsi che il
voltaggio indicato sulla targhetta di alimentazione
dell'apparecchio corrisponda alla corrente elettrica
locale. La targhetta di alimentazione è applicata sulla
parte inferiore dell’alimentatore.
Collegare ora l’alimentatore alla corrente elettrica.
La lampada si accende e si spegne automaticamente per
autotest. Prima di inserire il conduttore ottico, rimuovere
il foglio protettivo dalla corrispondente apertura sul
manipolo. Ruotare leggermente il conduttore ottico nel
fissarlo sul manipolo. Successivamente, montare un cono
antiriflesso sul conduttore ottico.
Messa in funzione

3938
Disinfettare o autoclavare le superfici contaminate della
lampada fotopolimerizzatrice, il conduttore ottico e il
cappuccio antiriflesso prima di ogni uso. Inoltre,
assicurarsi che l’emissione della luce consenta una poli-
merizzazione adeguata. A tale scopo, controllare che
il conduttore ottico non sia sporco o danneggiato e
utilizzare il radiometro integrato per controllare
l’emissione luminosa.
Avvio
La lampada si accende premendo il tasto di accensione e
si spegne automaticamente dopo 2 minuti. Se si desidera
spegnere l’apparecchio prima che sia trascorso il tempo
di polimerizzazione prestabilito, premere nuovamente il
tasto di accensione. Contemporaneamente alla luce si
attiva la ventola. Terminato il tempo di polimerizzazione,
essa continua a girare per un certo periodo di tempo per
raffreddare l’apparecchiatura. Non staccare l’alimentatore
dalla corrente elettrica finché la ventola è in funzione.
Selezione del programma di polimerizzazione
Quando si seleziona il tempo di polimerizzazione
attenersi alle Istruzioni d’Uso del materiale utilizzato.
Per i materiali selezionati sono consigliati i seguenti
tempi di polimerizzazione
Itempi di polimerizzazione consigliati per i materiali
compositi si riferiscono a tutti i colori e, se non indicato
diversamente nelle Istruzioni d’uso del materiale
utilizzato, per strati con spessore massimo di 2 mm.
Di norma, queste raccomandazioni si riferiscono a
situazioni in cui il conduttore ottico venga posto
direttamente sul materiale da polimerizzare.Aumentando
la distanza tra conduttore ottico e materiale, il tempo
di polimerizzazione dovrà aumentare in modo
corrispondente. Per esempio, se la distanza dal materiale
èdi 9 mm l’effettiva intensità luminosa si riduce di
circa il 50%. In tal caso, il tempo di polimerizzazione
consigliato dovrà essere raddoppiato.
Segnali acustici
Avvio/ Stop 1 beep
Dopo 10 secondi 1 beep lungo
Dopo 20 e 80 secondi 1 beep corto
Dopo 40 e 100 secondi 2 beep corti
Dopo 60 e 120 secondi 3beep corti
Isegnali acustici possono essere disattivati. Per disattivare
il segnale acustico, tener premuto il tasto di accensione
per circa 30 secondi a lampada spenta. Per ripristinare i
segnali acustici, tener premuto il tasto di accensione per
altri 30 secondi a lampada spenta.
Intensità luminosa
Con l’uso del conduttore ottico 10-mm fornito con il kit,
l’intensità luminosa è di minimo 500 mW/cm2.Se si
utilizzano invece i conduttori ottici addizionali (p.e.
conduttore ottico 8-mm e conduttore ottico Power-
Booster 13>8 mm), l’intensità luminosa varia molto
impercettibilmente ed i tempi di polimerizzazione
sopraccitati, quindi, rimangono invariati.
10 sec.
20 sec.
30 sec.
40 sec.
Adesivi
AdheSE
Excite | DSC
Syntac
Heliobond
–
–
Compositi
Adamant
Tetric EvoCeram
Tetric EvoFlow
Artemis | 4 Seasons
InTen-S
Tetric Ceram | HB
Tetric Flow Chroma
4Seasons Flow
Heliomolar HB
Tetric
Heliomolar | Flow
Helio Progress
–
Altri
Systemp.inlay | onlay
Systemp.flow
Helioseal | F | Clear |Chroma
Restauri indiretti con cementi
compositi a indurimento duale
– Per segmento:
occlusale, mesiale, distale
Restauri indiretti con i
cementi compositi foto-
polimerizzabili Variolink II e
Variolink Veneer
– Per segmento:
occlusale, mesiale, distale
– Per ogni millimetro di
spessore del restauro
p.e. restauro in ceramica di
2mm di spessore, solo Base
(20 secondi x 2) =
40 secondi per segmento
–
Compoglass F | Flow
Manutenzione e pulizia
Misurazione dell’intensità luminosa
L’intensità luminosa di bluephase C5 e del conduttore
ottico 10-mm fornito con il kit, può essere controllata sul
radiometro integrato nella base del manipolo.A tal fine,
rimuovere il cappuccio antiriflesso ed appoggiare la
punta del conduttore ottico a livello sul radiometro, sen-
za esercitare pressione.
L’indicatore luminoso sopra il radiometro si illuminerà di
verde a seconda dell’intensità luminosa misurata. Ogni
singola spia luminosa indica un’intensità luminosa di
circa 200 mW/cm2(cfr. Indicatori sulla base del manipolo).
Nel caso il valore misurato non corrispondesse
all’intensità luminosa preventivata, procedere come
segue:
– controllare il programma di polimerizzazione
selezionato
– pulire il radiometro con un panno umido
– detergere i puntali ottici probabilmente sporchi
(cfr. “Manutenzione e pulizia”)
– sostituire l'eventuale puntale ottico danneggiato
con uno nuovo
Se queste misure preventive non migliorano i risultati,
rivolgersi al proprio rivenditore o al Centro Assistenza di
fiducia.
Il radiometro non è adatto per misurare l’intensità
luminosa di altri aparecchi luminosi o conduttori ottici.
Durante la pulizia dell'apparecchio evitare assolutamente,
che liquidi o altre sostanze entrino nel manipolo (pericolo
di scossa elettrica).
Durante la detersione staccare il manipolo dalla presa di
corrente.
Alloggiamento
Pulire il manipolo e la base del manipolo con una
normale soluzione disinfettante non aldeidica. Per la
detersione non utilizzare soluzioni altamente aggressive
(p.e. soluzioni a base di olio d’arancia o soluzioni con
contenuto di etanolo superiore al 50%), solventi
(p.e. acetone), o strumenti appuntiti che possono
danneggiare o graffiare la plastica. Pulire le parti di
plastica sporche con soluzione saponata.
Conduttore ottico
Detergere il conduttore ottico con un disinfettante e un
panno morbido. Rimuovere con cura ed attenzione il
materiale residuo, per esempio composito, dal puntale
ottico con le unghie o una spatola in plastica. Non
utilizzare strumenti affilati o appuntiti, perché possono
graffiare il terminale e la superficie del conduttore ottico
eridurre quindi l'emissione di luce. Il puntale ottico ed i
vappucci antiriflesso possono essere autoclavati.
Controllare che il conduttore ottico non sia danneggiato.
Verifica: tenendo un conduttore ottico contro luce, se
alcuni segmenti appaiono neri, allora alcune fibre di
vetro si sono rotte. In tal caso, il puntale ottico deve
essere sostituito con uno nuovo.
Operazioni
Table of contents
Languages:
Popular Medical Equipment manuals by other brands


Getinge
Getinge Arjohuntleigh Nimbus 3 Professional Instructions for use

Mettler Electronics
Mettler Electronics Sonicator 730 Maintenance manual

Pressalit Care
Pressalit Care R1100 Mounting instruction

Denas MS
Denas MS DENAS-T operating manual

bort medical
bort medical ActiveColor quick guide

AccuVein
AccuVein AV400 user manual


