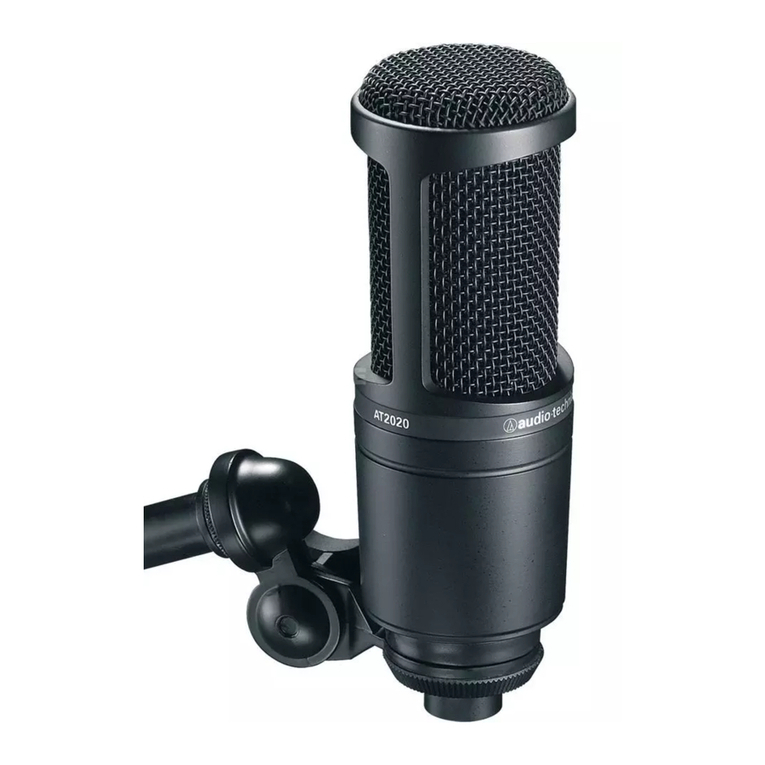
InSync Speech Technologies Buddy DesktopMic 7G User manual

Buddy DesktopMic 7G
User’s Guide

Contents
Buddy DesktopMic 7G Overview ........................................................................ 4
Features .......................................................................................................... 4
Supported Operating Systems: ........................................................................... 5
Supported Speech Software and Voice Applications:......................................... 5
Installing the Buddy DesktopMic 7G USB .......................................................... 5
Installation Procedure for Windows 8 ................................................................ 6
Installation Procedure for Windows 7 ................................................................ 6
Installation Procedure for Windows XP .............................................................. 8
Testing Hardware............................................................................................ 8
Making Buddy DesktopMic 7G a Preferred Device....................................... 11
Installing Buddy DesktopMic 7G in Windows Vista .......................................... 12
Installation Procedure for Macintosh ............................................................... 13
Using the Buddy DesktopMic 7G ...................................................................... 14
Using Buddy DesktopMic 7G with Windows Speech Recognition.................... 15
Installation Procedure for Macintosh ............................................................... 17
Using Buddy DesktopMic 7G with Dragon NaturallySpeaking or Dragon Medical
.......................................................................................................................... 17
How to create an additional Dragon User Profile:........................................ 18
How to add an additional dictation source:.................................................. 18
Benefit of an additional dictation source: ................................................ 18
Testing the Audio Settings in Dragon NaturallySpeaking ............................. 19
Default Buddy DesktopMic Button Configuration ............................................ 20
Reconfiguring Buddy DesktopMic Button......................................................... 20
Using Buddy USB with VoIP applications .......................................................... 21
Troubleshooting................................................................................................ 21
Microphone volume too low ............................................................................ 22

Buddy DesktopMic 7G not recognized.............................................................. 23
Special Considerations for Speech Dictation .................................................... 24
Safety Precautions ............................................................................................ 24
Taking Care of Your DesktopMic....................................................................... 25
Limited Warranty .............................................................................................. 26
How to get warranty service............................................................................. 27
Technical Support: ............................................................................................ 28

Buddy DesktopMic 7G Overview
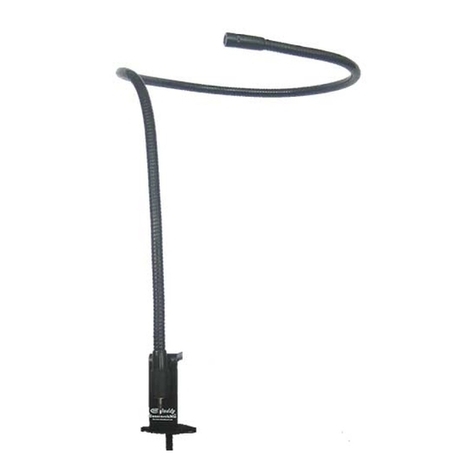
The Buddy DesktopMic 7G is a highly customizable, multi-function,
professional-quality USB microphone. It is ergonomic, sturdy and stylish. The
sturdy base is constructed from a solid black anodized Zinc and Aluminum
dent-resistant alloy. Buddy DesktopMic 7G includes a noise-canceling
microphone element for pure audio. The performance is equal to headsets.
The selectable mute-toggle or Push-to-Talk button means the microphone only
hears when you want it to hear. This yields high recognition accuracy with
Dragon NaturallySpeaking and Microsoft Windows Speech Recognition. The
Buddy DesktopMic 7G is setting new standards for voice-capture technology.
Featuring InSync Speech's revolutionary FilteredAudio noise-filtering
technology, this professional desktop microphone is perfectly suited for any
voice application. It provides exceptional accuracy with speech-recognition
applications and will deliver exceptional voice clarity over the Internet when
used with Skype, Google Voice and Google Talk, net meeting, webinar or any
other VoIP software. Best of all, this technology is packed into a small, stylish
form factor. It runs on all computers that include standards based USB device
interface, such as Microsoft Windows, Apple Mac, Linux and Google Chrome
OS.
The stylish Buddy DesktopMic 7G combines high-quality materials and
FilteredAudio technology in a compact and slick-form factor. The flexible and
durable gooseneck provides hands-free usage and is adjustable to suit your
working style.
Features
•USB Plug-and-Play comes with 8' (2.5m) A to B USB detachable cable,
does not require cumbersome drivers or software
•Revolutionary FilteredAudioTM technology coupled with
unidirectional microphone, provides clear voice capture even in
extremely noisy environments
•Ideal for voice applications, such as speech recognition, dictation,
transcription, Skype®, Google Talk®, Google Voice®, net meeting,
webinars and any other VoIP application
•Works with any host that supports USB device interface. Tested to
work with Windows®, Mac®, Linux® and Chrome OS®

•Made from high-quality materials with durable, heavy-duty and
adjustable 24" (60 cm) gooseneck
Supported Operating Systems:
•Microsoft Windows® 8, Microsoft Windows® 7, Vista, XP SP2
or later
•Mac OS® 10.4 or higher
•Linux 2.6 or higher
•Google Chrome OS
Supported Speech Software and Voice Applications:
Dragon NaturallySpeaking 10.0 or higher
Microsoft Windows Speech Recognition
VoIP applications such as Skype, Google Talk, Windows Live
Messenger etc.
Installing the Buddy DesktopMic 7G USB
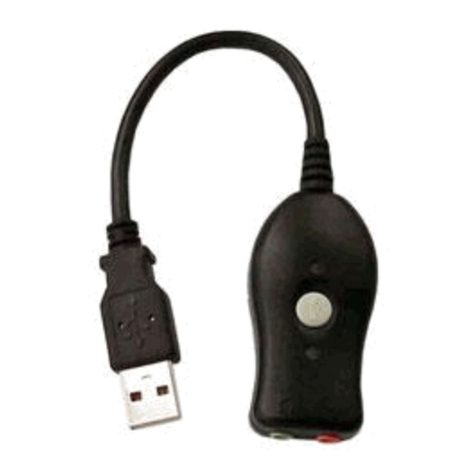
The Buddy DesktopMic 7G features the USB 2.0 interface (USB 1.1 Compatible)
and plug-and-play under Windows XP, Vista, Win 7, Win 8 and MAC OSX
operating systems .
1. Plug the USB connector to a dedicated USB Port in your computer; it is
fully functional after being recognized by the computer. Use of a USB
Splitter or USB Hub device to connect DesktopMic 7G to your
computer is NOT RECOMMENDED. Hubs and splitters introduce
communication delays, which is not suited for any real time audio
device and will result in intermittent loss of audio (or dropped words in
speech-to-text processing).

2. If the system has power, the indicator light (LED) of the microphone
will light up green.
Installation Procedure for Windows 8
Installation Procedure for Windows 7
With the device connected, Windows automatically initializes and loads the
appropriate drivers and configures the device. Buddy 7G devices use standard
device drivers built into target platform such as Windows or Mac.

Once Windows has finished you will be advised that the device is ready to
use. This may take a minute or more especially if searching for device drivers
from Windows update is enabled.
If the unit does not initialize correctly, check that the cables are properly
inserted.
Note: You can change the USB Port for the Buddy DesktopMic 7G but the first
time you plug the microphone into a new USB port, there will be a short delay
due to driver installation for the new port.
To make your Buddy DesktopMic 7G your default device:
•Click Start →Control Panel From Control Panel choose Hardware and
Sound followed by Sound.
•Click on Recording tab. Buddy DesktopMic 7G may have a green
check mark, if not select the device by clicking with right mouse
button.
•Click “Set as Default Device” from the resulting properties menu.

Installation Procedure for Windows XP
With the device connected, Windows will automatically initialize and load the
appropriate drivers and configure the device.
To verify the operation, please proceed with the following steps:
Testing Hardware
Go to Start > Settings > Control Panel. Click on Sound and Audio Devices to
bring up Sounds and Audio Devices properties dialog as follows:

1. Click on Voice Tab. Verify that Voice Recording is set to Buddy
DesktopMic 7G. If it is not the default devices, click on the down arrow
and scroll to select it.
2. Once the Buddy DesktopMic 7G option is set as the default device,
click on Test Hardware button below.
Note: In the dialog above you see separate entries for playback and
recording device. These settings are independent. You must choose
to use a different sound card and/or USB adapter for each of these
functions.

Click on the Next button to continue. The system will test your
hardware. Once the test is complete, it will prompt you with the following
screen
Click on the Next button once more and both Volume buttons will become
active.

Read the short paragraph in quotation marks. As you read the paragraph you
will hear your voice in the earphones. If the volume is too low or too high you
can adjust it with sliders on the volume meter.
Making Buddy DesktopMic 7G a Preferred Device
To select your Buddy DesktopMic 7G as a preferred device for sound
recording.
Click on Start > Control Panel > Sound and Audio Devices then click on Audio
Tab
The following screen will appear
If the Buddy DesktopMic 7G is not the default device, click on the down arrow
to select it and click the OK button.

Installing Buddy DesktopMic 7G in Windows Vista
Once you plug your USB product, Windows Vista automatically installs all
necessary drivers for the device to perform properly.
To verify that your device is properly installed follow these steps:
Sound Devices for Playback:
Click on Start > Settings > Control Panel > Sound
A new window will pop up (see above). You will see 3 tabs: Playback,
Recording and Sounds
To select Buddy DesktopMic 7G as the default recording device, in the
Recording tab, select the device from the list and press the Set Default button.

Installation Procedure for Macintosh
1. In system OSX: in the Apple menu, open System Preferences.
2. Double-click the Sound preference file.
3. Click on the Input tab.
4. Double click Buddy DesktopMic 7G under ”Choose A Device For
Sound Input” dialog box.
5. Set input volume to the appropriate level if necessary
6. Exit System Preferences.
Additional details for installing your Buddy microphone are at
http://www.BuddyMicrophones.com.

Using the Buddy DesktopMic 7G
The Buddy DesktopMic 7G is designed to used 10 to 12 inches from your
mouth.
See pictures below:
* *
* *
The noisier your environment, the more important it is to have the
microphone close to your mouth. In a quiet office, you may be able to
effectively use this with it positioned further away from your mouth. In a
noisy office, it will work much better if close to the mouth but out of the
breath stream.
Over time the windsock may get dirty. You can replace it or you can wash
it. If you wash it, make certain it is dry prior to putting it back on the
microphone boom.

The cables should not be stressed by being stretched, bent, or otherwise
compromised.
Using Buddy DesktopMic 7G with Windows Speech Recognition
If you are using your Buddy device with Microsoft Windows Vista or Windows
7 Speech Recognition, you first need to set up the microphone using your
Buddy DesktopMic 7G.
Follow these steps:
Click Start > Control Panel >Ease of Access> Set up a microphone
The Microphone Setup Wizard window will display; select Desktop
Microphone Click Next and Next again

Start reading to adjust the volume input of the microphone, once you finish
reading the sentence click Next then Finish.
Once you have installed the microphone, you can start using Microsoft Speech
Recognition software.

Installation Procedure for Macintosh
1. In system OSX: in the Apple menu, open System Preferences.
2. Double-click the Sound preference file.
3. Click on the Input tab.
4. Double click Buddy DesktopMic 7G under ”Choose A Device For
Sound Input” dialog box.
5. Set input volume to the appropriate level if necessary
6. Exit System Preferences.
Additional details for installing your Buddy microphone are at
http://www.BuddyMicrophones.com.
Using Buddy DesktopMic 7G with Dragon NaturallySpeaking or
Dragon Medical
Having made your Buddy product your preferred device in Windows is not
enough for Dragon NaturallySpeaking to recognize it.
The audio quality from the dictation source may vary, so it is very important
that the proper source is selected during the New User Wizard/Audio Setup.
If you have multiple microphones or devices, it may be necessary to setup an
additional user profile or an additional dictation source. Here are some
guidelines:
a) If the microphone/device connection type is exactly the same, then it
is necessary to create a second Dragon user profile. Nuance
recommends creating a separate Dragon user profile for each source.
b) If the microphone/device connect type is different, then it is not
necessary to create a second Dragon user profile, but an additional
dictation source should be created. For example, if the first device is a
digital audio recorder and the second device is a USB Audio device,
then it is recommended to add a dictation source to the existing
Dragon user profile.

How to create an additional Dragon User Profile:
1. Open Dragon NaturallySpeaking.
2. If the user profile is automatically loading (this will occur automatically
if there is only a single user profile/source), wait for it to complete.
3. If the "Open Profile" dialog appears, close the dialog.
4. On the DragonBar, select:
5. "Profile > New User Profile" menu (in version 11 and 12). If a user
profile loaded, it may be necessary to "Close" the open user profile
first (from the Profile menu).
6. "NaturallySpeaking >Open User > New" menu (in version 10). If a user
profile is loaded, it may be necessary to "Close" the open user profile
first (from the NaturallySpeaking menu).
7. Follow the instructions in the Audio Setup Wizard to select the new
source.
How to add an additional dictation source:
1. Open Dragon NaturallySpeaking.
2. Load the current user profile (this will occur automatically if there is
only a single user profile/source).
3. On the DragonBar, select:
4. "Profile > Add dictation source to current User Profile" menu (in
version 11 and 12).
5. "NaturallySpeaking >Open User > Source" menu (in version 10).
6. Click "New" (if necessary) and follow the steps to add an additional
source.
7. When prompted, select the proper dictation source from the drop-
down menu.
8. Follow the instructions in the Audio Setup Wizard to configure the new
source.
Benefit of an additional dictation source:
By adding a dictation source to an existing user profile, the two sources will
use the same vocabulary. Therefore, any vocabulary changes and accuracy
improvements performed will be accessed by both sources. If a new user
profile is created, the vocabularies remain separate.

Notes:
•Depending on the source being added, additional training may be
necessary to ensure accurate voice recognition.
•If the additional source is not available for a device of the same
connection type (i.e. original source is a USB microphone and the
additional source requested would be a USB microphone). In this
case, it is better to create a new user profile (for the separate USB
microphone) OR to run the Audio Setup Wizard and switch the original
source to the new USB microphone.
Testing the Audio Settings in Dragon NaturallySpeaking
Open Dragon NaturallySpeaking
1. Click on (Release 10) Tools > Accuracy Center > Check your audio
settings or (Release 11 or Dragon Medical Practice Edition) Audio
> Check Microphone
2. A new screen will pop up, select your device and run the quick
Audio Setup Wizard.
3. Once finished you are ready to use your device and begin
dictating.
If your Accuracy Center menu is grayed, follow these steps:
1. Open Dragon NaturallySpeaking
2. Click on Profile Menu (Dragon in Medical 10, NaturallySpeaking in
other Release 10 products) > Prepare User for Dictation
3. A new window will pop up advising you that the Audio Setup Wizard
needs to be run.
4. If there is more than one active audio device, another screen will pop
up, Select your device and run the quick Audio Setup Wizard.
5. Once finished you are ready to use your device and begin dictating.

Default Buddy DesktopMic Button Configuration
When shipped, Buddy DesktopMic 7G button is by default set for the following
function:
Button1(
Click Microphone mute
The default LED settings are:
LED 1 Green when plugged into USB
LED 2 Blinking Blue when muted
Reconfiguring Buddy DesktopMic Button
While the default Buddy DesktopMic button setting is useful as-is for many
persons and applications, some will want the button set to perform different
function.
Some may want the button optimized for navigating a custom
application. Others may want the button to generate common
text. Whatever the need, the button actions can be changed using the
MyBuddyMic software.
To make changes, download the MyBuddyMic software, install it and run it,
then use it to modify the settings. You can create separate “profiles” so that
you can easily change from one set of button definitions to another.
The MyBuddyMic software can be freely downloaded at
http://www.BuddyMicrophones.com
Instructions for configuration and use are included in the MyBuddyMic
software.
Most of the MyBuddyMic settings, including text and keyboard actions, are set
on the microphone itself so do not require that any other software be run
once set. The Dragon actions available with the MyBuddyMic software require
that the MyBuddyMic software run while the buttons are in use.
More detailed instructions for using the Buddy DesktopMic buttons are at
http://www.BuddyMicrophones.com.
Table of contents
Other InSync Speech Technologies Microphone manuals
