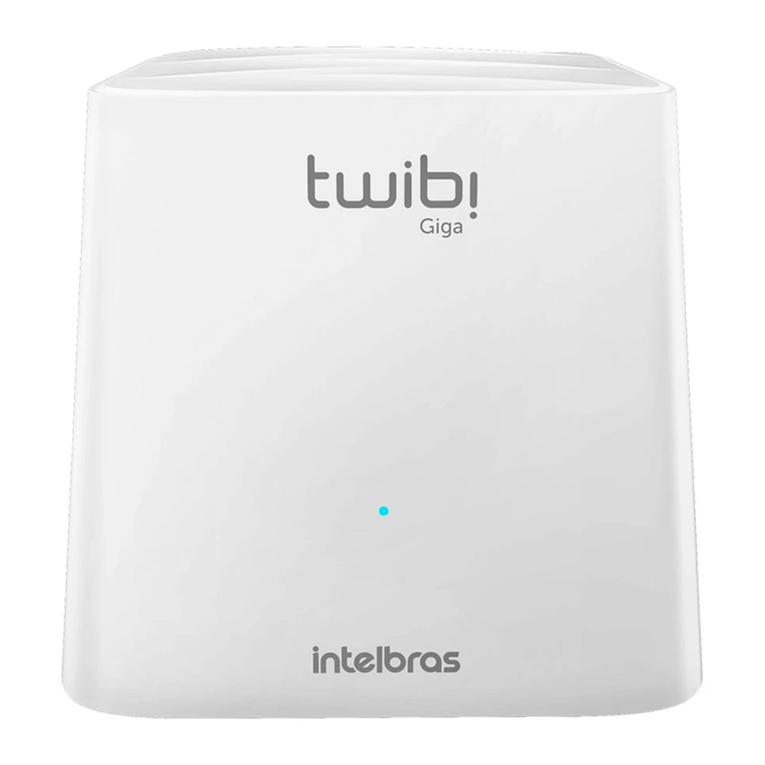
Intelbras Twibi Giga User manual

User guide
Twibi Giga

Twibi Giga
Mesh router
Congratulations, you have just purchased a product with Intelbras
quality and security.
The Mesh Twibi Giga router provides a complete solution for home
networks and small ofces. With it you can share Internet access
with multiple devices in a high-speed wireless network. Its installa-
tion and management can be done through the Wi-Fi Control Home
application for Android®or iOS, quickly and easily.

Care and safety
Prera instalar seu roteador na
parte central do ambiente, de
preferência, em local mais alto, por
exemplo, em cima de um móvel.
Evite um número excessivo de
barreiras físicas entre os
dispositivos transmissores e os
receptores da rede Wi-Fi.
Ao adicionar novos Twibis a
sua rede verique se estão
todos com o LED verde, isso
garante uma melhor
performance da sua rede.
Prefer to install your router in the
central part of the environment and
preferably in a higher location, for
example on top of a furniture.
Avoid an excessive number of physi-
cal barriers between the transmitting
and receiving devices on the
Wi-Fi
network.
When adding new Twibis to
your network, make sure that
they are all with the
Green
LED,
this ensures better performance
of your network.
Não deixe seu Twibi exposto à luz do sol ou às fontes de calor.
Não coloque o Twibi em locais fechados ou apertados.
Não deixe seu Twibi próximo do micro-ondas.
Twibi
Do not leave your Twibi exposed to sunlight or heat sources
Não deixe seu Twibi exposto à luz do sol ou às fontes de calor.
Não coloque o Twibi em locais fechados ou apertados.
Não deixe seu Twibi próximo do micro-ondas.
Twibi
Do not place the Twibi in closed or tight places.
Não deixe seu Twibi exposto à luz do sol ou às fontes de calor.
Não coloque o Twibi em locais fechados ou apertados.
Não deixe seu Twibi próximo do micro-ondas.
Twibi
Do not leave your Twibi near the microwave.
Não deixe seu Twibi exposto à luz do sol ou às fontes de calor.
Não coloque o Twibi em locais fechados ou apertados.
Não deixe seu Twibi próximo do micro-ondas.
Twibi
Do not leave your Twibi near the wireless phone (analog).

Summary
1. Technical specications 5
2. Meaning of LED 6
3. Installation 6
3.1. Connecting a Twibi to your modem. . . . . . . . . . . . . . . . . . . . . . . . . . . . . . . . .7
3.2. Connect your smartphone to Twibi .................................8
4. Conguration 9
4.1. Initial conguration of Twibi ......................................9
4.2. Adding another Twibi to your network .............................10
5. Using the Wi-Fi Control Home app 11
5.1. Information about each Twibi ....................................13
5.2. Device list ..................................................14
5.3. Wi-Fi
network name and password................................15
5.4. Visitors Wi-Fi ................................................16
5.5. Parental control ..............................................16
5.6. Band control ................................................20
5.7. Internet
menu ...............................................21
5.8. Login password ..............................................21
5.9. Fast roaming ................................................22
5.10. Port forwarding .............................................22
5.11. UPnP.....................................................22
5.12. DHCP
Server ...............................................23
5.13. DNS......................................................23
5.14. Firmware update ............................................23
5.15. Automatic maintenance .......................................23
6. Frequently asked questions 24
Warranty term 25

5
1. Technical specications
Hardware
2 internal antennas of 3 dBi
1
WAN/LAN
gigabit port
1
LAN
gigabit port
Chipset Realtek®RTL8197FS+RTL8812BR+RTL8363
Flash
Memory 16 MB
RAM
memory 128 MB
Wireless parameters
Standards
IEEE 802.11ac/a/n 5 GHz
IEEE 802.11b/g/n 2.4 GHz
IEEE 802.11v/r (roaming)
Radio mode MU-MiMo
Beamforming
Frequency of operation 2.4 GHz
5 GHz
Bandwidth 2.4 GHz: 20, 40 MHz
5 GHz: 40, 80 MHz
Transmission rate 2.4 GHz: up to 300 Mbps
5 GHz: up to 867 Mbps
Channels of operation 2.4 GHz: 1 to 11 (Brazil)
5 GHz: 40
Maximum power
(E.I.R.P.)
2.4 GHz: 315 mW (25 dBm)
5 GHz: 315 mW (25 dBm)
Receiver sensitivity at 2.4 GHz
802.11b 1 Mbps: -97 dBm
802.11g 54 Mbps: -78 dBm
802.11n 20 MHz MCS7: -71 dBm
802.11n 40 MHz MCS7: -70 dBm
Receiver sensitivity at 5 GHz 802.11a 6 Mbps: -92 dBm
802.11ac 80 MHz MCS9: -61 dBm
Security WPA/WPA2-PSK with TKIP and/or AES encryption
Power supply
Input 100–240 V to 50/60 Hz
Output 12 V/1.5 A
Maximum power consumption 18 W
Attention: this equipment is not entitled to be protected against harmful interference
and may not cause interference to duly authorized systems.

6
2. Meaning of LED
Main Twibi Other Twibis Meaning
Green Green Everything set! Connected to the internet and excellent connection
between Twibis
Green Yellow The Twibi with the
Yellow
LED is a little far away, we recommend
bringing it closer to another Twibi
Green Pink The Twibi with the
Pink
LED is too far away, we recommend
bringing it closer to another Twibi
Green Red The Twibi with the
Red
LED is not able to connect to another Twibi,
get it closer to another Twibi
Blue ashing Blue ashing Your Internet has just disconnected, Twibi is trying to connect to
the internet again
Red Red Your Internet is not working, check your modem and cable
connection
Note:
if you have not yet set up your Twibi, it will ash
Blue
for a period and then it will
turn
Red
. Follow the steps described here in the guide to congure your Twibi.
3. Installation
Before you start installing Twibi, download the app
Wi-Fi Control Home
in the App
Store® or Google® Play. You can search the app in the store or scan the QR Code
below.

7
3.1. Connecting a Twibi to your modem
To use the Internet through Twibi you need to connect it to your operator’s modem
or router. It is necessary to do this only on a Twibi of your network, following the
procedure:
1. Connect one end of the network cable to your modem (
LAN
port) and the other
end to the Twibi’s
WAN
port;
2. Connect the power supply to the Twibi and then plug it into the electrical outlet.
Internet
Modem
Internet
Modem
Installation example

8
3.2. Connect your smartphone to Twibi
To start conguring the Twibi you must rst connect to your
Wi-Fi
network, go to
your device's
Wi-Fi
network list and look for the Twibi
Wi-Fi
network. By default,
the network is without password, just click on it to connect.
List of Wi-Fi networks

9
4. Conguration
All Twibi settings are made through the Wi-Fi Control Home application, always
make sure you are connected to the
Wi-Fi
network generated by Twibi itself. If you
are connected to another
Wi-Fi
network or disconnected from Wi-Fi, the applica-
tion will not nd Twibi. Don't worry, if it does, the application will show you how to
connect to the correct
Wi-Fi
network.
4.1. Initial conguration of Twibi
To make the rst settings, open the Wi-Fi Control Home application, it will de-
tect that your Twibi is not congured and will automatically open the installation
wizard, follow the procedure shown to congure your Twibi. When it is correctly
connected to the internet, the LED should turn
Green
.
LE
D
LED
Product congured and operating normally
Note: if the LED does not turn green, open the application to identify the problem
and by clicking on the error message, it will display the steps for correction.

10
4.2. Adding another Twibi to your network
You can add more Twibis to your network and thereby increase the range of your
Wi-Fi. To add a new Twibi to your network, follow the procedure:
1. Position the new Twibi up to 15 meters from another already installed Twibi;
2. Connect the power supply to the Twibi and then plug it into the electrical outlet;
3. Wait 1 minute until the product LED starts ashing
Blue
and open the Wi-Fi Con-
trol Home application. The following screen should appear, informing that a new
Twibi has been found. Click on
Allow
to add Twibi to your network.
Note: if this screen does not appear when you open the application, click on
Set-
tings
and then
Add Twibi
. Just follow the steps in the application to add the new
Twibi to your network.

11
5. Using the Wi-Fi Control Home app
When you open the Wi-Fi Control Home application after the rst conguration,
the main screen will be displayed:
Main screen of the application

12
Here’s what each item means:
Shows how much of your internet upload is currently
being used, in megabits per second
Shows how much of your internet download is currently
being used, in megabits per second
Click to display your internet information
Shows the status of each Twibi in your network and
tells you individually how the connection is between
each Twibi
Click on Twibi to see more information about it
Shows the number of devices connected to your
network. Click to see the list of connected devices
Shows the main screen of the application
Displays the application settings

13
5.1. Information about each Twibi
To see information specic to each Twibi, just click on the
Twibi
you want to get
the information on the main screen. When you click on Twibi, the following screen
will appear:
Twibi information screen
Here’s what each item means:
»Status: shows if Twibi is
online
or
ofine
, check the tips that are shown if Twibi
is
ofine
.
»Connection quality: shows the connection quality of this Twibi with the
Mesh
network, we recommend positioning your Twibis so that the quality shown is
Ex-
cellent
. Next to the quality, an icon informs how the Twibi is connected to the
Mesh
network, showing when via Wi-Fi and when via cable.
»NS: shows the Twibi serial number.

14
»Location: click to inform the location where Twibi is installed to facilitate the
identication and location of each Twibi.
»LED status: shows a description of the product’s LED colors and allows you to
congure the LED to always be off or on.
»More information: displays technical details of the Twibi.
To remove the Twibi from your network click on the icon and then on
Remove
,
a conrmation message will appear, just click on
Yes
if you really want to remove
the Twibi.
5.2. Device list
To see the list of connected devices click on
Connected Devices
on the main screen.
Device list

15
You can view the devices connected to your network, for each device an icon is
displayed with the manufacturer name, device name, through where the device is
connected (2.4 GHz, 5 Ghz or via cable), how long the device is connected and the
download rate used by the device in real time.
For more information about each device, just click on it. By clicking on it, it is
possible to:
» View the upload and download rate of the device in real time.
» Change the device name in the option
Device name.
» Add the device in a group in the option
Group
.
» View more information such as IP address and MAC address in the option
Infor-
mation
.
» Block the device from accessing Wi-Fi by clicking
Add to the block list
.
To view the blocked devices click on the icon .Within the list of blocked devices,
you can release each device individually or release all of them at once.
5.3.
Wi-Fi
network name and password
To change the name or password of your
Wi-Fi
network, got to the menu
Settings
and click on
Wi-Fi
.
»Wi-Fi name: This is the name that will appear in the
Wi-Fi
network listof your
devices. The name will be for both 2.4 GHz and 5 GHz
Wi-Fi
networks, and can
be up to 32 characters long.
»Wi-Fi password: this is the password you will use when connecting your wi-
reless devices to your network (e.g. mobile phones, tablets, laptops, etc.). The
password will be for both 2.4 GHz and 5 GHz
Wi-Fi
networks, and must contain
between 8 and 63 characters.
The elds
Wi-Fi Name
and
Wi-Fi Password
allow the following characters:
You can share your
Wi-Fi
network name and password by clicking the icon and
choosing the application through which you want to share.
Note: changes will apply to your
Mesh
system.

16
5.4. Visitors Wi-Fi
In the menu
Visitors Wi-Fi
you can congure a separate network for visitors. With
this you do not need to give your main
Wi-Fi
network password to other people.
»Wi-Fi name: this is the name that will appear in the
Wi-Fi
network listof your
devices. The name will be for both 2.4 GHz and 5 GHz
Wi-Fi
networks, and can
be up to 32 characters long.
»Wi-Fi password: this is the password you will pass on to your visitors to connect
their wireless devices to your network (e.g. mobile phones, tablets, laptops, etc.).
The password will be for both 2.4 GHz and 5 GHz
Wi-Fi
networks, and must
contain between 8 and 63 characters.
»Active time: inform for how many hours you want the visitors network to be
available, after that time the visitors network will be disabled. If you want the
visitors network to be always available, select the option
Always active
.
The elds
Wi-Fi Name
and
Wi-Fi Password
allow the following characters:
You can share your
Wi-Fi
network name and password with your visitors by clicking
the icon and choosing the application through which you want to share.
Note: the changes will be applied to your
Mesh
system, i.e. all Twibis available
on the network.
5.5. Parental control
Twibi’s parental control works with access groups, so you can control multiple
devices more easily. To manage your children’s access, for example, you can create
a group called
Children
and add all their devices, such as smartphones, computers
and video games (consoles). This way you can limit the internet use time and block
websites for all your children’s devices.
The rst time you access parental control, you will be asked to create your rst
group, just click on
Create Group
, enter a name for the group and choose which
devices you want to add to the group.

17
When you open the parental control after creating your rst group, the list of
groups will appear, on this screen you can add a new group by clicking on
+
, block
the internet for all devices in the group by clicking on or release access by clic-
king on . The other settings can be made within each group, click on the group
you want to congure to view the following screen:
Group settings screen
Internet access is enabled, click on the icon to block Internet access
Internet access is blocked, click on the icon to enable Internet access
Devices Shows the list of devices the group is managing
Click to add more devices to the group
Click to remove devices from the group

18
Internet blocking Set the times the group will not be able to access the Internet. See the
internet blocking item for further details
URL Filter Congure which sites the group will not be able to access. See the item
Filtro de
URL
for further details
To remove the group, click on and then on
Remove
.
Internet blocking
The option
Internet blocking
allows you to create rules to control Internet access
for the desired group.
On the rst access, the application will go directly to the rule creation screen, on
the next accesses just click on the icon
+
to add more rules.
To create a rule, you can congure:
Internet blocking screen

19
Enable You can create a rule and disable it if you want to make an exception occasionally,
so you do not have to remove the rule and create it again
Rule name To make management easier, enter a name for the rule
Start and End Set the time that the Internet will be blocked for the devices
Active on Dene which days the rule should work
Note: you can create 6 internet blocking rules per group.
To remove the rule, click on and then on
Remove
.
URL Filter
The option
URL Filter
allows you to control which websites the group can access.
URL Filter screen

20
URL Filter Allows to disable the lter, releasing access to all websites for the group
Type of
restriction
Select
Block listed
if you want to block only some sites and all those you do not
enter will be released. If you want to block all sites and release only a few, select
Allow listed
and enter the sites you want to allow
List of websites The list will show the websites added so far, whether the site will be released or
not depends on the type of restriction selected previously
Add
Click to add a website to the list, just enter a keyword of the site, for example, to
enter the website
www.intelbras.com.br,
just enter the word
intelbras
Note:
pay attention to the password used because all websites that contain it will
be blocked.
5.6. Band control
Band control prioritizes the Internet for games and website navigation. To work
efciently, it is necessary to inform the contracted internet speed. When you click
on
Save
, Twibi will automatically perform band prioritization.
Band control
Other manuals for Twibi Giga
1
Table of contents
Other Intelbras Network Router manuals
