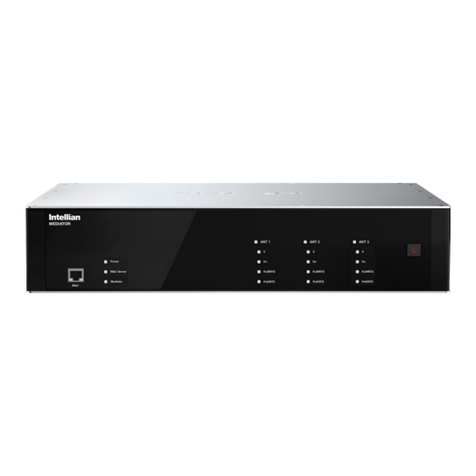
Intellian Dual TVRO User manual

Doc. No.: UM-TM-170331-V1.2
Dual TVRO Mediator
Installation and Operation User Guide

2
Intellian Dual TVRO Mediator
Intellian Dual TVRO Mediator Serial Number
This serial number will be requested for all troubleshooting or service Inquiries.
Notice
All Right Reserved
Intellian and the Intellian logo are trademarks of Intellian Technologies, Inc., registered in the U.S. and other countries.
Dual TVRO Mediator is the trademarks of Intellian Technologies, Inc. Intellian may have patents, patent applications, trademarks, copyrights,
or other intellectual property rights covering subject matter in this document. Except as expressly provided in any written license agreement from Intellian,
the furnishing of this document does not give you any license to these patents, trademarks, copyrights, or other intellectual property. All other logos,
trademarks, and registered trademarks are the property of their respective owners. Information in this document is subject to change without notice.
Every effort has been made to ensure that the information in this manual is accurate. Intellian is not responsible for printing or clerical errors.

3
Table of Contents
INTRODUCTION
INTELLIAN DUAL TVRO MEDIATOR
COMPONENTS LIST
DUAL TVRO MEDIATOR INSTALLATION
FRONT AND REAR PANELS OF THE MEDIATOR
DIMENSIONS
INSTALLATION SITE
THE LED STATUS LIGHTS
CONNECT THE CABLES
ANTENNA 1
ANTENNA 2
MULTI-SWITCH
WARRANTY
SPECIFICATION
4
4
4
5
5
5
6
6
7
8
9
10
11
12

4
Intellian Dual TVRO Mediator
Introduction
Intellian Dual TVRO Mediator
Intellian’s Dual TVRO Mediator is designed for a ship that has two
Intellian Satellite TV Antenna Systems. Intellian Mediator will compare
the satellite signal receptions between the 2 antennas and switch to the
antenna that has better signal receptions automatically. It is made to
ensure that the program the viewer is watching is clear and free from
any interruptions when one of the antenna’s is experiencing blockage.
For example; if “Antenna A” is mounted on the port side and “Antenna
B” is mounted on the starboard side, they will not both be blocked at the
same time if both antennas are tracking the same satellite. The Intellian
Mediator will not change the state of the antenna’s if both antennas are
blocked, or if both are tracking on a satellite. However, it will switch to
provide a satellite signal from Antenna A when it is not blocked and will
switch to provide a satellite signal from Antenna B whenever Antenna A
is blocked.
Components List
Item Image Q’ty Description Size Remark
1 2 Rack Bracket - 19inch Rack Mount
2 2 Table Bracket - Table Mount
3 2 RS-232 Cable 1.8m Mediator to ACU
4 1
AC Power
Cord
(CEE 7/7)
1.5m Mediator Power

5
Dual TVRO Mediator Installation
You will need to wire the Intellian Satellite TV Antenna System differently
than specified in its original manual. These instructions will require
you to do additional installation steps. The following instructions and
configuration diagrams will explain how to modify your system for the
Mediator use.
Front and Rear Panels of the Mediator
RF 1 RF 2 RF 3 RF 4
Back
Front
Antenna 1
ACU ACU
Antenna 2
PC Interface PC Interface
Dual Antenna Mediator
Connection Status
Power ACU Antenna1
Antenna1 Mediator Antenna2
Antenna2
29.5 cm (11.6”)
431mm (16.9”) 44mm (1.7”)
Dimensions

6
Intellian Dual TVRO Mediator
Installation Site
The Mediator should be installed below deck, in a location that is
• Dry, cool, and ventilated.
• Easily accessible from your main TV viewing area.
• Near to Antenna Control Unit and Multi-Switch
The LED Status Lights
1. Power – Red: Mediator is powered up
2. ACU – Green: Two PC serial cables are connected properly between
the ACU and the Mediator.
3. Antenna 1/ Antenna 2 –Green: The antenna that is currently in use will
flash.

7
Connect the Cables
Refer to the simplified block diagram blow to install the system.
TV
(Not Supplied)
TV
(Not Supplied)
TV
(Not Supplied)
TV
(Not Supplied)
TV
(Not Supplied)
TV
(Not Supplied)
TV
(Not Supplied)
TV
(Not Supplied)
Dual Antenna Mediator
Connection Status
Power ACU Antenna1
Antenna1 Mediator Antenna2
Antenna2
Multi -switch
8 outputs
VL HL VH HH
IRD 1 IRD 2 IRD 3 IRD 4 IRD 5 IRD 6 IRD 7 IRD 8
ACU 1 ACU 2
RS232
RS232
* TV, IRD and Multiswitch are not supplied by Intellian
RF1 RF1
Antenna 1 Antenna 2
Mediator
Multi-switch

8
Intellian Dual TVRO Mediator
Antenna 1
1. Connect the coaxial cable from the RF1 connector on the antenna to
the ANTENNA connector on the ACU1.
2. Connect the coaxial cable from the RECEIVER connector on the
ACU1 to the RF1’s ANT1 connector on the Mediator.
3. Connect the coaxial cable from the RF2 connector on the antenna
to the RF2’s ANT1 connector on the Mediator.
4. Connect the coaxial cable from the RF3 connector on the antenna
to the RF3’s ANT1 connector on the Mediator.
5. Connect the coaxial cable from the RF4 connector on the antenna
to the RF4’s ANT 1 connector on the Mediator.
6. Connect the PC serial cable from the PC INTERFACE (RS-232)
connector on the ACU1 to the Antenna1’s ACU (RS-232) connector on
the Mediator.
RF 1 RF 2 RF 3 RF 4
Antenna 1
ACU ACU
Antenna 2
PC Interface PC Interface
Antenna1
ACU 1
Mediator
• RS232 Connector (Mediator to ACU)
Pin Signal Pin Signal
1-6-
2RXD 7-
3-8-
4-9-
5GND
D-Sub 9 pin RS232
Supplied Component
12345
6789
54321
9876

9
Antenna 2
1. Connect the coaxial cable from the RF1 connector on the antenna to
the ANTENNA connector on the ACU2.
2. Connect the coaxial cable from the RECEIVER connector on the
ACU2 to the RF1’s ANT2 connector on the Mediator.
3. Connect the coaxial cable from the RF2 connector on the antenna to
the RF2’s ANT2 connector on the Mediator.
4. Connect the coaxial cable from the RF3 connector on the antenna to
the RF3’s ANT2 connector on the Mediator.
5. Connect the coaxial cable from the RF4 connector on the antenna to
the RF4’s ANT2 connector on the Mediator.
6. Connect the PC serial cable from the PC INTERFACE (RS-232)
connector on the ACU1 to the Antenna2’s ACU (RS-232) connector on
the Mediator.
RF 1 RF 2 RF 3 RF 4
Antenna 1
ACU ACU
Antenna 2
PC Interface PC Interface
Antenna2
ACU 2
Mediator
Note: Once the ACU is connected to the Mediator, you will have to use
either two “PC Interface” connectors on the rear panel of the Mediator
or two USB connectors (Antenna 1/Antenna 2) on the front panel of the
Mediator to connect the antenna systems with a PC. The Mediator will not
function if you connect a PC using the USB connector on the front panel
of ACU.

10
Intellian Dual TVRO Mediator
Multi-switch
Intellian recommends that an ACTIVE multiswitch be used in all
installations.
1. Connect the four IF cables from the four RECEIVER connectors on the
Mediator to the 4 input connectors on the multiswitch.
2. Connect the IF cable from the output connector on the multiswitch to
the ‘Satellite In’/ ‘ANT’ connector on the IRD.
3. If you have more than one IRD, repeat step 2 to connect the RF cables
between the other receivers and multiswitch output connectors.
RF 1 RF 2 RF 3 RF 4
Mediator
Antenna 1 Antenna 2
PC Interface PC Interface
8 outputs
MULTISWITCH
VL HL VH HH

11
This product is warranted by Intellian Technologies Inc., to be free from defects in
materials and workmanship for a period of THREE (3) YEARS on parts and TWO (2)
YEARS on labor performed at Intellian Technologies, Inc. service center from the
purchased date of the product.
Intellian Technologies, Inc. warranty does not apply to product that has been
damaged and subjected to accident, abuse, misuse, non-authorized modification,
incorrect and/ or non-authorized service, or to a product on which the serial number
has been altered, mutilated or removed.
It is required to present a copy of the purchase receipt issued by Intellian
Technologies, Inc. that indicates the date of purchase for after-sales service under
the warranty period. In case of failure to present the purchase receipt, the warranty
period will begin 30 days after the manufacturing production date of the product
purchased.
Any product which is proven to be defective in materials or workmanship, Intellian
Technologies, Inc. will (at its sole option) repair or replace during the warranty period
in accordance with this warranty. All products returned to Intellian Technologies, Inc.
under the warranty period must be accompanied by a return material authorization
(RMA) number issued by the dealer/distributor from Intellian Technologies, Inc. and
a copy of the purchase receipt as a proof of purchased date, prior to shipment.
Alternatively, you may bring the product to an authorized Intellian Technologies, Inc.
dealer/distributor for repair.
Additional Terms and Conditions;
The warranty(THREE (3) YEARS on parts and TWO (2) YEARS on labor) is effective only for products purchased
since January 1st, 2017.
Warranty
Table of contents
Other Intellian Controllers manuals
Popular Controllers manuals by other brands
Silvercrest
Silvercrest SFB 10.1 C3 User manual and service information
ATECH
ATECH BC 700 Installation and operating instructions
Aqua Medic
Aqua Medic T-Computer Operation manual
Hobby King
Hobby King YEP Series instruction manual
Moe's
Moe's ZTRV-BY-100-WH-FR user manual
digitalview
digitalview ALR-1920 instructions
