Intelligent Biometric Controls 1Touch evo3 Series User manual

1. Features and Technical Specifications: 1
2. Fingerprint Recognition Notes: 2
3. Enrollment Options: 3
User Enrollment 4
Changing Master Code 4
Enroll Fingerprint User at Random 4
Enroll Fingerprint User with User ID 5
Enroll Pass Code User 5
4. Lock Operation: 6
Unlocking Door with Fingerprint 6
Unlocking Door with a Pass Code 6
Unlocking Door from the Inside 6
Locking the Door 6
Enabling/ Disabling Passage Mode 6
5. Deleting Users: 7
Deleting a Fingerprint User with a User ID 7
Deleting ALL Fingerprint Users 7
Deleting Pass Code Users with User Id’s 7
Delete ALL Pass Code Users 7
6. Frequently Asked Questions: 8
7. Troubleshooting the Lock: 9
8. Performing A Factory Default: 10
9. Setting the Directions of the Handle 11
10. Disassembly and Assembly: 12
11. Accessing the Key Hole 13
12. Technical Support 13
Table of Contents
0
1Touch® evo3 Series Fingerprint Lock
http://www.1touchlock.com | Intelligent Biometric Controls, Inc. | v1.1

=State of the art optical anamorphic scanner insures quick & reliable
fingerprint authentication
=Fingerprint, pin or key access methods
=Handle orientation can easily be reversed
=By default, the handle automatically locks door when shut
=All weather - operating temp: -4 ° to 140 ° F
=Easy installation - typically installs with only a “phillips head”
screwdriver!
=Add / delete individual users directly on the lock
=“Free Passage” mode enables unit to be unlocked when desired
=Bump-proof “Laser Cut Dimple Keys” (4 included)
=Keys cannot be copied
=Fits doors 1 3/8" - 2 1/2” thick
=Runs on any brand name 4 AA batteries
=Audible rapid beep low battery warning
=Fingerprints will not be lost if batteries fail or are removed
=Sliding weather cover triggers sensor to power on automatically
=Press the “#” button as a secondary method to activate the lock
1.0 Features
1.1 Technical Specifications
Item Description
Sensor Optical
Resolution 560DPI
Scanning time <1s
FRR(False Rejection Rate) <0.01%
FAR(False Acceptance Rate) <0.0001%
Battery 4 AA Alkaline battery
Working current 150-300mA
Standby current 30uA
Display Blue LCD
Identification mode Fingerprint, Pin, Key
Working temperature -4 ° to 140 ° F
Working humidity 10%-97%
1
Introduction1Touch® evo3 Series Fingerprint Lock
http://www.1touchlock.com | Intelligent Biometric Controls, Inc. | v1.1

Tip 2: Locating The Fingerprint “Core”
The “core” of a fingerprint is defined as the point
located within the inner most recurving ridge. It
is extremely important that this area is identified,
and placed on the fingerprint scanner during the
enrollment and verification of your fingerprint.
Tip 1: Choosing The “Best” Finger
Use either your Index, Thumb, Middle or Ring
finger, when enrolling and verifying your
fingerprint. Avoid using the Pinky finger, as it
typically has a smaller & less defined fingerprint
pattern. Also, try enrolling fingers on the non-
dominate hand as those fingers may have prints
in better condition.
Tip 3: Prepare The Finger For Enrollment
When enrolling and verifying with your fingerprint
it is important that your finger be clean. It is also
recommended that the finger be relatively
undamaged and without scars.
Hint: Washing your hands with moisturizing soap
and using hand lotion will also improve accuracy!
Tip 4: Finger Placement
When placing your finger on the scanner, make
sure that the location of the “core”, located in Tip
2, is making direct contact with the scanner.
Apply medium pressure, or just enough to flatten
the skin on your finger. GOOD
BAD
Fingerprint Core
2.0 Fingerprint Recognition Notes
!
Proper fingerprint placement is important when using any biometric
device. Please be sure to use the tips below when using your
fingerprint to authenticate with the 1Touch evo3. ®
2
Fingerprint Tips1Touch® evo3 Series Fingerprint Lock
http://www.1touchlock.com | Intelligent Biometric Controls, Inc. | v1.1

3.0 Enrolling Fingerprint & Password Users
When Entering Users into the Lock you have 3 Options:
You can enroll fingerprints at random.
You can enroll as an ID# (+) fingerprint user.
You can assign users a pass code.
ALL pass codes MUST be 8 digits long!
Enroll at Random
If you are using the lock on a home & the primary users will be your
immediate family & you do not have any reason to think you will need to
delete them from the lock in the future, we suggest you use this type of
enrollment. You can store several scanned templates of several fingers
without having to re-enter the enrollment code per finger.
(ex. 3 scans of 2 fingers on each hand for each user)
ID# with Fingerprint User
If you are using the lock on the door of a small business or at home and
you need the ability to delete a user without deleting all users, this type
of enrollment is best. You will assign a 3 digit ID# to each scanned
template per user. For example, you have 2 temporary workers named
Mary & Adam. You make Mary user 101 & scan her index finger. The
lock will scan the fingerprint twice per template. If you want to enroll
another finger for Mary you create another ID# like 102 for that new
finger. You do the same procedure for Adam. You make him user 103. If
you want to delete the user you simply delete the user ID# & the
fingerprint associated with that ID# is deleted out of the system.
Pass Code Users (Not the Master Pass Code!)
You can create a series of pass codes to gain entry. If a person has
damaged fingerprints you can assign them a pass code. You can also
set up pass codes for your shift managers. A common use is to create a
pass code you can give out in case of emergencies. For example; you
are out of town & need to let a neighbor into your house. You tell them
the pass code. When you get home you simply delete that pass code.
*You can use any combination of all three enrollment options! 3
3.1 Examples of Different Enrollment Options
User Enrollment1Touch® evo3 Series Fingerprint Lock
http://www.1touchlock.com | Intelligent Biometric Controls, Inc. | v1.1

3.2 Changing Master Code
PRESS:
0 + * + Default Master Code + New 8 Digit Master
Code + Repeat New 8 Digit Master Code + #
NOTE: The default Master Code is: 11111111
NOTE: When successful the lock will make a solid single beep. If
unsuccessful it makes 3 quick beeps.
HINT: When entering the codes take a 2-3 second short pause between
codes
Example: Master Code (pause) New 8 Digit Code (pause) Repeat New Code
When the Master Code has been changed, close the slide cover, open it
up & try the code to confirm your new code is working.
PRESS:
1 + # + Master Code + #
NOTE: At this point the scanner will light up.
FIRST SCAN: Place the 1st finger on the scanner and remove when
scanner light turns off.
SECOND SCAN: Replace the same finger when scanner lights up for the
second time. You will hear a single beep if the enrollment is successful.
REPEAT: You can keep adding fingerprints one after another at this stage.
HINT: If a scan fails you will hear 3 beeps & the scanner goes off. Just
repeat the steps above. 4
3.3 Enroll Fingerprint Users at Random (No User ID’s)
User Enrollment
NOTE: The scanner cover must be pulled up or the
“#” button pressed to power on the lock before
adding, deleting, or changing codes or fingerprint
users.
The 1Touch evo3 will automatically exit out of ®
Programming Mode after 15 seconds. Please be sure
to wait 15 seconds after enrolling, modifying or
deleting a user before using the 1Touch evo3.
1Touch® evo3 Series Fingerprint Lock
http://www.1touchlock.com | Intelligent Biometric Controls, Inc. | v1.1

5
User Enrollment
3.5 Enroll Pass Code User
PRESS:
1 + # + Master Code + 3 digit User ID + #
NOTE: At this point the scanner will light up.
FIRST SCAN: Place the 1st finger on the scanner and remove when
scanner light turns off.
SECOND SCAN: Replace the same finger when scanner lights up for the
second time. You will hear a single beep if the enrollment is successful.
REPEAT: To add another finger for this user or any other users please
repeat the process stated above. A fingerprint ID# can NOT be the same
as a pass code ID#.
Example: Fingerprint User ID= #200 and Pass Code User ID= #300
PRESS:
1 + * + Master Code + 3 Digit ID + New 8 Digit
Pass Code + Repeat New 8 Digit Pass Code + #
NOTE: A pass code ID# can NOT be the same as a fingerprint ID#.
HINT: When successful the lock will make a solid single beep. If
unsuccessful it makes 3 quick beeps.
HINT: When entering the codes take a 2-3 second short pause between
codes.
Example: Master Code (pause) ID# (pause) New Code (pause) Repeat New
Code
When the new pass code is enrolled, close the slide cover, open it up &
try the code to confirm your new code is working.
3.4 Enroll Fingerprint Users with User ID’s
1Touch® evo3 Series Fingerprint Lock
http://www.1touchlock.com | Intelligent Biometric Controls, Inc. | v1.1

Lock Operation
4.0 Unlocking Door with Fingerprint
To open with an enrolled fingerprint simply slide the cover up & place the
finger gently on the scanner.
NOTE: You will hear a beep & a click sound. Your door is now open.
NOTE: If the cover is already up: simply hit the # button to activate the
scanner.
PRESS:
8 Digit Pass Code
NOTE: Do not enter the 3 digit user ID.
NOTE: You will hear a beep & a click sound. Your door is now open.
To open the lock from inside your home or business simply turn the
handle.
NOTE: The 1Touch evo3 always provides “free egress”. It is ®
impossible to prevent someone from exiting the building.
After you exit through the door or the door shuts behind you the 1Touch ®
evo3 automatically locks the latch.
When enabled, Passage Mode allows the 1Touch evo3 to be unlocked ®
simply by lifting the slide cover or pressing the ‘#’ button. This feature is
useful when user authentication is not required.
PRESS:
* + * + Master Code + #
NOTE: Entering the code above will toggle Passage Mode between
enabled status and disabled status.
NOTE: Unlock by sliding the cover up or hitting the # button.
4.1 Unlocking Door with a Pass Code
4.2 Unlocking Door from the Inside
4.3 Locking the Door
4.4 Enabling/Disabling Passage Mode
6
1Touch® evo3 Series Fingerprint Lock
http://www.1touchlock.com | Intelligent Biometric Controls, Inc. | v1.1

7
Deleting Users
5.0 Deleting a Fingerprint User with a User ID
PRESS:
2 + # + Master Code + Users 3 Digit ID + Users
3 Digit ID Again + #
NOTE: When successful the lock will make a solid single beep. If
unsuccessful it makes 3 quick beeps.
HINT: This procedure will delete all fingerprint users with user ID’s and
those without user ID’s!
PRESS:
3 + # + Master Code + #
NOTE: When successful the lock will make a solid single beep. If
unsuccessful it makes 3 quick beeps.
PRESS:
2 + * + Master Code + Users 3 Digit ID + Users
3 Digit ID Again + #
NOTE: When successful the lock will make a solid single beep. If
unsuccessful it makes 3 quick beeps.
PRESS:
3 + * + Master Code + #
NOTE: When successful the lock will make a solid single beep. If
unsuccessful it makes 3 quick beeps.
5.1 Deleting ALL Fingerprint Users
5.2 Deleting Pass Code Users with User ID’s
5.3 Delete ALL Pass Code Users
1Touch® evo3 Series Fingerprint Lock
http://www.1touchlock.com | Intelligent Biometric Controls, Inc. | v1.1

FAQ
8
6.0 Frequently Asked Questions
1) Where does the key go?
You remove the decorative cover from the keyway using the black
Magnetic Key Cover tool that came with the lock.
2) Can I get more keys made for my lock?
This lock comes with 4 high security “Laser Cut Dimple” keys, which are
“Bump proof”. Due to this security feature it is impossible to get or make
more keys. The key cylinder cannot be replaced.
3) How do I change the batteries?
On the back lock body (the side of the lock without the scanner) ) find
the base of the handle, there is a ring around it. Twist off the ring nut by
hand or use “Y” wrench that came with the lock (depicted on page 11,
figure 1 of the manual), then take off cover to replace the batteries.
4) What kind of batteries should I use?
Any 4 AA batteries will work. We suggest for 1st time users get brand
name new batteries like Energizer or Duracell.
5) How often should I change the batteries?
If in a conventional home setting you will be able to get several
thousand uses out of a set of batteries. Though not required we do
recommend you change batteries at the same time you change them in
your smoke detectors or when you change your clocks. It's best to keep
the batteries as fresh as possible.
6) If I take the batteries out, will I lose the information in the lock?
No! The 1Touch evo3 stores the information even with no batteries!®
7) How do I know if the batteries are getting low?
When you slide the scanner cover up it will make a series of very quick
beeps. That is the low power warning. It sounds much different than the
chime you get normally.
8) Can the lock be set to allow access when just turning the handle?
No. The 1Touch evo3 can be set to passage mode that will allow ®
access when lifting the slide cover or pressing ‘#’.
1Touch® evo3 Series Fingerprint Lock
http://www.1touchlock.com | Intelligent Biometric Controls, Inc. | v1.1

7.0 Troubleshooting the 1Touch evo3
9
Troubleshooting
1) Are you using the correct Master passcode?
Confirm you know the Master Passcode. Press the #1 button eight
times. If that works its the current Master Passcode (See Page 4). If not
you need to find the new master code or reset the lock.
2) Be Sure You Are Using Fresh Brand Name Batteries!!
The 1Touch evo3’s internal circuitry and scanner requires a good ®
source of power which is provided by 4 AA batteries. It is advised that
the batteries are replaced with fresh, name brand batteries anytime a
decrease in lock performance is noticed, even if the low battery warning
is not heard!
3) If the scanner is not reading certain fingerprints well:
- Try re-enrolling the user’s fingerprint. Certain characteristics of a
fingerprint may change over time requiring re-enrollment.
- Try a fingerprint from a non-dominant hand.
- When you are enrolling your fingerprint templates please
remember to do the following:
* Make sure you are putting the “Core” of your fingerprint on the
scanner. (Refer to page 2 for more information)
* When enrolling multiple templates, try to slightly change the way you
rest your finger on the scanner with each scan. Imagine you have
groceries in your hand and will be approaching the scanner with the
other hand. This will help the scanner detect slight variations when
you place your finger on the scanner.
* Simply Place your finger on the scanner, do not Press Down too
hard! Pressing too strongly will cause the ridge patterns to flatten out,
making it more difficult for the scanner to match the fingerprint!
* If it's cold outside, blow on your hands and rub them together or add
lotion. This will warm up your fingers causing the ridge patterns of
your fingerprints to stand out more.
4) If the scanner lights up solid blue, but never accepts or rejects
any fingerprint, and simply turns off after 10-20 seconds:
Please perform a Factory Default of the lock. (see page 10)
5) Unable to change or add a code?
When entering the different codes it’s advised to pause 2-3 seconds
between entering of the new codes. (ex. Default code (pause) New
Code (pause) New Code again.)
1Touch® evo3 Series Fingerprint Lock
http://www.1touchlock.com | Intelligent Biometric Controls, Inc. | v1.1

10
Factory Default
8.0 Performing a Factory Default
FIRST: Please remove the back lock body cover
NEXT: Disconnect the power cable from the battery pack.
NOTE: If you are trying to troubleshoot an issue with the 1Touch,
reconnect the power cable and test your lock. If the lock now works, the
problem was likely a cable connection issue. If this does not solve the
problem, disconnect the power cable and move on to the next steps.
NEXT: Remove the front lock body off the door.
NEXT: Remove the back lock body off the door.
NOTE: It is recommended to use new AA batteries. If available, connect a
9VDC battery instead of the battery pack for added power during Reset.
NEXT: Reconnect the front & back lock bodies by reconnecting the power
cable to the battery pack or a 9V battery.
NEXT: Find the “Reset” button on the back of the front lock body.
NEXT: Press & hold down the small button labeled “Reset”.
NEXT: While holding the “Reset” button down, use your other hand to
slide the scanner cover up.
NOTE: After about 10-15 seconds you will hear a single beep indicating
the lock has been reset.
HINT: To confirm, slide the cover up & enter the default Master Code
11111111. It will open the lock.
For more troubleshooting information visit:
http://www.fingerprintdoorlocks.com/help/
6) If you are hearing a Beep sound:
1-Beep = Successful Action (scanned finger, entered code etc..)
3-Beeps = Unsuccessful Action
3-Sets of 2 Beeps = The User ID# is already in use
Rapid beeping sound when the cover is lifted = Low Battery Warning
Rapid beeping sound when enrolling a new user = Out of Memory
1Touch® evo3 Series Fingerprint Lock
http://www.1touchlock.com | Intelligent Biometric Controls, Inc. | v1.1

1Touch® evo3 Series Fingerprint Lock
http://www.1touchlock.com | Intelligent Biometric Controls, Inc. | v1.1
Choose whether your lock should be
set to a Left ‘L’ or Right ‘R’ handed
position:
mWhen looking into the room being
secured: If the door hinges are on the
right side of the door, then your lock
needs to be set to the Right ‘R’
Position. If the door hinges are on the
left side of the door, then your lock
needs to be set to the Left ‘L’ Position
Setting the back lock handle position:
mTake the back body cover off the lock
as seen on page 12. Once the back
body cover is removed the handle
orientation switch will be displayed, as
seen in figure 1.
mWith a fingertip pull down on the
switch. A click and release of the
handle will occur. The handle will
swing up to the vertical position (figure
2).
mNow pull the handle down to the
desired orientation. A click will place
the handle into position (figure 3).
Setting the front lock handle position:
mTurn the front lock body in order to see
the back side with the axel; which has
the handle orientation switch (figure 4).
mUsing a fingerprint pull the switch up
to release the handle, then turn the
handle to the desired orientation.
mThe handle will click into place and
you are ready to install your lock.
9.0 Setting the Direction of the Handle
11
1Touch® evo3 Series Fingerprint Lock
Figure 2
Figure 3
Figure 4
Figure 1
LR
LR
LR

Figure 6
Disassembly:
mUsing the tool represented in figure 5,
remove the nut highlighted in figure 6.
mSlide the Back Body Cover,
highlighted in figure 7, off of the Back
Body of the 1Touch lock.
mRemove the 2 screws, highlighted in
figure 8, to separate the Front and
Back Lock Bodies.
Assembly:
mReplace existing latch with the latch
provided with the 1Touch
mUsing the necessary supplied rubber
gaskets, align the lock Front and Back
Bodies into position. Be sure to pass
the power cable through the door hole
and also through the hole in the Back
Body (above and right of the top screw
in figure 4). Power pack runs on 4
AA batteries a 9V battery!! The NOT
Power cable/adapter connects to
the Black Battery pack on the back
lock body!
mWith the Front and Back Bodies in
position, replace the 2 screws
highlighted in figure 8.
mReplace the Back Body Cover
highlighted in figure 7
mReplace the nut highlighted in figure 6
For more installation information visit:
http://www.fingerprintdoorlocks.com/help/
Figure 7
Figure 8
Figure 5
10.0 Disassembly and Assembly
12
1Touch® evo3 Series Fingerprint Lock
http://www.1touchlock.com | Intelligent Biometric Controls, Inc. | v1.1

11.0 Accessing the Key Hole with the Magnetic Key Cover Tool
FIRST: Locate the Magnetic Key Cover Tool.
NEXT: Place the magnetic end of the tool directly on the Key Hole Cover.
NEXT: Once magnetically attached, simply pull the tool away from the lock
and the Key Hole Cover should separate and remain attached to the tool.
For all technical issues, please contact:
FAQ’s & Video Help Files:
http://www.fingerprintdoorlocks.com/help/
Phone: 513.239.6322
Email: [email protected]
13
12.0 Technical Support
1Touch® evo3 Series Fingerprint Lock
http://www.1touchlock.com | Intelligent Biometric Controls, Inc. | v1.1
Table of contents
Other Intelligent Biometric Controls Lock manuals
Popular Lock manuals by other brands
Kensington
Kensington ComboSaver Instruction guide

ARB
ARB RD203 installation guide
Simons Voss Technologies
Simons Voss Technologies SI SmartLocker AX manual
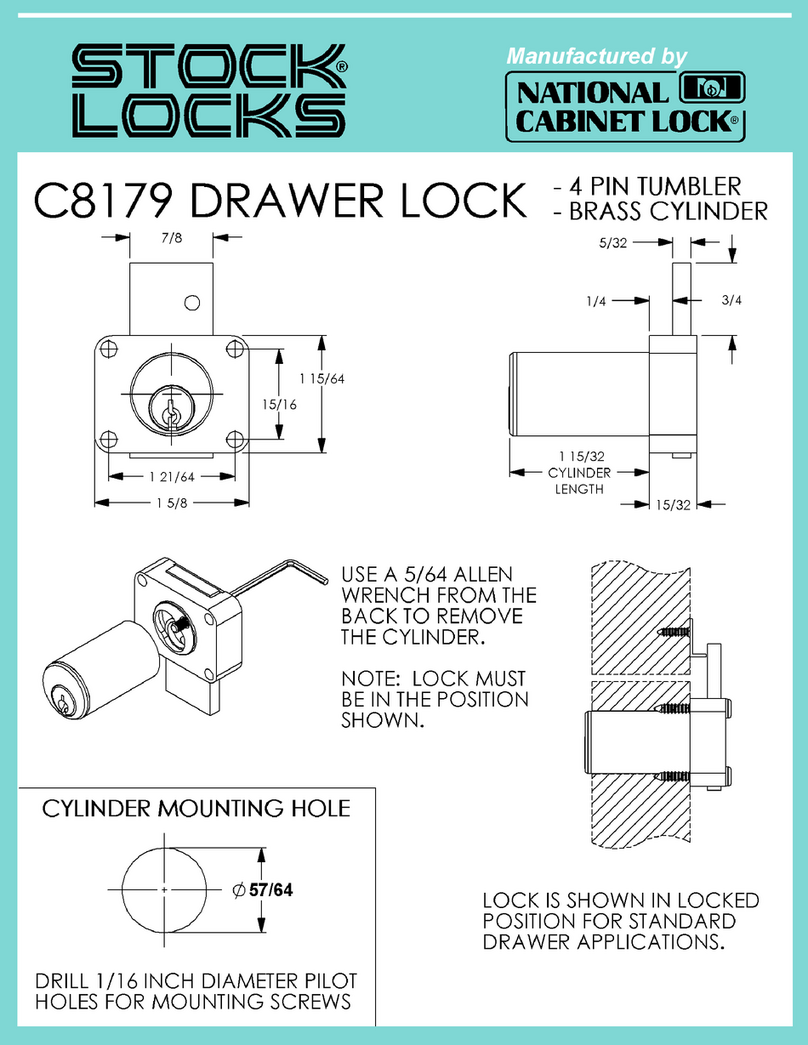
National Cabinet Lock
National Cabinet Lock C8179 Dimensional drawing
Simons Voss Technologies
Simons Voss Technologies SmartIntego PadLock AX manual

Maco
Maco MULTI-MATIC Maintenance and adjustment instructions

Masterlock
Masterlock BCO0103 Instructions for installation
McGrathLocks
McGrathLocks MLM818 quick start guide

Tripp Lite
Tripp Lite SRCOMBO owner's manual

wink haus
wink haus blueCompact operating manual
Masterlock
Masterlock 4697 user manual
gebatronic
gebatronic TCS-Cody-T4 Instructions for assembly and use
