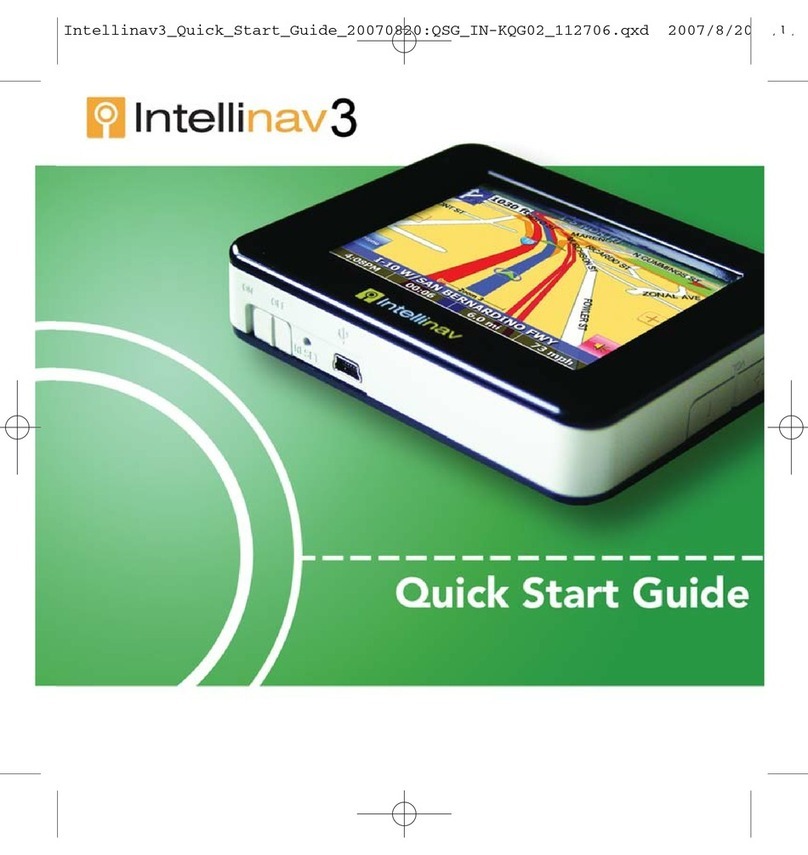
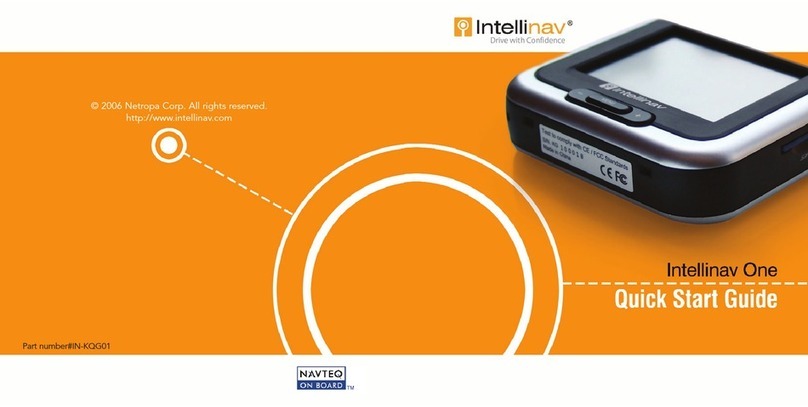
Intellinav 1 User manual

Intellinav One
User’s Manual
Copyright © 2006 Netropa Corp. || http://www.intellinav.com
All rights reserved.
Part number#IN-KIG01

2
Intellinav One User’s Manual
Safety and Regulation . . . . . . . . . . . . . . . . . . . . . . . .39
Software License Agreement . . . . . . . . . . . . . . . . . . .40
Limited Warranty . . . . . . . . . . . . . . . . . . . . . . . . . . . .44
Caring for your device . . . . . . . . . . . . . . . . . . . . . . . .45
Important Information . . . . . . . . . . . . . . . . . . . . . . . .46
System Specifications . . . . . . . . . . . . . . . . . . . . . . . .48
1
User's Manual
Getting Started . . . . . . . . . . . . . . . . . . . . . . . . . . . . . .3
Basic Operation . . . . . . . . . . . . . . . . . . . . . . . . . . .4
Mounting the Intellinav System . . . . . . . . . . . . . . . .5
Starting Intellinav . . . . . . . . . . . . . . . . . . . . . . . . . . . . .6
Getting GPS Signal . . . . . . . . . . . . . . . . . . . . . . . . .6
Car Cursor . . . . . . . . . . . . . . . . . . . . . . . . . . . . . . . .6
GPS Information . . . . . . . . . . . . . . . . . . . . . . . . . . .6
Entering Data on the Intellinav System . . . . . . . . . .7
Moving Through the Screens . . . . . . . . . . . . . . . . .7
Resetting the Intellinav System . . . . . . . . . . . . . . . .7
Working with the Map . . . . . . . . . . . . . . . . . . . . . . . . .8
Map View . . . . . . . . . . . . . . . . . . . . . . . . . . . . . . . .8
Maneuver Detail . . . . . . . . . . . . . . . . . . . . . . . . . . .8
Panning the Map . . . . . . . . . . . . . . . . . . . . . . . . . .8
Route List . . . . . . . . . . . . . . . . . . . . . . . . . . . . . . . .9
Location Information . . . . . . . . . . . . . . . . . . . . . . . .9
POI Information . . . . . . . . . . . . . . . . . . . . . . . . . .10
Planning Your Route . . . . . . . . . . . . . . . . . . . . . . . . .11
Setting a Single Destination . . . . . . . . . . . . . . . . .11
Using an Address as a Destination . . . . . . . . . .11
Using an Intersection as a Destination . . . . . . .13
Using a Point of Interest (POI) as a Destination .15
Using a Favorite Destination as a Destination . .17
Using a Recent Destination as a Destination . .17
Using a City Center as a Destination . . . . . . . .18
Detours, Avoid Roads, and Stopovers . . . . . . .20
Setting an Itinerary . . . . . . . . . . . . . . . . . . . . . . . .22
Using Shortcuts . . . . . . . . . . . . . . . . . . . . . . . . . . .22
Managing Your Favorites List . . . . . . . . . . . . . . . . . . .23
Setting Your Options . . . . . . . . . . . . . . . . . . . . . . . . .24
Display Options . . . . . . . . . . . . . . . . . . . . . . . . . .24
Route Options . . . . . . . . . . . . . . . . . . . . . . . . . . .26
Speed Alert . . . . . . . . . . . . . . . . . . . . . . . . . . . . . .27
Localization . . . . . . . . . . . . . . . . . . . . . . . . . . . . . .28
System Settings . . . . . . . . . . . . . . . . . . . . . . . . . . . . .29
Screen Calibration . . . . . . . . . . . . . . . . . . . . . . . . .29
User Preferences . . . . . . . . . . . . . . . . . . . . . . . . . .29
Volume . . . . . . . . . . . . . . . . . . . . . . . . . . . . . . . . .30
Power . . . . . . . . . . . . . . . . . . . . . . . . . . . . . . . . . .30
Backlight . . . . . . . . . . . . . . . . . . . . . . . . . . . . . . . .31
Date Time . . . . . . . . . . . . . . . . . . . . . . . . . . . . . . .31
System Info . . . . . . . . . . . . . . . . . . . . . . . . . . . . . .32
Factory Reset . . . . . . . . . . . . . . . . . . . . . . . . . .32
GPS Reset . . . . . . . . . . . . . . . . . . . . . . . . . . . . .32
MP3 Playback . . . . . . . . . . . . . . . . . . . . . . . . . . . . . .34
Playback Controls . . . . . . . . . . . . . . . . . . . . . . . . .34
Shuffle Mode . . . . . . . . . . . . . . . . . . . . . . . . . . . .35
Repeat Mode . . . . . . . . . . . . . . . . . . . . . . . . . . . .35
Playback Volume . . . . . . . . . . . . . . . . . . . . . . . . . .35
Photo Viewer . . . . . . . . . . . . . . . . . . . . . . . . . . . . . . .36
Full Screen Mode . . . . . . . . . . . . . . . . . . . . . . . . .37
Magnification . . . . . . . . . . . . . . . . . . . . . . . . . . . .37
Orientation . . . . . . . . . . . . . . . . . . . . . . . . . . . . . .37
Slide Show . . . . . . . . . . . . . . . . . . . . . . . . . . . . . .38
Table of Contents

4
Intellinav One User’s Manual
Basic Operation
3
User's Manual
Congratulations on your purchase of the Intellinav
system. Your Intellinav system can guide you to the
destination of your choice using signals from Global
Positioning Satellites (GPS) orbiting the earth.
There are 24 GPS satellites orbiting the earth. A GPS
device can calculate your position on the earth if it can
receive signals from at least three of these satellites.
When it receives at least four signals, a GPS device can
also calculate your altitude (height above sea level).
You can start using the Intellinav system simply by
mounting the holder on the car's windshield, plug in the
charger, and press the power button on the top of the
system.
FFoorryyoouurrssaaffeettyyaannddtthheessaaffeettyyooffootthheerrss,,pplleeaasseeddoonnoott
ooppeerraatteetthheessyysstteemmwwhhiilleeddrriivviinngg..IIttiissddaannggeerroouussttooddoo
ssoo..WWhheennyyoouuwwaannttttooeenntteerraannaaddddrreessssoorrcchhaannggeeaa
sseettttiinngg,,pplleeaasseeppuulllloovveerraannddppaarrkktthheeccaarriinnaassaaffee
aarreeaaffiirrsstt..YYoouusshhoouullddaallwwaayyssppaayyffuullllaatttteennttiioonnttootthhee
rrooaaddaanndduusseetthheessyysstteemmoonnllyyaassaannaaiidd,,bbyyttaakkiinnggoonnllyy
ggllaanncceessaattaattiimmee,,aannddlliisstteenniinnggttootthheevvooiicceepprroommppttss..
AAnniinneexxppeerriieenncceeddddrriivveerrsshhoouullddNNOOTTuusseetthheessyysstteemm..
Getting Started
SD Card Slot
Power Button
Speaker (rear)
Reset (bottom)
Earphone Jack
Main Menu
Volume (+/-)
LED
LCD Panel
External Antenna Connector
USB Port
DC In

6
Intellinav One User’s Manual
Press the PPOOWWEERRbutton.
The Intellinav screen appears.
Tap Navigate. A warning screen appears.
Tap I AAggrreeeeafter you have read and agreed to the
warning. The map view appears and you are ready to set
your first destination!
Getting GPS Signal
To use the Intellinav system to guide you to a destination,
the system's GPS antenna must receive GPS signals. GPS
signals can be obstructed by ceilings, trees, and nearby
tall buildings. Signals can also be obstructed by the roof
of your vehicle. For best results, position your Intellinav
system where it has a clear view of the sky.
The very first time turning on the system may take as
long as 15 minutes to obtain a valid GPS fix. Once the
first GPS fix is obtained, thereafter, it should normally
take no more than 30 seconds to 1 minute to obtain a
valid GPS fix.
Car Cursor
The status of the GPS signal is represented in the car
cursor color:
Green: 4 or more satellites
Yellow: 3 satellites
Red: less than 3 satellites
Gray: no satellite at all
Only when the car cursor is green will you be receive
accurate GPS tracking and navigation.
GPS Information
TToovviieewwtthheeGGPPSSiinnffoorrmmaattiioonn::
1. Tap MMeennuu. The Main
Menu appears.
2. Tap GGPPSSIInnffoorrmmaattiioonn.
The GPS Information
screen appears.
TToocclloosseetthheeGGPPSSIInnffoorrmmaattiioonnssccrreeeenn::
1. Tap the BBaacckk--AArrrroowwin the upper right corner.
Starting Intellinav
5
User's Manual
Mounting the Intellinav System
MMoouunnttiinnggtthheeSSuuccttiioonnCCuupp
1. Press the suction cup firmly against the windshield.
2. Press down the lever to fix the suction cup in place.
3. Press in the circular buttons to unlock the arms.
4. Adjust the angles of the arms to achieve the best viewing position.
MMoouunnttiinnggtthheeCCrraaddlleeaannddGGPPSS
1. Press the lever to lock or unlock the cradle.
2. Insert the GPS unit bottom in first, and then lock it using the lever on the top.
CChhaarrggiinnggtthheeGGPPSSuunniitt
1. Prior to first use, please use the wall charger to fully charge the unit for 4-6
hours until battery LED is green.
2. In vehicle, you may plug the car charger to provide continuous power. On a full
charge, the unit can operate up to 5 hours.

8
Intellinav One User’s Manual
The Intellinav system gives you many ways of looking at
the map. You can see your current position, view any of
the turns on a route, and the map to view other areas.
You can zoom in and out, and find information about
specific locations.
Map View
The map view on the Intellinav system shows your
current location.
At the bottom of the map is a scale indicating your
current zoom level. On the upper right is the compass.
On the center right and left are zoom in and out
buttons, respectively.
Maneuver Detail
If you have set a destination, the map displays additional
information. As you navigate to a destination, the top of
the map displays the name of the next street, the
direction of your next turn and the distance to the turn.
At the bottom of the map you see the estimate of how
much time remains before arriving at your destination,
the remaining distance to your destination, and your
current speed.
On the upper left is an arrow indicating the direction and
the type of maneuver ahead, as well as the remaining
distance to the next maneuver
.
Panning the Map
You can pan the map by tapping and dragging the map.
To return to the regular map view, press the XXbutton.
Working with the Map
7
User's Manual
Entering Data on the Intellinav System
The Intellinav system doesn't have a keyboard. Instead,
you tap the screen to enter data. When you are entering
data, a screen containing the Letters of the alphabet
appears:
As you tap the buttons on the keyboard, the list at the
top of the screen scrolls to show the next item that
matches the Letters you've tapped.
If you need to enter numbers, tap the 1-2-3 button, and
the numeric keyboard appears:
Moving Through the Screens
The Intellinav system shows you one screen at a time.
Each time you tap a button, a new screen appears.
If you want to return to go to the previous screen, tap
the in the upper right corner of the screen. If you
want to go back to the map view directly, tap the
button on the upper left corner of the screen.
Resetting the Intellinav System
You should never have to reset the Intellinav System
under normal circumstances. However, in the event that
a problem cannot be corrected, you may reset the
Intellinav System by pressing the Reset button on the
bottom of the unit, using a pen or paper clip.

10
Intellinav One User’s Manual
manual). You can also get additional information about
the current location, including latitude and longitude.
POI Information
To view information about a POI on the map, tap on the
icon on the map. The POI(S) screen will appear.
9
User's Manual
Route List
If you have set a destination, you can view a list of the
maneuvers that make up your route.
TToovviieewwtthheerroouutteelliisstt::
1. Tap MMeennuu. The Main Menu appears.
2. Tap DDeessttiinnaattiioonn. The Destination Option screen
appears.
3. Tap RRoouutteeLLiisstt.
4. Tapping an item on the list and then tapping SShhooww
will display the detail directions for that turn.
Location Information
You can find location information about any point on the
map by pressing firmly on the map for one second. A
screen appears giving you the opportunity to set the
location as the Start or the Destination, and save the
location to your Favorites list, or view information.
From the Information screen you have several options:
Set Start Location
Set Stopover (with an
existing route)
Set Destination
Save This Location
Information
Setting the location as a
starting point is useful if you
are trying to find the
distance between two locations. Setting the location as
your destination is a quick way to set a destination.
Saving the location adds the location to your Favorites
list (you'll learn more about Favorites later in this

12
Intellinav One User’s Manual
2. Tap DDeessttiinnaattiioonn. The Set Destination screen
appears.
3. Tap AAddddrreessss. The Input Method screen appears.
4. If you need to change the region:
a. Tap CChhaannggeeSSttaattee. The Enter State Name
screen appears.
b. Tap the LLeetttteerrssto enter the name of the
region or State, or tap the name in the list.
c. Tap OOKKwhen you have selected the region
or State. You will return to the Input Method
screen.
5. Tap SSttrreeeettFFiirrsstt. The Enter Street Name screen
appears.
6. Tap the LLeetttteerrssto enter the name of the street. Tap
OK when you have selected the street. The Enter
House Number screen appears.
7. Tap the NNuummbbeerrssor Letters AA--DDto enter the
house number. Tap OOKK. The Select Address screen
appears.
8. Select the address that matches the location you
want to go to and tap NNaavv. The map appears, and
the guidance directions begin.
TTooEEnntteerraannAAddddrreessssaassaaDDeessttiinnaattiioonnUUssiinnggCCiittyyFFiirrsstt::
1. Tap MMeennuu. The main menu appears.
2. Tap DDeessttiinnaattiioonn. The Set Destination screen
appears.
3. Tap AAddddrreessss. The Input Method screen appears.
4. If you need to change the region or State:
a. Tap CChhaannggeeSSttaattee. The Enter State Name
screen appears.
b. Tap the LLeetttteerrssto enter the name of the
region or State, or tap the name in the list.
c. Tap OOKKwhen you have selected the region.
You will return to the Input Method screen.
5. Tap CCiittyyFFiirrsstt. The Enter City Name screen
appears.
6. Tap the LLeetttteerrssto enter the name of the City. Tap
11
User's Manual
You can set a destination with the Intellinav system many
different ways. Once you have set a destination, you can
add a detour or a stopover.
The Intellinav system also offers an Itinerary feature,
where you can enter up to 100 destinations and use the
Itinerary screen to re-order addresses as you like.
Setting a Single Destination
You can set your destination the following ways:
Address
Intersection
Point of Interest (POI)
Favorites
Recent
City Center
When you have found your destination, you have several
options:
Nav
Fav
Show
NNaavvcalculates the route
from your current location (or the location you set as a
starting point) to the destination.
FFaavvadds the destination to your Favorites list. Your
Favorites list is a list of locations that you can add
destinations to. You can also enter a name for a
destination and delete destinations from the list.
SShhoowwdisplays the location on the panning map without
calculating a route. You can also use it to manually set a
starting point.
Using an Address as a Destination
There are two ways to enter the address: by selecting
the street first, or by selecting the city first. If you use
Street First and too many records match, you will be
asked to use City First.
NNOOTTEE::
You will be prompted for the street name first,
then the house number.
TTooEEnntteerraannAAddddrreessssaassaaDDeessttiinnaattiioonnUUssiinnggSSttrreeeett
FFiirrsstt::
1. Tap MMeennuu. The main menu appears.
Planning Your Route

14
Intellinav One User’s Manual
8. Select the intersection that matches the location
you want to go to and tap NNaavv. The map appears,
and the guidance directions begin.
TTooeenntteerraanniinntteerrsseeccttiioonnaassaaddeessttiinnaattiioonnuussiinnggCCiittyy
FFiirrsstt::
1. Tap MMeennuu. The main menu appears.
2. Tap DDeessttiinnaattiioonn. The Set Destination screen
appears.
3. Tap IInntteerrsseeccttiioonn. The Input Method screen
appears.
4. If you need to change the region:
a. Tap CChhaannggeeSSttaattee. The Enter State Name
screen appears.
b. Tap the LLeetttteerrssto enter the name of the
region, or tap the name of the region.
c. Tap OOKKwhen you have selected the region.
You return to the Input Method screen.
5. Tap CCiittyyFFiirrsstt. The Enter City Name screen
appears.
6. Tap the LLeetttteerrssto enter the name of the city. Tap
OOKKwhen you have selected the city. The Enter
Street screen appears.
7. Tap the LLeetttteerrssto enter the name of the street. Tap
OOKKwhen you have selected the street. The Enter
2nd Street Name screen appears.
8. Tap the LLeetttteerrssto enter the name of the second
street. Tap OOKKwhen you have selected the street.
The Select Address screen appears.
9. Select the intersection that matches the location
you want to go to and tap NNaavv. The map appears,
and the guidance directions begin.
13
User's Manual
OOKKwhen you have selected the City. The Enter
Street Name screen appears.
7. Tap the LLeetttteerrssto enter the name of the street.
Tap OOKKwhen you have selected the street. The
Enter House Number screen appears.
8. Tap the NNuummbbeerrssor Letters AA--DDto enter the
house number. Tap OOKK. The Select Address screen
appears.
9. Select the address that matches the location you
want to go to and tap NNaavv. The map appears, and
the guidance directions begin.
Using an Intersection as a Destination
There are two ways to enter the intersection: by
selecting the street first, or by selecting the city first. If
you use Street First and too many records match, you
will be asked to use City First.
TTooeenntteerraanniinntteerrsseeccttiioonnaassaaddeessttiinnaattiioonnuussiinnggSSttrreeeett
FFiirrsstt::
1. Tap MMeennuu. The main menu appears.
2. Tap DDeessttiinnaattiioonn. The Set Destination screen
appears.
3. Tap IInntteerrsseeccttiioonn. The Input Method screen
appears.
4. If you need to change the region or State:
a. Tap CChhaannggeeSSttaattee. The Enter State Name
screen appears.
b. Tap the LLeetttteerrssto enter the name of the
region, or tap the name of the region.
c. Tap OOKKwhen you have selected the region.
You return to the Input Method screen.
5. Tap SSttrreeeettFFiirrsstt. The Enter Street Name screen
appears.
6. Tap the LLeetttteerrssto enter the name of the street.
Tap OOKKwhen you have selected the street. The
Enter 2nd Street Name screen appears.
7. Tap the LLeetttteerrssto enter the name of the second
street. Tap OOKKwhen you have selected the street.
The Select Address screen appears.

16
Intellinav One User’s Manual
15
User's Manual
Using a Point of Interest (POI) as a
Destination
There are many points of interest that you can select as
a destination. Generally, you choose a category and
then choose one of four methods of selecting the
specific point of interest. Sometimes you must first select
a subcategory (such as Museum within the category of
Attractions) before you can choose a selection method.
The four methods of selecting a specific point of
interest include two for nearby POIs and two for all
POIs in a region.
TToosseelleeccttaanneeaarrbbyyPPOOIIaassaa
ddeessttiinnaattiioonn::
1. Tap MMeennuu. The main
menu appears.
2. Tap DDeessttiinnaattiioonn. The
Set Destination screen
appears.
3. Tap PPOOII. The Points of
Interest screen appears.
4. Tap a CCaatteeggoorryy. Usually a subcategory screen
appears.
NNOOTTEE:
If you choose Restaurant, tap the letters to enter
a type of restaurant. If you choose Hotel, there is no
subcategory screen. Go to the next step.
5. Tap a SSuubbccaatteeggoorryy. The POI Options screen
appears.
TToosseelleeccttaanneeaarrbbyyPPOOIIffrroommaannaallpphhaabbeettiiccaalllliisstt::
a. Tap AAllpphhaabbeettiiccaall. The Enter POI Name
screen appears.
b. Tap the LLeetttteerrssto enter the name of the
POI. Tap OOKKwhen you have selected the
POI. The POI Select screen appears,
displaying the address of the POI.
c. Tap NNaavv. The map appears, and the
guidance directions begin.
TToosseelleeccttaanneeaarrbbyyPPOOIIbbyyddiissttaannccee::
a. Tap BByyDDiissttaannccee. The POI List screen
appears, listing the closest POIs first.
b. Tap the POI that you want to go to and tap
Nav. You may need to scroll down the list by
tapping the scroll bar. The map appears,
and the guidance directions begin.
TToosseelleeccttffrroommaallllPPOOIIssiinnaarreeggiioonn::
1. Tap MMeennuu. The main menu appears.
2. Tap DDeessttiinnaattiioonn. The Set Destination screen
appears.
3. Tap PPOOII. The Points of Interest screen appears.
4. Tap a CCaatteeggoorryy. Usually a subcategory screen
appears.
NNOOTTEE:
If you chose Restaurant, tap the Letters to enter
a type of restaurant. If you chose Hotel, there is no
subcategory screen. Go to the next step.
5. Tap a SSuubbccaatteeggoorryy. The POI Options screen
appears.
TToosseelleeccttaaPPOOIIffrroommaannaallpphhaabbeettiiccaalllliisstt::
1. Tap LLiissttAAllll. The Enter POI Name screen appears.
2. Tap the LLeetttteerrssto enter the name of the POI. Tap
OOKKwhen you have selected the POI. The POI
Select screen appears.

18
Intellinav One User’s Manual
3. Tap NNaavv. The map appears, and the guidance
directions begin.
TToosseelleeccttaaPPOOIIbbyycciittyy::
1. Tap BByyCCiittyy. The Enter City Name screen appears.
2. Tap the LLeetttteerrssto enter the name of the city and
tap OOKK. The Enter POI Name screen appears.
3. Tap the LLeetttteerrssto enter the name of the POI and
tap OOKK. The POI Select screen appears.
4. Tap NNaavv. The map appears, and the guidance
directions begin.
Using a Favorite Destination as a
Destination
Favorite destinations are locations you add to a list on
the Intellinav system. You can add locations to your
Favorites list as you set a destination, from the POI(S)
screen, and from the Location Information screen. You
can then easily select one of these locations as a
destination.
TTooSSeelleeccttaaFFaavvoorriitteeaassaaDDeessttiinnaattiioonn::
1. Tap Menu. The main menu appears.
2. Tap Destination. The Set Destination screen
appears.
3. Tap Favorites. The Favorites screen appears.
4. Tap on the favorite you want to use as a
destination and tap Nav. The map appears, and
the guidance directions begin.
Using a Recent Destination as a
Destination
Recent destinations are locations you have navigated to
recently. You can easily select one of these locations as a
destination. Managing your recent destinations list is
covered later in this section.
17
User's Manual
TToosseelleeccttaaddeessttiinnaattiioonnffrroommyyoouurrlliissttooffrreecceenntt
ddeessttiinnaattiioonnss::
1. Tap Menu. The main menu appears.
2. Tap Destination. The Set Destination screen
appears.
3. Tap Recent. The Recent screen appears.
4. Tap on the recent destination you want to go to
and tap Nav. The map appears, and the guidance
directions begin.
Using a City Center as a Destination
Sometimes you may want to use the Intellinav system to
get to a city, but not to a specific location within the city.
To do this you select a City Center as a destination.
As with selecting a Point of Interest, there are several
methods of selecting a city center: two for nearby city
centers and one for all city centers in a region.
TToosseelleeccttaanneeaarrbbyyCCiittyyCCeenntteerraassaaddeessttiinnaattiioonn::
1. Tap MMeennuu. The main menu appears.
2. Tap DDeessttiinnaattiioonn. The Set Destination screen
appears.
3. Tap CCiittyyCCeenntteerr. The City Center screen appears.
TToosseelleeccttffrroommaannaallpphhaabbeettiiccaalllliisstt::
a. Tap AAllpphhaabbeettiiccaall. The Enter City Name
screen appears.

20
Intellinav One User’s Manual
Detour
NNOOTTEE::
you cannot create a detour if you do not have a
current destination
TToosseettaaddeettoouurr::
1. Tap MMeennuu. The main menu appears.
2. Tap DDeessttiinnaattiioonn. The Destination Options screen
appears.
3. Tap DDeettoouurr. The Detour screen appears.
4. Select from three distance options to bypass. A
new route is calculated automatically.
TToocclleeaarraaddeettoouurr::
1. Tap MMeennuu. The main menu appears.
2. Tap DDeessttiinnaattiioonn. The Destination Options screen
appears.
3. Tap DDeettoouurr. The Detour screen appears.
4. Tap RReesseett.
Avoid Road
Once you have set a destination you can look at the list
of streets and determine if you need to mark one or
more as unavailable. If you mark a section as unavailable
the Intellinav system will calculate a new route that
avoids the section you marked.
NNOOTTEE:
You cannot avoid a road if you do not have a
current destination.
TTooaavvooiiddrrooaaddssiinntthheerroouutteelliisstt::
1. Tap MMeennuu. The main menu appears.
2. Tap DDeessttiinnaattiioonn. The Destination Options screen
appears.
3. Tap AAvvooiiddRRooaadd. The Avoid Road screen appears.
4. Mark any segments that you do not want included:
a. Tap on a route instruction to highlight it.
b. Tap Avoid. A do-not-enter symbol appears.
5. When you have finished marking segments, tap
NNaavv. Your route is recalculated, the map appears
and the guidance directions begin.
b. Tap the LLeetttteerrssto enter the name of the city.
Tap OK when you have selected the city.
The City Center screen appears.
c. Tap NNaavv. The map appears, and the
guidance directions begin.
TToosseelleeccttbbyyddiissttaannccee::
a. Tap BByyDDiissttaannccee. The City List screen
appears, listing the closest city centers first.
b. Tap the city that you want to go to and tap
NNaavv. You may need to scroll down the list by
tapping the scroll bar. The map appears, and
the guidance directions begin.
TToosseelleeccttffrroommaallllCCiittyyCCeenntteerrssiinnaarreeggiioonn::
1. Tap Menu. The main menu appears.
2. Tap Destination. The Set Destination screen
appears.
3. Tap City Center. The City Center screen appears.
TToosseelleeccttaacciittyycceenntteerriinnaarreeggiioonnoorrSSttaattee::
a. Tap LLiissttAAllll. The Enter City Name screen
appears.
b. Tap the LLeetttteerrssto enter the name of the city.
Tap OOKKwhen you have selected the city.
The City Center screen appears.
c. Tap NNaavv. The map appears, and the
guidance directions begin.
Detours, Avoid Roads, and Stopovers
The Detour feature will allow you to bypass a certain
portion of the route starting at your present position,
while avoid road allows you to bypass the entire road.
Stopovers are stops you add to a trip to make prior to
reaching your destination.
19
User's Manual

22
Intellinav One User’s Manual
21
User's Manual
Stopovers
Once you have set a destination you can add a
stopover. Adding a stopover does not cancel your
original destination. Once you reach your stopover, you
will be prompted to continue to the destination.
TTooccrreeaatteeaassttooppoovveerr::
1. Press MMeennuu. The main menu appears.
2. Tap DDeessttiinnaattiioonn. The Destination Options screen
appears.
3. Tap SSttooppoovveerr. The Set Destination screen appears.
4. Set your stopover destination using any of the
methods explained earlier in this section.
TTooccaanncceellaassttooppoovveerr::
1. Tap MMeennuu. The main menu appears.
2. Tap DDeessttiinnaattiioonn. The Destination Options screen
appears.
3. Tap CClleeaarrRRoouuttee. A confirmation message appears
asking if you want to continue to your next
destination.
4. Tap YYeess. The map appears and navigation
continues.
Setting an Itinerary
The Itinerary feature allows you to set multiple
destinations. You can add, remove, or re-order
destinations according to your needs.
TToosseetttthheeIIttiinneerraarryy::
1. Tap Menu. The main menu appears.
2. Tap Itinerary. The Itinerary screen appears.
3. Tap Add to add new destinations from Favorites,
Recent or POI list, or enter a new address as
destination.
4. Tap Del to remove a destination from the Itinerary.
5. Tap Go! to start navigating from the first item on
the Itinerary.
TTooRRee--oorrddeerrtthheeIIttiinneerraarryy::
1. Tap Move Up or Move
Down.
Using Shortcuts
The shortcut feature provides you quick access to some
of the most important destinations while you're on the
road, including:
Home
ATM
Gas
Hospital
Parking
Restaurant
Tourist Information
By tapping any of the POI
categories, you will see a list
of the nearest POIs sorted by
distance.

23
User's Manual
You can edit the destinations you add to your favorites
list to give them descriptive names. You can also remove
destinations from your favorites list.
TToommaannaaggeeyyoouurrffaavvoorriitteesslliisstt::
1. Tap MMeennuu. The main menu appears.
2. Tap FFaavvoorriitteess. The Favorites screen appears.
TTooeeddiittaaffaavvoorriittee::
a. Tap on the favorite you want to edit.
b. Tap Edit. The Edit Favorites screen appears.
c. Enter a descriptive name for this favorite.
d. Tap OK when you are done.
TTooddeelleetteeaaddeessttiinnaattiioonnffrroommyyoouurrffaavvoorriitteesslliisstt::
a. Tap on the favorite you want to delete.
b. Tap DDeell. The favorite is removed from the
list.
c. ap OOKKto close the Favorites screen.
Managing Your Favorites List
24
Intellinav One User’s Manual
You can set many different options to customize the
Intellinav system and make it work your way. These
options include:
Display Options
Route Options
Speed Alert
Localization
Display Options
The display options give you control over the
appearance of the map. You can change the following:
Orientation
Guidance
Day/Night
POI Icons
Color
3D View
There are two orientation settings. Heading turns the
map as you drive so that you are always moving toward
the top of the screen. North keeps the map oriented with
North at the top of the map, like a traditional paper map.
There are two guidance settings, which control whether
or not the maneuver detail screen appears when you
near your next maneuver. If you use the auto setting, the
maneuver detail screen appears.
The day/night setting controls the background of the
screen. If you choose auto, the Intellinav system will
automatically switch to a darker version of your color
scheme soon after sunset, to reduce the glare in the
vehicle. You can also choose to use either the day or
night setting at all times.
There are three options for displaying POI icons. If you
choose default, the most commonly displayed
categories of POI icons will appear on the map at zoom
levels of 1000 ft and closer. If you choose off, no POI
icons are displayed. If you choose custom, you can
choose which categories of POI icons you want
displayed.
The color settings control the background color of the
map. You can choose from four different colors.
Setting Your Options

26
Intellinav One User’s Manual
Route Options
The route options give you control over the navigation
of your trip. You can change the following:
Method
Ferries
Toll Roads
Carpool
Turns
There are four method settings. Quickest calculates the
route that should take the least amount of time. Major
calculates a route that uses major roads whenever
possible. Shortest calculates the route that is shortest in
distance. Local calculates a route that uses local roads
whenever possible.
The ferries setting indicates whether ferries should be
included when your route is calculated. If you include
ferries, the route will take you to the ferry terminal, but
the total time for the route does not take into account
the ferry schedule or time spent on the ferry.
The toll roads setting indicates whether you want to
include or exclude toll roads when your route is
calculated. If you include toll roads, those roads will be
used if appropriate for the method you selected.
The carpool setting indicates whether or not you want to
include carpool or high occupancy vehicle (HOV)
restrictions in the calculation of your route.
The turns setting indicates whether or not you want to
make more or less turns.
TToosseettyyoouurrrroouutteesseettttiinnggss::
1. Tap MMeennuu. The main menu appears.
2. Tap RRoouutteeOOppttiioonnss. The Route Options screen
appears.
3. Tap your Method preference: QQuuiicckkeesstt, MMaajjoorr,
SShhoorrtteesstt, or LLooccaall.
4. Tap your Ferries preference: IInncclluuddeeor EExxcclluuddee.
5. Tap your Toll Roads preference: IInncclluuddeeor EExxcclluuddee.
6. Tap your Carpool preference: IInncclluuddeeor EExxcclluuddee.
7. Tap your Turns preference: RReedduucceeddor NNoorrmmaall.
The 3D view settings control your view of the map. Off
shows you the map in traditional 2D mode. High,
Medium, and Low show you a 3D version of the map,
with a different angle for each value. If you use any of
the 3D settings you will not be able to tap on a location
to view location information.
TToosseettyyoouurrddiissppllaayysseettttiinnggss::
1. Tap MMeennuu. The Menu button and then Settings.
2. Tap DDiissppllaayyOOppttiioonnss. The Display Options screen
appears.
3. Tap your Orientation preference: HHeeaaddiinnggor
NNoorrtthh.
4. Tap your Guidance preference: AAuuttooor MMaannuuaall.
5. Tap your Day/Night preference: AAuuttoo, NNiigghhtt, or
DDaayy.
6. Tap your POI Icons preference: DDeeffaauulltt, OOffff, or
CCuussttoomm.
When you tap CCuussttoommthe POI Options screen
appears.
a. Tap on the categories you want displayed.
The categories to be displayed are
highlighted.
b. You can use SSeelleeccttAAlllland CClleeaarrAAllllto
quickly highlight or clear categories.
c. When you have highlighted the categories
you want displayed, tap OOKK. You return to
the Display Options screen.
7. Tap your Color preference: YYeellllooww, GGrreeyy, WWhhiittee, or
FFuucchhssiiaa.
8. Tap your 3D View preference: 22DD, HHiigghh, MMeeddiiuumm,
or LLooww.
9. When you have finished choosing your options, tap
OOKK..
25
User's Manual

27
User's Manual
8. When you have finished choosing your options,
tap OOKK.
Speed Alert
You can use the speed alert feature to warn you if your
vehicle is exceeding the speed limit. There are two
speed alert options: auto speed alert and fixed speed
alert. Auto speed alert uses the type of road to
determine the probable speed limit. Fixed speed alert
lets you enter a speed and will warn you if that speed is
exceeded.
Auto speed alert is based on road class and may not
necessarily reflect the actual speed limit. Please use this
feature only as a reference
TToosseetttthheessppeeeeddaalleerrtt::
1. Tap MMeennuuand then Settings.
2. Tap SSppeeeeddAAlleerrtt. The Speed Alert screen appears.
TToosseettaauuttoossppeeeeddaalleerrtt::
a. Tap AAuuttoo. A warning appears.
b. Tap OOKKto close the warning.
c. Tap OOKK. You return to the map.
TToosseettaaffiixxeeddssppeeeeddaalleerrtt::
a. Tap FFiixxeedd.
b. Enter the speed you want to use as a
maximum speed.
c. Tap OOKKafter reading the warning message.
You return to the map.
28
Intellinav One User’s Manual
Localization
The localization options give you control over the
settings affected by your location, including:
Language
Time Zone
Daylight Savings Time
Units
There are six language settings. When you change the
language, all of the screen names and controls will be in
the selected language. There are six time zone settings,
for all areas of the United States. There are two daylight-
savings options, to determine whether or not daylight
savings time is currently in effect at your location. There
are two settings for units, which determine how the
distance to your location is expressed. You can choose
between Mi (miles) or KM (kilometers).
TToosseettyyoouurrllooccaalliizzaattiioonnsseettttiinnggss::
1. Tap MMeennuu. Menu screen appears.
2. Tap SSeettttiinnggss. Settings screen appears.
3. Tap LLooccaalliizzaattiioonn. The Localization screen appears.
4. Tap your Language preference: EEnngglliisshh, FFrreenncchh,
SSppaanniisshh, CChhiinneessee, KKoorreeaannor JJaappaanneessee.
5. Tap your Time Zone preference: EEaasstteerrnn, CCeennttrraall,
MMoouunnttaaiinn, PPaacciiffiicc, AAllaasskkaaor HHaawwaaiiii.
6. Tap your Daylight Saving preference: DDSSTTor
SSttaannddaarrdd.
7. Tap your Units preference: MMiior KKMM.
8. When you have finished choosing your options, tap
OOKK.

30
Intellinav One User’s Manual
Screen Calibration
When you first turn on the Intellinav system, you will be
asked to calibrate the system. This process ensures that
when you tap the screen the item tapped is activated.
You can also recalibrate by tapping on System, Sys Info,
and Calibration.
TTooccaalliibbrraatteetthheessccrreeeenn::
1. From the Main Menu, tap on System and then Sys
Info.
2. Tap the center of the black dot as it moves around
the screen.
User Preferences
You can adjust the settings of your device to suit the way
you work. Adjusting certain settings, such as those for
system volume, power LED, and backlight may increase
your standby time.
TTooaacccceesssstthheeSSyysstteemmppaanneell::
1. Tap System on the Main Menu panel.
There are six preference icons on this panel.
System Settings
29
User's Manual
Tap to set the volume level for system sounds
and enable tapping sound.
Tap to view the battery power level and enable
the hot keys backlight.
Volume
TToosseetttthheessyysstteemmssoouunnddlleevveell::
1. Tap - /+ to adjust the volume level.
2. Tap to apply the changes made.
TTooeennaabblleettaappssoouunnddss::
1. Tap the "Enable sounds for taps" check box.
2. Tap to apply the changes made.
Power
TTooeennaabblleetthheehhoottkkeeyyssbbaacckklliigghhtt::
1. Tap the "Hot keys backlight on when pressed"
check box.
2. Tap / to set the hot keys backlight's auto-off
function. Options include backlight off after 5, 10,
15 and 20 seconds.
3. Tap to apply the changes made.
TTooeennaabblleetthheehhoottkkeeyyssbbaacckklliigghhttwwhheennppoowweerriiss
pplluuggggeeddiinn::
1. Tap the "Hot keys backlight on when AC-in" check
box.
2. Tap to apply the changes made.
Tap to set the touch screen backlight level and
enable its auto off function.
Tap to change the system date, time, and time
zone settings.
Tap to set the language option for the system
menus and voice prompts.
Tap to displays your device's OS Version, GPS
F/W, and SW Code Version. Options for factory
reset, GPS reset, and calibration

32
Intellinav One User’s Manual
Backlight
TToosseetttthheessccrreeeennbbaacckklliigghhttlleevveell::
1. Tap -/+ to adjust the screen backlight level.
2. Tap to apply the changes made.
TToosseetttthheessccrreeeennbbaacckklliigghhttaauuttoo--ooffffffuunnccttiioonn::
1. Tap / under the Battery and AC Power settings.
a. Options for Battery includes: Never, after 10
or 15 seconds, and for AC Power includes:
Never, after 1, 2 or 3 minutes.
2. Tap to apply the changes made.
Date Time
TToosseetttthheeddaattee::
1. Tap on Date.
2. Tap on / to set the
Year, Month and Day.
3. Tap to apply the changes made.
TToosseetttthheeTTiimmee::
1. Tap on Time
2. Tap on / to set the Hour and minute.
3. Select AM or PM
4. Select 24 Hours to show 24-hour clock
5. Tap to apply the changes made.
TToosseetttthheeTTiimmeeZZoonnee::
1. Tap on Time Zone
2. Tap on / to select the Time Zone that is
application to you.
3. Tap to apply the changes made.
31
User's Manual
NNoottee::
The "Automatically adjust clock for daylight
saving changes" will be displayed under the Time Zone
setting menu if the daylight saving system is adopted.
System Info
You may have to perform a reset if the device freezes
(i.e., device no longer responds to the buttons on the
screen). A soft reset allows your device to get a fresh
start, similar to rebooting a computer. This will restart
your device and adjust memory allocation. All records
and entries are retained after a soft reset. GPS settings
are also retained.
Factory Reset
TTooppeerrffoorrmmaassooffttrreesseett::
1. Hold the device securely, and then press the soft
reset button on the bottom of your device.
To load the factory default setting
If you still encounter problems even after soft resetting
the device, loading the factory default settings may
correct the problems. These default settings have been
selected to optimize your device's performance.
1. Tap System on the Main Menu panel.
2. Tap System Info in the System panel.
3. Tap Factory Reset and then Yes to confirm.
4. After the Factory Reset, reconfigure your device's
user preferences.
GPS Reset
In the following circumstances, the TTFF (Time To First
Fix) values of your device may be longer than usual:
After a long period of inactivity.
If the current GPS fix position is more than 500km,
or more than 12 hours apart, from the previous
position.
oThis is due to the nature of the GPS
algorithm and rotational velocity between
the satellites and planet Earth, and is
deemed normal. To correct this, perform a
GPS reset. This will update the GPS
database, which contains information about
the GPS satellites that the unit needs to
function in navigation mode.

34
Intellinav One User’s Manual
TTooRReesseetttthheeGGPPSS::
1. Close the navigation program, if it is currently
running, by tapping on Menu in the map display,
and then Exit in the navigation Menu screen.
2. Tap System on the Main Menu panel.
3. Tap System Info on the System panel.
4. Tap GPS Reset and then Yes to confirm.
5. The GPS Reset process will take about a minute to
complete.
33
User's Manual
you can use a computer to load MP3 onto an SD card
and then load that sd card into the SD card slot located
at the side of the unit.
TTooooppeenntthheeMMPP33PPllaayyeerr::
1. Tap MP3 on the Main
Menu panel. The MP3
player appears.
TTooooppeennMMPP33ffiilleessffoorrppllaayybbaacckk::
1. Tap the Folder button to open the file browser.
The program will automatically scan the device
SD/MMC card for supported digital files. Only
sub-directories containing compatible music files
will be displayed.
2. Search for the file(s) you want to play by tapping
/ to scroll through all available files.
3. Tap a file to start playback of the selected file.
a. When the file is located in the root directory,
tap the file for playback.
b. When the file is located inside a sub-
directory, tap the sub-directory icon, then
tap a file for playback.
4. Tap Up-One-Level
button to return to the
root directory.
5. The selected file will
automatically be played.
Files in the same
directory will also be played, provided the repeat
function is disabled.
PPllaayybbaacckkCCoonnttrroollss
The icons in the MP3 player
let you control the playback
mode.
TTooccoonnttrroollffiilleeppllaayybbaacckk::
Keys Descriptions
Tap to pause or resume playback.
Tap to stop playback.
Tap to skip backward to the previous track. If
the current file is the first track in the list, the
last track will be played.
Tap to skip forward to the next available track.
If the current file is the last track in the list, then
the first track will be played.
MP3 Playback

36
Intellinav One User’s Manual
Shuffle Mode
Each directory containing supported music files is
considered a playlist. You can choose to shuffle the
playback sequence to play files in random order.
TToorreeaarrrraannggeetthheeppllaayybbaacckksseeqquueennccee::
1. To enable the Shuffle mode, tap (Random).
An enabled Shuffle mode is indicated by the word
"Random" on the playback display, and a fade-out
Random icon.
2. To disable the Shuffle mode, tap the fade-out
Random icon.
Repeat Mode
The repeat mode lets you play the current track in a
loop. The same track will be played over and over, until
you disable the Repeat mode.
TTooeennaabblleeoorrddiissaabblleetthheeRReeppeeaattmmooddee::
1. To enable the Repeat mode, tap (Repeat).
An enabled Repeat mode is indicated by the word
"Repeat" in the playback display, and a fade-out
Repeat icon.
2. To disable the Repeat mode, tap the fade-out
Repeat icon.
3. Tapping Random icon will automatically disable the
Repeat mode.
Playback Volume
To adjust the playback volume, you can use either the
MP3 volume control slider, or the volume control
hardware buttons.
TTooccoonnttrroolltthheeppllaayybbaacckkvvoolluummee::
1. Hold and drag the slider of the volume level bar.
This will only affect the volume of the track
playback.
2. Press the volume buttons (-/+). This will also adjust
the sound level for the device's system sounds.
35
User's Manual
With the Intellinav system, you can keep images of your
favorite moments as mobile as you are by using the
Photo Viewer. You can use a computer to load pictures
onto an sd card and then load that sd card into the SD
card slot located at the side of the unit. The program
features:
Support for JPEG and BMP (1-, 4-, 8-, and 24-bit)
files.
Auto-scanning of supported files in the device's
SD/MMC card.
Three viewing modes: Thumbnail, Full Screen, and
Slide Show.
Album support based on sub-directory contents.
oEach sub-directory containing compatible
image files is treated as an individual album.
For a more organized file search, it is
advisable to sort image files into sub-
directories based on something, such as a
particular event or a certain period. To
illustrate, a sub-directory containing pictures
from your daughter's birthday can be named
"Cassie's 10th Birthday"; or "May 11 to
June 24" for a sub-directory consisting of
pictures taken during that period.
NNoottee:
The performance of the Photo Viewer may be
affected by the size of the image files.
TTooooppeennPPhhoottooVViieewweerr::
1. Tap Photo on the Main Menu panel.
2. The program will automatically scan the device's
SD/MMC card for supported image files. Image
files will be displayed as thumbnails; only sub-
directories containing compatible files will be
displayed.
3. Tap / to scroll through all available files. When
a thumbnail is selected, a red border appears
around it.
Photo Viewer

38
Intellinav One User’s Manual
Full Screen Mode
In Full Screen mode, image files can be viewed in a
larger scale. You can also change its orientation angle.
TToovviieewwiimmaaggeessiinnFFuullllSSccrreeeennmmooddee::
1. Search for the file you want to view.
2. Tap / to scroll through all available files.
3. Tap Up-One-Level to return to the device's root
directory.
4. Open the file in Full Screen mode.
a. When the file is located in the root directory,
tap the file.
b. When the file is located inside a sub-
directory, tap the sub-directory icon, then
tap the file you want to view.
5. Tap to display the previous available image.
6. Tap to display the next available image.
Magnification
TToocchhaannggeetthheeiimmaaggeemmaaggnniiffiiccaattiioonnlleevveell::
1. Tap (-) to zoom into the center of the image.
a. When in a zoomed-in state, you can hold
and drag the image to pan it in any direction
you want.
2. Tap (+) to zoom out the image display.
Orientation
TToocchhaannggeetthheeiimmaaggeeoorriieennttaattiioonn::
1. Tap to rotate the image 90°, 180°, 270°, or
360° clockwise.
37
User's Manual
Slide Show
You have the option to view images in a slide show
much like viewing a presentation. Images are adjusted
to fit the entire display area and are shown in a 3-second
interval.
TTooeennaabblleetthheeSSlliiddeeSShhoowwmmooddee::
1. In Thumbnail or Full Screen mode, tap (Slide
Show).
2. Tap the touch screen to stop the slide show and
return to the previous viewing mode.
Other manuals for 1
1
This manual suits for next models
1
Table of contents
Other Intellinav GPS manuals
