manuals.online logo
Brands
  1. Home
  2. •
  3. Brands
  4. •
  5. Intense
  6. •
  7. Bicycle
  8. •
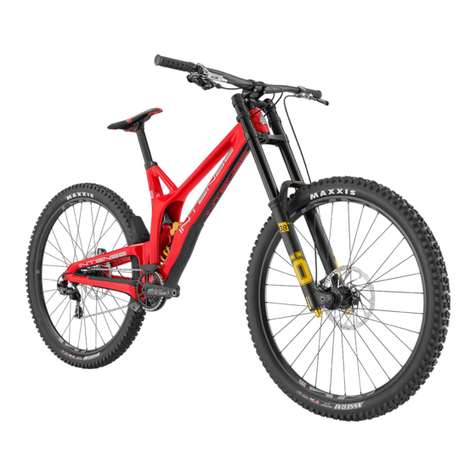
  9. Intense 951 Series User manual

Intense 951 Series User manual

REGISTER YOUR BIKE AT:
www.intensecycles.com/pages/registerbike
FOR TECHNICAL ASSISTANCE:
Email info@intensecycles.com
Phone +1 951-307-9211
CONTENTS
3
WELCOME TO THE
INTENSE FAMILY!
CONGRATULATIONS ON
YOUR NEW INTENSE
951 TRAIL BIKE!
AT INTENSE WE HAVE
ONE GOAL -
TO PROVIDE THE RIDE
OF YOUR LIFE!
04-05 Getting to know your bike
06-07 Getting to know your tools
08-21 SETup guide
22-23 GEOMETRY - guide to FLIP CHIP
24-25 FRAME SPECS & COMPONENT LIST
26-27 MAINTENANCE
28-29 PARTS LISTINGS
30-31 PARTS KITS
www.intense951.com
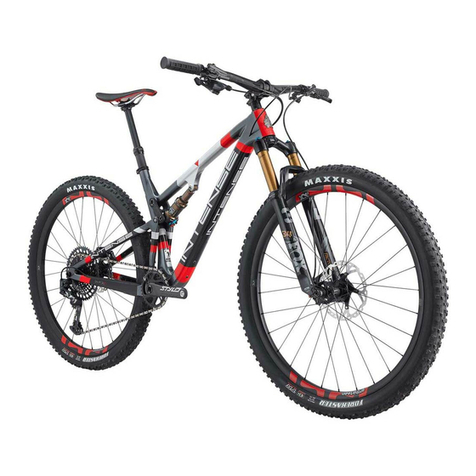
INTENSE 951 TRAIL
GETTING TO KNOW YOUR BIKE
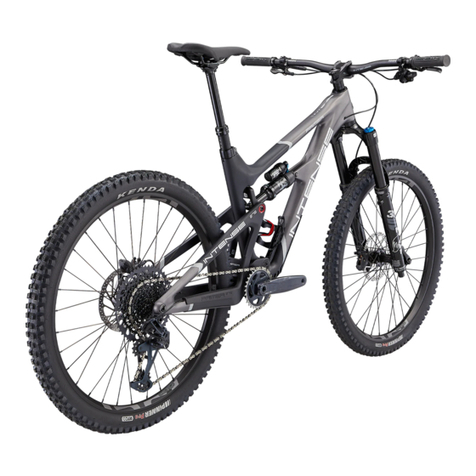
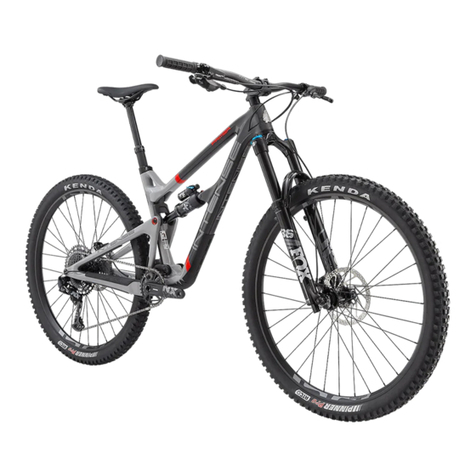
Featuring a lightweight full carbon frame, rolling on 29”
wheels, and with 140/150mm of suspension travel the

bike… in fact it might be the only bike you’ll ever need.


assured on the descents and fun everywhere else. The

54
SADDLE
(SEAT)
fork rebound
adjuster
fork COMPRESSION
DAMPING ADJUSTER
(TOP OF RIGHT LEG)
fork AIR VALVE CAP
(TOP OF LEFT LEG)
BRAKE
CALIPER
Bottle
CAGE
MOUNTS
FORKs
BRAKE
rotor
CRANK
ARM
CHAINRINGCHAIN
RIM
TIRE
SPOKES
CASSETTE FLIP CHIP
REAR
DERAILLUER
ADJUSTABLE
SEATPOST
(DROPPER)
SEAT
CLAMP
REAR
SHOCK
TOPTUBE
DOWNTUBE
FLAK
GUARD
WHEEL HUB
HEADTUBE
TOP
SUSPENSION
LINK
CHAINSTAY
PROTECTOR
LOWER
SUSPENSION
LINK
REAR FRAME
TRIANGLE
www.intense951.com
BRAKE LEVERS
HANDLEBARS
DROPPER
POST LEVER
SHIFTER
GRIPS
STEM
WHAT ELSE IS IN THE BOX?
GETTING TO KNOW YOUR TOOLS







tool (19), high pressure shock pump (21) and a torque wrench (18). The torque wrench is a tool that





1. PH1 Philips driver
2. PH2 Philips driver
3. Long reach 5mm Allen driver
4. Torque wrench extension
5. 2mm HEX/Allen driver
6. 2.5mm HEX/Allen driver
7. 3mm HEX/Allen driver
8. 4mm HEX/Allen driver
9. Flat head driver
10. 5mm HEX/Allen driver
11. 6mm HEX/Allen driver
12. 8mm HEX/Allen driver
13. T25 Torx driver
14. T30 Torx driver
15. T40 Torx driver
16. 1/4" drive-to-1/4" drive bit adaptor
17. 1/4" drive-to-3/8" drive adaptor
18. Torque Wrench

(4mm, 5mm, 6mm)
20. Torx 25 tool
21. INTENSE Shock Pump
WANT TO GO TUBELESS?


intense951.com/pages/techvideos for our handy

1 2 3 4
21
5 6 7 8 9 10 11 12 13 14 15 16 17
18
19
20
76 www.intense951.com

INTENSE +1 951.307.9211
WE ARE HERE TO HELP!
INTENSE 951 TRAIL
SETUP GUIDE


and much more.
GO TO INTENSE951.COM/PAGES/TECHVIDEOS




bike in the stand. Only use the seatpost to clamp the bike to the stand. For those of you who don’t

over the following pages.
9
Your new 951 TRAIL is almost ready to go, you just need to do a few things to get your bike ready for


NEED HELP?
DO NOT RETURN TO THE STORE
call us at: +1 951.307.9211
or email: [email protected]
our rider support team looks forward
to helping with any questions.
www.intense951.com
1110
STEP 03
RELEASE DROPPER, REMOVE BIKE FROM BOX
2CReplace the faceplate of the stem and




the faceplate and the main body of the stem is
even all the way around.
3ANow raise the adjustable seatpost
(dropper) to its full height by pressing the



2D


using the torque wrench to 5Nm.
3BTurn the bike over (upside down) so that it
is balancing on its saddle and handlebars.
It is a good idea to protect your saddle and
handlebars with a piece of cardboard or cloth to

STEP 01
REMOVE WHEELS AND PREPARE BIKE
STEP 02
INSTALL HANDLEBARS
1A

numbered to make it easy for you to
remove everything in the right order. The wheels

Please keep all packaging for possible future
storage or shipping.
2ARemove any packaging on the front of the
bike, then spin the handlebar stem 180°



side of the bike, with the fork arch facing forward.
1B
and place nearby. Carefully remove the



a stand.
2B Using the 4mm Allen key remove the
faceplate of the stem and put the
handlebars in place. Use the guidelines printed

and evenly. Check that the brake, gear and

kinked or twisted in any way.
www.intense951.com
1312
STEP 05
INSTALL THE REAR WHEEL
5A
spacer. Once this is removed be careful


5C


rotors with your hands or gloves, any small amount
of grease may contaminate them.
5D

rotor with the rear brake caliper making sure that


the slots on the frame dropouts.
5BThere is a integrated metal lever that sits




STEP 04
INSTALL DERAILLEUR
4A

derailleur and chain. Using a 5mm Allen key, screw
the derailleur into the derailleur hanger/frame.
4C
(top when upside down) pivot the whole
derailleur toward the front of the bike. There will
be some resistance from the spring, so be careful

4BAt this point be careful that the notch




4DWhen it won’t go any further forward (in





B SCREWDERAILLEUR
PUSH TOWARD THE
FRONT OF THE BIKE
CAGE LOCK
POSITION AT 70°
TO THE AXLE
www.intense951.com

1514
STEP 07
RUN THROUGH THE GEARS

check that they are working correctly. To do this

so that the wheel begins to spin, with your hand

anything in the chain). If you are having any issues
with the gears, please check out our Tech Video
Series on our website:
intense951.com/pages/techvideos
STEP 06
INSTALL THE FRONT WHEEL
6ARemove all packaging from the wheel

the correct place). Then remove the orange brake

by unscrewing it.
5EOnce everything is lined up and in







6B
into the brake caliper body and that
the hub body slots into the grooves on the fork.
When everything is in the correct place reinsert




5F
To do this, gently push the derailleur

loaded, so once the derailleur arm is pushed

unlock. Slowly let the derailleur arm move

PUSH TOWARD THE
FRONT OF THE BIKE
INSERT AXLE FROM

www.intense951.com
STEP 08
ADJUST HEADSET & HANDLEBARS
8A
its wheels and check that your headset
is adjusted correctly. Set your headset preload

with a very slight amount of resistance. If it feels

slightly using a 5mm Allen key and then gently


the headset again. If the bars won’t turn smoothly



8BOnce you are happy with your headset
adjustment you need to make sure that

is to straddle your bike and look down and line the
back of your handlebars up with the front of the


using a 5mm Allen.
1716
STEP 09
ADJUST SADDLE HEIGHT
Set the height of your saddle (seat) with your

4mm Allen key loosen the seatpost clamp and
adjust the seatpost to the correct height. A good


of your hip bone the palm of your hand should
be level with the top of the saddle. Adjust as


performance of the seatpost.

height once you have set up your suspension

STEP 10
CHECK TIRE PRESSURE




www.intense951.com
STEP 11
BIKE CHECK


the brakes are working correctly by spinning the wheels and pulling the brake levers. Check the front






just right for you.
1918
STEP 12
FRONT SUSPENSION SETUP
12A
up your suspension. The 951 TRAIL
uses air sprung suspension on the front and rear to
smooth out the trails. To begin, set the air pressure.
Look at the air pressure chart on the right, that will
give you a good guide to start from. Remember to
calculate your weight when you are in full riding

12C
the fork. Sag is important, it allows the
fork to work properly. With the help of a friend sit






forks further (your friend can help here by holding
the handlebars so they don’t drop).
12B




you reach the desired pressure.
12D

gap between the top of the fork leg and the black


for the 140mm (5.5”) fork that comes on the 951
TRAIL that measurement should be around 30mm
(1.1”). Use a ruler to measure the gap. Adjust the

sag. Replace the top cap.
AIR VALVE CAP. TO UNSCREW
TURN COUNTERCLOCKWISE
lbs kgs psi
  
  
  
  
  
  
  
  
  
  
  
  
  




SUGGESTED STARTING POINTS
FOR SETTING FORK SAG
SUGGESTED REBOUND SETTINGS
lbs kgs 
  
  
  
  
  
  
  
  
  
  
  
  
  





Then back it out (counterclockwise) to the number of clicks shown in the table below.



ADJUSTING
GRIP
COMPRESSION
DAMPING



adjustments to control
fork performance under

terrain, and is intended to
be adjusted throughout
the ride. Turning the
lever to the full counter-

the fork in the Open
mode. Turning the lever

sets the fork in the
Medium mode. Turning
the lever to the full

the fork in Firm mode.

the Open, Medium,
and Firm modes can be

compression damping.
FOX recommends
beginning with the

Open mode.
REBOUND
OPEN (counterclockwise)


FASTEST
CLOSED (clockwise)


SLOWEST
FOX RHYTHM 36 FLOAT
150 MM. GRIP DAMPER
www.intense951.com
2120
STEP 13
REAR SUSPENSION SETUP
Now do the same for the rear shock. The Schrader valve is easier to see, so unscrew the cap and pump





RUBBER O-RING
SHOCK REBOUND DIAL
COMPRESSION
ADJUSTMENTS


adjustments to control
shock performance

changes in terrain, and is
intended to be adjusted
throughout the ride.
Use the OPEN mode
during rough descending,
the MEDIUM mode for

and the FIRM mode
for climbing.
REBOUND
OPEN (counterclockwise)


FASTEST
CLOSED (clockwise)


SLOWEST


maintenance or visit ridefox.com
RIDER WEIGHT AIR PRESSURE REBOUND
(lbs/kgs) (psi) (clicks out from
fully closed)
Closed is Clockwise
Open is Counterclockwise
100lbs / 45kgs 130 11
110lbs / 50kgs 140 10
120lbs / 54kgs 155 9
   
   
   
   
170lbs / 77kgs 215 7
180lbs / 82kgs 225 7
   
   
   
220lbs / 100kgs 275 4
230lbs / 104kgs 285 3
240lbs / 109kgs 300 2
250lbs / 113kgs 310 2
SUGGESTED STARTING POINTS
FOR SETTING UP YOUR SHOCK
FOX PERFORMANCE FLOAT DPX2.
3-POSITION (OPEN, TRAIL, LOCK-OUT)
www.intense951.com
AIR VALVE CAP. TO UNSCREW
TURN COUNTERCLOCKWISE
C
A
BB Drop
B
F
D
E
G
H
L
K
I
J
REV.
DATE
REVISION RECORD
APPROVED
PCN #
1
10/23/2020
Release
CK
951 Trail
SMALL SMALL
MEDIUM MEDIUM
LARGE LARGE
XL XL
Flip Chip Setting:
LOW
LOWER
LOW
LOWER
LOW
LOWER
LOW
LOWER
Wheel Base:
A
1170 mm/ 46" 1171 mm/ 46"
1200 mm/ 47.2" 1201 mm/ 47.3" 1229 mm/ 48.4" 1230 mm/ 48.4"
1267 mm/ 50"
1267 mm/ 49.9"
Top Tube Length:
B
578 mm/ 22.8" 580 mm/ 22.8"
608 mm/ 24" 610 mm/ 24" 636 mm/ 25"
639 mm/ 25.1" 673 mm/ 26.5" 675 mm/ 26.6"
Chain Stay Length:
C
440 mm/ 17.3"
441.5 mm/ 17.4"
440 mm/ 17.3"
441.5 mm/ 17.4"
440 mm/ 17.3"
441.5 mm/ 17.4"
440 mm/ 17.3"
441.5 mm/ 17.4"
Head Tube Length:
D
90 mm/ 3.5" 90 mm/ 3.5" 90 mm/ 3.5" 90 mm/ 3.5"
100 mm/ 3.9" 100 mm/ 3.9" 120 mm/ 4.7" 120 mm/ 4.7"
Head Tube Angle:
E
65.7˚ 65.1˚ 65.7˚ 65.1˚ 65.7˚ 65.1˚ 65.7˚ 65.1˚
Reach:
F
411 mm/ 16.2"
405 mm/ 16"
442 mm/ 17.4"
435 mm/ 17"
467 mm/ 18.4"
461 mm/ 18"
497 mm/ 19.6" 491 mm/ 19.3"
Stack:
G
612 mm / 24"
616 mm/ 24.3"
612 mm / 24"
617 mm/ 24.3"
622 mm / 24.5" 626 mm / 24.7"
640 mm/ 25.2" 645 mm/ 25.4"
BB Height:
H
346 mm/ 13.6" 339 mm/ 13.3" 346 mm/ 13.6" 339 mm/ 13.3" 346 mm/ 13.6" 339 mm/ 13.3" 346 mm/ 13.6" 339 mm/ 13.3"
BB Drop
29 mm/ 1.1" 36 mm/ 1.4" 29 mm/ 1.1" 36 mm/ 1.4" 29 mm/ 1.1" 36 mm/ 1.4" 29 mm/ 1.1" 36 mm/ 1.4"
Seat Tube Angle (Effective):
I
75˚ 74˚ 75˚ 74˚ 75˚ 74˚ 75˚ 74˚
Seat Tube Angle (Actual):
J
70˚
69.5˚
70˚
69.5˚
70˚
69.5˚
70˚
69.5˚
Seat Tube Length:
K
408 mm/ 16" 408 mm/ 16" 431 mm/ 17" 431 mm/ 17"
451 mm/ 17.8" 451 mm/ 17.8" 476 mm/ 18.7"
475.5 mm/ 18.7"
Standover Height:
L
815 mm/ 32"
810 mm/ 31.9"
815 mm/ 32" 809 mm/ 32"
819 mm/ 32.2"
819 mm/ 32"
828 mm/ 32.6" 822 mm/ 32.4"
Fork Axle To Crown:
561 mm / 22" 561 mm / 22" 561 mm / 22" 561 mm / 22" 561 mm / 22" 561 mm / 22" 561 mm / 22" 561 mm / 22"
Lower Headset Stack Height:
12 mm / 0.5" 12 mm / 0.5" 12 mm / 0.5" 12 mm / 0.5" 12 mm / 0.5" 12 mm / 0.5" 12 mm / 0.5" 12 mm / 0.5"
Fork Offset:
51 mm / 2" 51 mm / 2" 51 mm / 2" 51 mm / 2" 51 mm / 2" 51 mm / 2" 51 mm / 2" 51 mm / 2"
Fork Trail:
114 mm / 4.5" 118 mm / 4.6" 114 mm / 4.5" 118 mm / 4.6" 114 mm / 4.5" 118 mm / 4.6" 114 mm / 4.5" 118 mm / 4.6"
Fork Travel:
150 mm / 5.9" 150 mm / 5.9" 150 mm / 5.9" 150 mm / 5.9" 150 mm / 5.9" 150 mm / 5.9" 150 mm / 5.9" 150 mm / 5.9"
Rear Travel:
140 mm / 5.5" 137 mm / 5.4" 140 mm / 5.5" 137 mm / 5.4" 140 mm / 5.5" 137 mm / 5.4" 140 mm / 5.5" 137 mm / 5.4"
Rear Shock Size:
210 X 50 210 X 50 210 X 50 210 X 50 210 X 50 210 X 50 210 X 50 210 X 50
Front Center:
731 mm / 28.8" 731 mm / 28.8"
761 mm / 30" 761 mm / 30" 790 mm / 31" 790 mm / 31" 828 mm / 33" 828 mm / 33"
BB Height based on Tire OD:
750 mm/ 29.5" 750 mm/ 29.5" 750 mm/ 29.5" 750 mm/ 29.5" 750 mm/ 29.5" 750 mm/ 29.5" 750 mm/ 29.5" 750 mm/ 29.5"
951 Trail
TITLE:
42380 Rio Nedo
Temecula, CA 92590-3708 USA
TEL: 1.951.296.9596
Intense Cycles
1
REV:
1 OF 1
SHEET:
951 Trail Geometry - Rev 1
PART NO.
UNITS: MM (UNLESS NOTED)
DO NOT SCALE DRAWING
SCALE: 1:3
A0
SIZE:
FILENAME:
DO NOT MANUALLY UPDATE
QUAL ENG
MFG ENG
RELEASED
CHECKED
DRAWN
DATE
NAME
COPYRIGHT © 2013 BY Intense Cycles Co
These drawings, any and all specifications and data herein contained and the products manufactured in
accordance with the said drawings, specifications and data are the exclusive property of Intense Cycles of
Temecula, CA (USA), in accordance with the provisions of the National laws and International Conventions
for the protection of Intellectual Property. No disclosure, copy, use, manufacture, advertising, and sale of the said
drawings, specifications, data and products are permitted without the prior written consent of Intense Cycle Co.
1.5
0.8
0.5
0.2
.1
TOLERANCE
1
UNTOLERANCED ANGLE DIMENSIONS
OVER 300 UP TO 1000
OVER 100 UP TO 300
OVER 30 UP TO100
OVER 10 UP TO 30
FROM 0 UP TO 10
LENGTH DIMENSIONS
UNTOLERANCED LENGTH DIMENSIONS (mm)
FINISH:
ALL DIMENSIONS CONTAINED ON THIS PRINT ARE SPECIFIED IN THE FULLY FINISHED
CONDITION. MANUFACTURER MAY NEED TO MAKE CHANGES TO TOLERANCES TO
ALLOW FOR MATERIAL BUILD-UP/REMOVAL AS A RESULT OF FINISHING PROCESS.
FINISHED PRODUCT MUST MATCH PRINT SPECIFICATIONS.
951 Trail
10/23/2020
CK
GEOMETRY
GUIDE TO FLIP CHIP
The 951 TRAIL has a great feature called a ‘Flip Chip’. The Flip Chip allows you to alter the geometry



down to personal preference, riding style and the type of terrain you normally ride on. Follow the
steps below, or check out our Tech Video at intense951.com/pages/techvideos
2322
951
TRAIL
HIGH SETTING (MM / INCH)
SIZE SMALL MEDIUM LARGE EXTRA LARGE
    
    
    
    
    
    
    
    
    
    
    
    
    
LOW SETTING
SIZE SMALL MEDIUM LARGE EXTRA LARGE
    
    
    
    
    
    
    
    
    
    
    
    
    
HOW TO...
FLIP THE CHIP
01
loosen and remove the drive side RT Nut.
03

the front shock bolt with 4mm Allen key in right
hand, push down on rear shock and lower the
back of the shock out of the way, then snug the
front shock bolt to hold shock and prevent it from

04
spacers. Upper link spacers have internal





and shock, torque all hardware to corresponding
values in table shown on page 29.
02

www.intense951.com
FRAME SPECS COMPONENT LIST
SHOCK SPECS
   
  
  
 
 
   
  
  
 
   
 
  
NOTE: The 951 TRAIL is designed around the use of a single chainring only.

 
 
 

Please visit: intense951.com/pages/bikemanuals
the components listed above.
  
Stroke: 50mm
 
 

FORK




  

ROTORS

  


CASSETTE
  

SPOKES

TIRES

SEATPOST

INTENSE 951 TRAIL 29” 140mm Travel



INTENSE Recon 45mm
INTENSE Recon 780mm width

TRP Slate T4 Callipers and Levers, Front and Rear
TRP 180mm. Front and Rear






INTENSE Alloy






    
COMPONENT MANUAL ONLINE RESOURCE
2524 www.intense951.com
LOOKING AFTER YOUR BIKE
MAINTENANCE

maintenance to sustain the level of performance your frame was designed around. Proper care will
also ensure the bike is safe to ride at all levels. It is important to read and understand the carbon

ride. These will not only help to limit or avoid costly repairs but will also help to avoid injury due to
service neglect and component failure.
CARBON CARE
INTENSE, LLC employs advanced composite techniques and material in our frames which do require

each frame is designed around. Not following these guidelines will decrease the level of performance
and possibly cause injury or death.

washers, abrasive cloths or cleaners.

 

• Never clamp any part of a carbon frame in a bike stand or car rack.


 
 

the carbon.
• Never ream or face a carbon frame.


     
or 1 Month or 6 Months 1 Year
TIRES  
sidewalls for tears and punctures
  
  
    
   
   
   
SPOKES    
   
    
SEATPOST     
    
 
    
 
    
 
    
 
    
    
for stretching
     
MAINTENANCE SCHEDULE
2726 www.intense951.com
      
1 Crush Tube 130758 Crush Tube Lower Link 1 N/A
      
      
     
     
      
      
     
     
      
      
     
      
     
15 Crush Tube 130847 Crush Tube Top Link 1 N/A
      
17 Carbon Top Link 130859 Carbon Top Link 1 N/A
      
     
     
     
   
22 Push Rivet 140038 Push Rivet 1 N/A
     
24 Seat Collar 340342 Seat Collar 1 N/A
     
     
     
     
     
     
     
     
     
     
     
     
     
     
     
     
     
     
INTENSE 951 TRAIL
PARTS LISTINGS
2928 www.intense951.com
INTENSE 951 TRAIL
PARTS KITS
3130
AXLE KIT IT150125 Axle Kit Rear CNC 148 x 12 Boost With Hidden Lever 951 Series TRAIL
    
BEARING KIT LOWER IT340193 Bearing Rebuild Kit Lower 951 Series TRAIL
1 IT340193 Crush Tube Lower Link
    
    
BEARING KIT UPPER IT150106 Bearing Rebuild Kit Upper 951 Series TRAIL
    
    
  TRAIL
    
    
    
    
    
    
HANGER KIT IT340177 Derailleur Hanger Kit 951 Series XC
    
    
HARDWARE KIT LOWER IT150025 Link Kit Lower Hardware Titanium 951 Series TRAIL
    
    
    
    
    
    
    
    
  
LINK KIT LOWER IT150035 Link Kit Lower Complete Forged 951 Series TRAIL
    
LINK KIT UPPER IT150034 Link Kit Upper Complete Carbon 951 Series TRAIL
    
SEAT COLLAR IT340210 Seat Collar Bolted 951 Series TRAIL
24 IT340210 Seat Collar
    
HARDWARE KIT UPPER IT150024 Link Kit Upper Hardware 951 Series TRAIL
    
    
    
    
    
    
    
    
    
    
    
  
www.intense951.com
NEED HELP?
DO NOT RETURN TO THE STORE
call us at: +1 951.307.9211
or email: [email protected]
our rider support team looks forward

to helping with any questions.

This manual suits for next models

2

Other Intense Bicycle manuals

Intense Spider 275 CARBON BOOST User manual

Intense

Intense Spider 275 CARBON BOOST User manual

Intense 951 GRAVEL 2023 User manual

Intense

Intense 951 GRAVEL 2023 User manual

Intense SNIPER T ELITE User manual

Intense

Intense SNIPER T ELITE User manual

Intense RECON MX User manual

Intense

Intense RECON MX User manual

Intense 2022 TAZER MX User manual

Intense

Intense 2022 TAZER MX User manual

Intense SNIPER XC FRO User manual

Intense

Intense SNIPER XC FRO User manual

Intense TRACER 279 EXPERT User manual

Intense

Intense TRACER 279 EXPERT User manual

Intense 951 TRAIL 2023 User manual

Intense

Intense 951 TRAIL 2023 User manual

Intense TAZER ALLOY PRO User manual

Intense

Intense TAZER ALLOY PRO User manual

Intense PRIMER S User manual

Intense

Intense PRIMER S User manual

Intense Primer 29 2019 User manual

Intense

Intense Primer 29 2019 User manual

Intense M 2022 Series User manual

Intense

Intense M 2022 Series User manual

Intense DJ 22024 User manual

Intense

Intense DJ 22024 User manual

Intense TRACER 29 PRO 2022 User manual

Intense

Intense TRACER 29 PRO 2022 User manual

Intense PRIMER 275 EXPERT 2022 User manual

Intense

Intense PRIMER 275 EXPERT 2022 User manual

Intense TRACER T275 CARBON User manual

Intense

Intense TRACER T275 CARBON User manual

Intense UZZI User manual

Intense

Intense UZZI User manual

Intense Sniper T User manual

Intense

Intense Sniper T User manual

Intense m16 User manual

Intense

Intense m16 User manual

Intense TAZER MX ALLOY PRO User manual

Intense

Intense TAZER MX ALLOY PRO User manual

Popular Bicycle manuals by other brands

ZERODE TANIWHA user manual

ZERODE

ZERODE TANIWHA user manual

MAXBIK MX-18 user manual

MAXBIK

MAXBIK MX-18 user manual

SOBOWO FAT user manual

SOBOWO

SOBOWO FAT user manual

EMG Speedy Go instruction manual

EMG

EMG Speedy Go instruction manual

FiT FLYER instructions

FiT

FiT FLYER instructions

DAHON JACK - 2009 manual

DAHON

DAHON JACK - 2009 manual

Specialized BICYCLE owner's manual

Specialized

Specialized BICYCLE owner's manual

Derby cycle Pedelec Impulse Evo user guide

Derby cycle

Derby cycle Pedelec Impulse Evo user guide

Polaris EV501 manual

Polaris

Polaris EV501 manual

STONBIKE SUPER H user manual

STONBIKE

STONBIKE SUPER H user manual

Gazelle Orange Pure Innergy user manual

Gazelle

Gazelle Orange Pure Innergy user manual

DESTRO STEALTH ELITE BMX manual

DESTRO STEALTH

DESTRO STEALTH ELITE BMX manual

FAFREES F20 user manual

FAFREES

FAFREES F20 user manual

Chillafish Bunzi user manual

Chillafish

Chillafish Bunzi user manual

BOLD Unplugged 160 29 manual

BOLD

BOLD Unplugged 160 29 manual

Velomobile World Bulk MK1 instruction manual

Velomobile World

Velomobile World Bulk MK1 instruction manual

Mondraker Bicycle owner's manual

Mondraker

Mondraker Bicycle owner's manual

Porsche eBike Cross 2020 manual

Porsche

Porsche eBike Cross 2020 manual

manuals.online logo
manuals.online logoBrands
  • About & Mission
  • Contact us
  • Privacy Policy
  • Terms and Conditions

Copyright 2025 Manuals.Online. All Rights Reserved.