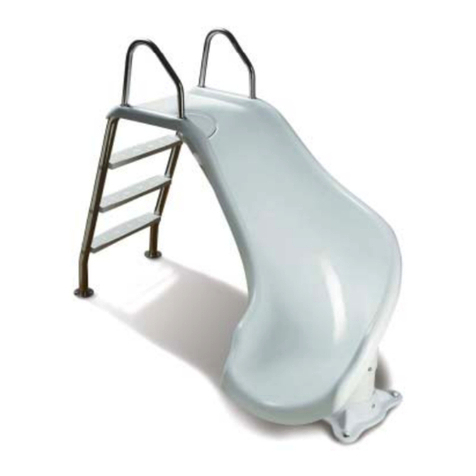
Inter-fab X-STREAM 2 SLIDE Programming manual

XS2-IM Rev. 6/11 (SBK-XS2 INSTALL)
3 0 5 0 S . A L V E R N O N W A Y • T U C S O N , A Z 8 5 7 1 3
520.790.7040 • 800.737.5386 • FAX 520.790.7127
i n t e r - f a b . c o m
X - S T R E A M 2 ™S L I D E
Assembly & Installation Instructions
IMPORTANT
THESE INSTRUCTIONS
MUST REMAIN WITH
THE SLIDE OWNER!
NOTE The stub-up location
for the X-Stream 2 slide is in
a different position than the
first generation X-Stream
slide. If you need X-Stream 1
information, please contact
Customer Service at:
1-800-737-5386.

I N S T A L L A T I O N M A N U A L X - S T R E A M 2 ™ S L I D E
1
XS2-IM Rev. 6/11 (SBK-XS2 INSTALL)
TABLE OF CONTENTS
Important Notices to the Installer..............................................2
Intended Use Instructions ........................................................3
Water Safety Envelope.............................................................4
Slide Placement & Footprint Diagrams - Left Turn .......................5
Slide Placement & Footprint Diagrams - Right Turn......................6
Slide Components ...................................................................7
Step 1: Attach Ladder Foot to Ladder .......................................
Step 2: Attach Ladder to Entry Section......................................9
Step 3: Attach Handrails to Ladder & Entry Section ...............9-11
Step 4: Attach Feet to Legs...................................................12
Step 5: Assemble the Flume Sections.................................12-13
Step 6: Alignment of Flume Sections .......................................13
Step 7: Attach Legs to Flume.................................................13
Step : Attach Entry Section & Ladder to Flume .......................14
Step 9: Anchor Slide to Deck .................................................15
Step 10: Connect Water Supply System ..................................15
Step 11: Finishing Steps........................................................16
Final Inspection Check List .....................................................16
Slide Care & Maintenance......................................................16
Paver Kit Information.............................................................17
Exploded View of X-Stream 2 Slide ..........................................1
Parts List (corresponds with exploded view)..............................19
Hardware Kit Information.......................................................20
Notes..................................................................................21
Inter-Fab Limited Warranty.....................................................22

I N S T A L L A T I O N M A N U A L X - S T R E A M 2 ™ S L I D E
2
XS2-IM Rev. 6/11 (SBK-XS2 INSTALL)
THE X-STREAM 2 SLIDE CAN BE ASSEMBLED AND INSTALLED IN EITHER A LEFT
OR RIGHT TURN CONFIGURATION.
INTER-FAB HIGHLY RECOMMENDS THAT YOU READ THE ENTIRE INSTALLATION
MANUAL BEFORE YOU ATTEMPT THE INSTALLATION OF THE X-STREAM 2 SLIDE.
YOU MUST USE THE PROVIDED ANTI-SEIZE ON ALL THE BOLTS AND ALL-THREADS
OR THE NUTS MAY SEIZE.
INTER-FAB RECOMMENDS THAT A TWO-PERSON CREW ASSEMBLE THE X-STREAM
2 SLIDE.
INTER-FAB HIGHLY RECOMMENDS THAT YOU FOLLOW THE INSTALLATION
SEQUENCE IN THIS MANUAL.
THE SLIDE POSITIONING GRAPHICS ON PAGES 5 AND 6 ARE FOR REFERENCE
ONLY. INTER-FAB STRONGLY RECOMMENDS THAT ONLY THE FULLY AND
CORRECTLY ASSEMBLED SLIDE BE USED TO LOCATE THE POSITIONS FOR THE
ANCHOR BOLTS AS DESCRIBED ON PAGE 14.
IMPORTANT NOTICES TO THE INSTALLER

I N S T A L L A T I O N M A N U A L X - S T R E A M 2 ™ S L I D E
3
XS2-IM Rev. 6/11 (SBK-XS2 INSTALL)
INTENDED USE INSTRUCTIONS
1. Everyone who uses this slide must know, understand and follow these instructions
2. The ANSI/NSPI-4 2007 standard for above ground pools prohibits the use of slides or diving boards on
above ground pools.
3. This slide is designed for residential inground pool use ONLY. This slide may not be used on any
above ground pool. Such use of this slide may result in serious injury or death.
4. This slide should never be installed on above ground pools, ponds, floating docks or platforms, boat docks
or houseboats or any natural body of water.
5. This slide should never be installed on any commercial, public or semi-public pool.
6. Be familiar with the shape and depth of the pool before you slide. This slide should only be used with the
proper water safety envelope, as described in Diagrams A, B & C on page 4 and in accordance with the
slide positioning Diagrams D, E, F and G on pages 5 and 6.
7. Because the slide may only be used in water 4’ deep or greater, all slide users must be able to swim in
deep water.
. Weight limit for this slide is 250 pounds, no slider weighing more than 250 pounds may use this slide.
9. The surface of the slide is very slippery when wet; USE CAUTION when entering the slide and when
transitioning from standing to sitting.
10. Slide in a feet first sitting position ONLY.
11. IMPORTANT sliding headfirst is prohibited: serious spinal injury resulting in paralysis or death can result.
12. Maintain adult supervision at all times.
13. Only one person at a time is allowed on the slide; this includes the ladder.
14. Be sure the water delivery system is on and lubricating the slide prior to use.
15. Collision with another swimmer or a diver can result in serious injury or death for one or both persons:
Before sliding, always make sure that the path in front of the slide is free from any (including submerged)
obstructions including other people or objects in the pool such as rafts, inner tubes etc. When a diving
board is also present, make sure you do not use the slide while someone is on or using a diving board.
Take turns.
16. No roughhousing or horseplay should be allowed on the slide at any time.
17. Do not stand, jump or dive from any part of the slide.
1 . Do not slide on objects such as rafts or inner tubes. doing so greatly increases your risk of injury.
19. Do not slide through or at objects such as rafts or inner tubes, doing so greatly increases your risk of
injury.
20. Do not use this slide if physically impaired or handicapped without your doctor’s permission.
21. Do not use this slide with a history of heart conditions, seizures, back problems, fainting or fear of
heights.
22. Do NOT use this slide if you are pregnant.
23. Do not drink alcohol and use this slide.
24. Don’t take chances, inspect the slide at least once a year (see the slide inspection list on page 16, do
not use the slide if any part becomes loose, damaged, weakened or broken. If necessary, before using
the slide again, have it inspected and repaired by a competent professional familiar with pool slides.
SLIDE IN A SITTING
POSITION ONLY
Face forward on the slide, holding the legs and arms
with the palms of your hands forward and tilted up.
WARNING SERIOUS INJURY OR DEATH CAN RESULT FROM THE
IMPROPER INSTALLATION OR USE OF THIS SLIDE.
When installed according to these instructions, this slide conforms to
Consumer Product Safety Standard Guidelines.
DO NOT SLIDE HEAD FIRST SERIOUS INJURY
CAN RESULT DEEP WATER
SWIMMERS
ONLY

I N S T A L L A T I O N M A N U A L X - S T R E A M 2 ™ S L I D E
4
XS2-IM Rev. 6/11 (SBK-XS2 INSTALL)
DIAGRAM A
(NOT TO SCALE)
DIAGRAM C
(NOT TO SCALE)
Minimum Water Safety Envelope
3'
4'6"9'
4'
Point A
4'
WATER SAFETY ENVELOPE
A minimum water depth of three feet (3') under the exit
of the slide which increases to a depth of four feet (4')
at point A which is located four feet six inches (4'6")
from the back wall of the pool. A minimum depth of
four feet (4') must be maintained at a distance of nine
feet (9') along the centerline of the slide from point A.
The above described water depth profile shall extend a
minimum of three feet three inches (3'3") on either
side of the centerline of the slide.
(See Diagrams A, B & C)
13'6"
16˚
20" Max
Level Deck
Water Level
DIAGRAM B
(NOT TO SCALE)
Minimum Slide
Clearance Area
ALL SLIDES SHOULD
BE GROUNDED
Check your local electrical
code requirements.
X-STREAM 2

I N S T A L L A T I O N M A N U A L X - S T R E A M 2 ™ S L I D E
5
XS2-IM Rev. 6/11 (SBK-XS2 INSTALL)
SLIDE PLACEMENT DIAGRAM & FOOTPRINT DIAGRAM
X-Stream 2 S ide - Left Turn
DIAGRAM D
(NOT TO SCALE)
DIAGRAM E
(NOT TO SCALE)
NOTE The stub-up location
for the X-Stream 2 slide is in
a different position than the
first generation X-Stream
slide. If you need X-Stream 1
information, please contact
Customer Service at:
1-800-737-5386.

I N S T A L L A T I O N M A N U A L X - S T R E A M 2 ™ S L I D E
6
XS2-IM Rev. 6/11 (SBK-XS2 INSTALL)
SLIDE PLACEMENT DIAGRAM & FOOTPRINT DIAGRAM
X-Stream 2 S ide - Right Turn
DIAGRAM F
(NOT TO SCALE)
DIAGRAM G
(NOT TO SCALE)
NOTE The stub-up location
for the X-Stream 2 slide is in
a different position than the
first generation X-Stream
slide. If you need X-Stream 1
information, please contact
Customer Service at:
1-800-737-5386.

I N S T A L L A T I O N M A N U A L X - S T R E A M 2 ™ S L I D E
7
XS2-IM Rev. 6/11 (SBK-XS2 INSTALL)
IMPORTANT For a Left Turn Slide, Flume A–B is upper flume, and C–D is the lower flume,
in that order. For a Right Turn Slide, C–D is the upper flume and A–B is the lower flume.
Flumes are labeled A–B or C–D in small letters centered on flanges.
A–B Flume C–D Flume
Exit Section Entry Section Straight Foot
Pedestal (2) 16˚ Foot
Pedestal (1)
Step Assembly Long Leg Short Leg
Handrail (2)
1–Right; 1–Left Water Outlet
(comes with entry section)
X-STREAM 2 SLIDE COMPONENTS

I N S T A L L A T I O N M A N U A L X - S T R E A M 2 ™ S L I D E
XS2-IM Rev. 6/11 (SBK-XS2 INSTALL)
LIST OF REQUIRED TOOLS
Tools required for assembly and installation of X-Stream 2 slide
NOTE USE PROVIDED ANTI-SEIZE ON ALL BOLTS!
1. Hammer
2. 3/8" drive ratchet
3. 3/8" x 6" ratchet extension
4. 1/2" deep socket (deep socket is necessary)
5. 9/16" socket
6. 9/16" box end ratchet wrench
7. Drill with 3/8" masonry bit
8. Tape measure
9. PVC Pipe Cutter
ASSEMBLY AND INSTALLATION INSTRUCTIONS
For left turn slides, flume A–B is the upper flume and C–D is the lower flume, in that order.
For right turn slides, flume C–D is the upper flume and A–B is the lower.
STEP ONE Attach 16˚ Foot Pedesta to Step Assemb y
TIP The leg foot pedestal for the ladder has a slant inside, the other 2 foot pedestals
do not slant. The ladder foot pedestal only utilizes 3 bolts while the other 2 foot
pedestals utilize 4 bolts.
TIP Use the provided anti-seize on all the bolts used to assemble this slide or the
nuts may seize.
Utilizing hardware kit XS-101-SS, attach the step foot pedestal to the step assembly using
(2) 3/ ” x 2” bolts and (1) 3/ ” x 2.5” bolt. The longer bolt location is just below the water
supply hose hole located at the bottom of the ladder. (See Fig. 1) Place a flat washer over
a 3/ ” bolt; then push bolt through the pre-drilled holes in the PVC ladder and ladder foot,
then place flat washer then 3/ ” nylon locking nut and tighten.
Fig. 1
Note Use slide box and packaging during assembly to protect slide components from
damage from the decking surface.

9
XS2-IM Rev. 6/11 (SBK-XS2 INSTALL)
2” 2 1/2”
I N S T A L L A T I O N M A N U A L X - S T R E A M 2 ™ S L I D E
STEP TWO Attach the Ladder to the Entry Section
Thread the flex PVC hose from the entry section through the step tube assembly and out
the pre-drilled hole under the bottom step. Utilizing hardware kit XS-103-SS, attach the lad-
der to the entry section on the ground. Be careful not to scratch the slide; use the card-
board box the slide arrived in for protection. Insert the top of the ladder into the ladder
receiver on the entry section and align the holes. (See Fig. 2) Place a 3/ ” lock washer
over a 3/ ” bolt; then 3/ ” flat washer then push bolt through the pre-drilled holes in the
PVC ladder into the nuts embedded in the entry section leg receiver, hand tighten only.
(These will be tightened after attachment to flume/exit section.
Fig. 2 Ladder Step Support Sub-Assembly
STEP THREE Attach the Handrai s to the Ladder and Entry Section
TIP Install the handrails as shown in figure below.
TIP Hand tighten the all-threads into the handrails only, do not use any mechanical means
such as a wrench or pliers to tighten the all-threads.
TIP There are 7 all-threads utilized on each handrail. There are 2 different lengths of all-
threads used on each handrail. See Fig. 3 to match actual size. (XS2-105-SS Kit)
TIP The offset at the bottom of each handrail faces in as the step attachment point is nar-
rower than the entry section.
Fig. 3 Fig. 4 Back View of Ladder Section Assembly

I N S T A L L A T I O N M A N U A L X - S T R E A M 2 ™ S L I D E
10
XS2-IM Rev. 6/11 (SBK-XS2 INSTALL)
STEP THREE Attach the Handrai s to the Ladder and Entry Section - CONT.
Insert the correct length of all-thread into the nuts embedded in the handrails then attach
the handrails as illustrated. (See Fig. 5 and 6)
Hand tighten all-thread into each of the 7
locations on the handrails. Ensure correct
length of all-thread is used at each location.
5/16” x 2” all-thread (5 each as shown)
5/16” x 2-1/2” all-thread (2 each as shown)
Make sure to use provided anti-seize on the
all-thread before inserting into the embedded
nuts.
Insert handrail into the top section first as
illustrated. Push or pull the handrail apart
until the all-threads pass through the 5
holes in the entry section and through the
holes drilled in the upper 2 steps.
Make sure to use the provided anti-seize
on the flange nut threads before attaching
to the all-thread.
2-1/2”x5/16”
2”x5/16”
Fig. 5
Fig. 6
Fig. 6

I N S T A L L A T I O N M A N U A L X - S T R E A M 2 ™ S L I D E
11
XS2-IM Rev. 6/11 (SBK-XS2 INSTALL)
These 5 locations on the entry section that
receive a flange nut only. A flat washer is not
needed. Hand tighten.
Make sure to use the provided lubricant on
the all-threads before attaching the flange
nuts.
These two locations require a flat washer,
flange nut and rubber cap. Hand tighten.
Make sure to use the provided lubricant on
the all-threads before attaching the flange
nuts.
NOTE 1/8” – 1/4” of the all-threads will
extend through the flange nut.
Now tighten all 7 nuts on each handrail and
repeat for other handrail.
Don’t forget the protective rubber caps.
(Back of steps only.)
Fig. 7
Fig. 8
Fig. 8
STEP THREE Attach the Handrai s to the Ladder and Entry Section - CONT.

I N S T A L L A T I O N M A N U A L X - S T R E A M 2 ™ S L I D E
12
XS2-IM Rev. 6/11 (SBK-XS2 INSTALL)
STEP FOUR Attach the Foot Pedesta s to the Legs
TIP Both PVC legs have the same hole drill pattern at each end. There is no top/bottom
orientation.
Insert one end of the long PVC leg onto the foot pedestal, align the holes, utilizing hardware kit
XS-101-SS, place a flat washer over a 3/ ” bolt; then push bolt through the pre-drilled holes
in the PVC leg and the foot pedestal, then place flat washer then 3/ ” nylon nut and tight-
en. Repeat the process for the short PVC leg.
STEP FIVE Assemb e the F ume Sections
TIP Assemble the flume sections on the ground. Be careful not to scratch the slide; use
the cardboard box for protection. Hand tighten the flume bolts for now, they will be fully
tightened once the flume is correctly aligned.
Right Turn or Left Turn Assembly
The flumes are labeled A–B or C–D in small letters on the flanges without the gaskets.
To assemble a Left Turn slide: flume A–B will be the upper flume and C–D will be the lower
flume, assembled in that order.
To assemble a Right Turn slide: flume C–D will be the upper flume and A–B will be the lower
flume, assembled in that order.
TIP There are 3 factory installed gaskets. Ensure that a gasket is in place on the entry
section, and the “B” end of the A–B flume and the “D” end of the C–D flume.
Utilizing hardware kit XS2-102-SS, attach the lower flume to the upper flume. Align the five
holes in the flange, push 3/ ” bolt through a flat washer, then through the pre-drilled holes
in the flanges, then push bolt through a flat washer, then a lock washer and through a 3/ ”
nut. Hand tighten at this time.
Fig. 9

I N S T A L L A T I O N M A N U A L X - S T R E A M 2 ™ S L I D E
13
XS2-IM Rev. 6/11 (SBK-XS2 INSTALL)
STEP FIVE Assemb e the F ume Sections – CONT.
Utilizing hardware kit XS2-102-SS, attach the exit section to the lower flume section. Align
the five holes in the flange, push 3/ ” bolt through a flat washer, then through the pre-drilled
holes in the flanges, then push bolt through a flat washer, then a lock washer and through
a 3/ ” nut. Hand tighten at this time.
STEP SIX A ignment of F ume Sections
There is enough tolerance in the flange connections to provide a smooth and even transition
of the sliding surface between the flume sections.
Once the two flume sections and the exit section are bolted together hand tight, then gently
push or pull on the flume sections to ensure a smooth even alignment of the sliding surface.
Next, starting with the exit section, tighten the center bolts first and then tighten the two
outer bolts maintaining a smooth sliding surface.
Repeat this process on the flange between the upper and lower flume.
Fig. 10
STEP SEVEN Attach the Legs to the F ume
Insert the top of the long leg into leg receiver of the upper flume, and the top of the short leg
into the leg receiver of the lower flume. Align holes, then Utilizing hardware kit XS-103-SS,
place a 3/ ” lock washer over a 3/ ” bolt, then 3/ ” flat washer, then push bolt through
the pre-drilled holes in the PVC ladder into the nuts embedded in the leg receiver, and hand
tighten. Do not fully tighten nuts at this time.
Fig. 11 Flumes/Exit Assembly

I N S T A L L A T I O N M A N U A L X - S T R E A M 2 ™ S L I D E
14
XS2-IM Rev. 6/11 (SBK-XS2 INSTALL)
TIP Hand tighten the all-threads into the
entry section flange only. Do not use any
mechanical means such as a wrench or
pliers to tighten the all-threads.
With two people, stand the assembled
Flumes/Exit Assembly upright and balance
on the two legs. Lean the Ladder & Entry
Section against the Upper Flume Section.
Align the 5 all-threads in the entry section
with the 5 holes in the Upper Flume Section
and gently push them through. Place a 3/ ”
flat washer, then lock washer and then a
3/ ” nut on each all-thread. Ensure a smooth
even alignment of the sliding surface and
tighten the nuts in an alternating pattern
until all the nuts are uniformly tight.
Do not over tighten.
STEP EIGHT Attach the Entry Section & Ladder to the F ume
Utilizing hardware kit XS2-102-SS, thread the (5) 3/ ” x 2.5” all-threads into the embedded
nuts in the entry section flange. The all-threads will thread in about 3/4” with approximate-
ly 1-3/4” protruding. (See Fig. 12)
Fig. 12
Fig. 13

I N S T A L L A T I O N M A N U A L X - S T R E A M 2 ™ S L I D E
15
XS2-IM Rev. 6/11 (SBK-XS2 INSTALL)
STEP NINE Anchoring the S ide to the Deck
Position the assembled slide on the deck in its correct and final position, then ensure that
the long and short legs are plumb by checking each leg with a bubble level on two sides at
90˚ to each other. Then utilizing a slope finder, ensure that the Ladder is at a 16˚ slope from
vertical as shown in Diagram C on page 4. Once the legs and ladder are correctly oriented,
tighten the 4 bolts on each upper PVC leg and step assembly (12 bolts total).
Next, recheck the alignment of the sliding surface, if necessary, loosen the flume nuts and
gently adjust for a smooth, even sliding surface. Once aligned correctly, re-tighten the flange
nuts in an alternating pattern until the nuts are uniformly tightened and the flume gaskets
are fully compressed. Do not over tighten.
Now that the slide is in its correct and final position, the 2 legs are plumb, and the ladder
is at 16˚ slope, use the feet as a template to carefully mark the locations for all the anchor
bolts. Since it is not possible to drill the anchor bolt holes with the slide in place, gently move
the slide to one side allowing sufficient room to drill the anchor bolt holes. Anchor bolts are
in Hardware Kit XS-104-SS.
TIP Be careful when drilling the holes for the anchor bolts so as not to drill completely
through the deck. It is also very important not to drill too deep. The bolt holes must be
drilled to the proper depth so that 1” of the anchor bolts extend above the deck.
Gently reposition the slide. Position feet over the anchor bolts, then tighten the anchor bolt
nuts. Check and re-tighten ALL SLIDE CONNECTIONS at this time.
TIP All 3/ ” Anchor Bolts must extend
1” above deck.
Fig. 14
STEP TEN Connect the Water Supp y System
Connect the bottom 1” PVC Flex Pipe to the customer installed water stub-up, as necessary.
It is recommended that the provided in-line valve be installed between the slide and the water
source so that the water flow can be adjusted as necessary.

I N S T A L L A T I O N M A N U A L X - S T R E A M 2 ™ S L I D E
16
XS2-IM Rev. 6/11 (SBK-XS2 INSTALL)
STEP ELEVEN Finishing Steps
• Install protective caps on all exposed bolts.
• Turn water supply on and check water flow.
• Clean Slide and dispose of all debris caused by the installation.
HINT: It is recommended that after several days of use, all visible bolted connections be
re-tightened as needed.
FINAL INSPECTION / ANNUAL INSPECTION CHECK LIST
1. Measure the depth and width of the water in front of the slide as well as the slide’s exit
height above water to ensure they conform to Diagrams A, B, and C on page 4.
2. Check the slide’s position on the deck and ensure it conforms to the diagrams on pages 5-6.
3. Ensure the slide is securely anchored to the deck and stable.
4. Inspect the runway for visible cracks or tears.
5. Inspect the runway and ensure a smooth, even sliding surface. Ensure the gaskets
between the flanges are compressed uniformly.
6. Inspect the runway for any water leaks and adjust water flow for even water distribution
across sliding surface. Ensure water does not splash outside the runway, and all water
running off the slide falls into the pool.
7. Inspect the slide for any loose or corroded fasteners.
. Ensure there is a protective rubber cap on all exposed nuts and bolts.
9. Inspect all step-attachment points and ensure the steps are seated on the nylon support
rods correctly.
10. Inspect the ladder handrails for rigidity and attachment. Can they be pulled out of their
sockets?
11. Inspect the slide for sharp edges or protrusions on the ladder, deck flanges, handrails
or runway.
12. Make sure the slide warning label is securely adhered to the slide.
NOTE this insta ation is not comp ete unti you, the insta er, gives the owner’s manua
to the customer and then reviews the intended use instructions with them.
X-STREAM™ SLIDE CARE & MAINTENANCE
Your slide requires periodic maintenance to keep it looking like new.
• Wash monthly or more frequently, if needed. Be careful to keep cleaning material from
entering the pool.
• Wash with a mild soap such as hand dishwashing soap, avoid using strong cleaners or
abrasives. Avoid strong alkaline (such as tri-sodium phosphate) or highly acidic cleaners.
Avoid bleach and ammonia.
* These suggestions and data based on information believed to be reliable, from our raw materials
manufacturers. They are offered in good faith, but without guarantee, as conditions and methods
of use and procedures are beyond our control.

I N S T A L L A T I O N M A N U A L X - S T R E A M 2 ™ S L I D E
17
XS2-IM Rev. 6/11 (SBK-XS2 INSTALL)
Fig. 15
Example of Slide Foot on Concrete Pad (Side View)
CONCRETE
24” min.
Layer of setting
material to
secure pavers
to concrete.
PAVERS 3”
max.
Drawing Is
NOT To Scale
HEIGHT OF WEDGE
ANCHOR ABOVE
FINAL DECK
SURFACE
When installing an Inter-Fab X-Stream 2™ slide using a paver kit, you must ensure that all
standard installation requirements are met. The slide must be compatible with the type of
pool on the intended installation and all ANSI/NSPI-4 2007 requirements must be met.
Refer to installation manual.
Figure 16 illustrates an example of the minimum concrete pads recommended for the
X-Stream 2 ™ slide. Specific slide positions and concrete pad orientations may vary. Make
sure to allow for water stub up location near the ladder foot on the X-Stream 2 ™ slide
when pouring the concrete pad for the ladder foot. In order to ensure proper placement,
you will need to set the slide up first to determine where the concrete pillars will be located.
Figure 15 shows an example side view of a slide foot and an wedge anchor used in a paver
installation. Pavers can be a maximum of 3” thick. Pavers must be mechanically attached
to the concrete pad using a setting material (such as mortar or thinset for example) that
is no thicker than 3/ ”.
1” of each 3/ ” wedge anchor needs to be exposed above the final deck surface. You will
need to factor in the thickness of your paver (3” MAX.) and the thickness of your setting
material (3/ ” MAX.) for your individual installation. For the 1/2” wedge anchors, you will
leave 1-1/4” exposed above final deck surface.
You will need a 3/ ” masonry bit for the X-Stream 2™ slide.
Inter-Fab Inc. will not be responsible for damage to pavers caused by drilling or
mechanically attaching to concrete pad. Refer to paver manufacturer’s specific
installation instructions before beginning.
WEDGE
ANCHORS
Fig. 16
Minimum Concrete Pads – X-Stream 2™ Slide
(Plan View – NOT to Scale)
Pool Ed e
3 concrete pads are needed:
24” wide x 24” long x 24” deep
Center each foot on one pad. You may
rotate the
square pads
as needed.
X-STREAM 2™ NOTES
• All X-Stream 2™ wedge anchors (12 ea.) are
3/ ” x 7”.
• All wedge anchors must be drilled to a depth
of 6” with 1” of the bolt above the final deck
surface.
24” min.
5” min.
from edge
PAVER KIT INFO – X-STREAM 2

I N S T A L L A T I O N M A N U A L X - S T R E A M 2 ™ S L I D E
1
XS2-IM Rev. 6/11 (SBK-XS2 INSTALL)
X-STREAM 2™ SLIDE (XS-GR-SS)

I N S T A L L A T I O N M A N U A L X - S T R E A M 2 ™ S L I D E
19
XS2-IM Rev. 6/11 (SBK-XS2 INSTALL)
X-STREAM 2™ SLIDE (XS-GR-SS)
NOTES:
X-Stream 2 slide only comes in Summit Gray
X-Stream 2 can turn to the right or the left
DRAWING RE RESENTS THE FOLLOWING ART NUMBERS:
XS-GR-SS
ALL CHART INFORMATION BELOW CORRES ONDS WITH THE DRAWING ON THE REVIOUS AGE.
<---
ITEM # COM ONENT DESCRI TION
XS-GR-SS
XS-101-SS
XS2-102-SS
XS-103-SS
XS-104-SS
XS2-105-SS
STE
ASSEMBLY
HARDWARE KITS/ ARTS KITS – QTY. COUNTS
1 XS-RIGHT FLUME A & B RIGHT HA D FLUME SECTIO 1
2 XS-LEFT FLUME C & D LEFT HA D FLUME SECTIO 1
3 XS-EXIT BOTTOM SECTIO 1
4 XS-E TRY TOP SIDE SECTIO WITH WATER OUTLET 1
5 XS-L HA DRAIL LEFT HA DRAIL WITH X-STREAM LOGO 1
6 XS-R HA DRAIL RIGHT HA DRAIL WITH X-STREAM LOGO 1
7 XS-FOOT PEDESTAL STRAIGHT FOOT PEDESTAL 2
8 XS-16 FOOT PEDESTAL 16 DEGREE FOOT PEDESTAL 1
9 H-6 X 21.250 6" X 21.250" GRAY PVC PIPE SCHEDULE 40 1
10 H-6 X 45.375 6" X 45.375" GRAY PVC PIPE SCHEDULE 40 1
11 H-6 X 71.5 6" X 71.5" GRAY PVC PIPE SCHEDULE 40 1
12 XS-STEP X-STREAM BLOW MOLDED STEP 5
13 H-.463 X .310 CAP GRAY PROTECTIVE CAP 4
14 H-.562 X .390 CAP GRAY PROTECTIVE CAP 11 25 12 12
15 H-SS 3/8 F UT 3/8” FI ISH UT S.S. 15
16 H-SS 3/8 FLT WASHER 3/8” X 1” FLAT WASHER S.S. 22 25 12
17 H-SS 3/8 LOC WASHER 3/8” LOCK WASHER S.S. 15 12 12
18 H-SS 3/8 YLO 3/8” YLO I SERT UT S.S. 11
19 H-SS 3/8 WEDGE 3/8” X 2-3/4” WEDGE A CHOR W/ UT & FLAT WASHER S.S. 12
20 H-SS 3/8 X 3 TAP 3/8” X 3” HEX HEAD TAP BOLT S.S. 10
21 H-SS 3/8 X2-1/2 3/8” X 2-1/2” HEX HEAD BOLT S.S. 1
22 H-SS 3/8-16X2 3/8” X 2” HEX HEAD BOLT S.S. 10 12
23 H-SS 3/8X2-1/2 3/8” X 2-1/2” ALL-THREAD STUD S.S. 5
24 H-SS 5/16 FLA WASHER 5/16” FLAT WASHER S.S. 4
25 H-SS 5/16 HEX FLA GE 5/16” HEX FLA GE UT S.S. 14
26 H-SS 5/16 X 2 5/16” X 2” ALL-THREAD STUD S.S. 10
27 H-SS 5/16 X 2-1/2 5/16” X 2-1/2” ALL-THREAD STUD S.S. 4
28 H-G4C GASKET U-SHAPED GASKET - 3 HOLES 3
29 H-1 BALL VALVE 1" BALL VALVE-SLIP GRAY 1*
30 H- YLO ROD 101 AT YLO ROL 101 .375 DIA. 5*
31 H-1 SPA HOSE GRAY SPA HOSE FOR STEP ASSEMBLY, 10 FT. LE GTH 10*
32 XS2 WATER OUTLET COMES AS PART OF E TRY SECTIO 1*
33 XS-STEP COMP COMPLETE ASSEMBLED STEP, I CLUDES ITEMS 11, 12, 29, 30, & 31 1
34 H-A TI-SEIZE A TI-SEIZE PACKET ( OT SHOW )
* not pictured
HARDWARE NOTE
Use a small dab of
anti seize lubricant
(included) on all bolt
threads.
Other manuals for X-STREAM 2 SLIDE
1
Table of contents
Other Inter-fab Lighting Equipment manuals
Popular Lighting Equipment manuals by other brands

Martin
Martin MAC 700 PROFILE user manual
CIXI ZHONGFA LAMPS
CIXI ZHONGFA LAMPS LN3271P instruction manual

EuroLite
EuroLite AC-300 DMX LED user manual

Fomei
Fomei LED RGB 100D user guide

Health Zenith
Health Zenith DualBrite 4700 Installation and operating instructions

Blizzard Lighting
Blizzard Lighting Motif Risplendi 150 manual
