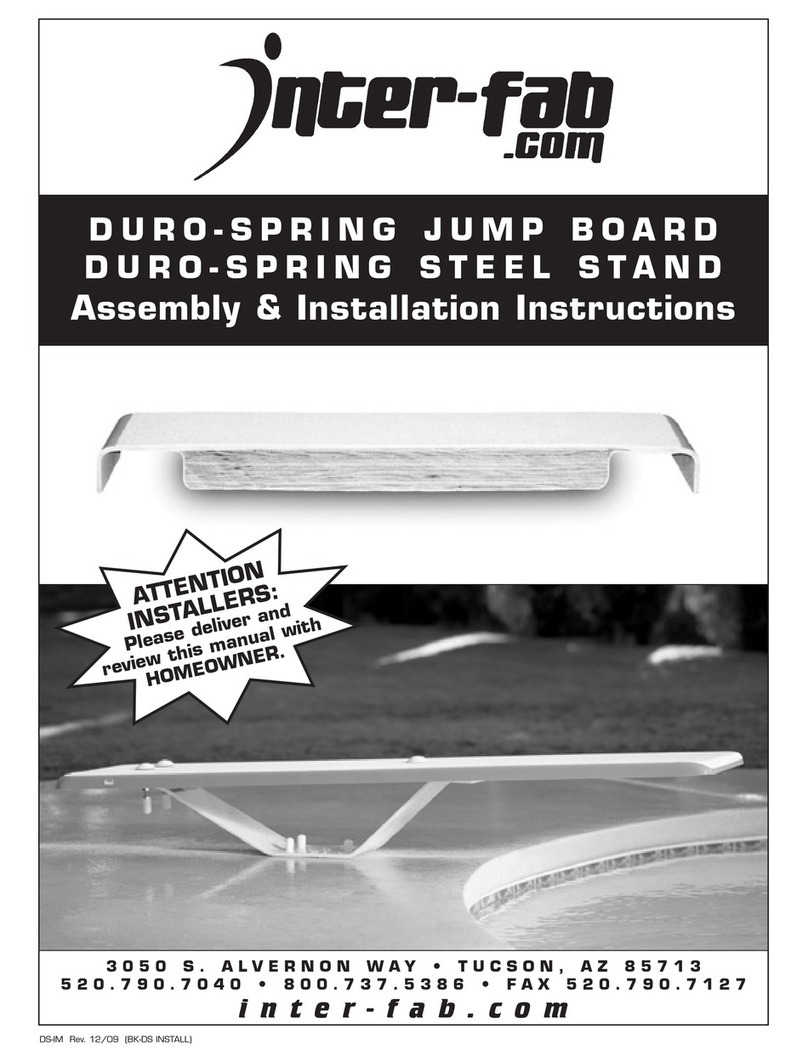
Inter-fab T7 Instruction manual

T7-IM Rev. 10/17 (BBK-T7 INSTAL)
T 7 ™DIVING SYSTEM
Assembly & Installation Instru tions
3050 S. ALVERNON WAY • TUCSON, AZ 85713
520.790.7040 • 800.737.5386 • FAX 520.790.7127
i n t e r - f a b . c o m
ATTENTION
INSTALLERS:
Please deliver and
review this manual with
HOMEOWNER.
V s t nter-fab.com to v ew our nstallat on help v deo.
(V deo does NOT replace nstallat on nstruct ons.)

WARNING: IMPORTANT INSTALLATION INFORMATION
The installation of this pro uct shoul be one only by a license
an professional installer. Installation shoul be one strictly
in conformance with all local buil ing co es, electrical co es
an other buil ing an safety laws an regulations. Among other
things, that your installer shoul carefully analyze the nee to
bon the pro uct to prevent an electrical hazar . Failure to
properly install this pro uct coul result in a angerous con ition,
inclu ing but not limite to electrical an or structural hazar s.
Inter-fab, Inc. isclaims all liability arising from the installation
an the user assumes all risk associate with the installation.
For Technical Support or Assistance,
Contact Customer Service at:
INTER-FAB, INC.
3050 S. ALVERNON WAY
TUCSON, AZ 85713
(800) 737-5386
or visit: www.inter-fab. om
To obtain complete copies of the ANSI/APSP/ICC-5 2011
Stan ar for Resi ential Ingroun Pools or to obtain copies of
the “Plan Your Dive, Steer Up” or “The Sensible Way to Enjoy
Your Ingroun Swimming Pool” contact:
The Asso iation of Pool & Spa Professionals (APSP)
2111 Eisenhower Ave.
Alexandria, VA 22314
(703) 838-0083
or visit: www.theapsp.org
WARNING

INSTALLATION MANUAL T7™ DIVING SYSTEM
1
T7-IM Rev. 10/17 (BBK-T7 INSTAL)
TABLE OF CONTENTS:
Safety First ............................................................................2
Inten e Use Instructions ........................................................3
Important Notices to the Installer..............................................4
Minimum Diving Water Envelope Information...............................5
T7 Placement ........................................................................6
T7 Jig Info & Placement Tips ...................................................7
Step 1: Install Water Feature (optional equipment) ......................8
Step 2: T7 Assembly..........................................................9-10
T7 Explo e View & Parts List................................................11
T7 Care & Maintenance ........................................................12
Article 5 Extracte from ANSI/APSP/ICC-5 2011 ...............13-16
Pages for Notes ...................................................................17
Inter-Fab Limite Warranty.....................................................18

INSTALLATION MANUAL T7™ DIVING SYSTEM
2
T7-IM Rev. 10/17 (BBK-T7 INSTAL)
This Inter-Fab iving boar an stan shall be installe only by a professional swimming pool contractor
or with the irect supervision of a license professional, engineer or architect. Diving boar s may
be installe only on resi ential ingroun swimming pools properly esigne for their use.
Diving boar s that are improperly installe can be very angerous to the user resulting in possible
serious hea an /or spinal column injury, inclu ing the paralysis or eath of the user.
It is very important that this iving boar an stan be installe only on Type 1 or greater pools
buil in strict accor ance with the American National Stan ar for Resi ential Ingroun Swimming
Pools (ANSI/APSP/ICC-5 2011) an in accor ance with the inclu e INTER-FAB RESIDENTIAL
POOL SPECIFICATIONS TABLE 2.
In a ition to the above stan ar an reference table, these installation instructions provi e by
Inter-Fab, Inc. must be iligently followe .
It is also important that any an all warnings provi e with the iving boar be strictly a here to
an poste in a conspicuous location. If not provi e or they are misplace , please purchase
warning signs from your pool contractor or professional pool supply store an post them in a location
that the users of the iving boar can clearly see.
DIVING TIPS: Even the safest equipment must be used properly. Inter-Fab promotes safe diving by
offering these tips on the proper use of your diving board: always dive into water that meets depth
requirements, with arms extended; be aware of the bottom and the walls of the pool; avoid ollisions
with pool toys and floats; and instru t your pool users to always “steer up”. When you begin your
dive you must get ready to steer up. As you enter the water, your arms must be extended over
your head, hands flat aiming up. Hold your head and ar h your ba k.
FOR RESIDENTIAL INGROUND SWIMMING POOL USE ONLY
NO COMMERCIAL, PUBLIC OR SEMI-PUBLIC USE IS ALLOWED
ONLY ONE PERSON ON THE DIVING BOARD AT ONE TIME
MAXIMUM WEIGHT = 300 LBS
Plan Your Dive
Ba k Ar hed
Arms Extended
Head and Hands Up
Hold Diving Form
Steer up for a safe dive.
PLAN YOUR DIVE, STEER UP
SAFETY FIRST!
WARNING

INSTALLATION MANUAL T7™ DIVING SYSTEM
3
T7-IM Rev. 10/17 (BBK-T7 INSTAL)
“A pool is the safest place to swim an a iving boar installe in compliance with manufacturers
instructions an the ANSI/APSP/ICC-5 2011 Stan ar for In-groun Resi ential Pools is the
safest place to ive from. To ensure that you an your family an guests are able to safely enjoy
your iving boar for many years, it is critical that you follow the following instructions.”
DO
1. Know the shape an epth of the pool before
you ive.
2. Make sure that all family members an guests
are familiar with these instructions before they
use your pool an iving boar .
3. Make sure that the iving boar has been
installe in compliance with the Assembly
an Installation Instructions an with the
ANSI/APSP/ICC-5 2011 Stan ar for In-groun
Resi ential Pools. This inclu es the shape an
epth of the pool as well as the height of the
iving boar .
4. Enter feet first the first time.
5. Plan your path to be sure you avoi any other
swimmers, or objects in or un er the water,
such as floats, tires, toys etc.
6. Keep your hea up, arms up an fully exten e
an steer up with your han s.
7. Practice carefully before you ive hea first.
8. Become familiar with the iving boar an its
spring before iving hea first
9. Dive straight ahea , not to the si e of the
boar or pool.
10. Dive from the iving boar only.
11. Make sure that chil ren an non-swimmers
are supervise at all times.
12. Always remember that when you ive you must
steer up.
13. Inspect your iving boar , base an stan on
a regular basis (at least twice a year) an keep
them in proper repair.
14. Contact your ealer, installer or Inter Fab
(800-737-5386) with any questions or concerns
about the safe use of your iving boar .
DON’T
1. Don’t rink an ive.
2. Don’t install this or any iving boar on an
above groun pool or ive into an above
groun pool from any surface.
3. Don’t ive into a pool from anyplace not specif-
ically esignate for iving. Never ive into the
shallow portion of any pool.
4. Don’t ive across the wi th of the pool or to
the si es of the pool.
5. Don’t Run an ive.
6. Don’t engage in horseplay in or aroun the iving
boar or pool.
7. Don’t use your iving boar as a trampoline.
8. Don’t o a back ive. Backyar pools are not
built for that type of activity.
9. Don’t try fancy ives. Keep the ives simple.
10. Don’t ive into or through objects or toys such
as inner tubes.
11. Don’t swim or ive alone.
12. Don’t use a iving boar or stan or base that
is ruste or worn out or in poor repair.
THE T7 DIVING SYSTEM IS A JUMP BOARD
INTENDED USE
INSTRUCTIONS
WARNING

INSTALLATION MANUAL T7™ DIVING SYSTEM
4
T7-IM Rev. 10/17 (BBK-T7 INSTAL)
The specifications foun on page 5 of this manual represent the minimum water envelope
require by Inter-Fab an by the ANSI/APSP/ICC-5 2011 Stan ar for Resi ential Ingroun
Swimming Pools. Each of these imensions must be met or excee e . Installation of a iving
boar of any type on a pool that oes not meet or excee each of the minimum specifications as
provi e on page 5, inclu ing but not limite to the slope requirement, is in irect violation of this
manufacturer’s instructions an the 2011 Stan ar , an can result in serious injury or eath.
The installation of the T7 iving system is not complete until you, the installer have measure the
pool to ensure it meets the Inter-fab resi ential ingroun minimum pool specifications an the
ANSI/APSP/ICC-5 2011 Stan ar for Resi ential Ingroun Swimming Pools
The installation of the T7 iving system is not complete until you the installer has elivere to your
customer an reviewe with your customer the “Owners Manual” as well as the “Plan Your Dive
Steer-Up” brochure.
The T7 iving system ( iving boar , springs, an base) is a complete system an must be installe
as a complete system. It is strictly prohibite to install any T7 component on any other stan ,
spring, or base.
Inter-fab highly recommen s that you, the installer, obtain an consult the ANSI/APSP/ICC-5 2011
Stan ar for Resi ential Ingroun Swimming Pools before procee ing with the installation.
CHECK YOUR LOCAL ELECTRICAL CODE FOR BONDING REQUIREMENTS. USE ANTI-SEIZE
ON ALL HARDWARE.
IMPORTANT NOTICES
TO THE INSTALLER
THE T7 DIVING SYSTEM IS A JUMP BOARD.
ONLY ONE PERSON AT A TIME ON THE DIVING BOARD,
WITH A MAXIMUM WEIGHT LIMIT OF 300 LBS.

INSTALLATION MANUAL T7™ DIVING SYSTEM
5
T7-IM Rev. 10/17 (BBK-T7 INSTAL)
MINIMUM DIVING WATER ENVELOPE:
NOTE: DRAWINGS ARE NOT TO SCALE.
NOTES:
DIVING EQUIPMENT
TIP OF BOARD
ABOVE POINT A
DIVING EQUIPMENT PROHIBITED
DIVING EQUIPMENT PROHIBITED
A B C D A B C D WA AB BC CD* DE WE
0
I 6’-0” 7’-6” 5’-0” 2’-9” 10’-0” 12’-0” 10’-0” 8’-0” 1’-6” 7’-0” 7’-6” VARIES 6’-0” 28’-9”
II 6’-0” 7’-6” 5’-0” 2’-9” 12’-0” 15’-0” 12’-0” 8’-0” 1’-6” 7’-0” 7’-6” VARIES 6’-0” 28’-9”
III 6’-10” 8’-0” 5’-0” 2’-9” 12’-0” 15’-0” 12’-0” 8’-0” 2’-0” 7’-6” 9’-0” VARIES 6’-0” 31’-3”
IV 7’-8” 8’-6” 5’-0” 2’-9” 15’-0” 18’-0” 15’-0” 9’-0” 2’-6” 8’-0” 10’-6” VARIES 6’-0” 33’-9”
V 8’-6” 9’-0” 5’-0” 2’-9” 15’-0” 18’-0” 15’-0” 9’-0” 3’-0” 9’-0” 12’-0” VARIES 6’-0” 36’-9”
POOL
TYPE
MINIMUM DEPTHS
AT POINT
MINIMUM WIDTHS
AT POINT
MINIMUM LEN THS
BETWEEN POINTS
TABLE 1 - MINIMUM WATER ENVELOPE (ANSI/APSP/ICC-5 2011)
DBL** HOW** F H J K L M N
0
I 6’ DB/6’ JB/7’ T7 20” 2’-9” 5’-0” 4’-0” 7’-2.5” 7’-6” 6’-0” 3’-9” 2’-1.5” 12’
II 8’ DB/6’ JB/7’ T7 20” 2’-9” 3’-10” 4’-2” 7’-2.5” 7’-6” 6’-8” 3’-9” 2’-1.5” 12’
III 10’ DB/8’ JB/7’ T7 26” 2’-9” 4’-4.75” 4’-4.5” 7’-5.5” 8’-0” 6’-7” 3’-11.5” 1’-7.5” 13’
IV 10’ DB/8’ JB/7’ T7 30” 2’-9” 5’-10.5” 3’-10” 7’-8” 8’-6” 8’-3” 5’-7” 2’-7” 13’
V 12’ DB/8’ JB/7’ T7 40” 2’-9” 6’-2” 3’-11.5” 7’-9.5” 9’-0” 8’-2.5” 5’-9” 2’-7” 14’
POOL
TYPE
MAX. DIVIN
BOARD LEN TH
MAX. HEI HT
OVER WATER
AT POINT A
CROSS SECTIONAL
DIMENSIONS AT
POINT A
CROSS SECTIONAL DIMENSIONS AT POINT B
TABLE 2 - INTER-FAB RESIDENTIAL POOL MINIMUM SPECIFICATIONS
MIN. HEAD
ROOM
ABOVE
DIVIN
SURFACES
*Min. length between points CD may vary based upon water depth at point D and the slope between points C & D
ABBREVIATIONS: **DBL=Diving Board Length; DB=Diving Board; JB=Jump Board; **HOW=Height Over Water
F
G
H
JK
N
M
L
DIVING EQUIPMENT

INSTALLATION MANUAL T7™ DIVING SYSTEM
6
T7-IM Rev. 10/17 (BBK-T7 INSTAL)
Concrete Minimums:
8’ Long
4’ Wi e
6” Deep
NOTE: READ THESE INSTRUCTIONS IN THEIR ENTIRETY BEFORE ATTEMPTING T7
INSTALLATION.
REFER TO: ANSI/APSP/ICC-5 2011 American National Standard for Residential Inground Swimming Pools
(pages 13 through 16) and to page 5 for Inter-Fab Residential Inground Pool Minimum Specifications.
INTER-FAB CANNOT GUARANTEE CUSTOMER’S CONCRETE OR THICKNESS
The top surface of the diving board from the deck end to
the tip end shall be level or have an upward slope of 5/8"
per foot maximum. Elevation difference shall not exceed
4-3/8" from the deck end to the tip of the board. There
shall be no downward slope towards the water. The slope
shall be measured using a level as shown in the graphic
to the left.
T7 DIVE
STAND
NOMINAL
BOARD
LENGTH
ANSI/
NSPI-5
POOL
TYPE
DISTANCE FROM
WATER’S EDGE TO
FORWARD JIG BOLT
(S) *
DISTANCE FROM
WATER END OF
BOARD TO FORWARD
JIG BOLT
MAX HEIGHT OF
BOARD OVER
WATER
(HOW)
7’ T7 ONLY I 31” 50” 18” 20”
7’ T7 ONLY II 31” 50” 18” 20’
7’ T7 ONLY III 25” 50” 24” 26”
7’ T7 ONLY IV 19” 50” 30” 30”
7’ T7 ONLY V 13” 50” 36” 40”
MUST BE INSTALLED ON TYPE I POOL OR GREATER
MIN. OVERHANG
POINT A TO
POINT W
ONLY T7
DIVING
BOARD CAN
BE UTILIZED
ON T7 DIVE
STAND
IMPORTANT: THESE DIMENSIONS ARE ACCURATE ONLY FOR VERTICAL POOL WALLS,
TYPICALLY GUNITE CONSTRUCTION, WITH LESS THAN A 3’ RADIUS TO THE POOL FLOOR.
DUE TO THE VARYING SIZES OF OTHER POOLS, TYPICALLY VINYL LINER CONSTRUCTION,
PLEASE CONTACT CUSTOMER SERVICE FOR PROPER JIG PLACEMENT. 1.800.737.5386
TABLE 3 – PLACEMENT CHART
FIG. A – T7 PLACEMENT SPECIFICATIONS:
*optional water stub
up for Boar Fall
installation
*

INSTALLATION MANUAL T7™ DIVING SYSTEM
7
T7-IM Rev. 10/17 (BBK-T7 INSTAL)
• T7 Installation limite to Resi ential Ingroun Swimming Pools conforming to a Type I or greater imension
in accor ance with the ANSI/APSP/ICC-5 2011 Stan ar an Inter-Fab’s Resi ential Ingroun Swimming
Pool Minimum Specifications.
• Install jig on the eep en of the pool on centerline.
• Before installing the T7 jig ensure the concrete eck surroun ing the jig meets the minimum 8’ long x 4’
wi e x 6” eep minimum.
• Comply with all lo al and national ele tri al odes when bonding jig.
• Be careful to ensure that the re cappe bolt is towar the pool an set back from the water’s e ge at the
correct istance base on the table on page 6.
• The 3 jig bolts must exten 2” above the final eck surface.
• Ensure the eck surroun ing the jig an base is flat an level so the base makes uniform contact with the eck
surface.
• Leave the protective caps on the bolts until the concrete has cure an base/stan is rea y to be installe .
• If installing a Boar Fall with the T7 ensure that a 1/2” water stub-up is locate per the iagram on page 6
an as shown in the above illustration. Provi e a minimum of 10 gallons per minute to the en of the T7
iving boar .
JIG PLACEMENT TIPS:
MOUNTING JIG:
SIDE VIEW TOP VIEW
T7™ JIG INFO:
TOWARD POOL
RED
CAP
YELLOW
CAPS

INSTALLATION MANUAL T7™ DIVING SYSTEM
8
T7-IM Rev. 10/17 (BBK-T7 INSTAL)
If purchase , attach the optional waterfall assembly to the un ersi e of the iving boar as follows:
IMPORTANT: To keep the T7 water feature from clogg ng, ensure water s from a f ltered return l ne
from the pool.
A) The center (central) rib on the un ersi e of the iving boar is hollow an is cappe at the factory. Remove the
cap from front of the center rib exposing the hollow channel.
B) The Boar Fall comes from the factory with an 8' length of 1/2" flex PVC pipe attache . The 8' length
goes thru the boar an attaches with PVC glue to one si e of the 1/2" union. The 4" length of flex PVC
pipe attaches with PVC glue to the stub-up an then to the other si e of the 1/2" union.
C) Once the water tubing is threa e all the way thru the iving boar , from the base si e, gently pull the en
of the tubing until the waterfall assembly is pulle gently but snugly against the en of the
center rib.
D) Attach the waterfall unit to the Diving Boar by inserting the 4 provi e screws thru the pre-drilled holes in
the waterfall assembly; han tighten only (DO NOT USE SCREW GUN), over tightening the screws will
cause them to strip insi e the boar or break the waterfall housing, an voi s the warranty.
STEP 1: INSTALL WATER FEATURE: (OPTIONAL EQUIPMENT)
BOARD FALL CONFIGURATION: (OPTIONAL EQUIPMENT)
1. BOARD FALL: kit consists of E gewater, Mounting Har ware (4 screws), 8’ & 4” of 1/2” Flex PVC Pipe,
1-Union
IMPORTANT: The gel oat surfa e of the T7 Diving System is similar to a high quality marine finish; it is
long lasting, strong and beautiful but will s rat h if mishandled.
Do not pla e unprote ted parts on the ground. Do not slide or pull unprote ted parts along any surfa e.
Be areful unpa king parts and with tools during assembly.
ABC
T7 Diving System
INSTALLATION INSTRUCTIONS

INSTALLATION MANUAL T7™ DIVING SYSTEM
9
T7-IM Rev. 10/17 (BBK-T7 INSTAL)
TIP: Make sure to use the anti-seizing ompound on all the bolts or the nuts will seize.
1. Lay boar upsi e own on packaging being careful not to amage the gel coat surface.
2. Place T7-NSPRING over the 8 bolts on the boar as shown in photo below.The single center rill hole in
the spring center faces towar the pool. Use har ware kit T7-102-SS an attach the springs to boar
as shown in explo e view in page 11. Han tighten only at this time.
TIP: The springs are irectional. The longer en of the spring goes towar the pool.
STEP 2: T7 ASSEMBLY:
3. Boar Fall (opt onal) Boar
If installing a Boar Fall waterfall, run the hose
through the boar as shown in photo. Use the 4
screws provi e with the Boar Fall unit to
attach to bottom of boar .
4. Boar Fall (opt onal) Base
If installing the Boar Fall waterfall, remove the
hole black cap on the base by pushing it out
from the un ersi e. Do not try to remove from
the top as amage to the gel coat surface can
occur.
See arrow reference in photo shown.

INSTALLATION MANUAL T7™ DIVING SYSTEM
10
T7-IM Rev. 10/17 (BBK-T7 INSTAL)
5. Fee the PVC hose through the base an sit the
base on the springs as shown in photo.
Use har ware kit EDGE-SP an attach the base
to the springs as shown in explo e view on
page 11.
Use a ab of anti-seize provi e an tighten
these now to 25-30 ft lbs torque.
STEP 2: T7 ASSEMBLY – CONT.
6. Tighten the 8 nuts that hol the boar to the springs at this time. Torque to 20-25 ft lbs. (Note: all har ware
shoul be tight at this point of installation)
7. With the assembly upsi e own an on protective car boar move as close as possible to mounting jig.
Attach Boar Fall waterfall plumbing as escribe in installation manual “Install Water Feature” on pages
8 an 9.
8. The assembly is now rea y to set on the jig bolts. With 2 persons carefully set the assembly upright an
onto the jig. If installing an Boar Fall waterfall, tuck the excess hose un erneath the base as it is set on
the jig bolts. Using har ware kit T7-NBK attach the base to jig as shown in explo e view on page 11.
Tighten these nuts to 40-50 ft lbs torque.

INSTALLATION MANUAL T7™ DIVING SYSTEM
11
T7-IM Rev. 10/17 (BBK-T7 INSTAL)
NOTES:
* Part #T7-NBASE comes WITH jig.
The T7 diving board, base, and springs must be used together and cannot be used separately in any other configuration.
ITEM # COMPONENT DESCRIPTION
T7-NB
T7-102-SS
EDGE-SP
T-7
ITS – QTY. COUNTS
1 T7-NBASE-(color code) NO STEP T7 BASE 1
2 T7-DB-(color code) 7’ T7 DIVIN BOARD 1
3 T7-NJI 3 BOLT T7 NO STEP BASE JI 1
4 T7-NSPRIN -(color) T7 NBASE SPRIN S (pair) 1
5 SPRIN PAD (factory installed) T7 NSPRIN PAD 2
6 BOARD FALL (-L) OPTIONAL WATERFALL FEATURE 1
7 H-1/2 SPA HOSE 1/2” PVC FLEX SPA HOSE RAY 1
8 H-1/2 NYLON WAS 1/2” FLAT NYLON WASHER 3
9 H-SS 1/2 F WAS 1/2” SS FLAT WASHER 3
10 H-SS 1/2 LOC WA 1/2” SS LOCK WASHER 3
11 H-SS 1/2 H NUT 1/2” SS HEX NUT 3
12 H-1-1/2 WHT CAP .750 X 1-1/2 WHITE UV NUT CAP 3
13 H-SS 3/8 FLT WA 3/8” SS FLAT WASHER 8 12
14 H-SS 3/8 LOC WA 3/8” SS LOCK WASHER 8 6
15 H-SS 3/8 F NUT 3/8” SS FINISH HEX NUT 8
16 H-.562 X .390 CAP .553 X 1/2” RAY PROTECTIVE CAP 8
17 H-SS 3/8 X 2-1/2 3/8”–16 X 2-1/2” HEX HEAD BOLT SS 6
18 H-SS #8 X 3/4 SS 8 X 3/4” PAN HEAD PHILLIPS SCREW 4
19* H-SS 3/8 NYLON 3/8” NYLON INSERT LOCK NUT 6
20* H-ANTI-SEIZE PACKET OF ANTI SEIZE LUBRICANT (NOT SHOWN) 1 1
* not pictured
DRAWING REPRESENTS THE FOLLOWING PART NUMBERS:
T7 DB
T7-NSPRIN
T7-NBASE
T7-NB :
Base to Jig Mounting Hardware
T7-102-SS:
Board to Springs Mounting
Hardware
EDGE-SP:
Spring to Base Mounting
Hardware
T7 DIVING SYSTEM (T7 DB, T7-NBASE, T7-NSPRING):

INSTALLATION MANUAL T7™ DIVING SYSTEM
12
T7-IM Rev. 10/17 (BBK-T7 INSTAL)
T7™ CARE & MAINTENANCE:
Your T7 iving system requires perio ic maintenance to keep it looking like new.*
• Wash Monthly or more frequently, if nee e . Be careful to keep cleaning material from
entering the pool.
• Wash with a mil soap such as han ishwashing soap, avoi using strong cleaners or
abrasives. Avoi strong alkaline (such as tri-so ium phosphate) or highly aci ic cleaners.
Avoi bleach an ammonia.
• With the ex eption of the slip resistant surface on the top of the iving boar , wax the
iving system once or twice a year with a goo gra e paste wax formulate for gel coat
surfaces. CAUTION: be careful when applying wax. Waxing the slip resistant surfaces
may cause them to become slippery resulting in possible serious injury.
* These suggestions and data based on information believed to be reliable, from our raw materials
manufa turers. They are offered in good faith, but without guarantee, as onditions and methods
of use and pro edures are beyond our ontrol.

INSTALLATION MANUAL T7™ DIVING SYSTEM
13
T7-IM Rev. 10/17 (BBK-T7 INSTAL)
SUPPORT INFORMATION: ARTICLE 5 – POOL DIMENSIONS AND TOLERANCES
Extracted from ANSI/APSP/ICC-5 2011, American National Standard for Residential Inground S imming Pools
To obtain complete copies of the
ANSI/APSP/ICC-5 2011
Stan ar for Resi ential Ingroun Pools
contact:
The Asso iation of Pool & Spa
Professionals (APSP)
2111 Eisenhower Ave.
Alexandria, VA 22314
(703) 838-0083
or visit: APSP.org

INSTALLATION MANUAL T7™ DIVING SYSTEM
14
T7-IM Rev. 10/17 (BBK-T7 INSTAL)
SUPPORT INFORMATION: ARTICLE 5 – POOL DIMENSIONS AND TOLERANCES
Extracted from ANSI/APSP/ICC-5 2011, American National Standard for Residential Inground S imming Pools

INSTALLATION MANUAL T7™ DIVING SYSTEM
15
T7-IM Rev. 10/17 (BBK-T7 INSTAL)
SUPPORT INFORMATION: ARTICLE 5 – POOL DIMENSIONS AND TOLERANCES
Extracted from ANSI/APSP/ICC-5 2011, American National Standard for Residential Inground S imming Pools

INSTALLATION MANUAL T7™ DIVING SYSTEM
16
T7-IM Rev. 10/17 (BBK-T7 INSTAL)
SUPPORT INFORMATION: ARTICLE 5 – POOL DIMENSIONS AND TOLERANCES
Extracted from ANSI/APSP/ICC-5 2011, American National Standard for Residential Inground S imming Pools

INSTALLATION MANUAL T7™ DIVING SYSTEM
17
T7-IM Rev. 10/17 (BBK-T7 INSTAL)
NOTES:

INSTALLATION MANUAL T7™ DIVING SYSTEM
18
T7-IM Rev. 10/17 (BBK-T7 INSTAL)
LIMITED WARRANTY
Inter-Fab, In . will repair or replace, at its option, any pro uct manufacture by Inter-Fab, Inc. that fails uring
the applicable warranty perio because of a manufacturing or material efect; provi e that the efect is not
the result of improper installation, improper use or care, negligence, alterations or mo ifications to the pro uct,
or natural acci ents (acts of Go ). The applicable warranty perio for pro ucts manufacture by Inter-Fab,
Inc. is three (3) years from the ate of retail purchase, except as specifie below:
Pool Games equipment warranty perio s are as follows: Volleyball Poles, Basketball Poles, Basketball Rim,
an Basketball Backboar are one (1) year from ate of retail purchase. Volleyball, Volleyball Net, Basketball,
Basketball Net, an pumps are warrante for ninety (90) ays from ate of retail purchase.
The Board Fall water features, use for the T7™ an aquaBoard™pro ucts, have a warranty perio of one
(1) year from the ate of retail purchase.
Zoomerang™ sli e pro ucts warranty perio is one (1) year from the ate of retail purchase.
Build Your Own Slide™* (BYOS™), Build Your Own Slide 2™* (BYOS 2™), Garden Ride Series™*,River Run
Series™*, In-Pool Seating™, Pool/Spa Table™, Pool Seat™ an Sun Shelf Table™ pro ucts warranty perio s
are one (1) year from the ate of retail purchase.
City 2™ Slide an City Base™ pro ucts warranty perio are one (1) year from the ate of retail purchase.
Unless expressly state otherwise all pro ucts manufacture by Inter-Fab are for residential installation (single
family residen e) ingroun pool use only. Inter-Fab, Inc. expressly isclaims any an all warranties an liability
arising from the installation, alteration, or use of its resi ential pro ucts for any non-resi ential use such as
semi-public, public, or commercial applications. Pro ucts expressly manufacture for commercial installation
an use will be subject to this limite warranty.
This limite warranty is in lieu of all other warranties, whether express or implie . Inter-Fab, Inc. isclaims any
warranty of merchantability or fitness for a particular use, an noninfringement in relation to any of its pro ucts
an Inter-Fab, Inc. is not liable for consequential, inci ental or specific amages. This warranty is limite to
the repair or replacement of the manufacturing or material efect, or refun of the original purchase price,
whichever is less, at the sole option of Inter-Fab, Inc., an expressly oes not cover any labor or reinstallation
expenses relate to the replacement of any an all Inter-Fab pro ucts. This limite warranty shall be the sole
an exclusive reme y of irrespective of whether the claims are ma e in contract, tort, warranty, law, equity
or by statue.
This warranty is to the original purchaser of the pro uct only. Inter-Fab’s limite warranty is neither transferable
nor portable from consumer to consumer. The effective coverage ate begins at the ate of retail purchase.
Pro uct owner or representative must notify Inter-Fab, Inc. (or its wholesale agent) in writing, giving a full
escription of the nature of the pro uct efect or failure along with proof of purchase, serial number(s) of the
pro uct an photos within thirty (30) ays of the expiration of the applicable warranty perio . Inter-Fab, Inc.
reserves the right to physically inspect amage or efective pro ucts or components to etermine the cause
of the amage or efect, prior to authorizing repair or replacement of its pro ucts.
*Please see specific warranty information for the BYOS, BYOS 2, Gar en Ri e Series an River Run Series sli es.
3050 S. ALVERNON WAY • TUCSON, AZ 85713
520.790.7040 • 800.737.5386 • FAX 520.790.7127 • INTER-FAB.COM
Other manuals for T7
2
Table of contents
Other Inter-fab Lighting Equipment manuals
Popular Lighting Equipment manuals by other brands
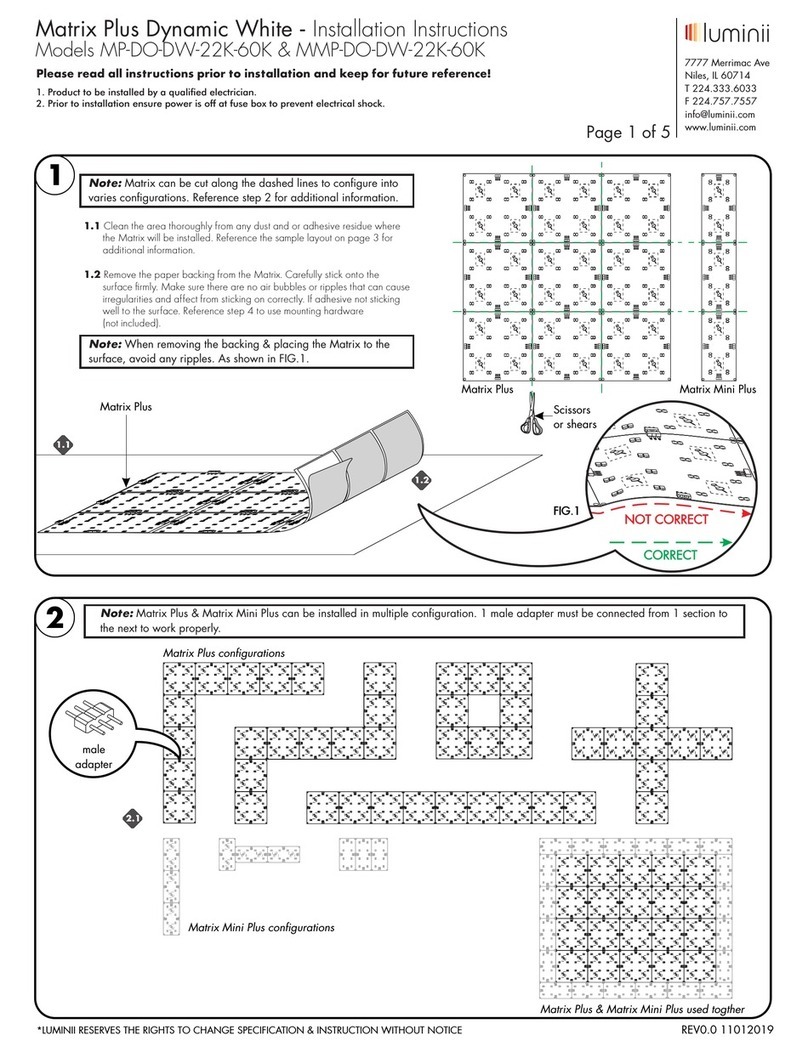
luminii
luminii Matrix Plus MP-DO-DW-22K-60K installation instructions

Videotec
Videotec GEKO IRH instruction manual
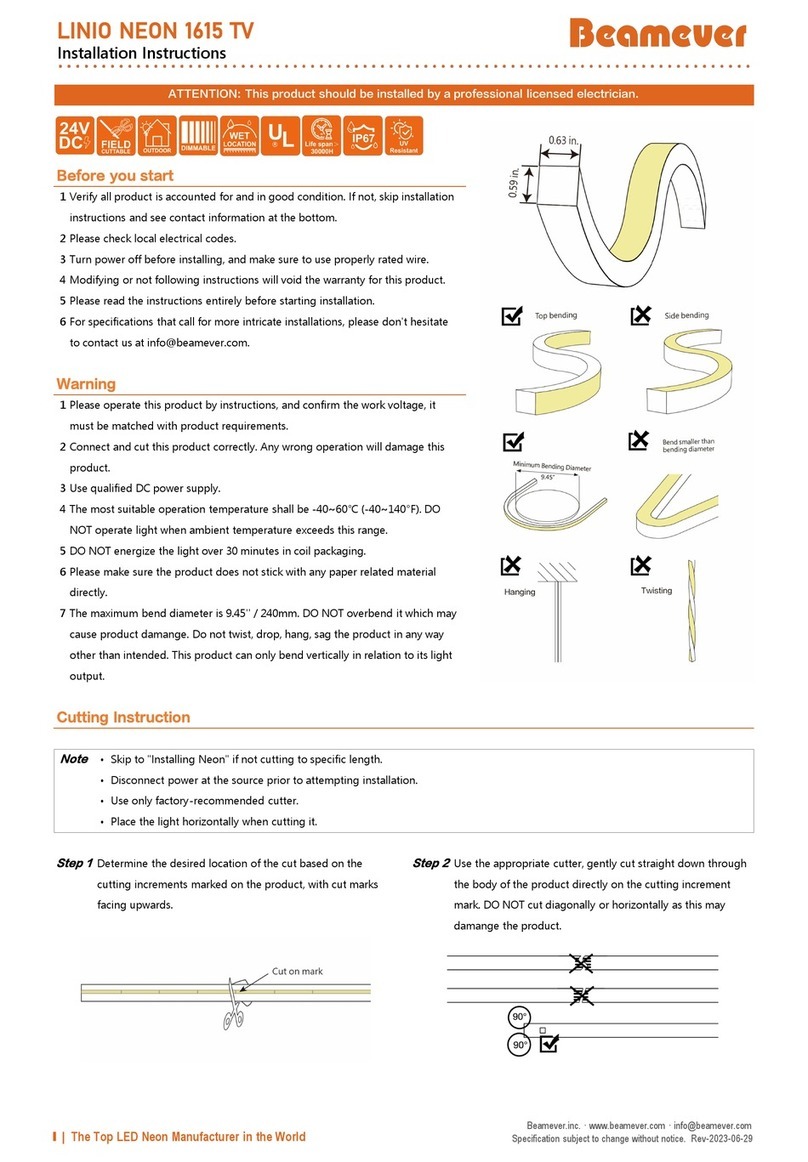
Beamever
Beamever LINIO NEON 1615 TV installation instructions
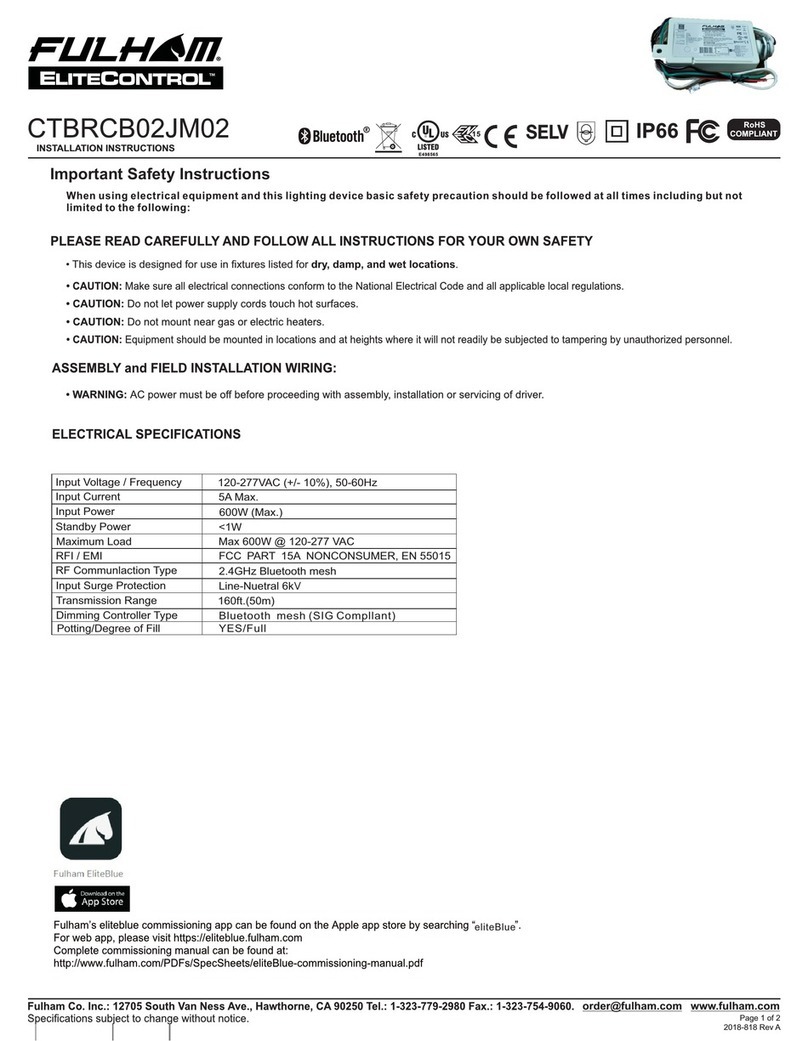
Fulham
Fulham EliteControl CTBRCB02JM02 installation instructions
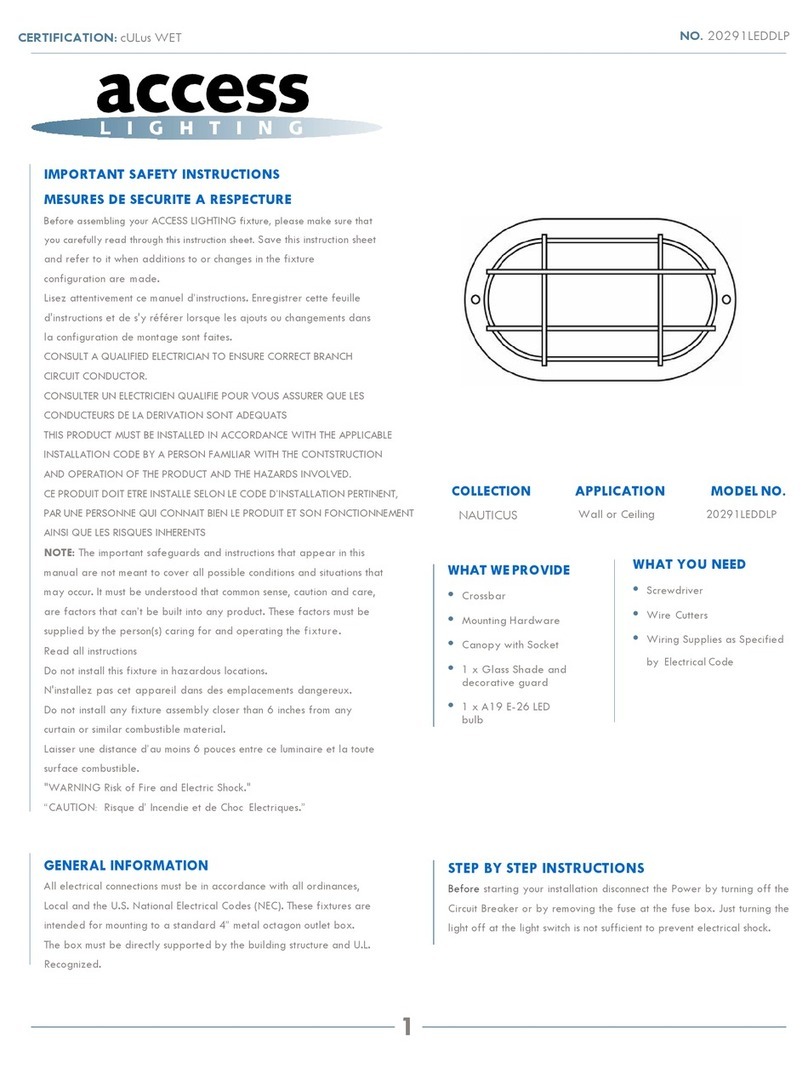
Access Lighting
Access Lighting 20291LEDDLP quick start guide
Fox
Fox Elite Bivvy Light operating instructions
