Inter-m NTU-100 User manual

Operation Manual
Network Tuner
NTU-100
(Program Installation)

NETWORK TUNER
Contents
Contents
Webpage Sett ng............................................................................................................................1
Ⅰ. Initial Web network setup..............................................................................................................1
Ⅱ. Main Menu Screen ......................................................................................................................2
Ⅱ. 1 Network Setup .........................................................................................................................3
Ⅱ. 2 Operation Mode Setup .............................................................................................................4
Ⅱ. 3 MP3 Time Signal Setup (MP3 Reserve Broadcast Settings)............................................................5
Ⅱ. 3-1 MP3 scheduled table view - View table................................................................................6
Ⅱ. 3-2 MP3 reserved setting - Add ................................................................................................6
Ⅱ. 3-3 MP3 reserved setting - Delete..............................................................................................7
Ⅱ. 3-4 MP3 reserved setting - Modify.............................................................................................7
Ⅱ. 3-5 MP3 source file management - Setup...................................................................................8
Ⅱ. 3-6 MP3 Holiday - Setup..........................................................................................................9
Ⅱ. 3-7 MP3 holiday - Delete..........................................................................................................9
Ⅱ. 4 I-Radio tine signal setup(I-Radio reserve broadcast setting) ........................................................10
Ⅱ. 4-1 I-Radio schedule table view - View ....................................................................................11
Ⅱ. 4-2 I-Radio reserved setting - Add...........................................................................................11
Ⅱ. 4-3 I-Radio reserved setting - Delete ........................................................................................12
Ⅱ. 4-4 I-Radio reserved setting - Modify.......................................................................................13
Ⅱ. 4-5 I-Radio Holiday - Setup ....................................................................................................14
Ⅱ. 4-6 I-Radio holiday - Delete....................................................................................................15
Ⅱ. 5 I-Radio setup..........................................................................................................................16
Ⅱ. 5-1 I-Radio setup - Edit...........................................................................................................17
Ⅱ. 6 Time Setup.............................................................................................................................18
Ⅱ. 7 View Log ...............................................................................................................................19
Ⅱ. 8 Upgrade System.....................................................................................................................20
Ⅱ. 9 Restart system ........................................................................................................................21
Ⅱ. 10 Factory Setting .....................................................................................................................22
Ⅱ. 11 Password Setting..................................................................................................................23
NETWORK TUNER
1
NTU-100
Webpage Sett ng
Webpage Sett ng
Ⅰ. In t al Web network setup
①INITIAL SETTING INFORMATION OF THE NETWORK EQUIPMENT
②REQUIRED EQUIPMENTS
- Use any network and browser enabled device such as a PC or tablet to connect to the Web browser of the
NTU-100.
③HOW TO SET UP
a. Connect the NTU-100 to a network and browser enabled device using a straight or cross network cable.
b. You can also connect via a network router or switch.
c. Set the network configuration of the NTU-100 and the network device.
※Disable the wireless network if your.
※Contents of this Operation Manual are subjected to be changed by revision of firmware, please refer
to “www.inter-m.com/en” for latest one.
DHCP NO IP Address 192.168.1.99
Netmask 255.255.255.0 Gateway 192.168.1.1
DNS1 168.126.63.1 DNS2 168.126.63.2

NETWORK TUNER
2NTU-100
d. From the network device browser (Internet Explorer, Chrome, etc) enter the IP address of the NTU-100 in
address bar of the internet browser.
e. When prompted to enter the access ID and password, enter the initially set values.
(user ID : admin, password : 1)
f. Click the Network Settings menu in the left navigation pane to configure the network setting of the
NTU-100.
Ⅱ. Ma n Menu Screen
Above is Default screen view when first connected to the Web page of the equipment.
①Device name
②Select language of the web pages (Korean / English).
③Navigation menu pane. (When setting the operating mode to MP3, the I-Radio settings menu is disabled.)
④When a topic is selected in any area, the content of that topic appear in this area.
Problems connecting?
①Make sure the cable is in good working order.
②Make sure that you are able to “ping” the NTU-100 from the network device.
(If there is no response, rework the network configuration)
③Make sure the equipment is turned on.

NETWORK TUNER
3
NTU-100
Ⅱ. 1 Network Setup
Above is a screen display when “Network Settings” menu is clicked. In this display, MAC address, IP
information, host name can be seen and be changed.
①The MAC address of the device is displayed.
②Host name of the configured device is displayed and can also be modified.
③Displays the IP information as applied to the device and the user can modify the IP information.
④Click [Apply button to apply the modified setting.
Click [Reset button to reset to the previous data setting.
⑤Displays Help & Tips on Network setup.

NETWORK TUNER
4NTU-100
Ⅱ. 2 Operat on Mode Setup
The above screen shows the“Operation Mode” menu.
This page shows how to set the operation mode of the MP3 or I-Radio.
①selects the mode of the current equipment.
②Displays Help&Tips on operation mode setup.
Mode Mode Description
MP3 Only the pre-program feature is provided when using MP3 files are used and
Internet Radio related functions cannot be used.
Internet Radio Internet Radio Play/Stop and Add/Delete, and pre-program are capable based
on Internet Radio. MP3 file related features are not available.

NETWORK TUNER
5
NTU-100
Ⅱ. 3 MP3 T me S gnal Setup (MP3 Reserve Broadcast Sett ngs)
Page displays the reserved broadcast and holiday broadcast settings, can also modify the settings.
①Displays current application status (Yes/No) of reserved broadcast and can change the status.
②Click [Download button to download the set data files from the device.
Downloaded file is a backup file of the current set data of the device. Backup filescan be uploaded by
clicking the [Upload button.
※ If Internet Explorer is used to download/upload, use version 10 or higher, versions 9 and below may
not operate properly.
③Displays reserved broadcast settings in Table Format.
④Can add, delete or modify the information.
⑤Set Holiday settings or delete the information.
⑥Manage the MP3 source files for use in reserved broadcast.
⑦Displays Help & Tips on MP3 Time signal setup (MP3 Reserved Broadcast Settings).

NETWORK TUNER
6NTU-100
Ⅱ. 3-1 MP3 scheduled table v ew - V ew table
①Name : Indicates the title of the Schedule.
②URL : Put your mouse over the icon and the set URL name will appear.
③Hour : Displays the set start and end time.
④Day of the Week : Displays the day of the week.
※If there is no preset file to play, the title is displayed in Red color.
Ⅱ. 3-2 MP3 reserved sett ng - Add
Press the ‘Add’ button to add a internet radio station. The following screen will appear.
①Title : Indicates the title of the schedule.
②File : Select a internet radio station play.
③Time : Playing time.
④Current Time : Current NTU-100 internal time is displayed.
⑤Specified Time : The selected station will play for the interval set from ‘start time’ will repeat until the ’end
time’.
⑥Day of Week : Set the desired day of broadcasting.
⑦Time schedule can be stored up to 50 events.

NETWORK TUNER
7
NTU-100
Ⅱ. 3-3 MP3 reserved sett ng - Delete
Press to delete a schedule and the following screen will appear
①Delete : Delete the selected schedule.
②Select all : Select or clear the entire list.
Ⅱ. 3-4 MP3 reserved sett ng - Mod fy
After modify the schedule, press the Apply button

NETWORK TUNER
8NTU-100
①Can see the titles of the (Reserved Broadcasts) and can also select the broadcast to modify.
②Select set the name to be modified.
③Select set the broadcast to be modified.
④Select set the time to be modified.
⑤Select set the day to be modified.
Ⅱ. 3-5 MP3 source f le management - Setup
The above screen shows the file management window for scheduled broadcast.
Select and delete the existing pre-program files, preview, and stop preview and upload any file.
①The titles of the MP3 files that are stored in the device are shown.
②From the ①list, select to delete, preview and stop preview.
③Show the available file upload space.
④Select any file to upload to the device.

NETWORK TUNER
9
NTU-100
Ⅱ. 3-6 MP3 Hol day - Setup
Holiday schedule programming. The schedule is not broadcasted on the selected date.
The following screen will appear.
①Add : Add a holiday.
②Enable : Select ENABLE to use the holiday setup.
③Start/End Date : Set the start date and the end date of the holiday setup.
④Start/End Time : set the start time and the end time of the holiday setup.
Press the save button to save the holiday setup.
⑤holiday can be set up to 30 events.
Ⅱ. 3-7 MP3 hol day - Delete
①Delete : Delete the selected holiday schedule.
②Select all : Select or clear the entire list.

NETWORK TUNER
10 NTU-100
Ⅱ. 4 I-Rad o t ne s gnal setup(I-Rad o reserve broadcast sett ng)
This menu allows you to set up scheduled radio to be playback.
Page displays the reserved broadcast and holiday broadcast settings, can also modify the settings.
①Displays current application status (Yes/No) of reserved broadcast and can change the status.
②Click [Download button to download the set data files from the device.
Downloaded file is a backup file of the current set data of the device. Backup filescan be uploaded by
clicking the [Upload button.
※ If Internet Explorer is used to download/upload, use version 10 or higher, versions 9 and below may not
operate properly.
③Displays reserved broadcast settings in Table Format.
④Can add, delete or modify the information.
⑤Set Holiday settings or delete the information.
⑥Displays Help & Tips on I-Radio Time signal setup (I-Radio Reserved Broadcast Settings).

NETWORK TUNER
11
NTU-100
Ⅱ. 4-1 I-Rad o schedule table v ew - V ew
①Name : Indicates the title of the Schedule.
②URL : Put your mouse over the icon and the set URL name will appear.
③Hour : Displays the set start and end time.
④Day of the Week : Displays the day of the week.
Ⅱ. 4-2 I-Rad o reserved sett ng - Add
Press the ‘Add’ button to add a internet radio station. The following screen will appear.

NETWORK TUNER
12 NTU-100
①Title : Indicates the title of the schedule.
②File : Select a internet radio station play.
③Time : Playing time.
④Current Time : Current NTU-100 internal time is displayed.
⑤Specified Time : The selected station will play for the interval set from ‘start time’ will repeat until the ’end
time’.
⑥Day of Week : Set the desired day of broadcasting.
⑦Time schedule can be stored up to 50 events.
Ⅱ. 4-3 I-Rad o reserved sett ng - Delete
Press to delete a schedule and the following screen will appear:
①Delete : Delete the selected schedule.
②Select all : Select or clear the entire list.

NETWORK TUNER
13
NTU-100
Ⅱ. 4-4 I-Rad o reserved sett ng - Mod fy
After modify the schedule, press the Apply button.

NETWORK TUNER
14 NTU-100
Ⅱ. 4-5 I-Rad o Hol day - Setup
Holiday schedule programming. The schedule is not broadcasted on the selected date.
The following screen will appear.
①Add : Add a holiday.
②Enable : Select ENABLE to use the holiday setup.
③Start/End Date : Set the start date and the end date of the holiday setup.
④Start/End Time : set the start time and the end time of the holiday setup.
Press the save button to save the holiday setup.
⑤holiday can be set up to 30 events.

Ⅱ. 4-6 I-Rad o hol day - Delete
①Delete : Delete the selected holiday schedule.
②Select all : Select or clear the entire list.
NETWORK TUNER
15
NTU-100

NETWORK TUNER
16 NTU-100
Ⅱ. 5 I-Rad o setup
Can view and edit the radio channels set in the device and can control operations (play/stop) and edit
related to internet radio.
①Radio channels that have been set on the device are listed and can be selected from the list.
②Click [Play button to play the selectionfrom step ①.
Click [Stop button to stop the current selection from play.
③Click [Edit button to change the radio channels.
④Displays Help & Tips on I-Radio setup.

NETWORK TUNER
17
NTU-100
Ⅱ. 5-1 I-Rad o setup - Ed t
Above screen is displayed when [Customize button is clicked.
①Click [Export button to download the set radio list file.
②Click [Import button to upload the downloaded channel list to the device.
※ If Internet Explorer is used to download/upload, use version 10 or higher, versions 9 or below may not
operate properly.
③Click [Apply button to apply the channel list information selected from step ⑥.
④Click [Reset button to reset to the previous channel list information setting.
⑤Displays the total number of channels in ⑥table list.
⑥Displays the currently set radio channels.
Click [Delete button on the right to delete the internet radio channels that are currently set.
⑦After entering the title/address of desired radio channel, click [Add button to add to the list.

NETWORK TUNER
18 NTU-100
Ⅱ. 6 T me Setup
Time zone and current time can be set.
①Time Zone
The default time zone is (GMT+09:00) Seoul.
Select a correct time zone in the box according to your geographical zone.
②Current Time
Displays the current date and time.
③Time Setup
a. Manual Setup
NTU-100 uses internal clock to make time so that its time has some drift from the correct time. It is
needed to adjust the time regularly.
b. Automatic Time Synchronization
It synchronizes the time from the time server so that NTU-100 can maintain the correct time.
The default time server is time.bora.net.
③Displays Help&Tips on time setup.
Other manuals for NTU-100
1
Table of contents
Other Inter-m Tuner manuals

Inter-m
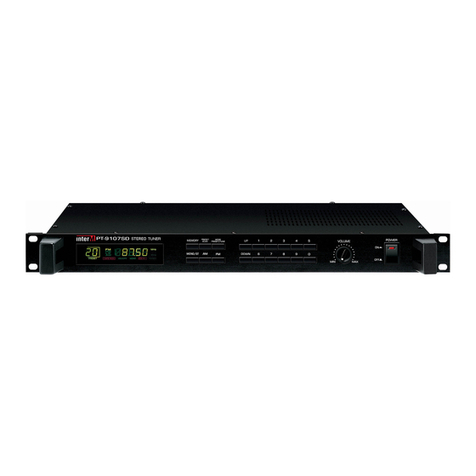
Inter-m PT-9107SD User manual

Inter-m
Inter-m PT-9107S User manual

Inter-m
Inter-m TU-610 User manual

Inter-m
Inter-m NTU-100 User manual

Inter-m
Inter-m PAM-T User manual

Inter-m
Inter-m PAM-MPM4 User manual

Inter-m
Inter-m PAM-MPM4A User manual

Inter-m
Inter-m TU-6200 User manual

Inter-m
Inter-m PT-9107S User manual

Inter-m
Inter-m PT-9107S User manual