Interacoustics OtoRead User manual

Instructions for Use
OtoRead
Instructions for Use GB
Gebrauchsanweisung DE
F
Bruksanvisning S
GR
I
Instrucções para a utilização P
Brugsanvisning DK
Käyttöohje FI
Manual de instrucciones E
PL
Kasutusjuhised - EE
Bruksanvisning N
-RO
Naudojimo instrukcijos - LT
Gebruiksaanwijzing - NL
Valid from serial no. 130932
80620304–03/2009


Instructions for Use GB
OtoRead


OtoRead Instruction for Use - English
Date: 2004-03-24 Page 1/8
Intended Use
and specificity of this type of device are based on the test characteristics defined by the user, and may
vary depending on environmental and operating conditions. The presence of otoacoustic emissions
suggests normal outer hair cell function, which in turn correlates to normal hearing. However, a
passing result using this instrument is not an indication that the full auditory system is normal. Thus, a
PASS result should not be allowed to override other indications that hearing is not normal. A full
audiologic evaluation should be administered if concerns about hearing sensitivity persist. A REFER
test result should not be assumed to be an indicator of a lack of auditory function; however, it should
be followed with full audiologic diagnostic testing.
Under certain circumstances, especially in low-humidity environments,
common electrostatic discharge may cause this instrument to turn itself off.
This effect causes no permanent damage, and the instrument may be turned
on again by the normal procedure of holding the DOWN button.
Important Safety Instructions
to perform the testing for which it has been designed. No person should attempt to use this instrument
without the necessary knowledge and training to understand how this equipment is to be properly
utilized and interpreted.
Precautions
Never insert the probe tip into the ear canal without affixing an eartip.
Use only the disposable eartips designed for use with this instrument.
The eartips are disposable and for single use use only. Do not clean or reuse
eartips.
Use only disposable 1.5v AA/UM-3/R6 Alkaline batteries for the test
instrument. Do not use rechargeable cells in this device; do not mix battery
types and do not mix old and new batteries.
WARNING indicates a hazardous situation which, if not
avoided, could result in death or serious injury.
CAUTION, used with the safety alert symbol, indicates a
hazardous situation which, if not avoided, could result in minor
or moderate injury.
NOTICE is used to address practices not related to personal
injury.

OtoRead Instruction for Use - English
Date: 2004-03-24 Page 2/8
Do not immerse the unit in any fluids. See the operation manual for proper
cleaning procedures.
Do not drop or otherwise cause undue impact to this device. If the instrument
is dropped or otherwise damaged, return it to the manufacturer for repair
and/or calibration. Do not use the instrument if any damage is suspected.
Use and store the instrument indoors only. Do not use this instrument or its
accessories in temperatures below 4°C /40°F or above 38°C /100°F, or in
relative humidity of more than 90%.
Do not attempt to open or service the instrument. Return the instrument to the
manufacturer for all service. Opening the instrument case will void the
warranty.
Do not operate the printer if the power supply has a damaged cord or plug.
See the instructions below.
Be sure to use only stimulation intensities, which will be acceptable for the
patient.
The transducers (headphones, bone conductor, etc.) supplied with the
instrument are calibrated to this instrument - exchange of transducers require
a recalibration.
Please note that the CE Marking is only legal if this Instruction is translated
into the national language of the user no later than at the delivery to him, if the
national legislation demands a text in the national language according to MDD
article 4.4.
Although the instrument fulfils the relevant EMC requirements precautions
should be taken to avoid unnecessary exposure to electromagnetic fields, e.g.
from mobile phones etc. If the device is used adjacent to other equipment it
must be observed that no mutual disturbance appears.
Disposal of batteries must be made according to national regulations.
If this apparatus is connected to one or more other devices with medical CE
marking, to make up a system or pack, the CE marking is only valid also for
the combination if the supplier has issued a declaration stating that the
requirements in the Medical Device Directive article 12 are fulfilled for the
combination.
Printer AC Power Source Precautions
The printer AC power source converts main voltage (120V AC or 220V AC) to
a low voltage (7V DC) for powering the printer. Use only the power source
supplied for this purpose.
Notice - This product is for indoor use only. Do not expose to water or
excessive dust.
Notice - This product is not suitable for operation in the presence of
flammable anesthetic mixture with air or with nitrous oxide.

OtoRead Instruction for Use - English
Date: 2004-03-24 Page 3/8
Do not cover the power source body as it may result in excessive heating. The
power source operates when the plug is inserted into an outlet. To turn it off,
remove the plug from the outlet. The outlet must be easily accessible and located
near the printer. Should a faulty condition occur, remove the plug from the outlet
immediately.

OtoRead Instruction for Use - English
Date: 2004-03-24 Page 4/8
Operation Instruction
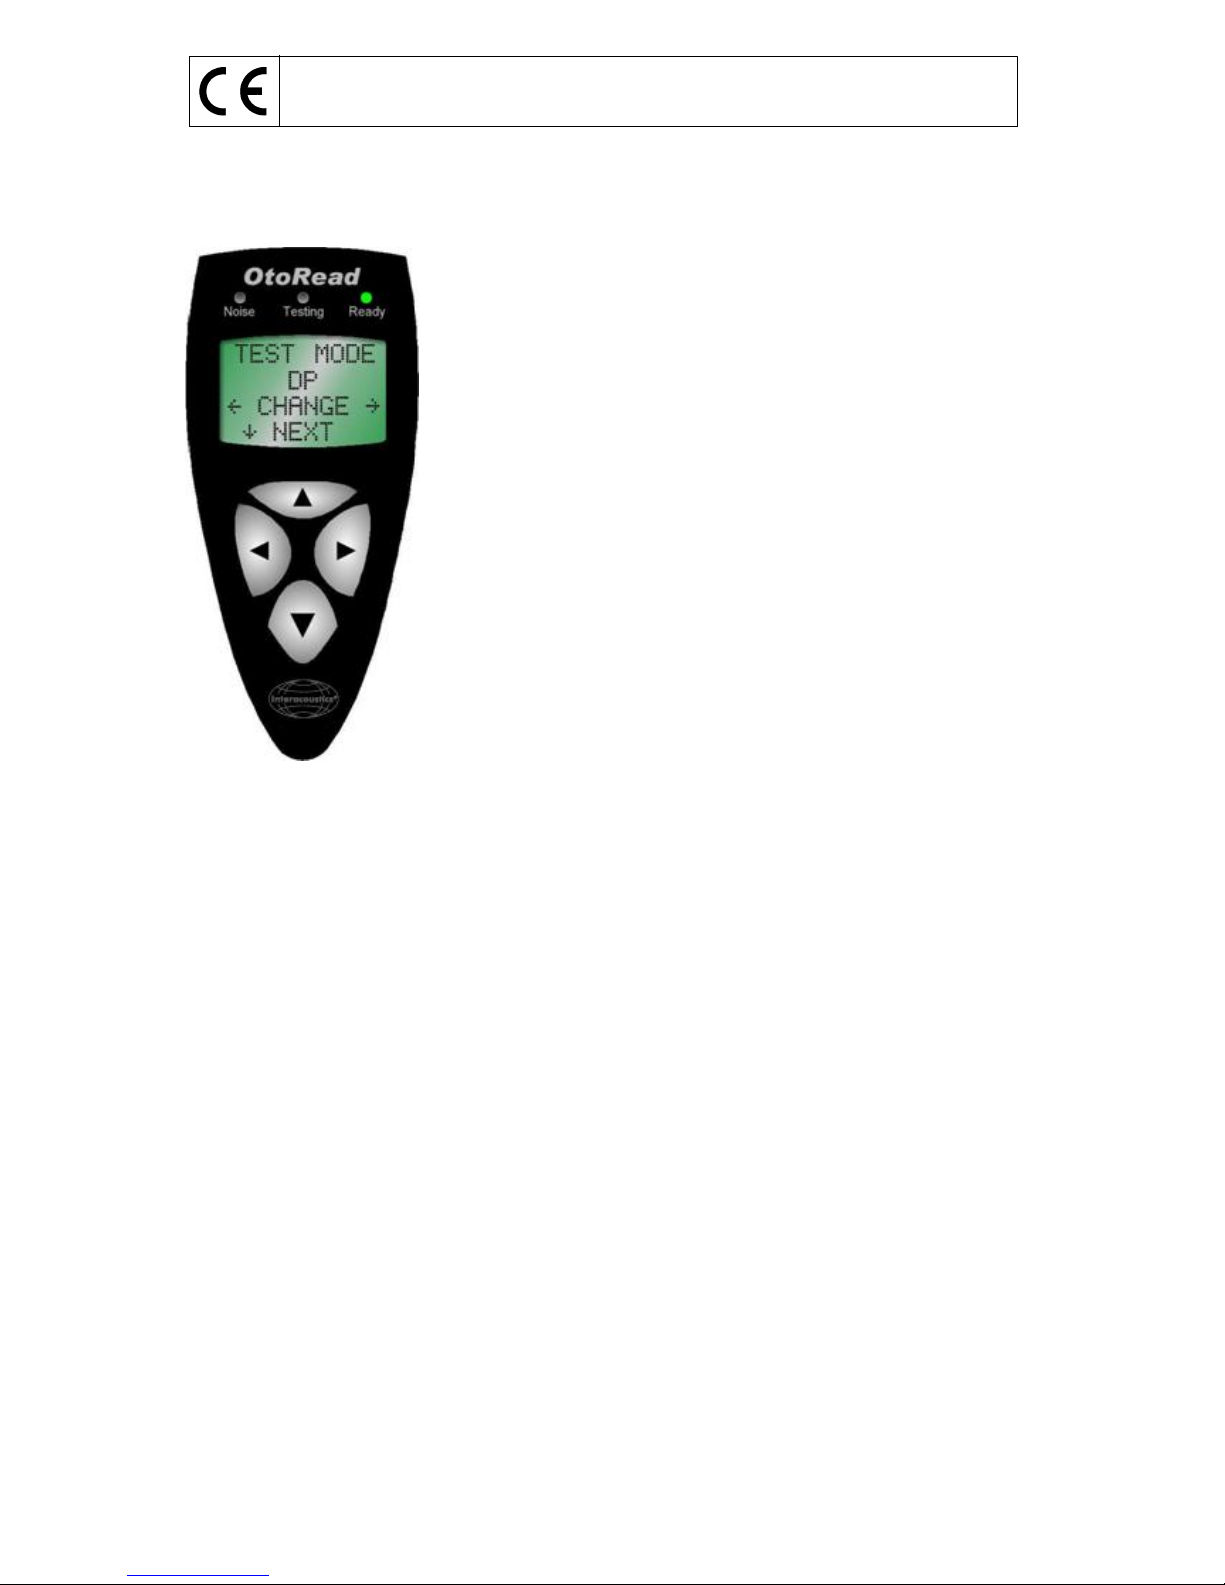
Switch on the OtoRead
The OtoRead is switched on by pressing the DOWN arrow key located
Switch off OtoRead
The OtoRead ha
automatically shut down the unit after 2 minutes (default) of inactivity. To
turn it back on, simply press the DOWN key. To switch of the OtoRead
press the UP key.
To begin testing
To begin testing, place a disposable eartip as far down as possible on
the probe tip. Turn on the OtoRead by pressing the DOWN button.
Select the test ear by pressing the LEFT or RIGHT button.
When a seal is obtained, the OtoRead instrument will automatically
begin the test by first calibrating and then testing emissions. The red
ERROR LED will illuminate if there is noise in the environment. This
flashing is normal and will often occur and testing can be made anyhow,
though it may influence the result.
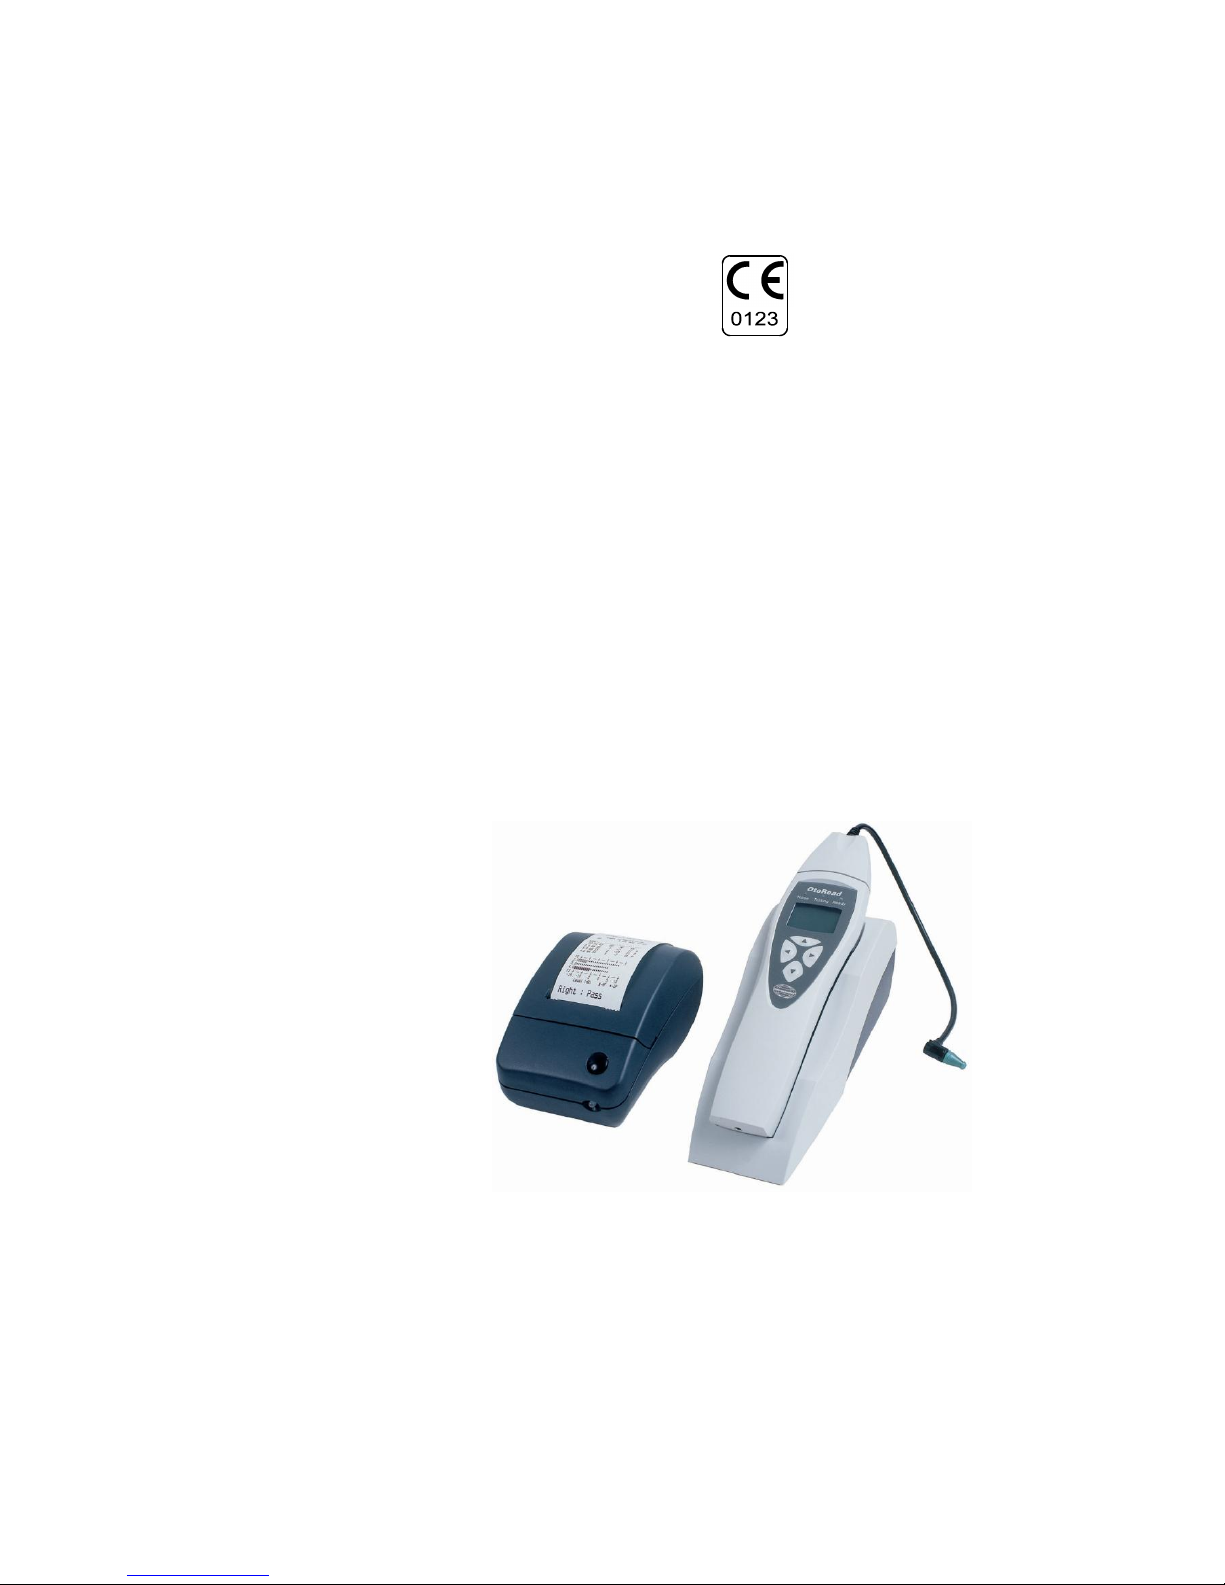
the LCD display. When testing is completed on both ears, turn the printer on by pressing the button on
top and place the hand-held unit on the cradle. The most recent test results for both ears will
automatically print out.
Testing children with PE tubes
To test children with PE tubes, the auto start needs to be disabled. This is accomplished by first
inserting the OtoRead with appropriate ear tip into the ear canal and obtaining a proper seal. To
disable auto start, at the Main Menu select the ear to be tested by holding down the RIGHT or LEFT
Read
will calibrate and test as before.
Review results
When testing is complete, the result of the test will be shown in the display. The results of the test are
automatically saved in the memory as soon as the test is complete.
the results,
push the DOWN arrow key to return to the bar graphs.
After reviewing the results, again push the DOWN arrow key to return to the Main Menu. Once a new
test for that ear is started, the previous results are erased.
Printing the Test Results
It is recommended that the results be printed after each patient. Turn on the printer by pressing the
round button before placing the instrument in the cradle. The test results that are stored will print out
automatically. The results of the most recent test from each ear will continue to be stored in memory
until another test is completed.

OtoRead Instruction for Use - English
Date: 2004-03-24 Page 5/8
Setting the clock
When the OtoRead test instrument is first used, the correct date and time will need to be set on its
internal clock. The date and time are listed on the test printout as month-day-year (e.g. Feb-28-01).
The clock should be set prior to testing, as changing it after tests are saved will not change the date
on the printout (see the operation manual for instructions).
Explanation to symbols which can be found on the instrument
DOWN arrow key.
UP arrow key
LEFT arrow key.
RIGHT arrow key
!
See explanation in manual.
OtoRead- Operation Panel Dictionary
Symbol:
Function:
SETUP
Setup menu from where Test Mode, Clearing Test Results, Auto-Shutdown
Time, Minimum Amplitude Value, Save Mode, Clock Mode Language and
Reset to Default Settings can be reached and modified.
TEST
Starts the autotest.
R
Right Ear.
L
Left Ear.
NOISE
Indicates the environmental noise level.
VOLUME
Indicates the ear canal volume.
CAL TEST
Is briefly shown when the instrument performs a calibration at the start of
each test.
LEFT EAR
Shows the result of the test for the left ear.
RIGHT EAR
Shows the result of the test for the right ear.
PASS
Indicates that the patient passed the screening.
REFER
Indicates that the patient did not pass the screening.
NO SEAL
Indicates that a seal was not maintained throughout the test.
NOISY
Indicates that excessive noise was present during the test.
Is used to change parameters in the current setup.
Is used to browse through the current setup.
10.35 AM
The time which will be displayed on the printout.
FEB-28-01
The date which will be displayed on the printout.
CHANGE
Use the LEFT and RIGHT arrow keys to change the parameters.
NEXT
Press the DOWN arrow key to save settings and go to the next menu.
DONE
Press the DOWN arrow to save settings and return to the Main Menu.
TEST RESULTS
CLEAR
The Test Results Clear menu allows the user to clear the test results stored
in the unit. It displays the number of test results which are currently saved in
the OtoRead.
VERIFY CLEAR
Use the LEFT and RIGHT arrow keys to clear the results stored in the
OtoRead. Next choose YES to verify clear and No to return to the menu
without clearing the menu.

OtoRead Instruction for Use - English
Date: 2004-03-24 Page 6/8
SAVE TESTS
The Save Mode menu allows the user to change the number of tests stored
in the OtoRead from only the most recent test result for each ear (L/R) to 50
tests.
STD 762.03
#0123456
Is shown briefly upon turning on the OtoRead. Indicates the type of OtoRead,
the software version and the serial number.
REVIEW
Press the DOWN key to review the bar graphs which are the test results
displayed as the emissions are measured.
TIME/DATE ERROR
approximately one hour.
MIN VALUE
The minimum Amplitude screen which allows the user to set the unit to
include minimum amplitude values in the pass/refer criterion.
ON
Turns the parameter on.
OF
Turns the parameter off.
CLOCK MODE
The Clock Mode menu allows the user to change the clock from a 12 hour
mode to a 24 hour mode.
LANGUAGE
The Language setup allows the user to select among English, German,
Spanish and French.
RESET TO
DEFAULT
Selecting the LEFT or RIGHT arrow key in the Reset to Default menu will
return the instrument settings to their factory settings (does not affect the
custom settings).
RESET
Press the LEFT or RIGHT arrow key to return the instrument settings to their
factory settings
TEST MODE
TEST MODE menu which allows the user to change the test protocol
between DP, DP custom, TE and TE Custom (according to model).
DP
The OtoRead will test in the DPOAE mode.
TE
The OtoRead will test in the TEOAE mode.
DP CUSTOM
The OtoRead will test in the DPOAE mode using custom settings.
TE CUSTOM
The OtoRead will test in the TEOAE mode using custom settings.
# OF FREQ.
The OtoRead can be set to test at either 4 or 6 frequencies. Press the LEFT
or RIGHT arrow keys to change the setting. It is also possible to select 6-HF
which is a 6-frequency test with an extended high-frequency range.
6-HF
6-frequency test with an extended high-frequency range (2, 4, 6, 8, 10, 12
kHz).
FREQ. RANGE
The Freq. Range menu allows the user to change the freq. range to be
tested. There are three options (4 if you select 6-HF).
PRESSURE
In the Pressure menu, the intensity of the primary tones (P1 and P2) may be
changed to any level between 40dB SPL and 70dB SPL by pressing the
LEFT or RIGHT arrow keys.
P1
Indicates the pressure for pure tone 1
P2
Indicates the pressure for pure tone 2
AVERAGING TIME
The Averaging time menu allows the user to change the average test time (in
seconds).There are 4 possible settings.
PASS SNR
This number refers to the number of decibels that the signal must be above
noise to be considered a PASS at that frequency. In the PASS SNR menu
the number of SNRs can be changed from 3 to 10 dB by pressing the LEFT
or RIGHT arrow keys.
FREQ FOR PASS
The number of frequencies required for determining a PASS can be set from
0 to 6 in the FRQ for PASS menu by pressing the LEFT or RIGHT arrow
keys.
SAVE PROTOCOL
Settings for the Custom program will be stored when pressing the DOWN
arrow key in the Save Protocol menu. To leave the setup menu without
saving the changes, press the UP button.

OtoRead Instruction for Use - English
Date: 2004-03-24 Page 7/8
Technical Specifications
specific details are
STANDARDS
EMC : Conforms to EN 60601-1-2.
MEDICAL CE-MARK
The CE-mark indicates that Interacoustics A/S meets the requirements of Annex II of
the Medical Device Directive 93/42/EEC. Approval of the quality system is made by
TÜV identification no. 0123.
PROBE SPECIFICATIONS
Measurement Type : Distortion Product Otoacoustic Emissions (DPOAE) or
Transient Evoked Otoacoustic Emissions (TEOAE)
Frequency Range : 1.5 to 12 kHz (DPOAE) 0.7 to 4 kHz (TEOAE)
DPOAE Stimulus Intensity Range: 40 to 70 dB SPL
TEOAE Stimulus Intensity Range: 83 dB SPL (±3 dB)
Maximum Output (protection): 90 dB SPL
Microphone System Noise : -20 dB SPL @ 2 kHz (1 Hz bandwidth) /
-13 dB SPL @ 1 kHz (1 Hz bandwidth)
Stimulus Sampling Rate : 31,250 Hz
INSTRUMENT SPECIFICATIONS
Power Supply : (4) AA/UM-3/R6 cells - Alkaline (6 V total)
Battery Life : Approximately 300 tests
Instrument Weight : 300 g/10.6 oz. including batteries
PRINTER SPECIFICATIONS
Type : Thermal dot matrix line printer
Speed : >10 lines per second
Operating Noise : <50 dB SPL
Weight : 845 g/1.9 lbs. including power supply
Power Supply : EN 60950
Input : 100-240 V~, 50-60 Hz, 0.8A
Output : +7 V, 5.0 A
Paper : Calculator-type thermal roll 57 mm/2.25" wide
PROCESSOR SPECIFICATIONS
Digital Signal Processor : Motorola 56303 24-bit 66 MHz 3.3 V
Storage : 2 Mbit Flash EEPROM (non-volatile)
Battery Backup : 0.1F 5.0 V (approx. 24 hours)
CODEC : 18 bit D/A, 18 bit A/D 96 dB SNR typical
Display : 4 line x 10 character STN liquid crystal
Switches : Membrane keypad 1 million + actuation
MAXIMUM SPL
The maximum sound pressure level output of this instrument remains well below 90 dB
SPL throughout the audible frequency range of 20 Hz to 20 kHz. This level is well within
OSHA permissible limits of 90 dBA for 8 hours.
Microphone Frequency Response (Nominal) System Noise Floor (Nominal)

OtoRead Instruction for Use - English
Date: 2004-03-24 Page 8/8
DETACHABLE PARTS
1 OtoRead Hand-held Unit
4 Probe Tips
1 Cradle
1 Printer
4 AA/UM-3/R6 Alkaline Batteries
1 Printer Power Supply
1 Printer Cable
1 Box of 146 Eartips (12 sizes)
2 Thermal Printer Paper Roll
1 Operation Manual
1 CE Manual
Concerning repair
1. Interacoustics is only considered to be responsible for the validity of the CE marking, effects on
safety, reliability and performance of the equipment if:
assembly operations, extensions, readjustments, modifications or repairs are carried out
by authorized persons,
a 1 year service interval is maintained,
the electrical installation of the relevant room complies with the appropriate
requirements and
The equipment is used by authorized personnel in accordance with the documentation
supplied by Interacoustics.
2. It is important that the customer (agent) fills out the RETURN REPORT every time a problem
arises and sends it to Interacoustics, Drejervaenget 8, DK-5610 Assens, Denmark. This should
also be done every time an instrument is returned to Interacoustics. (This of course also applies in
the unthinkable worst case of death or serious deterioration to patient or user).
3. When instrument fuses need renewal, the correct type as stated on the instrument shall be used.

Gebrauchsanweisung - DE
OtoRead


OtoRead Gebrauchsanweisung - deutsch
Datum: 2004-03-24 Seite 1/8
Bedienungsanleitung
-Gerät zur Ermittlung von
Hörverlusten. Empfindlichkeit und Genauigkeit der Messungen hängen von den durch den Benutzer
gewählten Testparametern ab und können je nach Umgebungs- und Einsatzbedingungen variieren.
Das Auftreten von otoakustischen Emissionen deutet auf eine normale Funktion der äußeren
Haarzellen hin, was im allgemeinen auf eine normale Funktion des Hörorgans schließen läßt.
-nbedingtes Indiz dafür, dass das
gesamte auditive System normal ist. -Ergebnis, falls andere Indikationen auf
-Ergebnis kann im
Gegenschluss nicht als Indikator für das Fehlen von Hörfunktionen gewertet werden, hier sollte
anschließend eine diagnostische audiologische Untersuchung des Gehörs erfolgen.
Unter speziellen Bedingungen, besonders in Räumen mit geringer
Luftfeuchte, kann es zu elektrostatischen Entladungen kommen. Das
sich abgeschaltet hat, es danach wieder eingeschaltet werden.
Sicherheitsmaßnahmen
ltem
Fachpersonal benutzt werden. Die richtige Anwendung des Gerätes und die Auswertung der
Ergebnisse erfordert notwendiges Fachwissen und Training bei der Messung von OAE`s im
allgemeinen und der ordnungsgemäßen Benutzung des Gerätes im speziellen.
Wichtige Sicherheitshinweise
aufgesteckten Ohrstöpsel in das Ohr eingeführt werden.
Verwenden Sie nur die vorgesehenen Einwegohrstöpsel.
Die Ohrstöpsel sind für einmaligen Gebrauch bestimmt. Sie dürfen nicht
gereinigt und wieder verwendet werden.
WARNUNG kennzeichnet eine gefährliche Situation, die,
wenn sie nicht vermieden wird, zu schweren Verletzungen mit
möglicher Todesfolge führen kann.
VORSICHT in Verbindung mit dem Sicherheitshinweis-
Symbol kennzeichnet eine gefährliche Situation, die, wenn sie
nicht vermieden wird, zu geringfügigen oder moderaten
Verletzungen führen kann.
HINWEIS dient dazu, auf Vorgehensweisen aufmerksam zu
machen, die nicht im Zusammenhang mit Verletzungsgefahr
für Personal stehen.

OtoRead Gebrauchsanweisung - deutsch
Datum: 2004-03-24 Seite 2/8
Verwenden Sie nur 1.5V Mignon Alkaline Batterien. Die Verwendung von
wiederaufladbahren Batterien ist nicht zulässig. Mischen Sie nicht
verschiedene Batterietypen oder alte und neue Batterien.
Flüssigkeiten dürfen auf keinen Fall in das Gerät eindringen. Die
ordnungsgemäße Reinigung des Gerätes ist in der Bedienungsanleitung
beschrieben.
Setzen Sie das Gerät keinen übermäßigen mechanischen Belastungen aus.
Falls es auf den Boden gefallen oder anderweitig beschädigt ist, senden Sie
es bitte an Ihre Servicestelle zur Überprüfung und Reparatur. Benutzen Sie
auf keinen Fall ein beschädigtes Gerät.
Das Gerät und Zubehör dürfen nur in geschlossenen Räumen betrieben
werden. Die zulässigen Umgebungstemperaturen dürfen sich nur
Interacoustics Gebrauchsanweisung
bewegen. Die zulässige Luftfeuchtigkeit sollte 75% nicht übersteigen.
Versuchen Sie nicht, das Gerät zu öffnen oder zu reparieren. Bei Öffnen des
Gehäuses erlischt jeder Gewährleistungsanspruch.
Betreiben Sie den Optionalen Drucker nicht, falls das Kabel des
Steckernetzteils beschädigt ist.
Stellen Sie sicher, nur Stimulations-Pegel anzuwenden, die für den Patienten
erträglich sind.
Die Transducers (Köpfhörer-Garnitur, Knochenleitung, usw.), die mit dem
Instrument geliefert werden, sind für dies Instrument kalibriert, wenn die
Transducer ausgewechselt werden, muß das Instrument neu kalibriert erden.
Bitte beachten Sie, daß das CE-Zeichen nur gültig ist, wenn diese Anleitung
spätestens bei der Lieferung an den Anwender in dessen Sprache übersetzt
worden ist, sofern die nationalen Gesetze gemäß der Medizinprodukte-
Richtlinie, Artikel 4.4, einen Text in der Landessprache verlangen.
Obwohl das Gerät die relevanten EMC Bestimmungen erfüllt, sollten Vor-
kehrungen getroffen werden, dass es nicht unnötigen elektromagnetischen
Feldern ausgesetzt wird, z.B. von Mobiltelefonen etc.Wenn das Gerät in
Nachbarschaft anderer Einrichtungen eingesetzt wird, muss beachtet werden, dass keine
wechselseitigen Störungen auftreten.
Die Entsorgung der Batterien muss in Übereinstimmung mit den nationalen
Vorschriften erfolgen.
Sofern dieses Gerät mit einem oder mehreren anderen Geräten mit
medizinischem CE-Zeichen verbunden wird, um ein System oder eine
Kombination zu bilden, so ist das CE-Zeichen für die Kombination nur gültig,
wenn der Lieferant eine Erklärung abgegeben hat, daß die Anforderungen in
Artikel 12 der Medizinprodukte-Richtlinie für die Kombination erfüllt sind.

OtoRead Gebrauchsanweisung - deutsch
Datum: 2004-03-24 Seite 3/8
Drucker-Netzteil Sicherheitshinweise
Das Druckernetzteil wandelt die Netzspannung (von 120V AC oder 230V AC)
zu einer ungefährlichen Gleichspannung von 7 V zum Laden der
Druckerbatterie. Benutzen Sie nur das mitgelieferte Steckernetzteil.
Das Steckernetzteil darf nur in geschlossenen Räumen betrieben und nicht
Wasser oder übermäßigem Staub ausgesetzt werden.
Diese Produkt darf nicht in explosiver Umgebung benutzt werden. Decken Sie
das Steckernetzteil nicht ab, da es sonst überhitzt werden kann. Das
Steckernetzteil beginnt zu arbeiten, wenn es in eine Steckdose gesteckt wird.
Zum Abschalten ziehen Sie es einfach aus der Steckdose wieder heraus. Falls
irgendein Fehler auftritt, sollten Sie das Netzteil als erstes aus der Steckdose
ziehen.

OtoRead Gebrauchsanweisung - deutsch
Datum: 2004-03-24 Seite 4/8
Bedienungsanleitung
Einschalten des OtoRead
Schalten Sie das Oto-Taste ein, die
sich unter dem Gerätedisplay befindet.
Ausschalten des OtoRead
Das OtoRead hat eine automatische Ausschaltfunktion, die das Gerät
nach 2 Minuten (standard) Inaktivität ausschaltet. Um das Gerät
wieder einzuschalte-Taste. Um das gerät
-Taste.
Testbeginn
Um einen Test durchzuführen, stecken Sie einen passenden
Ohrstöpsel so weit wie möglich auf die Sondenspitze.
-Taste ein.
Plazieren Sie den Ohrstöpsel tief im Gehörgang des Patienten ohne
das Trommelfell zu berühren. Bei akustisch dichtem Abschluss des
t mit der
Kalibrierung und dem Test von Emissionen. Die rote Fehleranzeige
leuchtet bei Störgeräuschen auf. Dies gehört durchaus zum normalen
Testablauf . Nach Ende des Tests (in ca. 6 Sekunden), erscheint auf
der LCD-
Nachdem Sie beide Ohren getestet haben, schalten Sie den Drucker durch Drücken des
Einschaltknopfs / ein und legen Sie den
Testresultat für beide Ohren wird jetzt automatisch ausgedruckt.
Messungen bei Kindern mit Paukenröhrchen
Bei Kindern mit Paukenröhrchen muss der automatische Testbeginn abgeschaltet werden.
Plazieren Sie die Sonde, wie vorstehend beschrieben richtig im Ohr und wählen Sie erst jetzt mit der
erlischt die grüne Bereitschaftsanzeige und der Test beginnt wenn die Taste losgelassen wird.
Wiederaufrufen der Testresultat
Wenn der Test beendet ist, werden die Ergebnisse auf dem Display dargestellt. Die Messergebnisse
werden nach Beendigung des Tests automatisch im Gerät abgespeichert.
est bestanden hat, d.h. das Emissionen mit dem geforderten
Signal-
Umgebungsgeräusche aufgetreten sind und das Testergebnis daher fehlerhaft sein kann.
bedeutet das der Sitz der Sonde nicht korrekt war. Jetzt kann entschieden werden, ob der Test
nochmals wiederholt werden soll. Um sich die Ergebnisse anzusehen drücken Sie die -Taste.
-Taste zurück zum
Hauptmenü. Als Standardeinstellung wird nur die jeweils letzte Messung pro Ohr gespeichert. Ein
neuer Test überschreibt die vorhandenen Messdaten. Daher sollte das Testergebnis vor der Messung
eines neuen Patienten ausgedruckt werden.
Bild 4 Tasten
Bild 5 Tasten

OtoRead Gebrauchsanweisung - deutsch
Datum: 2004-03-24 Seite 5/8
Ausdruck der Messergebnisse
Normalerweise sollten die Testergebnisse direkt nach der Messung eines Patienten ausgedruckt
werden. Schalten Sie den Drucker mit dem runden Knopf ein, bevor Sie das Gerät in die Halterung
stecken. Legen Sie das Gerät in die Aufnahmehalterung.Die gespeicherten Messergebnisse werden
jetzt automatisch ausgedruckt.In der Standardeinstellung können die aktuellsten Testergebnisse bis
zur Durchführung eines neuen Tests wiederholt ausgedruckt werden.
Die eingebaute Uhr einstellen
Wenn Sie das OtoRead Test Gerät zum ersten Mal benutzen stellen Sie bitte die richtige Uhrzeit und
das aktuelle Datum ein. Das Datum und die Uhrzeit wird mit ausgedruckt (z.B. Feb-28-01). Die Uhr
sollte vor dem test eingestellt werden, da eine nachträglich eingestellte Uhrzeit nicht im Test
übernommen wird.
Erklärung der Symbole am Audiometer
RUNTER Taste.
RAUF Taste
LINKS Taste.
RECHTS Taste
!
Erklärung in der Bedienungsanleitung lesen.
OtoRead- Bedienfeld
Symbol:
Function:
SETUP
Setup Menü in dem Test Modus, Löschen Testresultate, Auto-Abschaltzeit,
Minimum Amplituden Werte, Speichermodus, Uhrmodus, Sprache und Reset
für Standardwerte erreicht und eingestellt werden können.
TEST
Startet den Autotest.
R
Rechtes Ohr.
L
Linkes Ohr.
NOISE
Zeigt den wert der Umgebungsgeräusche an.
VOLUME
Zeigt das Ohrkanal-Volumen an.
CAL TEST
Wird bei der Kalibration des Geräts vor der Messung angezeigt.
Linkes Ohr
Zeigt die Messergebnisse des linken Ohres an.
Rechts Ohr
Zeigt die Messergebnisse des rechten Ohres an.
PASS
Zeigt an das der Patient den Test bestanden hat.
KONTROLLE
Zeigt an das der Patient den Test nicht bestanden hat.
NO SEAL
Kein dichter Sitz der Sonde während der Messung.
NOISY
Zeigt an das die Umgebungsgeräusche während des Tests zu hoch waren
Im angezeigten Setup können damit die Parameter geändert werden.
Wird benutzt um im angezeigten Setup die Parameter anzuwählen.
10.35 AM
Die Zeit die auf dem Ausdruck erscheint.
FEB-28-01
Das Datum das ausgedruckt wird.
ÄNDERN
WEITER
Drücke
Setup zu gelangen.

OtoRead Gebrauchsanweisung - deutsch
Datum: 2004-03-24 Seite 6/8
BESTÄTIGEN
Hauptmenü zu gelangen.
TESTERGEBNISS
LÖSCHEN
Das Menü ermöglicht dem Benutzer die Messergebnisse zu löschen. Die
Anzahl wird angezeigt.
Bestätigen Sie
nächstes wählen Sie YES zur Bestätigung an oder NO um die Ergebnisse
nicht zu löschen.
Speichern Test
In diesem Menü kann die Anzahl (bis 50 pro Ohr) der Tests angegeben
werden die abgespeichert werden sollen.
STD 762.03
#0123456
Wird während des Anschaltens kurz angezeigt. Es zeigt die Version und die
Seriennummer an.
REVIEW
Anzeige zu
sehen.
Zeit/Datum Fehler
Wird angezeigt wenn schwache Batterien nicht innerhalb einer Stunde
ausgetauscht werden.
MIN Werte
In diesem Menüpunkt kann der Benutzer entscheiden ob das Gerät
Minimumwerte in den PASS/REFER Kriterien mit einbezieht.
AN
Schaltet die Parameter ein.
AUS
Schaltet die Parameter aus.
Uhr Modus
Im Uhrenmenü kann die Uhr auf 12 oder 24 Stunden-Anzeige eingestellt
werden.
SPRACHE
Im Sprache Setup kann die Sprache auf , German, Spanisch und French
eingestellt werden.
PARAMETER
RÜCKSETZTEN
Wählen Sie die LINKS oder RECHTS Pfeiltaste im PARAMETER
RÜCKSETZTEN Menü um die Werkseinstellungen wiederherzustellen (dies
hat keinen Effekt auf die Benutzereinstellungen).
RÜCKSETZTEN
Drücken Sie die RECHTS oder LINKS Pfeiltaste um die Werkeinstellungen
auszuwählen
TEST MODUS
TEST MODE Menü in dem der Benutzer das Testprotokoll auswählen kann:
DP, DP custom, TE und TE Custom (je nach Model).
DP
Das OtoRead testet im DP Modus
TE
Das OtoRead testet im TE Modus
DP CUSTOM
Das OtoRead testet im DP Modus mit gebräuchlichen Einstellungen
TE CUSTOM
Das OtoRead testet im TE Modus mit gebräuchlichen Einstellungen
FREQUENZEN
Das OtoRead kann eingestellt werden ob es 4 oder 6 Frequenzen misst.
Drücken Sie die LINKS oder RECHTS Taste um die Einstellung zu ändern.
Es kann auch 6-HF eingestellt werden. Dies ist ein 6 Frequenzen Test mit
erweitertem Hochtonbereich.
6-HF
6 Frequenzen Test mit erweitertem Hochtonbereich. (2, 4, 6, 8, 10, 12 kHz).
FREQ. BER.
Das Freq. Range Menüerlaubt dem Benutzer die den Frequenzbereich der
getestet wird zu verändern. Drei Optionen stehen zur Verfügung (4 wenn 6-
HF ausgewählt wurde).
PEGEL
Im Pegel Menü kann die Intensität der primären Töne (P1 und P2) zwischen
40dB SPL und 70dB SPL mit den LINKS und RECHTS Tasten eingestellt
werden.
P1
Zeigt den Pegel von Ton 1
P2
Zeigt den Pegel von Ton 2
MITTLUNG
Das Mittelungs-Zeit Menü erlaubt dem Benutzer die Mittelungszeit zu ändern
(in Sekunden). Es gibt 4 mögliche Einstellungen.
PASS SNR
Die Zahl gibt den dB Wert an, die das Signal bei dieser Frequenz über dem
Geräusch liegen muss, um als PASS bewertet zu werden. Mit den LINKS
und RECHTS Tasten kann der Wert zwischen 3 und 10 dB geändert werden.
FREQ FÜR PASS
Hie kann ausgewählt werden wie viele Frequenzen als PASS bewertet
werden müssen, damit die gesamte Messung als PASS bewertet werden
kann. Hier kann ein Wert von 1 bis 6 mit den LINKS und RECHTS Tasten
eingestellt werden.
Other manuals for OtoRead
4
Table of contents
Languages:
Other Interacoustics Test Equipment manuals
Popular Test Equipment manuals by other brands

Tempo Fitness
Tempo Fitness PE2003 instruction manual

Seica
Seica PILOT H4 Operator's manual

Beijing
Beijing TIME 5100 instruction manual

Franklin Electric
Franklin Electric CADD-5000 KIT Operation guide

Time Electronics
Time Electronics 1068 user manual

Vermason
Vermason ZVM LIMMIT COMPARATOR operating instructions