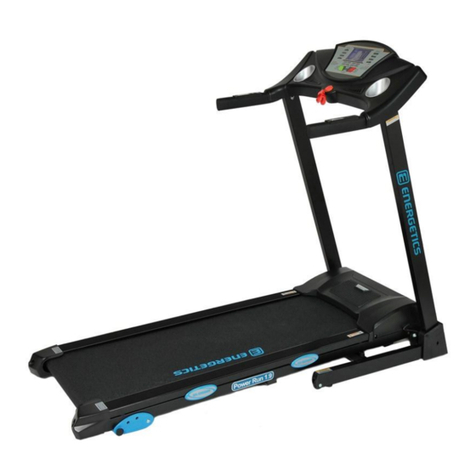
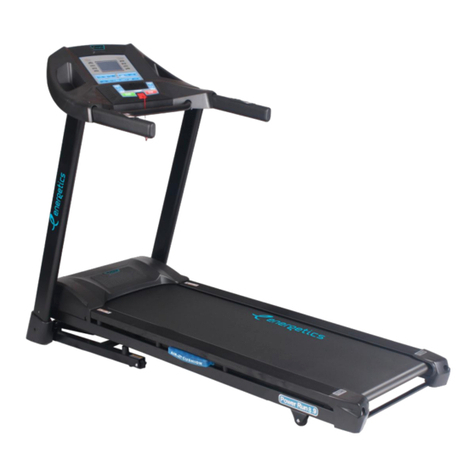
INTERSPORT ENERGETICS POWER RUN 20.1 User manual

1
ENERGETICS
POWER RUN 20.1
ENGLISH MANUAL

2
Thanks for purchasing this product .The product will help you keep fitter, healthier and better in a very easy way.
User Guide
Always connect the power plug to a socket with a grounded circuit and the socket must have a special circuit to avoid sharing with other
electrical equipment.
2. Ensure the treadmill stable on the ground before use.
3. Check if its function normal or not before running.
4. Stand on two side rails when the treadmill starts
5. Clipped the safety key to your clothes when upcoming to control any emergency.
7. Follow the running belt with left leg to do preparation before trial run. Only when you feel you can run, you can stand on the treadmill
and do it with the right posture. And only one person is allowed to exercise on the treadmill, and overload exercise is strictly prohibited.
8. You can adjust speed if necessary.
10. Remember to turn off the power and pull out the plug when you finish exercising.
Safety precaution:
Place the treadmill indoors to avoid any water and no heavy stuff.
When using the fitness device, wear comfortable clothing and preferably sports or aerobic
shoes.
Keep children away from the treadmill to avoid any accident.
No overload to give damages to motor, controller, roller and running belt. Make routine
maintenance to the treadmill.
Keep less indoor dust and a certain extent of humidity to avoid interference of console and
controller.
Keep the household treadmill continuously running no more than 2 hours.
Keep good air circulation when running.
There should be 2000x1000mm safe space at the end of treadmill when running。
Stop running if any discomfort and consult the doctor.
Reserve the silicon bottle to some place that children cannot reach, to avoid serious mistake.
Prohibit the user jumping off the treadmill directly after use.
Pull out the power plug gently from the socket.
Stop the machine if anything wrong and cut the power immediately.

3
DANGER!
To reduce accidents or harm, please check following rules.
Ensure your clothes zipped up before running.
Do not wear clothes that easily hooked.
Keep power cord away from hot objects.
Keep children away from the treadmill.
If something wrong , support the handle bar to push up and leave running belt.
Do not use the treadmill outdoor.
Cut off the power before move of the treadmill .
Do not open motor and roller cover unless professionals .
The treadmill is equipped with a cable that has a conductor and an earth plug. The plug must be plugged into a suitable 16 AMPERE
(AMP) socket by the safety of your electrical panel which is properly installed and grounded in accordance with all local codes and
regulations.Ensure that only one person at a time uses the fitness device.
Stop exercising immediately should you feel unwell or if you feel pain in your joints or muscles. In particular, keep an eye on how
your body is responding to the exercise program. Dizziness is a sign that you are exercising too intensively with the device. At the first
signs of dizziness, lay down on the ground until you feel better.
Warning!
Prohibit!
◆Following patients under treatment need to get use of the treadmill after approval of professional doctor.
(1)The person with backache or used to get hurt in the leg ,waist ,neck . Those with numbness of legs, waist, neck and hands (
those with chronic diseases such as inter vertebral disc protrusion, spinal slip, cervical vertebra protrusion, etc. )
(2)The patient with deformational arthritis , rheumatism or gout .
(3)The patient with osteroporosis .
(4)The patient with a bad circulatory system like heart disease ,vascular disorders and vascular hypertension .
(5)The patient with respiratory disturbance.
(6)The patient with Artificial heart rhythm problem.
(7)The patient with malignant tumors.
(8)The patient with thrombosis .
(9)The patient with diabet caused perceptual disturbance.
(10)The person with skin injury .
(11)The patient with a high fever above 38℃.
(12)The person with bent back bone.
(13)The person with pregnance or in (menstrual) period.

4
(14)The person feels discomfortable .
(15)The person is obviously in a bad condition.
(16)The person for the purpose of rehabilitation.
(17)The person having abnormal physical features.
-Above cases may cause accident or poor health
◆Stop exercising immediately should you feel unwell like pain in your joints or muscles, dizziness, numb, and abnormal
heart beat, and consult the doctor as soon as possible.
◆Keep children away from this product.
- Children may get hurt if you ignore this.
◆Told the children that this is not a toy.
- Children may get hurt if you ignore this.
◆when using, taking out, putting back or moving this product, please make sure there is nobody or pets around.
Prohibit!
◆stop use this product when the cover cracked (inner parts come out) or welded parts drop off.
-may cause danger or injury.
◆Do not jump up or down from the treadmill when running.
- may fall down and get injury.
◆Do not use or reserve the treadmill outdoor or near bathroom to avoid water.
◆Do not use or reserve the treadmill in the area exposed to direct sunlight, and avoid high temperature places like electric blanket and
warmer.
- may cause electric leakage or fire.
◆Do not use when the power line or plug damaged, or the socket is loose.
- may cause electric shock, short circuit or fire.
◆Do not damage or twist the power cord, also do not put heavy things on it.
- may cause fire or electric shock.
◆Only for one person at a time, tell people around not too close.
- may fall down and cause injury.
◆disassemble, repair, change by customer themselves are forbid absolutely.
- may cause mechanical breakdown and injury.
To avoid water!
◆the main body and operating components can not meet with water or drink.
- may cause electric shock and fire.

5
Prohibit!
◆Do not exercise too much if you are not a regular sportspeople.
◆Do not use the treadmill after meals or when feel tired.
- may cause damage to your health.
◆Suitable for home & semi-professional use indoors.
◆Do not use the product while you are having meals or doing other activities.
◆Do not use the product when you feel the body become slow after drink.
- may cause accident or injury.
◆Do not use the product when you have hard object in your pocket.
- may cause accident or injury.
◆the power plug cannot be attached with needle, waste or water.
- may cause electric shock, short circuit and fire.
◆Do not pull out the plug or switch the power to “off”while operating.
- may cause injury.
Do not operate with wet hands!
◆Do not pull out or insert the plug with wet hands.
- may cause electric shock or injury.
Remember to pull out the plug!
◆Remember to pull out the plug when not using.
- Dust and dampness can damage insulation and then cause electric leakage and fire.
◆Pull out the plug when maintenance.
- may cause electric shock and injury.
◆stop using immediately when the product can not start or have something abnormal, pull out the plug and make a trouble call.
- may cause electric shock and injury.
◆pull out the plug when meet with power failure suddenly.
- may cause accident and injury when power resumption.
◆You should hold the plug not the wire when pulling out the plug.
- may cause short circuit, electric shock and fire.
Ground connection instruction!
◆the product must have grounded connection. The grounded connection can provide a channel with least resistance for the current when the
product is malfunction, thus can reduce the danger of electric shock.
◆The product is equipped with electric wire for grounding conductor and grounding plug. The plug must insert into the socket that conformed
to the local regulations.
Danger!
◆incorrect connection of grounding conductor may cause electric shock.If you are not sure about the grounding connection, please ask a
professional electrician to check.if the plug of the product is not match your socket, you should ask for a n electrician to install a correct socket.
◆the product have grounding plug. Please confirm that you have the matched socket first. Socket adapter is not allowed.

6
Packing list
Main Frame Upright Post Frame (L & R) Hardware bag
Console rear cover Console base frame cove
Manual Silicon oil safety key

7
Main parts
Motor cover Console Motor Running belt
Running deck Side rail Front roller Rear roller
Rear cover Motor belt Incline motor

8
Hardware bag
Allen C.K.S half thread screw
(M8*60*20)6pcs
Allen C.K.S full thread screw (M8*15)8pcs Allen C.K.S full thread screw (M8*20)2pcs
Philips C.K.S. self-taping screw(ST4*12)2pcs Philips C.K.S. self-taping screw
(ST4*16)4pcs
Allen C.K.S half thread screw (M8*30*20)
2pcs
T shaped wretch(S6)1PCS Cross Wrench 1pcs L shaped wretch(63580 )1PCS

9
Treadmill instruction Safety key
Handle bar
Upright post
Console
Side rail
Rear cover
Motor Cover
Running belt
Technical information
Dimension
Unfold: 1925*925*1470mm
Fold: 1402*925*1541mm
Running
board
1530*550mm
Speed
0.5-22km/h

10
ASSEMBLY INSTRUCTIONS
Step 1: Take out the machine from box and put it on the flat floor.
Step 2: Connect communication wire of the console with the right upright post. Insert the left and
right upright post on the base frame, and then fix the each upright post with 2pcs M8*60*20 screw
and 1pc M8*20 screw.

11
Step 3: Fold up the treadmill, (Note: Before assemble the base frame cover, please ensure the
screws for base frame and upright post are fixed completely.) Put the base frame covers in the
left and right side of upright post, then clip-on the covers together. Last, fix the each covers by
2pc ST4*12 screws.

12
Step 4: Insert the console on the upright post. See above picture. (Note: Please connect the
communication cables in the right handlebar and upright post, avoid damaging the cable.) Use 2pcs
M8*15 screw to fix each upright post, and then use 1pc M8*30*20 screw to fix the hole under each
handlebar. (Note: The screw M8*30*20 is for adjusting the handlebar, it can not be fixed tightly, or else
the tube will be damaged.)

13
Step 5: Put the display on the console, and lock the two parts together with 4pcs M8*15 screw.

14
Step 6: Place the rear cover on the rear of console, and fix it with 4pcs of ST4*16 screws
Last Step: Check all screws were fixed rightly or not. Make sure the treadmill was assembled stably.

15
Console Function Instruction
Key Definition & Display window instruction
Display
window

16
Function description of console:
1.1 P0 is user manual program, P1-P36 is built-in automatic training program, 3 U words, FAT;
1.2 One LED display screen, 6 digital tube display screen and 19 operation keys;
1.3 Operating speed range: 0.5~22.0KM/H;Incline range: 0~15 sections;
1.4 System self-check and prompt for abnormal information;
1.5 Conversion function of speed and distance on inch metric mode.
1.8 ECO functions :(optional)
Display window instruction:
:display speed data;
:display time data
:display distance data;
:display calories data;
:display heart rate data;
: display incline data
Keyboard operation Instructions:
1 "PROG" : select program P0~P36, U01, U02, U03, FAT;
2 "MODE" : when the initial state of manual MODE is selected, it will be in normal MODE. Press the MODE key to cyclically select the
countdown MODE under manual MODE -> backward counting calories -> backward counting distance -> forward timing MODE; In P1-
P36, is the reset key with the default value (30 minutes) between the countdown.
3 "START" : START/pause button. START the treadmill under the stopped state; When running, pause the treadmill.
☆"STOP" : STOP key; In the running state, press the STOP key to slow STOP;
4 "+" : click the button for speed, click the button for setting parameters in the state of stop or fat measurement, click the button for speed
in the state of operation;
5 "-" : speed decreasing key. In the state of stop or fat measurement, it is the key of setting parameter decreasing; in the state of
operation, it is the key of speed decreasing;
6 "QUICK SPEED" : 4, 8, 12, 16, shortcut key. Under the running state of the treadmill, directly set the SPEED as the key value;
7 " " : gradient increment key;
8 " " : Slope decline key;
9 "QUICK INCLINE" : 3, 5,8, 12 INCLINE shortcuts. When the treadmill is running, directly set the speed as the specified value of the
key;

17
Inch Metric Mode Conversion Function:
1.changes kilometers into
miles.
2.changes miles into
kilometers.
Safety key description:
Safety key is made with the touch switch, clothespin and nylon rope composition, with emergency shutdown safety precautions. In any
state, as long as the safety key is out of position, treadmill to stop running, console keyboard prohibits operation,The screen shows "E-07"
with a beep.Re-put the safety key, the screen displays for 2s, enter into the system default working state.
Safe Use Guide:
1. Plug the power cord into the 16AMP power socket with safety grounding, turn on the power switch, display the electronic watch screen
with prompt sound, and then identify the safety lock;
2. Place the safety lock in the position on the electronic watch, clip the clothes on the chest, and then enter the default working state after
2 seconds of full screen display: all counters are cleared, set the reset value, and the treadmill is in the positive timing mode of manual
program P0;
3. Press "PROG" key to loop to select a program: P0~P36, U1,U2,U3,FAT;
A) "P0" is a user-defined program. Press the "MODE" key to cycle to select four training modes, the training speed and the slope is set by
the user. The default value is: speed 1.0km /H, slope 0%.
Training mode 1: counting time, counting time, distance and calories, turn off the setting function;
Training mode 2: During the countdown, under the setting state, the time window flashes. Press the "+" and "-" keys to modify the set
value.
Setting range: 5-99, default: 30:00;
Training mode 3: Pour calories. Under the setting state, the calorie window flashes. Press the "+" and "-" keys to modify the setting
Value, set range: 20-9990Cal, default: 50CAL;
Training mode 4: Count the distance backwards. Under the setting state, the distance window flashes. Press the "+" and "-" keys to
modify the setting
Value, setting range: 1.0-99.0km, default value: 1KM;
B) "P1-P36" is the system setting program, which is trained only in the countdown MODE. Under the setting state, the time window
flashes, press "+" and "-" keys to modify the set value, press "MODE" key to reset to the default value, the setting range is 5-99min, and
the default value is 30:00;
4. After setting the training mode, press the "START" button, and the 5-second countdown will be displayed on the screen, accompanied
by 5 prompts. After the countdown is 1, the treadmill will START gently, accelerate slowly to the displayed speed, and then run smoothly
at a constant speed.

18
A) In running state, press "+", "-" or "QUICK SPEED" to adjust the SPEED of the treadmill;
B) In P1-P36, the speed and slope of each program are divided into 16 sections, and each section is divided equally according to the
set time. The adjusted speed and slope are only valid within the current section, and three prompt sounds will be issued three seconds
in advance when switching between sections. The motor stops automatically when the program is running at full 16 segments,
accompanied by a prompt sound;
C) Press the "START" button again when the motor is in operation and the motor will switch between suspension and operation.
Restart under the suspended state, and the recorded run data and process remain unchanged;
5. When the motor is running, press the "STOP" button, the motor will slow down until it stops smoothly, and all Settings will return to
the default state;
6. In any state, pull off the safety lock, and the screen will display "E-07" with a prompt sound, and the treadmill will stop running;
7. The electronic control system is under safety monitoring at any time. If any abnormality is found, the running machine will stop in an
emergency. The screen will display abnormal information with a prompt sound.
8. Body FAT test method: press "PROG" key to select program FAT, "DISTANCE" window to display and set the item number, and
press "MODE" key to select the item number; The "TIME" window on the right shows the parameters for setting the project.
Press the "+" and "-" keys to set the parameters.
A) Serial number F1 (Sexo) : denotes gender;Set parameter range: 1-2, "1" means male, "2" means female, Default value: 1;
B) Serial number F2 (Age) : represents Age; Set parameter range: 1-99 years old, default: 25 years old
C) Serial number F3 (Height) :Setting parameter range: 100-220cm, default value: 170CM;
D) Serial No. F4 (Weight) : denotes Weight; Setting parameter range: 20-150kg, default: 70KG;
E) Serial number F5 (BMI) : indicates that you have completed parameter setting and entered the state of body fat test. Please hold
your hands on the heart rate sensor tablets at the left and right handles and wait for 8 seconds. The parameter display window will
display the body fat rate (BMI) of the subject;For Asians, body fat less than 18 is considered thin, between 18 and 24 is considered
ideal, between 25 and 28 is considered overweight, and over 29 is considered obese. The default value is 24 (this data is for exercise
reference only).
ECO function:
incline
e min.
incline is 0. In every time using, the default of treadmill is not in the ECO mode.
ERP function:
The system defaults to ERP mode. In the state of not running the treadmill, it will enter the sleep state in about 4.5 minutes to save
power consumption. Press any key to wake up the system.
Long press the MODE key for 3S to display "2222", cancel the ERP function, and long press 3S to display "1111" to return to ERP
MODE.

19
CONNECT SMART PHONE
It is compatible with the app I Console+ with real routes and maps, interactive workout videos and data file of your training.
Download on your smart phone or tablet the app I Console+ via Google Play for Android and via APP Store for IOS or by using the QR code
below.
【1】Log in to the iConsole application and after creating your personal account
click on "GET STARTED" located on the top right.
【2】Tap any of the programs and a login window will immediately appear where
you will need to connect the iConsole application to the treadmill.
【3】Tap the matching devices like 'iConsole-XXXX' (X means random digit) to pair;
Supported versions for iConsole:
-For Android devices: 5.0 or later.
-Requires iOS : 11.0 or later. Compatible with iPhone, iPad, and iPod touch.

20
Search, download & install Kinomap over Apple Store or
Google Play depending on your smartphone system.
【1】Enter Kinomap to select [More] page;
【2】Select to add more fitness equipment;
【3】Select and click treadmill icon;
【4】Tap iConsole entrance;
【5】Tap the matching devices like 'iConsole-XXXX' (X means random digit) to pair;
【6】Find related videos to start your favorite running mode.
Supported versions for KINOMAP:
-For Android devices: 5.0 or later.
-Requires iOS 9.0 or later. Compatible with iPhone, iPad, and iPod touch.
It is compatible with the app Kinomap (subscription required). Download the Kinomap app on your smartphone or tablet . (Google
Play for Android & APP Store for IOS).
Train all around the world with interactive videos and routes and the treadmill will automatically adjust the slope based on the
route of your choice.
Explore the world, monitor your performance, share your experience with the whole Kinomap community.
Invite and compete with other users of the Kinomap APP or you can also train by yourself and try to compete and surpass your
own previous performances.
Table of contents
Languages:
Other INTERSPORT Treadmill manuals