manuals.online logo
Brands
  1. Home
  2. •
  3. Brands
  4. •
  5. Intex
  6. •
  7. Hot Tub
  8. •
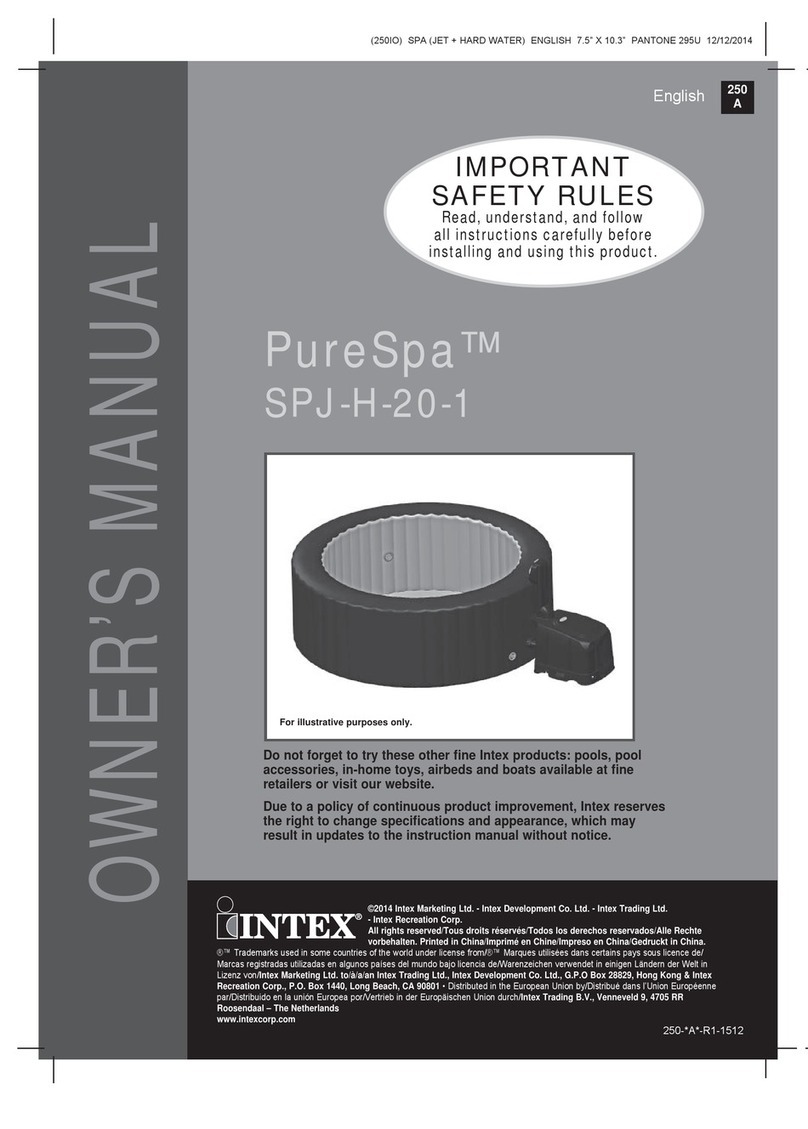
  9. Intex PureSpa SJB-HS-11 User manual

Intex PureSpa SJB-HS-11 User manual

Other Intex Hot Tub manuals

Intex PureSpa Greywood Deluxe SB-HWF20 User manual

Intex

Intex PureSpa Greywood Deluxe SB-HWF20 User manual

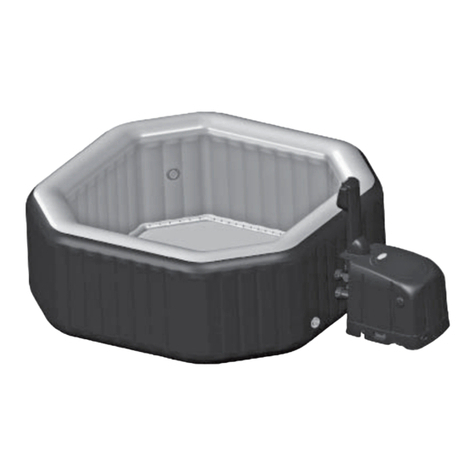
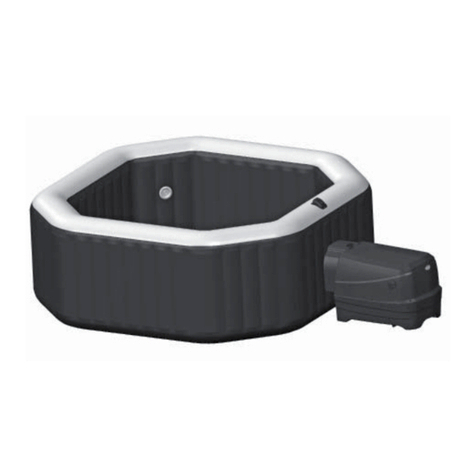
Intex PureSpa Jet & Bubble Deluxe Octagon User manual

Intex

Intex PureSpa Jet & Bubble Deluxe Octagon User manual

Intex PureSpa SB-H10 User manual

Intex

Intex PureSpa SB-H10 User manual

Intex Greywood Deluxe User manual

Intex

Intex Greywood Deluxe User manual

Intex PureSpa SSP-H-20-1C User manual

Intex

Intex PureSpa SSP-H-20-1C User manual

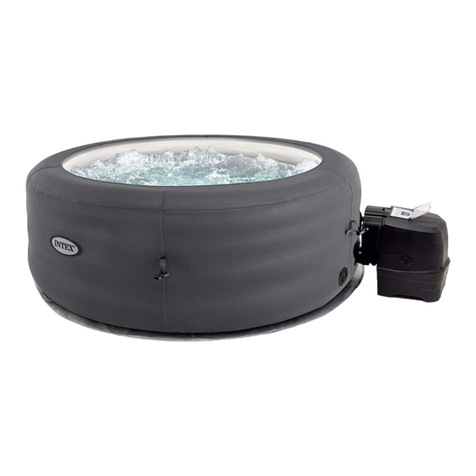
Intex SimpleSpa SB-B10 User manual

Intex

Intex SimpleSpa SB-B10 User manual

Intex PureSpa SB-H20 Assembly instructions

Intex

Intex PureSpa SB-H20 Assembly instructions

Intex PureSpa SB-H20 User manual

Intex

Intex PureSpa SB-H20 User manual

Intex PureSpa SSP-H-20-1 User manual

Intex

Intex PureSpa SSP-H-20-1 User manual

Intex PureSpa SJB-HS-10-1 User manual

Intex

Intex PureSpa SJB-HS-10-1 User manual

Intex PureSpa SB-HSWF10 User manual

Intex

Intex PureSpa SB-HSWF10 User manual

Intex PureSpa Jet Massage User manual

Intex

Intex PureSpa Jet Massage User manual

Intex PureSpa Greywood Deluxe SB-HW20 User manual

Intex

Intex PureSpa Greywood Deluxe SB-HW20 User manual

Intex PureSpa SSP-H-10-1 User manual

Intex

Intex PureSpa SSP-H-10-1 User manual

Intex PureSpa Greywood Deluxe User manual

Intex

Intex PureSpa Greywood Deluxe User manual

Intex PureSpa SPJ-H-22 User manual

Intex

Intex PureSpa SPJ-H-22 User manual

Intex PureSpa SSP-10 User manual

Intex

Intex PureSpa SSP-10 User manual

Intex PureSpa Greystone Deluxe Square User manual

Intex

Intex PureSpa Greystone Deluxe Square User manual

Intex PureSpa SC-WF20 User manual

Intex

Intex PureSpa SC-WF20 User manual

Intex SCL606 User manual

Intex

Intex SCL606 User manual

Intex PureSpa 128462 User manual

Intex

Intex PureSpa 128462 User manual

Intex PureSpa PS-BH-20 User manual

Intex

Intex PureSpa PS-BH-20 User manual

Intex PureSpa SSP-H-20-1 User manual

Intex

Intex PureSpa SSP-H-20-1 User manual

Intex PureSpa Greywood Deluxe SB-HWF10 User manual

Intex

Intex PureSpa Greywood Deluxe SB-HWF10 User manual

Popular Hot Tub manuals by other brands

Jacuzzi Flow Instructions for preinstallation

Jacuzzi

Jacuzzi Flow Instructions for preinstallation

Jacuzzi Premium J-315 owner's manual

Jacuzzi

Jacuzzi Premium J-315 owner's manual

Jacuzzi J-145 owner's manual

Jacuzzi

Jacuzzi J-145 owner's manual

Bestway Lay-Z-Spa 54189 manual

Bestway

Bestway Lay-Z-Spa 54189 manual

Everyday Hot Tubs 530 owner's manual

Everyday Hot Tubs

Everyday Hot Tubs 530 owner's manual

Softub PRESTIGE Owners Manual Water Treatment Guide

Softub

Softub PRESTIGE Owners Manual Water Treatment Guide

JNJ SPAS SPA-318 Programming instructions

JNJ SPAS

JNJ SPAS SPA-318 Programming instructions

KIRAMI Comfort Family Instructions for use

KIRAMI

KIRAMI Comfort Family Instructions for use

QCA Spa VS501 PAK (VL260 TOPSIDE) owner's manual

QCA Spa

QCA Spa VS501 PAK (VL260 TOPSIDE) owner's manual

HoMedics FB-655HJ-GB manual

HoMedics

HoMedics FB-655HJ-GB manual

Jacuzzi alimia instructions

Jacuzzi

Jacuzzi alimia instructions

Jacuzzi ARGA ARG101C0110 Use & maintenance

Jacuzzi

Jacuzzi ARGA ARG101C0110 Use & maintenance

CalderaSpas CalderaSpas Utopia Series owner's manual

CalderaSpas

CalderaSpas CalderaSpas Utopia Series owner's manual

anko SS-601A user manual

anko

anko SS-601A user manual

CalderaSpas CANTABRIA owner's manual

CalderaSpas

CalderaSpas CANTABRIA owner's manual

Dimension One Spas HYDRO SPORT Installation and owner's guide

Dimension One Spas

Dimension One Spas HYDRO SPORT Installation and owner's guide

Bestway Lay-Z-Spa Maldives HydroJet Pro manual

Bestway

Bestway Lay-Z-Spa Maldives HydroJet Pro manual

Dimension One Spas Nautilus Specifications

Dimension One Spas

Dimension One Spas Nautilus Specifications

manuals.online logo
manuals.online logoBrands
  • About & Mission
  • Contact us
  • Privacy Policy
  • Terms and Conditions

Copyright 2025 Manuals.Online. All Rights Reserved.

2016-0685
2017-10-02
Model label: Replacement cell for chlorine generating devices:
86IN X86IN X28IN PURESPA JET AND BUBBLE DELUXE SET Model SJB-HS-11
Replacement cell for the chlorine generating device
86IN X86IN X28IN PURESPA JET AND BUBBLE DELUXE SET Model SJB-HS-11
REGISTRATION NUMBER 32550, PEST CONTROL PRODUCTS ACT. This cell
must only be used on this model of chlorine generating device.
READ THE LABEL, THE INSTALLATION MANUAL AND OPERATION MANUAL OF
THE CHLORINE GENERATING DEVICE device 86IN X86IN X28IN PURESPA JET
AND BUBBLE DELUXE SET Model SJB-HS-11 BEFORE USING.
Registrant:INTEXTRADINGLTD., 
C/O9/FDahSingFinancialCentre,108GloucesterRoad,
Wanchai,HongKong.
CanadianAgent:WilliamWheelerAgencies 
1332CliftonStreetWinnipeg,MBR3E2V2
Telephone:204‐774‐5464
2016-0685
2017-10-02
Model label: Chlorine generating devices:
86IN X86IN X28IN PURESPA JET AND BUBBLE DELUXE SET Model SJB-HS-11
CHLORINE GENERATOR
CONTROLS BACTERIA AND ALGAE
In
Swimming Pool (Spa) Waters
Domestic
A maximum of 1098 L of water can be treated with one
86IN X86IN X28IN PURESPA JET AND BUBBLE DELUXE SET Model
SJB-HS-11 unit.
Maximum output of hypochlorous acid equivalent to 0.012 kg of free available chlorine
per day
For spas, a range of 3-5ppm of free available chlorine must be maintained.
READ THE LABEL AND OPERATING MANUAL BEFORE USING
KEEP OUT OF REACH OF CHILDREN
REGISTRATION NO. 32550 PEST CONTROL PRODUCT ACT
WARNING: operating 86IN X86IN X28IN PURESPA JET AND BUBBLE DELUXE
SET Model SJB-HS-11 without water flow through the cell can cause a build up of
flammable gases which can result in FIRE OR EXPLOSION.
Registrant:IntexDevelopmentCo.Ltd.,
C/O9/FDahSingFinancialCenter,
108GloucesterRoad,Wanchai,HongKong
CanadianAgent:WilliamWheelerAgencies 
1332CliftonStreetWinnipeg,MBR3E2V2
Telephone:204‐774‐5464

2016-0685
2017-10-02
MANUAL
86IN X86IN X28IN PURESPA JET AND BUBBLE DELUXE SET
Model SJB-HS-11
110-120V~, 60Hz, 12A
Read, understand, and follow
all instructions carefully before
installing and using this product.
REGISTRATION NUMBER 32550, PEST CONTROL PRODUCTS ACT
DO NOT RETURN PRODUCT TO STORE
To purchase parts and accessories or to obtain non-technical assistance, Visit
www.intexcorp.com
For technical assistance and missing parts call us toll-free (for U.S. and
Canadian Residents): 1-800-234-6839
Monday through Friday, 8:30am to 5:00pm Pacific Time
SAVE THESE INSTRUCTIONS
Donotforgettotrytheseother
fineIntexproducts:pools,pool
accessories,in-hometoys,
airbedsandboatsavailableat
fine retailersorvisitour
website.
Duetoapolicyofcontinuousproduct
improvement,Intexreserves the
right to change specifications and
appearance, which may resultin
updatestotheinstructionmanual
withoutnotice.
2016-0685
2017-10-02
TABLE OF CONTENTS
Warning...................................................................................................................................3-4
Parts .........................................................................................................................................5-6
Product Specifications........................................................................................................... 7
Set-up ........................................................................................................................................7-10
Salt Level Information...........................................................................................................11
Operation...................................................................................................................................12-13
LED Code Chart.....................................................................................................................14
Maintenance and Chemicals ...................................................................................................15-22
Storage .....................................................................................................................................22
Troubleshooting........................................................................................................................23-25
Warranty .................................................................................................................................26
Changes or modifications not expressly approved by the party responsible for compliance could void the user’s
authority to operate the equipment. Danger
•
RiskofAccidentalDrowning.Extremecautionmustbeexercisedtoprevent
unauthorizedaccessby children.Toavoidaccidents,ensurethatchildren
cannotusethisspaunlesstheyaresupervisedatall
times.
•
Riskofdrowning.Inspectthespacoverregularlyforleaks,prematurewearandtear,
damage,orsignsof deterioration.Neveruseawornordamagedcover:itwillnot
providethelevelofprotectionrequiredto preventunsupervisedaccesstothespabya
child.
•
Riskofinjury.Replacedamagedcordimmediately.Donotburycord.Connecttoa
grounded,grounding
type receptacle only.
•
RiskofInjury.Thesuctionfittingsinthisspaaresizedtomatchthespecificwater
flowcreatedbythe pump.Shouldtheneedarisetoreplacethesuctionfittingsorthe
pump,besurethattheflowratesare
compatible.
•
Toreducetheriskofinjury,donotremovethesuctionfittings.Neveroperateaspaorhot
tubifthesuction fittingsareloose,broken,damaged,crackedormissing.Replace
immediately.Neverreplaceasuction fittingwithoneratedlessthantheflowrate
markedontheoriginalsuctionfitting.
•
Toreducetheriskofdrowningfromhairandbodyentrapment,installasuctionfitting(s)
withamarkedflow ratethatequalsorexceedstheflowratemarkedontheequipment
assembly.
•
Makesurethepoweroutletcurrentandvoltageissuitablefortheelectricalequipment.
•
RiskofElectricShock.Installatleast1.5m(5feet)fromallmetalsurfaces.Asan
alternative,aspamay beinstalledwithin1.5m(5feet)ofmetalsurfacesifeachmetal
surfaceispermanentlyconnectedbya
minimum
8.4mm2
(8AWG)solidcopper
conductortothewireconnectorontheterminalboxthatis
providedforthispurpose.
•
RiskofElectricShock.Donotpermitanyelectricappliance,suchasalight,telephone,
radio,ortelevision,
within1.5m(5feet)ofaspaorhottub.
•
RiskofElectricShock.Donotusethespawhenitisraining,thunderingorlightning.
WARNING
2016-0685
2017-10-02
•
Awireconnectorisprovidedonthisunittoconnectaminimum8.4mm2(8 AWG)
solidcopperconductor betweenthisunitandanymetalequipment,metalenclosuresof
electricalequipment,metalwaterpipe,or conduitwithin1.5m(5feet)oftheunit.
•
Toreducetheriskofdrowningandinjury,donotpermitchildrentousethisproduct
unlesstheyareclosely supervisedatalltimes.
•
Toreducetheriskofchilddrowning,attachandlockspacoveraftereachuse.
•
Toreducetheriskofdrowningandinjury:
a)
Neverusethespaaloneorallowotherstousethespaalone.
b)
Beforeenteringaspaorhottub,theusershouldmeasurethewatertemperature
withanaccurate
thermometer since the tolerance of water
temperature-regulating devices varies.
c)
The water in a spa should never exceed 40°C (104°F)Water temperatures between
38°C (100°F)and 40°C (104°F)areconsideredsafeforahealthyadult.Lowerwater
temperatures are recommended for young children and when spa use exceeds 10
minutes.
d)
Pregnantandpossiblepregnantwomenshouldconsultaphysicianbeforeusingaspaorhottub.
e)
Sinceexcessivewatertemperatureshaveahighpotentialforcausingfetaldamageduring
theearlymonths ofpregnancy,pregnantorpossiblypregnantwomenshouldlimitspa
watertemperaturesto38°C (100°F). Donotstayinspaforlongerthan10minutes.
f)
Theuseofalcohol,drugs,ormedicationbeforeorduringspausemayleadto
unconsciousnesswiththe
possibility of drowning.
g)
Obesepersonsandpersonswithahistoryofheartdisease,loworhighbloodpressure,
circulatorysystem problems,ordiabetesshouldconsultaphysicianbeforeusingaspa.
h)
Personsusingmedicationshouldconsultaphysicianbeforeusingaspasincesome
medicationmay inducedrowsinesswhileothermedicationmayaffectheartrate,
bloodpressure,andcirculation.
i)
Check with a doctor before use if pregnant, diabetic, in poor health, or under medical care.
This equipment has been tested and found to comply with the limits for a Class B digital
device, pursuant to part 15 of the FCC Rules. These limits are designed to provide
reasonable protection against harmful interference in a residential installation. This
equipment generates, uses and can radiate radio frequency energy and, if not installed and
used in accordance with the instructions, may cause harmful interference to radio
communications. However, there is no guarantee that interference will not occur in a
particular installation. If this equipment does cause harmful interference to radio or
television reception, which can be determined by turning the equipment off and on, the user is
encouraged to try to correct the interference by one or more of the following measures:
•
Reorient or relocate the receiving antenna.
•
Increase the separation between the equipment and thereceiver.
•
Connect the equipment into an outlet on a circuit different from that to which the receiver
is connected.
•
Consult the dealer or an experienced radio/TV technician for help.
Operation is subject to the following two conditions: (1) this device may not cause interference, and (2) this device
must accept any interference, including interference that may cause undesired operation of the device.
READ AND FOLLOW ALL INSTRUCTIONS
j)
Exit immediately if uncomfortable, dizzy, or sleepy. Spa heat can cause
hyperthermia and unconsciousness.
Theuseofalcohol,drugs,ormedicationcan
greatlyincreasetheriskoffatalhyperthermia.Thecauses, symptoms,and
effectsofhyperthermiamaybedescribedasfollows:
Hyperthermiaoccurswhentheinternaltemperatureofthebodyreachesalevel
severaldegreesabovethe normal body temperature of 37°C (98.6°F). The
symptoms of hyperthermia include an increase in the internaltemperatureof
thebody,dizziness,lethargy,drowsiness,andfainting.Theeffectsof
hyperthermia
includefailuretoperceiveheat;failuretorecognizetheneedto
exitspaorhottub;unawarenessof impendinghazard;fetaldamagein
pregnantwomen;physicalinabilitytoexitthespaorhottub;and
unconsciousness resulting in the danger of drowning.
•
Peoplewithinfectiousdiseasesshouldnotuseaspaorhottub.
2016-0685
2017-10-02
•
Toavoidinjuryexercisecarewhenenteringorexistingthespaorhottub.
•
Alwaysaddchemicalstowater,neveraddwatertochemicals.Adding
watertochemicalsmaycause strongfumesorviolentreactionsand
hazardouschemicalspray.
•
Neverjumpordiveintoaspaoranyshallowbodyofwater.
•
Assemblyanddisassemblybyadultsonly.
•
Alwaysunplugthisproductfromtheelectricaloutletbeforeremoving,
cleaning,servicingormakingany adjustmenttotheproduct.
•
Theplugmustbeaccessibleafterproductisinstalled.
•
Donotburytheelectricalcord.Locatethecordwhereitwillnotbe
damagedbylawnmowers,hedge
trimmers and other equipment.
•
Ifthesupplycordisdamaged,itmustbereplacedbyaqualifiedelectricianin
ordertoavoidahazard.Use
only identical replacement parts when servicing.
•
Toreducetheriskofelectricshock,donotuseextensioncords,timers,plug
adaptorsorconverterplugsto connectunittoelectricalsupply;providea
properlylocatedoutlet.
•
Donotattempttopluginorunplugthisproduct whilestandinginwaterorwhenyourhandsare
wet.
•
Donotleavethespaemptyforextendedperiodoftime.Donotexposethespaunderdirect
sunshine.
•
Adequatedrainagesystemmustbeprovidedaroundthespatodealwithoverflowwater.
•
Donotallowthewaterinthespatofreeze.Donotturnonthespawhenthewaterisfrozen.
•
Donotusethespaifdamagedindeliveryand/ormalfunctioninginany
fashion.ContacttheIntexservice
center for further direction.
•
Neverpourwaterwithatemperaturehigherthan40°C (104°F)intothespadirectly.
•
Keepallpetsawayfromspatoavoidanydamage.
•
Donotaddbathoilorbathsalttothespawater.
•
WARNING
•
ThisproductisprovidedwithaGFCI/RCDlocatedattheendofthepower
cord.TheGFCI/RCDmustbe testedbeforeeachuse.Donotusethespaifthe
GFCI/RCDdoesnotfunctionproperly.Disconnectthe powercorduntilthe
faulthasbeenidentifiedandcorrected.Contactaqualifiedelectricianto
correctthe fault.DonotbypasstheGFCI/RCD.Therearenoserviceable
partsinsidetheGFCI/RCD.Openingthe GFCI/RCDwillvoidthewarranty.
•
Plugthepowercordintoagroundedelectricalsocket.
•
Pressthe
RESET
buttonontheGFCI/RCD
.
•
Turnonthespaelectricalequipment.
•
Pressthe
TEST
buttonontheGFCI/RCD
.
TheGFCI/RCDindicator
shouldturnoffandthe
electricalequipmentshouldshutoff.Ifthe
GFCI/RCDindicatordoesnotturnoff,andthe
electricalequipment
doesnotshutoff,theGFCI/RCDisfaulty.Donotusethespa.
Contact
aqualifiedelectriciantocorrectthefault.
Pressthe
RESET
buttonontheGFCI/RCD.Theindicatoron theGFCI/RCDshouldturn
on.IftheGFCI/RCDindicatordoes
not turn on, the GFCI/RCD is faulty. Do not use
the spa.
Contactaqualifiedelectricianimmediatelytocorrectthefault
When ordering parts, be sure to quote the model number and part numbers.
SPA SUCTION FITTING
Self-contained spa fittings. – For multiple
outlet use only. – Wall mounting only.
Replace suction fittings within 3 installed
years. – Tool required: screwdriver.
Spa suction fitting maximum flow rate: 84 gpm (5040 gph)
•
Check suction strainer fitting and fasteners for damage or tampering before each use of
the spa.
•
For service and winterization instructions refer to “Maintenance” and “Storage” sections.
•
Read and follow all instructions, save these instructions for future reference.
2016-0685
2017-10-02
Maximum seating capacity: 4 adults 6 adults
Water capacity: 795 L (210 gal) 1098 L (290 gal)
Inner/outer diameter: 150/201 cm
(
59/79 in
)
168/218 cm
(
66.86
Height: 71 cm (28 in)
Jet pump: 0.9 HP / 120 V / 60 Hz 0.95 HP / 120 V / 60 Hz
Bubble air blower: 1.1 HP / 110-120 V / 60 Hz
Filter pump flow rate: 1,741 L/hr (460 gal/hr)
Heater power: 1,300 Watts / 110-120 V / 60 Hz
Temperature range: 20ºC – 40ºC (68
°F - 104°F
Temperature rise: 1-1.5ºC/hr (2-3ºF/hr) 0.5-1ºC/hr
(
º/ )
Number of Water Jet Nozzles: 46
Number of Bubble Jets: 120 140
Spa tub recommended working air pressure: 1.2 psi (0.083 bar)
Cord-connected spa with pump, heater, water jet, blower, control panel, built-in hard water
treatment, and sanitation system.
This product requires a minimum of 13 Amps. If the circuit breaker trips, please check
that no other appliances or other large loads are on the same circuit as the spa.
Site preparation and requirements
•
The spa can be installed indoor or outdoor. For household use only.
•
The spa must be setup on a level, flat and smooth surface that is capable of supporting the
maximum load of the filled spa with four adult occupants: weight 1136Kg (2500 lbs); six
adults: 1592 kg (3500 lbs).
•
Make sure the area is free of sharp objects under or around the spa.
•
Provide adequate drainage system around the spa to deal with overflow water and splashes.
•
Provide a properly located power outlet to connect the spa and alloweasy access for periodic
testing of the cord mounted GFCI/RCD.
•
Make sure there is enough clearance around the spa for full access to the spa equipment for
maintenance and/or service.
•
The area shall facilitate draining purposes during long term spa storage.
Additional requirements for indoor installation
•
Make sure the floor can support the full weight of the filled spa with the maximum number
of occupants. Check with a qualified contractor or a structural engineer to verify this
requirement.
•
Make sure the floor is water resistant and non-slip surface. Do not install the spa on
carpet or other materials that will be damaged by moisture and condensation.
•
Do not install the spa indoors on a second floor above finished living space due to the
possibility of water and humidity damage.
•
Humidity is a natural side effect of indoor spa installation. The room shall be properly
ventilated to allow moisture to escape. Install a ventilating system to prevent excess
condensation, moisture in the room.
Additional requirements for outdoor installation
•
Spa owners may need to comply with local or states laws relating to childproof fencing,
safety barriers, lighting, and other safety requirements. Contact your local building code
enforcement office for further details.
•
Make sure the surface is level, flat, smooth and strong enough to support the full weight of the
filled spa.
•
Do not setup the spa on grass or dirt, as this increases the amount of debris entering the spa, and
damage the spa floor.
•
Do not expose the spa to direct sunlight for extended period of time.
It is possible to install and leave the spa outside at a temperature not lower than 4°C (39°F) provided the
water temperature inside the spa is higher than 4°C (39°F) and the water inside the circulation system,
pump, pipe are not frozen. Put a “temp barrier mat” between the spa floor and the ground to prevent heat
loss from the bottom of the spa and to provide better heat retention.
2016-0685
2017-10-02
Setup the spa with at least 2 persons.
1.
Move the entire package to the selected site. Do not drag the spa
tub across the ground as this can cause damage and leakage.
Open the carton carefully as this carton can be used to store the spa
during long term storage or when not in use.
2.
Lay out all the parts on the ground and make sure all the parts are
accounted for. For missing or damaged parts contact the
appropriate Intex Service Center listed in the separate “Authorized
service Centers” sheet.
3.
Safety Sign Card Posting
4.
The Safety Sign card included with the manual shall be posted in an
area visible to the users of the spa to alert them of the safety rules and
warnings. For replacement of the safety sign card, visit our website at
www.intexcorp.com for additional print copies. Laminate the printed
safety sign copy for protection from the elements.
Spa Control Unit Assembly
1.
Connect the control panel (3) cable plug into the receptacle on top of
the spa control base and screw in the plug cover firmly by hand (see
drawing 1). Note: Spread the ground cloth with the bubbles facing
down over the cleared area where you intend to setup your spa.
2.
Screw the control panel bolts (4) with the provided bolt wrench (6) to secure the
control panel (see drawing 2).
3.
Plug the spa control unit into a grounded electrical outlet.
For indoor inflation:
Inflate the Spa Tub Wall
1.
Take out the ground cloth (19) and spread it over the cleared area.
Then spread out the spa liner over the ground cloth and point the
drain valve towards a suitable draining area.
NOTE: Spread the ground cloth with the bubbles facing down over
the cleared area where you intend to setup your spa.
2.
Unscrew the control base inflation cap (9) to reveal the air blower
inflation outlet, insert one end of the inflation hose (7) into the outlet
and turn to the right to lock it (see drawing 3).
3.
Unscrew the air valve cap to reveal the stem in the up position for
inflation. Insert the other end of the inflation hose (7) into the valve
and turn to the right to lock it in position (see drawing 4).
4.
Press the button to turn on the control unit panel buttons first. Press
the button to inflate the spa tub wall until it is firm to the touch but not
hard (see drawing 5).
IMPORTANT: Do not over inflate or use high pressure air compressor to inflate.
5.
Press the button again to turn it off.
6.
Disconnect the inflation hose (7) from the air valve and attach the
2016-0685
2017-10-02
pressure gauge (5) to the air valve. The pressure gauge indicator
should be in the green area for a properly inflated spa tub (see
drawing 6). Repeat previous steps to add more air if necessary.
7.
Replace the air valve cap back.
NOTE: The cap is designed to be screwed on and off. Never exert
force as this could cause the complete internal inflation system of the
valve to come loose. See “Spa Tub Air Valve Fastening” for valve
maintenance.
Inflate the Spa Cover Air Bladder
1. Open the inflation valve and insert the inflation hose (7) into the valve ,press to inflate until it is firm to
the touch but not hard
2. disconnected the inflation hose (7) from the air blower inflation outlet and the valve.
3. Replace the control base inflation cap (9) back, close and recess the inflation valve
NOTE: If there is a need to add some air to the spa tub wall or spa cover
air bladder after they have been setup, refer to above “Inflate the Spa Tub
Wall” and “Inflate the Spa Cover Air Bladder” sections. The cover air
bladder is preinstalled inside the spa cover. If it needs to be reinstalled,
place the uninflated air bladder inside the spa cover lip before inflating the
bladder.
Deflation
For Spa Tub Wall:
1.
Unscrew the cap
to reveal the
stem, push the
stem in and turn
90 degree right
to secure it in the
down position
(see drawing 8).
2.
Once the
deflation is
completed,
push the stem
in and turn 90
degree left to
return it to the
inflation
position.
3.
Replace the cap back.
For Cover Air Bladder:
1.
Pull valve cap out and squeeze the valve at its base until deflated.
2.
Close and recess the valve back.
Spa Control Unit Installation
1.
Connect the spa control unit to the spa tub (see drawing 9).
Hand-tighten the connectors securely. Do not use tools to tighten.
CAUTION:
Do not sit, lean, cover or place any objects over the spa control
unit.
2.
Attach the two filter cartridge housing assemblies to the two outlet grids
on the inside of the spa (marked “B”). Inflate the spa tub first before
installing filter pump fittings.
ATTENTION! In order to comply with the requirements of the Virginia
2016-0685
2017-10-02
Grahame Baker Act, suction outlets cannot be covered while the spa
is in use. The Act was intended to address high suction / volume
circulation systems but does not exclude low volume systems as used
on this spa. Accordingly, remove the filter cartridge assemblies and
any other spa cleaning attachment from the spa outlets before spa
usage (see drawing 10). Re-attach them after usage for water
filtration and cleaning.
3.
Before filling with water ensure the bottom drain valve caps are
securely closed on the inside and outside.
4.
Fill the spa tub with freshwater to a level between MIN and MAX
marked on the inside of the spa wall. Do not over fill the spa. Never
move the spa tub with water inside and/or with the control base
attached to the spa as the spa or control base may be damaged.
. WARNING: Never pour water with a temperature higher than 40°C
(104°F) into the spa directly. It is
recommended to fill the spa tub
with lukewarm water for quick heating and energy saving.
5.
Place the spa cover and spa air bladder (pre-installed in spa cover)
over the spa tub, and make sure the spa cover buckles are locked
using the key provided after pulling the buckled straps tight.
IMPORTANT: Inspect the spa cover regularly for leak, premature
wear and tear or deterioration. Never use a damaged spa cover.
6.
Ensure the spa is plugged into a grounded electrical socket and
press the button to turn on the control unit panel buttons first. Press the
button on the control panel to activate the heater,see “Spa
Control Unit
Panel” operation section.
IMPORTANT: The following conditions will lead to slow water heating:
•
The ambient temperature is lower than 10ºC (50ºF).
•
Outdoor wind speed is above 3.5-5. 4m/s (8-12 mph).
•
The jet function is activated when heating the spa water.
•
The spa is not properly covered with the spa cover when the water is heating.
The spa comes with a built-in saltwater sanitation system. Common salt (sodium
chloride) is made up of two elements, sodium and chloride. During the installation of
the device, a measured quantity of salt is dissolved in the SPA water to make it
slightly salty. The SPA water flows through the sanitation system’s electrolytic cell
to produce chlorine. The chlorine dissolves in the water and instantly starts
destroying bacteria and algae. It also oxidizes all other organic materials.
•
Which kind of salt to use:
Use only Sodium Chloride Salts
Use only sodium chloride (NaCl) salt that is at least 99.9% pure. It is also acceptable
to use water conditioning salt pellets (the compressed forms of evaporated salt).
However, it will take alonger time for them to dissolve. Do not use iodized or yellow
(yellow prussiate of soda) colored salt. Salt is added to the SPA water and the
electrolytic cell uses the salt to create chlorine. The purer the salt the better the
performance of the electrolytic cell.
•
Optimum Salt Levels
The ideal salt level in the SPA water is between 2000-3000 ppm (parts per million).
The optimal level is 2500 ppm.
A too low salt level will reduce the efficiency of the sanitation system and result in low
chlorine production. Too high a salt level may damage the power supply and cause
corrosion to metal fixtures and accessories. The salt in the SPA is constantly
recycled. The loss of salt is due only to SPA water being physically removed from the