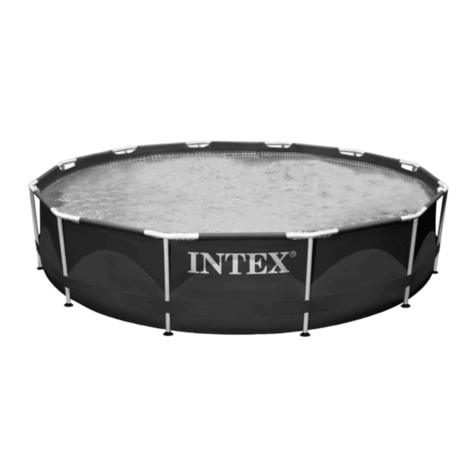
Intex 128210NP User manual

Zusammengeführte PDF Datei. Die Originale sind im folgenden Verzeichnis verlinkt. / Merged PDF File. Original files are linked in the following list. / Sloučený soubor PDF.
Originály jsou propojeny v následujícím adresáři. / Egyesített PDF fájl. Az eredetiek a következő könyvtárban találhatók. / Zlúčený súbor PDF. Originály sú prepojené v
nasledujúcom adresári. / Združena datoteka PDF. Izvirniki so povezani v naslednjem imeniku. / Spojena PDF datoteka. Izvornici su povezani u sljedećem imeniku.
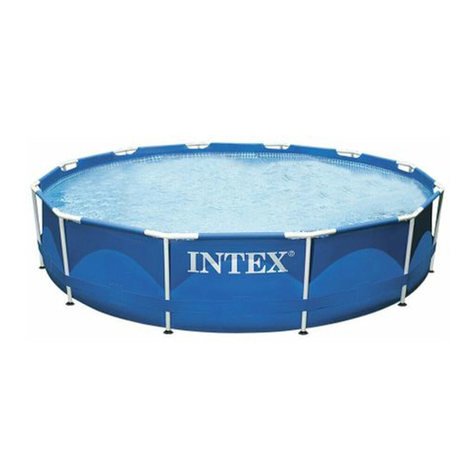
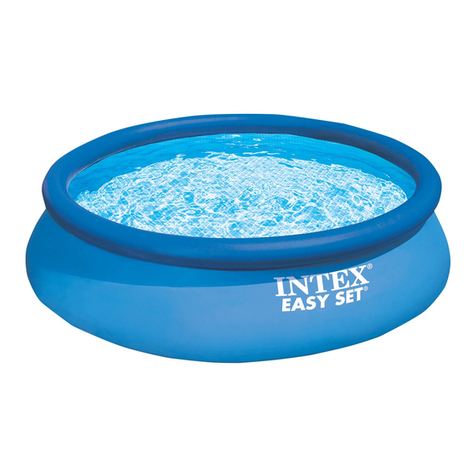
128210NP - Frame Pool Rondo Ø 366 x 76 cm
Above Ground Pool 2
Overview Pool Size vs Pump Running Time 15
Setup Video 17
Repair Kit 19
Service Center 20

87
A
English
(87IO) METAL FRAME POOL ENGLISH 7.5” X 10.3” PANTONE 295U 04/29/2022
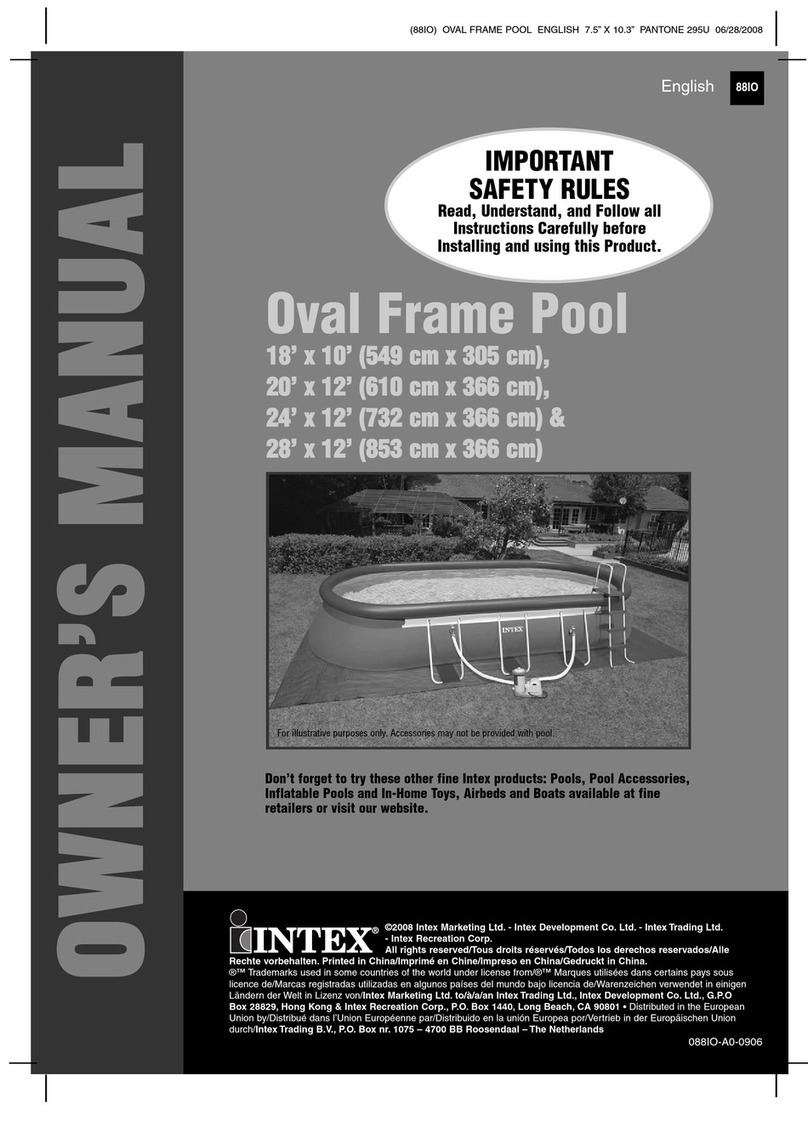
OWNER’S MANUAL
METAL FRAME POOL
8’ - 24’ (244cm - 732cm) models
IMPORTANT
SAFETY RULES
Please read, understand, and follow all
instructions carefully before installing
and using this product.
Keep for
future reference.
Don’t forget to try these other fine Intex products: Pools, Pool
Accessories, Inflatable Pools and In-Home Toys, Airbeds and
Boats available at fine retailers or visit our website listed below.
Due to a policy of continuous product improvement, Intex
reserves the right to change specifications and appearance,
which may result in updates to the instruction manual without
notice.
For illustrative purposes only.
©2022 Intex Marketing Ltd. - Intex Development Co. Ltd. - Intex Recreation Corp. All rights
reserved/Tous droits réservés/Todos los derechos reservados/Alle Rechte vorbehalten.
Printed in China/Imprimé en Chine/Impreso en China/Gedruckt in China.
®™ Trademarks used in some countries of the world under license from/®™ Marques utilisées dans certains pays sous licence de/
Marcas registradas utilizadas en algunos países del mundo bajo licencia de/Warenzeichen verwendet in einigen Ländern der Welt in
Lizenz von/Intex Marketing Ltd. to/à/a/an Intex Development Co. Ltd., Hong Kong & Intex Recreation Corp., P.O. Box 1440, Long
Beach, CA 90801 • Distributed in the European Union by/Distribué dans l’Union Européenne par/Distribuido en la unión Europea por/
Vertrieb in der Europäischen Union durch/Intex Trading B.V., Ettenseweg 46, 4706 PB Roosendaal – The Netherlands • Distributed in
the UK by Unitex Service (UK) Limited, 21 Holborn Viaduct, London EC1A 2DY, UK.
www.intexcorp.com
087-*A*-R0-2304

87
A
SAVE THESE INSTRUCTIONS
English
(87IO) METAL FRAME POOL ENGLISH 7.5” X 10.3” PANTONE 295U 04/29/2022
Page 2
Warnings / Important safety rules................................................ 3-4
Parts References............................................................................ 5-6
Setup Instructions.......................................................................... 7-9
Pool Maintenance & Chemicals.................................................... 10
Troubleshooting............................................................................. 10
Pool maintenance & drainage....................................................... 11
Winter preparations....................................................................... 12
General Aquatic Safety.................................................................. 12
Limited Warranty............................................................................ 13
Special Introductory note:
Thanks for buying an Intex pool. Please read this manual before setting up your pool.
This information will help extend the pool life and make the pool safer for your family’s
enjoyment. A team of 2-3 people is recommended for pool set up. Additional people will
speed up the installation.
No tools are required for the assembly.
TABLE OF CONTENTS

87
A
SAVE THESE INSTRUCTIONS
English
(87IO) METAL FRAME POOL ENGLISH 7.5” X 10.3” PANTONE 295U 04/29/2022
Page 3
IMPORTANT SAFETY RULES
Read, Understand and Follow All Instructions Carefully Before Installing and Using this Product.
• Continuous and competent adult supervision of children and the disabled is required at all times.
• Secure all doors, windows and safety barriers to prevent unauthorized, unintentional or unsupervised pool
entry.
• Install a safety barrier that will eliminate access to the pool for young children and pets.
• Pool and pool accessories are to be assembled and disassembled by adults only.
• Never dive, jump or slide into an above-ground pool or any shallow body of water.
• Failure to set up pool on flat, level, compact ground or over filling could result in the pool’s collapse and the
possibility that a person lounging in the pool could be swept out/ejected.
• Do not lean, straddle, or exert pressure on the inflatable ring or top rim as injury or flooding could occur. Do
not allow anyone to sit on, climb, or straddle the sides of the pool.
• Remove all toys and flotation devices from, in, and around the pool when it is not in use. Objects in the pool
attract young children.
• Keep toys, chairs, tables, or any objects that a child could climb on at least four feet (1.22 meters) away
from the pool.
• Keep rescue equipment by the pool and clearly post emergency numbers at the phone closest to the pool.
Examples of rescue equipment: coast guard approved ring buoy with attached rope, strong rigid pole not
less than twelve feet (12') [3.66m] long.
• Never swim alone or allow others to swim alone.
• Keep your pool clean and clear. The pool floor must be visible at all times from the outside barrier of the
pool.
• If swimming at night use properly installed artificial lighting to illuminate all safety signs, ladders, pool floor
and walkways.
• Stay away from the pool when using alcohol or drugs/medication.
• Keep children away from pool covers to avoid entanglement, drowning, or other serious injury.
• Pool covers must be completely removed before pool use. Children and adults cannot be seen under a pool
cover.
• Do not cover the pool while you or anyone else is in the pool.
• Keep the pool and pool area clean and clear to avoid slips and falls and objects that may cause injury.
• Protect all pool occupants from recreational water illnesses by keeping the pool water sanitized. Don’t
swallow the pool water. Practice good hygiene.
• All pools are subject to wear and deterioration. Certain types of excessive or accelerated deterioration can
lead to an operation failure, and can ultimately cause the loss of large quantities of water from your pool.
Therefore, it is very important that you properly maintain your pool on a regular basis.
• This pool is for outdoor use only.
• Empty pool completely when not in use for a longer period and safely store the empty pool in such a way
that it does not collect water from rain or any other source, and to prevent from being blown away by strong
wind. See storage instructions.
• While the swimming pool is in use, you will need to operate the filter pump to ensure that there is at least
one complete turnover of water a day. Consult your pump’s manual to calculate the necessary
operating hours.
POOL BARRIERS AND COVERS ARE NOT SUBSTITUTES FOR CONTINUOUS AND COMPETENT
ADULT SUPERVISION. POOL DOES NOT COME WITH A LIFEGUARD. ADULTS ARE THEREFORE
REQUIRED TO ACT AS LIFEGUARDS OR WATER WATCHERS AND PROTECT THE LIVES OF ALL
POOL USERS, ESPECIALLY CHILDREN, IN AND AROUND THE POOL.
FAILURE TO FOLLOW THESE WARNINGS MAY RESULT IN PROPERTY
DAMAGE, SERIOUS INJURY OR DEATH.
Advisory:
Pool owners may need to comply with local or state laws relating to childproof fencing, safety barriers, lighting,
and other safety requirements. Customers should contact their local building code enforcement office for
further details.
WARNING
87
A
SAVE THESE INSTRUCTIONS
English
(87IO) METAL FRAME POOL ENGLISH 7.5” X 10.3” PANTONE 295U 04/29/2022
Page 4
IMPORTANT SAFETY RULES
Please read, understand, and follow all instructions carefully before installing and using this product. These
warnings, instructions, and safety guidelines address some common risks of water recreation, but they cannot
cover all risks and dangers in all cases. Always use caution, common sense, and good judgment when
enjoying any water activity. Keep for future reference. Packaging must be read carefully and kept for future
reference. See product for additional warnings.
General
• Check pins, bolts and/or screws for rust; splinters or any sharp edges regularly, especially accessible
surfaces, to avoid injuries.
Non swimmers safety
• Continuous, active, and vigilant supervision of weak swimmers and non-swimmers by a competent adult is
required at all times (remembering that children under five are at the highest risk of drowning).
• Designate a competent adult to supervise the pool each time it is being used.
• Weak swimmers or non-swimmers should wear personal protection equipment when using the pool.
• When the pool is not in use, or unsupervised, remove all toys from the swimming pool and its surrounding to
avoid attracting children to the pool.
Safety devices
• It is recommended to install a barrier (and secure all doors and windows, where applicable) to prevent
unauthorized access to the swimming pool.
• Barriers, pool covers, pool alarms, or similar safety devices are helpful aids, but they are not substitutes for
continuous and competent adult supervision.
Safety equipment
• It is recommended to keep rescue equipment (e.g. a ring buoy) by the pool.
• Keep a working phone and a list of emergency phone numbers near the pool.
Safe use of the pool
• Encourage all users especially children to learn how to swim.
• Learn Basic Life Support (Cardiopulmonary Resuscitation - CPR) and refresh this knowledge regularly. This
can make a life-saving difference in the event of an emergency.
• Instruct all pool users, including children, what to do in case of an emergency.
• Never dive into any shallow body of water. This can lead to serious injury or death.
• Do not use the swimming pool when using alcohol or medication that may impair your ability to safely use
the pool.
• When pool covers are used, remove them completely from the water surface before entering the pool.
• Protect pool occupants from water related illnesses by keeping the pool water treated and practicing good
hygiene. Consult the water treatment guidelines in the user’s manual.
• Store chemicals (e.g. water treatment, cleaning or disinfection products) out of the reach of children.
• Removable ladders shall be placed on a horizontal surface.
• Observe and follow the warnings and safety signs on the pool wall.

87
A
SAVE THESE INSTRUCTIONS
English
(87IO) METAL FRAME POOL ENGLISH 7.5” X 10.3” PANTONE 295U 04/29/2022
Page 5
PARTS REFERENCE
Before assembling your product, please take a few minutes to check the contents
and become familiar with all the parts.
16’ (488cm) and below
(The number of pieces will vary depending on the pool size)
18’ (549cm) and above
(The number of pieces will vary depending on the pool size)
NOTE: Drawings for illustration purpose only. Actual product may vary. Not to scale.
3
4
5
6
7
8
10
1 2
9
1 2
9
3
4
5
6
7
8

87
A
SAVE THESE INSTRUCTIONS
English
(87IO) METAL FRAME POOL ENGLISH 7.5” X 10.3” PANTONE 295U 04/29/2022
Page 6
REF
NO. DESCRIPTION
8 X 20”
(244cm X 51cm)
8 X 30”
(244cm X 76cm)
10’ X 30”
(305cm X 76cm)
10’ X 30”
(305cm X 76cm)
Printing
12’ X 30”
(366cm X 76cm)
12’ X 33”
(366cm X 84cm)
12’ X 36”
(366cm X 91cm)
12’ X 39”
(366cm X 99cm)
12’ X 48”
( 366cm X 122cm)
13’ X 39”
(396cm X 99cm)
SPARE PART NO.
1 DRAIN CONNECTOR 10201 10201 10201 10201 10201 10201 10201 10201 10201 10201
2 DRAIN VALVE CAP 10649 10649 10649 10649 10649 10649 10649 10649 10649 10649
3 T - JOINT 13010 13240 12798 12798 12798 12798 12798 12798 12798 12799
4 LEG CAP
11574D 11574D
10309 10309 10309 10309 10309 10309 10309 12138
5 HORIZONTAL BEAM 13011 13234 12807 12807 12807 12807 12807 12807 12807 12808
6
POOL LINER (DRAIN VALVE CAP INCLUDED) <BLUE>
13001 13233 10095 13022 10096 12883 12884 12885 12886 12887
7 VERTICAL LEG 13012 13235 12810 12810 12810 12811 12812 12813 12814 12815
8 GROUND CLOTH ----------
9 POOL COVER ---------
11142
10
STRAINER HOLE PLUG (WITH 1 EXTRA)
10127 10127 10127 10127 10127 10127 10127 10127 10127 10127
REF
NO. DESCRIPTION
14 X 42”
(427cm X 107cm)
14’ X 48”
(427cm X 122cm)
15’ X 33”
(457cm X 84cm)
15’ X 36”
(457cm X 91cm)
15’ X 42”
(457cm X 107cm)
15’ X 48”
(457cm X 122cm)
16’ X 42”
(488cm X 107cm)
16’ X 48”
(488cm X 122cm)
18’ X 48”
(549cm X 122cm)
24’ X 52”
(732cm X 132cm)
SPARE PART NO.
1 DRAIN CONNECTOR 10201 10201 10201 10201 10201 10201 10201 10201 10201 10201
2 DRAIN VALVE CAP 10649 11044 10649 10649 11044 11044 11044 11044 11044 11044
3 T - JOINT 12799 12799 12799 12799 12799 12799 12799 12799 12800 12800
4 LEG CAP 12138 12138 12138 12138 12138 12138 12138 12138 12139 12139
5 HORIZONTAL BEAM 12808 12808 12808 12808 12808 12808 12808 12808 12809 12809
6
POOL LINER (DRAIN VALVE CAP INCLUDED) <BLUE> OR
12888 12889 10097 12890 12891 10098 12892 12893 10099 12894
POOL LINER (DRAIN VALVE CAP INCLUDED) <GREY>
---------
11043
7 VERTICAL LEG 12816 12818 12817 12337 12816 12818 12816 12818 12819 12820
8 GROUND CLOTH --
18932 18932 18932 18932 18927 18927 18933 18935
9 POOL COVER 11054 11054 18901 18901 18901 18901 10754 10754 18937 18929
10
STRAINER HOLE PLUG (WITH 1 EXTRA)
10127 10127 10127 10127 10127 10127 10127 10127 --
REF
NO. DESCRIPTION
POOL SIZE & QUANTITIES
8’
(244cm)
10’
(305cm)
12’
(366cm)
13’
(396cm)
14’
(427cm)
15’
(457cm)
16’
(488cm)
18’
(549cm)
24’
(732cm)
1 DRAIN CONNECTOR 1 1 1 1 1 1 1 1 1
2 DRAIN VALVE CAP 1 1 1 1 1 1 1 2 2
3 T - JOINT 8 10 12 13 14 15 16 18 24
4 LEG CAP 8 10 12 13 14 15 16 18 24
5 HORIZONTAL BEAM 8 10 12 13 14 15 16 18 24
6
POOL LINER (DRAIN VALVE CAP INCLUDED)
111111111
7 VERTICAL LEG 8 10 12 13 14 15 16 18 24
8 GROUND CLOTH -----1111
9 POOL COVER ---111111
10 STRAINER HOLE PLUG (WITH 1 EXTRA) 3 3 3 3 3 3 3 --

87
A
SAVE THESE INSTRUCTIONS
English
(87IO) METAL FRAME POOL ENGLISH 7.5” X 10.3” PANTONE 295U 04/29/2022
Page 7
IMPORTANT
Before allowing anyone to use the pool, hold a family meeting. Establish a set of rules that
include, at a minimum, the important safety rules and general aquatic safety information in this
manual. Review these rules on a regular basis and with all users of the pool, including guests.
POOL SETUP
WARNING
IMPORTANT SITE SELECTION AND GROUND
PREPARATION INFORMATION
• The pool location must allow you to secure all doors, windows, and safety barriers to prevent
unauthorized, unintentional or unsupervised pool entry.
• Install a safety barrier that will eliminate access to the pool for young children and pets.
• Failure to set up the pool on flat, level, compact ground and to assemble and fill with water
in accordance with the following instructions could result in the pool’s collapse or the
possibility that a person lounging in the pool could be swept out/ejected, resulting in serious
injury or property damage.
• Risk of electric shock: connect the filter pump only to a grounding type receptacle protected
by a ground-fault circuit interrupter (GFCI) or residual current device (RCD). To reduce the risk
of an electrical shock, do not use extension cords, timers, plug adapters or converter plugs
to connect the pump to an electrical supply. Always provide a properly located outlet. Locate
the cord where it cannot be damaged by lawn mowers, hedge trimmers, and other equipment.
See the filter pump manual for additional warnings and instructions.
• Risk of serious injury: do not attempt to assemble pool in high wind conditions.
Select an outdoor location for the pool with the following requirements in mind:
1. The area where the pool is to be set up must be absolutely flat and level. Do not set up the pool on a
slope or inclined surface.
2. The ground surface must be compacted and firm enough to withstand the pressure and weight of a fully
set up pool. Do not set up the pool on mud, sand, soft or loose soil conditions.
3. Do not set up the pool on a deck, balcony or platform, which may collapse under the weight of the filled
pool.
4. The pool requires at least 4 feet of space all around pool from objects that a child could climb on to gain
access to the pool.
5. Grass under the pool will be damaged. Splash out chlorinated pool water could damage the surrounding
vegetation.
6. Eliminate all aggressive grasses first. Certain types of grass such as St. Augustine and Bermuda, may
grow through the liner. Grass growing through the liner it is not a manufacture defect and is not covered
under warranty.
7. The area shall facilitate drainage of the pool water after each use and/or for long term pool storage.

87
A
SAVE THESE INSTRUCTIONS
English
(87IO) METAL FRAME POOL ENGLISH 7.5” X 10.3” PANTONE 295U 04/29/2022
Page 8
POOL SETUP (continued)
You may have purchased this pool with the Intex Krystal Clear™ filter pump. The pump has its own
separate set of installation instructions. First assemble your pool unit and then set up the filter pump.
Estimated assembly time 30-60 minutes. (Note the assembly time is only approximate and individual
assembly experience may vary.)
1. Liner preparation
• Find a flat, level location that is free and clear of stones, branches or other sharp objects that may
puncture the pool liner or cause injury.
• Open the carton containing the liner, joints, legs, etc., very carefully as this carton can be used to store
the pool during the winter months or when not in use.
• Take out the ground cloth (8) (if included) and spread it
over the cleared area. Then take out the liner (6) and
spread it out over the ground cloth, with the drain valve
directed towards the draining area. Place the drain valve
away from the house. Allow the sun to warm up the liner
before inserting the beams (5) into the sleeve openings.
IMPORTANT: Always set up the pool unit with at least
2 persons. Do not drag the liner across the ground
as this can cause liner damage and pool leakage
(see drawing 1).
• During the setup of this pool liner, point the hose connections or openings in the direction of the electric
power source. The outer edge of the pool should be within reach of the pump’s electrical connection.
2. Horizontal beams assembly
• The frame pool’s legs (7) and beams (5) fall into two groups. The larger diameters are the horizontal
beams that are slid (pushed) into the sleeve openings at the top of the liner. The smaller diameters are
the vertical legs. Both these legs and beams fit into the T-joints (3).
NOTE: Sprinkle some talcum powder over the horizontal beams
before sliding them into the pool liner sleeve. This will make
removal of the beams from the liner easier during the disassembly
of the pool.
• Starting at any location, but always working in the same direction,
push the horizontal beam into the sleeve. Once the beam is centered
take one of the T-joints and attach the joint to one end of the beam.
Push the beam firmly into the T-joint. Repeat this procedure in a
circular fashion until all the beams and joints have been connected
(see drawings 2.1 & 2.2).
NOTE: It’s important to start from one location and work in the
same direction until the last attachment. Do not start from multiple
locations as this will make the connections difficult for the last few
beams and joints.
The last joint connection may be difficult to complete. You can
do it though, if you first simultaneously raise the last joint and
beam about 2 inches (5cm). Now insert the beam into the joint
while lowering the pieces into position. The beam will easily
slide into the joint (see drawing 2.3). Ensure that the last joint
is fully connected before proceeding to connecting the legs.
1
6
2.3
3
2.2
5
3
2.1
5

87
A
SAVE THESE INSTRUCTIONS
English
(87IO) METAL FRAME POOL ENGLISH 7.5” X 10.3” PANTONE 295U 04/29/2022
Page 9
3. Vertical legs assembly
• For
8’ x 20” (244 cm x 51 cm):
Attach the leg’s end cap (4) to the bottom of each leg (7) first.
With the beams and T-joints assembly resting on the ground,
insert the top of the leg into the bottom of the T-joint (3) (see
drawing 3.1). Continue the process with all the vertical legs.
NOTE: This pool size does not come with an all-around center
belt.
• Lift the beams assembly and make sure all the legs are in
a vertical position (see drawing 3.2). Push all the T-joints
downward to ensure they are firmly connected to the legs.
•
For 10’ (305 cm) and above sizes:
Attach the leg’s end cap (4) to the bottom of each leg (7) first.
With the beams and T-joints assembly resting on the ground,
slide one vertical leg into the belt loop located in the middle
of the pool liner and insert the top of the leg into the bottom
of the T-joint (3) (see drawing 3.3). Continue the process
with all the vertical legs.
• Lift the beams assembly and make sure all the legs are in
a vertical position (see drawing 3.4). Push all the T-joints
downward to ensure they are firmly connected to the legs.
• Pull gently, in an outward direction, the bottom of the leg making sure the leg is vertical and perpendicular
to the level ground.
4. Filling of the pool
• The following applies to pool liners with hose connectors (16’ (488cm) & below pools). If the pool was
purchased without a filter pump, insert two of the three plugs (10) into the black filter pump outlets. Do
this from the inside of the pool so that water will not run out when filling it. If the pool was purchased
with a filter pump, read the Krystal Clear™ Filter Pump Manual first and then proceed to next installation
step.
• Before filling the pool with water, ensure that the drain plug inside the pool is closed and that the drain
cap on the outside is screwed on tightly. Fill the pool with no more than 1 inch (2.5 cm) of water. Check
to see whether the water is level.
IMPORTANT: If the water in the pool flows to one side, the pool is not completely level. Setting
up the pool on unlevel ground will cause the pool to tilt resulting in the sidewall material bulging
and a potential collapse of the pool. If the pool is not completely level, you must drain the pool,
level the area or move the pool to a different area that is level, and re-fill the pool, following the
above directions.
• Smooth out the bottom liner wrinkles (from inside the pool) by pushing out where the pool floor and pool
sides meet. Or, (from outside pool) reach under the side of the pool, grasp the pool floor and pull in an
outward direction. If the ground cloth is causing the wrinkles, have 2 people pull from opposite sides to
remove all wrinkles. Use the properly assembled pool ladder when entering or exiting the pool during this
process. Also make sure all the legs are vertical and perpendicular to the ground.
• Fill the pool with water up to just below the sleeve line
(see drawing 4).
POOL SETUP (continued)
4
WATER LEVEL
3.1
7
4
7
4
3.2
3
3.3
7
4
7
4
3.4
3

87
A
SAVE THESE INSTRUCTIONS
English
(87IO) METAL FRAME POOL ENGLISH 7.5” X 10.3” PANTONE 295U 04/29/2022
Page 10
PROBLEM DESCRIPTION CAUSE SOLUTION
ALGAE
COLORED
WATER
FLOATING
MATTER IN
WATER
CHRONIC LOW
WATER LEVEL
SEDIMENT ON
POOL BOTTOM
SURFACE DEBRIS
• Greenish water.
• Green or black spots
on pool liner.
• Pool liner is slippery
and/or has a bad odor.
• Water turns blue,
brown, or black when
first treated with
chlorine.
• Water is cloudy or
milky.
• Level is lower than
on previous day.
• Dirt or sand on pool
floor.
• Leaves, insects etc.
• Chlorine and pH level
need adjustment.
• Copper, iron or
manganese in water
being oxidized by the
added chlorine.
• "Hard water" caused by a
too high pH level.
• Chlorine content is low.
• Foreign matter in water.
• Rip or hole in pool liner
or hoses.
• Heavy use, getting in
and out of pool.
• Pool too close to trees.
• Super chlorinate with shock
treatment. Correct pH to your
pool store's recommended level.
• Vacuum pool bottom.
• Maintain proper chlorine level.
• Adjust pH to recommended
level.
• Run filter until water is clear.
• Replace cartridge frequently.
• Correct the pH level. Check with
your pool dealer for advice.
• Check for proper chlorine level.
•
Clean or replace your filter cartridge.
• Repair with patch kit.
• Finger tighten all caps.
• Replace the hoses.
• Use Intex pool vacuum to
clean bottom of pool.
• Use Intex pool skimmer.
Water maintenance
The maintenance of a proper water balance through appropriate use of sanitizers is the single most
important factor in maximizing the life and appearance of the liner as well as ensuring clean, healthy
and safe water. Proper technique is important for water testing and treating the pool water. See your
pool professional for chemical, test kits and testing procedures. Be sure to read and follow the
written instructions from the chemical manufacturer.
1. Never let chlorine come in contact with the liner if it is not completely dissolved. Dissolve granular or
tablet chlorine first in a bucket of water, then add it to the pool water. Likewise with liquid chlorine; mix it
immediately and thoroughly with the pool water.
2. Never mix chemicals together. Add the chemicals to the pool water separately. Thoroughly dissolve each
chemical before adding another one to the water.
3. An Intex pool skimmer and an Intex pool vacuum are available to assist in maintaining clean pool water.
See your pool dealer for these pool accessories.
4. Do not use a pressure washer to clean the pool.
TROUBLESHOOTING
POOL MAINTENANCE & CHEMICALS
REMEMBER TO
• Protect all pool occupants from possible water-related illnesses by keeping the pool water
clean and sanitized. Do not swallow the pool water. Always practice good hygiene.
• Keep your pool clean and clear. The pool floor must be visible at all times from the outside
barrier of the pool.
• Keep children away from pool covers to avoid entanglement, drowning, or other serious
injury.
WARNING
87
A
SAVE THESE INSTRUCTIONS
English
(87IO) METAL FRAME POOL ENGLISH 7.5” X 10.3” PANTONE 295U 04/29/2022
Page 11
EXCESSIVE RAIN: To avoid damage to the pool and over filling, immediately drain rain water that
causes the water level to be higher than the maximum.
How to Drain Your Pool and Long Term Storage
1. Check local regulations for specific directions regarding disposal of swimming pool water.
2. Check to make sure that the drain plug inside the pool is plugged in place.
3. Remove the cap from the drain valve on the outside pool wall.
4. Attach the female end of the garden hose to the drain connector (1).
5. Place the other end of the hose in an area where the water can be safely drained away from the house
and other nearby structures.
6. Attach the drain connector to the drain valve. NOTE: The drain connector will push the drain plug
open inside the pool and water will start to drain immediately.
7. When the water stops draining, start lifting the pool from the side opposite the drain, leading any
remaining water to the drain and emptying the pool completely.
8. Disconnect hose and adapter when finished.
9. Re-insert drain plug in drain valve on inside of pool for storage.
10. Replace drain cap on outside of pool.
11. Reverse set-up instructions to disassemble the pool, and remove all connecting parts.
12. Be sure that the pool and all parts are completely dry before storage. Air dry the liner in the sun until
completely dry before folding (see drawing 5). Sprinkle some talcum powder to prevent the vinyl from
sticking together and to absorb any residual missed.
13. Create a square shape. Starting at one side, fold one-sixth of liner in on itself twice. Do the same on the
opposite side (see drawings 6.1 & 6.2).
14. Once you have created two opposing folded sides, simply fold one over the other like closing a book
(see drawings 7.1 & 7.2).
15. Fold the two long ends to the middle (see drawing 8).
16. Fold one over the other like closing a book and finally compact the liner (see drawing 9).
17. Store the liner and accessories in a dry, temperature controlled, between 32 degrees Fahrenheit
(0 degrees Celsius) and 104 degrees Fahrenheit (40 degrees Celsius), storage location.
18. The original packing can be used for storage.
7.1
56.1 6.2
7.2 8 9
POOL MAINTENANCE & DRAINAGE
Do not add chemicals if the pool is occupied. This can cause skin or eye irritation. Concentrated
chlorine solutions can damage the pool liner. In no event is Intex Recreation Corp., Intex Development Co.
Ltd., their related companies, authorized agents and service centers, retailers or employees liable to the
buyer or any other party for costs associated with the loss of pool water, chemicals or water damage. Keep
spare filter cartridges on hand. Replace cartridges every two weeks. We recommend the use of a
Krystal Clear™ Intex Filter Pump with all of our above-ground-pools.
CAUTION ALWAYS FOLLOW THE CHEMICAL MANUFACTURER'S
DIRECTIONS, AND THE HEALTH AND HAZARD WARNINGS.

87
A
SAVE THESE INSTRUCTIONS
English
(87IO) METAL FRAME POOL ENGLISH 7.5” X 10.3” PANTONE 295U 04/29/2022
Page 12
WINTER PREPARATIONS
Winterizing your Above Ground Pool
After usage, you can easily empty and store away your pool in a safe place. You must
drain, disassemble and properly store the pool when the temperature drops below
41 degrees Fahrenheit (5 degrees Celsius) to prevent ice damage to the pool and related
components. Ice damage can result in sudden liner failure or pool collapse. Also see the
section “How To Drain Your Pool’’.
Should temperatures in your area not drop below 41 degrees Fahrenheit (5 degrees
Celsius), and you choose to leave your pool out, prepare it as follows:
1. Clean the pool water thoroughly. If the type is an Easy Set Pool or an Oval Frame Pool,
make sure that the top ring is properly inflated.
2. Remove the skimmer (if applicable) or any accessories attached to the threaded strainer
connector. Replace strainer grid if necessary. Be sure all accessories parts are clean and
completely dry before storage.
3. Plug the Inlet and Outlet fitting from the inside of the pool with the plug provided (sizes
16’ and below). Close the Inlet and Outlet Plunger Valve (sizes 17’ and above).
4. Remove the ladder (if applicable) and store in a safe place. Be sure the ladder is completely
dry before storage.
5. Remove the hoses that connect the pump and filter to the pool.
6. Add the appropriate chemicals for the winter period. Consult your local pool dealer as to
which chemicals you should use and how to use them. This can vary greatly by region.
7. Cover pool with Intex Pool Cover. IMPORTANT NOTE: INTEX POOL COVER IS NOT A
SAFETY COVER.
8. Clean and drain the pump, filter housing and hoses. Remove and discard the old filter
cartridge. Keep a spare cartridge for the next season.
9.
Bring pump and filter parts indoors and store in a safe and dry area, preferably between
32 degrees Fahrenheit (0 degrees Celsius) and 104 degrees Fahrenheit (40 degrees Celsius).
GENERAL AQUATIC SAFETY
Water recreation is both fun and therapeutic. However, it involves inherent risks of
injury and death. To reduce your risk of injury, read and follow all product, package and
package insert warnings and instructions. Remember, however, that product warnings,
instructions and safety guidelines cover some common risks of water recreation, but do
not cover all risks and or dangers.
For additional safeguards, also familiarize yourself with the following general guidelines
as well as guidelines provided by nationally recognized Safety Organizations:
• Demand constant supervision. A competent adult should be appointed as a “lifeguard” or
water watcher, especially when children are in and around the pool.
• Learn to swim.
• Take the time to learn CPR and first aid.
• Instruct anyone who is supervising pool users about potential pool hazards and about the use
of protective devices such as locked doors, barriers, etc.
• Instruct all pool users, including children what to do in case of an emergency.
• Always use common sense and good judgement when enjoying any water activity.
• Supervise, supervise, supervise.

87
A
SAVE THESE INSTRUCTIONS
English
(87IO) METAL FRAME POOL ENGLISH 7.5” X 10.3” PANTONE 295U 04/29/2022
Page 13
LIMITED WARRANTY
Your Intex Pool has been manufactured using the highest quality materials and
workmanship. All Intex products have been inspected and found free of defects prior to
leaving the factory. This Limited Warranty applies to the Intex Pool only.
This limited warranty is in addition to, and not a substitute for, your legal rights and
remedies. To the extent that this warranty is inconsistent with any of your legal rights, they
take priority. For example, consumer laws across the European Union provide statutory
warranty rights in addition to the coverage you receive from this limited warranty: for
information on EU-wide consumer laws, please visit the European Consumer Center
website at http://ec.europa.eu/consumers/ecc/contact_en/htm.
The provisions of this Limited Warranty apply only to the original purchaser and are not
transferable. This Limited Warranty is valid for the period noted below from the date of the
initial retail purchase. Keep your original sales receipt with this document, as proof of
purchase will be required and must accompany warranty claims or the Limited Warranty
will be invalid.
Pool Liner and Frame Warranty - 1 Year
If you find a manufacturing defect in the Intex Pool during the warranty period, please
contact the appropriate Intex Service Center listed in the separate “Authorized Service
Centers” sheet. If the item is returned as directed by the Intex Service Center, the Service
Center will inspect the item and determine the validity of the claim. If the item is covered by
the provisions of the warranty, the item will be repaired or replaced, with the same or
comparable item (at Intex’s choice) at no charge to you.
Other than this warranty, and other legal rights in your country, no further warranties are
implied. To the extent possibly in your country, in no event shall Intex be liable to you or
any third party for direct or consequential damages arising out of the use of your Intex Pool,
or Intex or its agents’ and employees’ actions (including the manufacture of the product).
If your country does not allow the exclusion or limitation of incidental or consequential
damages, this limitation or exclusion does not apply to you.
You should note that this limited warranty does not apply in the following circumstances:
• If the Intex Pool is subject to negligence, abnormal use or application, accident,
improper operation, improper maintenance or storage.
• If the Intex Pool is subject to damage by circumstances beyond Intex’s control, including
but not limited to, punctures, tears, abrasions, ordinary wear and tear and damage
caused by exposure to fire, flood, freezing, rain, or other external environmental forces;
• To parts and components not sold by Intex; and/or
• To unauthorized alterations, repairs or disassembly to the Intex Pool by anyone other
than Intex Service Center personnel.
The costs associated with the loss of pool water, chemicals or water damages are not
covered by this warranty. Injury or damage to any property or person is not covered by this
warranty.
Read the owner’s manual carefully and follow all instructions regarding proper operation
and maintenance of your Intex Pool. Always inspect your product prior to use. This limited
warranty will be void if use instructions are not followed.

156
C330 C330
FR C530 C530
FR C600
GS C1000
C1000
FR
C900
GS
C1500
C1500
FR
C1500
GS
C2500
C2500
FR
GS
SX925
SX925
FR
GS
SX1500
SX1500
FR
GS
QX2100 SX2100
SX2100
FR
GS
QX2600
QX2600
FR
SX2800
SX2800
FR
GS
SX3000 SX3200
SX3200
FR
GS
330 330 530 530 600 1,000 1,000 900 1,500 1,500 1,500 2,500 2,500 925 925 1,500 1,500 2,100 2,100 2,100 2,650 2,650 2,800 2,800 3,000 3,200 3,200
1,249 1,249 2,006 2,006 2,271 3,785 3,785 3,407 5,678 5,678 5,678 9,463 9,463 3,501 3,501 5,678 5,678 7,949 7,949 7,949 10,030 10,030 10,598 10,598 11,355 12,112 12,112
6' x 20"
(1.83m x 51cm) 3.5m x 3.5m 5.0m x 5.0m 8.0m x 8.0m 1 1 1 1 1 1 1
8' x 24"
(2.44m x 61cm) 4.0m x 4.0m 5.5m x 5.5m 8.5m x 8.5m 2 2 1 1 1 1 1
8' x 30"
(2.44m x 76cm) 4.0m x 4.0m 5.5m x 5.5m 8.5m x 8.5m 2 2 1 1 1 1 1
10' x 24"
(3.05m x 61cm) 4.5m x 4.5m 6.0m x 6.0m 9.0m x 9.0m 3 3 2 2 2 1 2
10' x 30"
(3.05m x 76cm) 4.5m x 4.5m 6.0m x 6.0m 9.0m x 9.0m 3 4 2 2 2 2 2
12' x 30"
(3.66m x 76cm) 5.0m x 5.0m 6.5m x 6.5m 9.5m x 9.5m 5 6 3 3 3 3 3
13' x 33"
(3.96m x 84cm) 5.5m x 5.5m 7.0m x 7.0m 10.0m x 10.0m 6 7 4 4 4 3 3 3 4 4
15' x 33"
(4.57m x 84cm) 6.0m x 6.0m 7.5m x 7.5m 10.5m x 10.5m 5 6 5 3 4 4 5 5 2 3 2 2 2
15' x 42"
(4.57m x 1.07m) 6.0m x 6.0m 7.5m x 7.5m 10.5m x 10.5m 7 7 7 4 5 5 6 7 3 3 2 2 3
15' x 48"
(4.57m x 1.22m) 6.0m x 6.0m 7.5m x 7.5m 10.5m x 10.5m 5 5 5 7 7 4 4 2 2 3
18' x 48"
(5.49m x 1.22m) 7.0m x 7.0m 8.5m x 8.5m 11.5m x 11.5m 5 5 5 3 3 5 6 3 3 4 3 3 3 3 2 2 2
7'2-5/8" x 4'11" x 23-5/8"
(2.20m x 1.50m x 60cm)
3.5m x 3.0m 3.5m x 4.5m 3.5m x 7.5m 12111111 11
8'6-1/2" x 5'3" x 25-5/8"
(2.60m x 1.60m x 65cm)
4.0m x 3.0m 4.0m x 4.5m 4.0m x 7.5m 22111111 11
9'10" x 6'6--3/4" x 25-5/8"
(3.00m x 2.00m x 65cm)
4.5m x 3.5m 4.5m x 5.0m 4.5m x 8.0m 33222111 22
9'10" x 6'6-3/4" x 29-1/2"
(3.00m x 2.00m x 75cm)
4.5m x 3.5m 4.5m x 5.0m 4.5m x 8.0m 34222111 22
14'9-1/4" x 7'2-5/8" x 33"
(4.50m x 2.20m x 84cm)
6.0m x 4.0m 6.0m x 5.5m 6.0m x 8.5m 67444333 34
8' x 20"
(2.44m x 51cm) 4.5m x 4.5m 6.0m x 6.0m 9.0m x 9.0m 22111111 11
8' x 30"
(2.44m x 76cm) 4.5m x 4.5m 6.0m x 6.0m 9.0m x 9.0m 33222111 12
10' x 30"
(3.05mx76cm) 4.5m x 4.5m 6.0m x 6.0m 9.0m x 9.0m 44232222 22
10' x 39"
(3.05m x 99cm) 4.5m x 4.5m 6.0m x 6.0m 9.0m x 9.0m 56333222 33
12' x 30"
(3.66m x 76cm) 5.0m x 5.0m 6.5m x 6.5m 9.5m x 9.5m 66443222 33
12' x 33"
(3.66m x 84cm) 5.0m x 5.0m 6.5m x 6.5m 9.5m x 9.5m 67444333 34
12' x 39"
(3.66m x 99cm) 5.0m x 5.0m 6.5m x 6.5m 9.5m x 9.5m 89555333 45
12' x 48"
(3.66m x 1.22m) 5.0m x 5.0m 6.5m x 6.5m 9.5m x 9.5m 666444 56
14' x 42"
(4.27m x 1.07m) 6.0m x 6.0m 7.5m x 7.5m 10.5m x 10.5m 777455 6733223
14' x 48"
(4.27m x 1.22m) 6.0m x 6.0m 7.5m x 7.5m 10.5m x 10.5m 8 8 5 5 6 7 8 4 4 2 2 3
15' x 33"
(4.57m x 84cm) 6.0m x 6.0m 7.5m x 7.5m 10.5m x 10.5m 4 4 4 5 6 3 3 2 2 2
15' x 42"
(4.57m x 1.07m) 6.0m x 6.0m 7.5m x 7.5m 10.5m x 10.5m 5 5 6 7 8 4 4 2 2 3
Pump running time (Hours) /Temps de fonctionnement recommandé par jour (heures) / Horas recomendadas por día (Horas) /Empfohlene Betriebsstunden pro Tag (Stunden) / Ore di funzionamento raccomandate
al giorno (ore) / Aanbevolen werkingsuren per dag (Uur) / Horas recomendadas por dia (horas) / Anbefale kører timer per dag (timer) / Zalecane godziny pracy (Godziny) /Рекомендуемое кол
ичество часов работы в день (Часы) / ポンプの作動時間表 (毎時) / 过滤器运行时间(小时)
C330
C530
C1000
C1500
C2500
SX925
SX1500
QX2100
SX2100
QX2600
SX2800
SX3000/SX3200
C330 (FR)
C530 (FR)
C1000 (FR)
C1500 (FR)
C2500 (FR/GS)
SX925 (FR/GS)
SX1500 (FR/GS)
QX2100 (FR)
SX2100 (FR/GS)
QX2600 (FR)
SX2800 (FR/GS)
SX3200 (FR/GS)
C330 (GS)
C600 (GS)
C900 (GS)
C1500 (GS)
(Gal./hr)/(Gallons/heure)/(Galones/hora)/(Gallonen/stunde)/(galloni/orari)/(Gals per uur)/(galões/hora)/(gallons/time)/(Galony/h)/(Галлоны/час)/(㌎/毎時)/(加仑/小时)
(L/hr)/(m3/heure)/(litros/hora)/(liter/stunde)/(litri/orari)/(Liter per uur)/(litros/hora)/(liter/time)/(LITRÓW/h)/(литров/час)/(㍑/毎時)/(升/小时)
POOL SIZE/TAILLE/
TAMAÑO/Bröße/
Dimensione/
Afmeting/
TAMANHO/
størrelse/
ROZMIAR BASENU/
РАЗМЕР/
サイズ/尺寸
GROUND SIZE/Taille du terrain/
SUPERFICIE NECESARIA/Grundgröße/
DIMENSIONI A TERRA/GRONDMAAT/MEDIDAS DA
PISCINA/GRUND STØRRELSE/ROZMIAR PODŁOŻA/
РАЗМЕР ПЛОЩАДКИ/
グランドサイズ/占地面积 (L X W)
POOL/piscine/
Piscina/POOL/
Piscina/Zwembad/
Piscina/POOL/
powłoka basenowa/
БАССЕЙНА/
プール/水池

156
C330 C330
FR C530 C530
FR C600
GS C1000
C1000
FR
C900
GS
C1500
C1500
FR
C1500
GS
C2500
C2500
FR
GS
SX925
SX925
FR
GS
SX1500
SX1500
FR
GS
QX2100 SX2100
SX2100
FR
GS
QX2600
QX2600
FR
SX2800
SX2800
FR
GS
SX3000 SX3200
SX3200
FR
GS
330 330 530 530 600 1,000 1,000 900 1,500 1,500 1,500 2,500 2,500 925 925 1,500 1,500 2,100 2,100 2,100 2,650 2,650 2,800 2,800 3,000 3,200 3,200
1,249 1,249 2,006 2,006 2,271 3,785 3,785 3,407 5,678 5,678 5,678 9,463 9,463 3,501 3,501 5,678 5,678 7,949 7,949 7,949 10,030 10,030 10,598 10,598 11,355 12,112 12,112
Pump running time (Hours) /Temps de fonctionnement recommandé par jour (heures) / Horas recomendadas por día (Horas) /Empfohlene Betriebsstunden pro Tag (Stunden) / Ore di funzionamento raccomandate
al giorno (ore) / Aanbevolen werkingsuren per dag (Uur) / Horas recomendadas por dia (horas) / Anbefale kører timer per dag (timer) / Zalecane godziny pracy (Godziny) /Рекомендуемое кол
ичество часов работы в день (Часы) / ポンプの作動時間表 (毎時) / 过滤器运行时间(小时)
C330
C530
C1000
C1500
C2500
SX925
SX1500
QX2100
SX2100
QX2600
SX2800
SX3000/SX3200
C330 (FR)
C530 (FR)
C1000 (FR)
C1500 (FR)
C2500 (FR/GS)
SX925 (FR/GS)
SX1500 (FR/GS)
QX2100 (FR)
SX2100 (FR/GS)
QX2600 (FR)
SX2800 (FR/GS)
SX3200 (FR/GS)
C330 (GS)
C600 (GS)
C900 (GS)
C1500 (GS)
(Gal./hr)/(Gallons/heure)/(Galones/hora)/(Gallonen/stunde)/(galloni/orari)/(Gals per uur)/(galões/hora)/(gallons/time)/(Galony/h)/(Галлоны/час)/(㌎/毎時)/(加仑/小时)
(L/hr)/(m3/heure)/(litros/hora)/(liter/stunde)/(litri/orari)/(Liter per uur)/(litros/hora)/(liter/time)/(LITRÓW/h)/(литров/час)/(㍑/毎時)/(升/小时)
POOL SIZE/TAILLE/
TAMAÑO/Bröße/
Dimensione/
Afmeting/
TAMANHO/
størrelse/
ROZMIAR BASENU/
РАЗМЕР/
サイズ/尺寸
GROUND SIZE/Taille du terrain/
SUPERFICIE NECESARIA/Grundgröße/
DIMENSIONI A TERRA/GRONDMAAT/MEDIDAS DA
PISCINA/GRUND STØRRELSE/ROZMIAR PODŁOŻA/
РАЗМЕР ПЛОЩАДКИ/
グランドサイズ/占地面积 (L X W)
POOL/piscine/
Piscina/POOL/
Piscina/Zwembad/
Piscina/POOL/
powłoka basenowa/
БАССЕЙНА/
プール/水池
15' x 48"
(4.57m x 1.22m) 6.0m x 6.0m 7.5m x 7.5m 10.5m x 10.5m 6 6 6 8 4 5 3 3 4
16' x 48"
(4.88m x 1.22m) 6.5m x 6.5m 8.0m x 8.0m 11.0m x 11.0m 4 4 5 3 3 5 5 3 3 4 2 3 2 3 2 2 2
16' x 52"
(4.88m x 1.32m) 6.5m x 6.5m 8.0m x 8.0m 11.0m x 11.0m 5 5 5 3 3 5 6 3 3 4 3 3 3 3 2 2 3
18' x 48"
(5.49m x 1.22m) 7.0m x 7.0m 8.5m x 8.5m 11.5m x 11.5m 5 6 6 3 4 6 7 4 4 5 3 3 3 3 3 3 3
18' x 52"
(5.49m x 1.32m) 7.0m x 7.0m 8.5m x 8.5m 11.5m x 11.5m 6 6 6 4 4 7 7 4 4 6 3 4 3 4 3 3 3
20' x 48"
(6.10m x 1.22m) 8.0m x 8.0m 9.5m x 9.5m 12.5m x 12.5m 7 7 7 4 5 8 8 5 5 6 4 4 4 4 3 3 4
20' x 52"
(6.10m x 1.32m) 8.0m x 8.0m 9.5m x 9.5m 12.5m x 12.5m 7 8 8 5 5 5 5 7 4 5 4 5 4 4 4
22' x 52"
(6.71m x 1.32m) 8.5m x 8.5m 11.0m x 11.0m - 6 6 7 7 8 5 6 5 6 4 4 5
24' x 52"
(7.32m x 1.32m) 9.0m x 9.0m 12.5m x 12.5m - 7 7 8 8 10 6767556
26' x 52"
(7.92m x 1.32m) 9.5m x 9.5m 14.0m x 14.0m - 88 7878667
9'10" x 6'6-3/4" x 33"
(3.00m x 2.00m x 84cm)
5.5m x 4.0m 5.5m x 5.5m 5.5m x 8.5m 34222111 2211111
13'1-1/2" x 6'6-3/4" x 39-1/2"
(4.00m x 2.00m x 1.00m)
6.5m x 4.0m 6.5m x 5.5m 6.5m x 8.5m 66443222 3322111
13'1-1/2" x 6'6-3/4" x 48"
(4.00m x 2.00m x 1.22m)
6.5m x 4.0m 6.5m x 5.5m 6.5m x 8.5m 78454333 4422112
16'6" x 9' x 48"
(5.03m x 2.74m x 1.22m)
7.0m x 5.0m 7.0m x 6.5m 7.0m x 9.5m 3 3 3 2 2 3 4 2 2 3 2 2 2 2 1 1 2
20' x 10' x 48"
(6.10m x 3.05m x 1.22m)
7.0m x 5.0m 7.0m x 6.5m 7.0m x 9.5m 4 4 4 3 3 5 5 3 3 4 2 3 2 3 2 2 2
9'10" x 5'9" x 31-1/2"
(3.00m x 1.75m x 80cm)
5.5m x 4.0m 5.5m x 5.5m 5.5m x 8.5m 34222111 2211111
13'1-1/2" x 6'6-3/4" x 39-1/2"
(4.00m x 2.00m x 1.00m)
6.5m x 4.0m 6.5m x 5.5m 6.5m x 8.5m 67444233 3422111
13'1-1/2" x 6'6-3/4" x 48"
(4.00m x 2.00m x 1.22m)
6.5m x 4.0m 6.5m x 5.5m 6.5m x 8.5m 78554333 4422112
16' x 8' x 42"
(4.88m x 2.44m x 1.07m)
7.0m x 4.5m 7.0m x 6.0m 7.0m x 9.0m 666444 5633222
18' x 9' x 52"
(5.49m x 2.74m x 1.32m)
7.5m x 4.5m 7.5m x 6.0m 7.5m x 9.0m 4 4 4 2 3 4 5 3 3 4 2 2 2 2 2 2 2
24' x 12' x 52"
(7.32m x 3.66m x 1.32m)
9.0m x 6.0m 9.0m x 7.5m 9.0m x 10.5m 7 7 8 4 5 8 9 5 5 7 4 4 4 4 3 3 4
32' x 16'x52"
(9.75m x 4.88m x 1.32m)
11.0m x 7.0m 11.0m x 8.5m - 88 7878667
15'8" x 49"
(4.78mx1.24m) 6.0m x 6.0m 7.5m x 7.5m 10.5m x 10.5m 4 4 4 2 3 4 5 3 3 4 2 2 2 2 2 2 2
18'8" x 49"
(5.69m x 1.24m) 7.0m x 7.0m 8.5m x 8.5m 11.5m x 11.5m 5 6 6 3 4 6 7 4 4 5 3 3 3 3 3 3 3
18'8" x 53"
(5.69m x 1.35m) 7.0m x 7.0m 8.5m x 8.5m 11.5m x 11.5m 6 6 6 4 4 7 7 4 4 6 3 4 3 4 3 3 3
13'1/1/2" x 9'10" x 49"
(4.00m x 3.00m x 1.24m)
6.5m x 5.0m 6.5m x 6.5m 6.5m x 9.5m 3332267332232222112
156-***-R0-2305

1901
(1901) setup video QR code instruction EN FR SP GE IT DU PT DA PL RU JA CH 7.5” X 10.3” 05/30/2018
1901-***-R0-1905
QR Code / Code QR / Código QR /
QR-Code / Codice QR / QR code /
Código QR / QR-kode / Kod QR /
QR-код / QR コード / 二维码
Watch Assembly Video
Visit www.intexdevelopment.com/support/videos
Or scan above QR Code
QR code readers are available from your app store.
A direct QR code link can be found on the pool wall next to the model number printing or on the pump rating label.
Visionnez la vidéo sur l’assemblage.
Consultez : www.intexdevelopment.com/support/videos
Ou scannez le code QR ci-dessus.
Des lecteurs de code QR sont disponibles sur votre marché d’applications.
Un lien de code QR direct est disponible sur la paroi de la piscine à côté du numéro de modèle imprimé ou sur la plaque signalétique de la pompe.
Visualice el vídeo de montaje
Visite www.intexdevelopment.com/support/videos
O escanee el Código QR anterior
Hay lectores de Código QR disponibles en su tienda de aplicaciones.
Puede ver un enlace directo de Código QR en la pared de la piscina junto al número de modelo o en la etiqueta de especicaciones de la bomba.
Sehen Sie sich das Montage-Video an
Besuchen Sie www.intexdevelopment.com/support/videos
Oder scannen Sie den QR-Code
QR-Code-Leser erhalten Sie in Ihrem App-Store.
Einen direkten QR-Code-Link nden Sie auf der Poolwand neben der aufgedruckten Modellnummer oder auf dem Typenschild der Pumpe.
Guarda il video di assemblaggio
Visita www.intexdevelopment.com/support/videos
o scansiona il codice QR qui sopra
I lettori di codici QR sono reperibili nell'app store del proprio smartphone.
Un link diretto al codice QR è riportato sulla parete della piscina di anco al numero di modello o sulla targa della pompa.
Bekijk het montagevideo
Bezoek www.intexdevelopment.com/support/videos
Of scan de bovenstaande QR code
QR code-lezers zijn verkrijgbaar in uw app-store.
U vindt een directe QR code-link op de wand van het zwembad naast de print van het modelnummer of op het typeplaatje van de pomp.
Veja o vídeo de montagem
Visite www.intexdevelopment.com/support/videos
Ou faça a leitura do código QR
Os leitores de códigos QR estão disponíveis na sua app store.
Pode encontrar um link direto de um código QR na parede da piscina ao lado do número do modelo na placa das especicações da bomba.
Se videoen med samlingsvejledningerne
Gå på www.intexdevelopment.com/support/videos
Eller scan QR-koden ovenfor
QR-kodelæsere kan hentes i din app-store.
Et direkte QR-kodelink kan ndes på poolsiden, ved siden af modelnummeret eller på mærkepladen på pumpen.
Obejrzyj lm z instrukcją montażu
Wejdź na www.intexdevelopment.com/support/videos
Lub zeskanuj powyższy kod QR
Czytniki kodu QR są dostępne w sklepie z aplikacjami.
Bezpośredni link do kodu QR można znaleźć na ścianie basenu obok nadruku numeru modelu lub na etykiecie znamionowej pompy.
Смотреть видео сборки
Посетите сайт www.intexdevelopment.com/support/videos
Или просканируйте QR-код выше
Сканеры QR-кода доступны в вашем магазине приложений.
Прямую ссылку QR-кода можно найти на стенке бассейна рядом с напечатанным номером модели или на этикетке характеристик насоса.
組み立て方のビデオを見る
www.intexdevelopment.com/support/videos にアクセス
または上の QR コードをスキャン
QR コードリーダーは App ストアで利用可能です。
QR コードへの直接リンクは、モデル番号印字のとなりのプール壁、またはポンプ規格ラベルにあります。
观看组装视频
访问 www.intexdevelopment.com/support/videos
或扫描以上的二维码
手机应用大全可以下载二维码阅读器。
您水池壁外的型号旁边或者过滤器的参数貼签中也印有相同二维码 , 可供您直接扫码观看。

1901
(1901) setup video QR code instruction GR, CZ, HR, LV, LT, SK, SLO, RO, BG, TR, SRB, HU 7.5” X 10.3” 05/30/2018
Κωδικός QR / QR kód / QR kôd /
QR kods / QR kodas / QR kód /
Koda QR / Cod QR / QR код /
Karekod / QR kod / QR kód
Δείτε το βίντεο συναρμολόγησης
Επισκεφθείτε την ιστοσελίδα www.intexdevelopment.com/support/videos
Ή σαρώστε τον ανωτέρω κωδικό QR
Αναγνώστες κωδικών QR είναι διαθέσιμοι στο app store σας.
Μπορείτε να βρείτε έναν απευθείας κωδικό QR στο τοίχωμα πισίνας δίπλα στον τυπωμένο αριθμό μοντέλου ή στην ετικέτα στοιχείων αντλίας.
Podívejte se na montážní video
Navštivte www.intexdevelopment.com/support/videos
Nebo oskenujte výše uvedený QR kód
Čtečky QR kódů jsou k dispozici v obchodě s aplikacemi.
Přímý odkaz s QR kódem se nachází na stěně bazénu vedle vytištěného čísla modelu nebo na údajovém štítku čerpadla.
Pogledajte video zapis o sastavljanju.
Posjetite www.intexdevelopment.com/support/videos
ili skenirajte gore navedeni QR kôd.
Čitače QR kodova možete nabaviti putem App Store.
Izravnu poveznicu na QR kôd možete pronaći na stjenki bazena pokraj otisnutog broja modela ili na označnoj pločici pumpe.
Noskatieties video, kā salikt ierīci
Apmeklējiet vietni www.intexdevelopment.com/support/videos
Vai arī noskenējiet QR kodu
QR kodu lasītāji pieejami Jūsu lietotņu veikalā.
Tiešo QR koda saiti var atrast uz baseina sienas blakus modeļa numuram vai sūkņa parametru etiķetē.
Žiūrėkite surinkimo vaizdo įrašą
Apsilankykite www.intexdevelopment.com/support/videos
Arba nuskaitykite aukščiau pateikiamą QR kodą
QR kodo skaitytuvą galite atsisiųsti iš savo programėlių parduotuvės.
Tiesioginę QR kodo nuorodą galite rasti ant vonelės sienelės, šalia atspausdinto modelio numerio arba siurblio vardinių charakteristikų lentelėje.
Pozrite si montážne video
Navštívte www.intexdevelopment.com/support/videos
Alebo oskenujte vyššie uvedený QR kód
Čítačky QR kódov sú k dispozícii v obchode s aplikáciami.
Priamy odkaz s QR kódom sa nachádza na stene bazénu vedľa vytlačeného čísla modelu alebo na údajovom štítku čerpadla.
Oglejte si video o sestavljanju
Obiščite www.intexdevelopment.com/support/videos
ali skenirajte zgornjo kodo QR
Čitalnike kod QR lahko dobite v svoji trgovini z aplikacijami.
Kodo QR z neposredno povezavo lahko najdete na steni bazena poleg natisnjene številke modela ali na nazivni ploščici črpalke.
Priviți instrucţiunile video de asamblare
Vizitați www.intexdevelopment.com/support/videos
Sau scanați codul QR de mai sus
Cititoare de coduri QR sunt disponibile pe platforma de aplicații.
Un link direct de code QR se găsește pe peretele piscinei, lângă numărul modelului imprimat sau pe eticheta tehnică a pompei.
Гледайте видео за сглобяването
Посетете www.intexdevelopment.com/support/videos
Или сканирайте QR кода по-горе
Можете да намерите четец за QR кодове във вашия магазин за приложения.
Можете да намерите директна връзка чрез QR код на стената на басейна до номера на модела или на информационния етикет на помпата.
Montaj Videosunu İzleyin
www.intexdevelopment.com/support/videos adresini ziyaret edin
Veya yukarıdaki karekodu taratın
Karekod okuyucular uygulama mağazanızda mevcuttur.
Havuzun duvarında, model numarası baskısının yanında veya pompa derecelendirme etiketinin üzerinde doğrudan karekod bağlantısı bulunabilir.
Pogledajte video o sklapanju
Posetite www.intexdevelopment.com/support/videos
Ili skenirajte QR kod iznad
Čitači QR kodova su dostupni u vašoj prodavnici aplikacija.
Direktna veza QR koda može se naći na zidu bazena pored odštampanog broja modela ili na nalepnici sa specikacijama pumpe.
Nézzen meg az összeszerelési videót
Látogasson el a www.intexdevelopment.com/support/videos weblapra
vagy szkennelje a fenti QR kódot
A QR kód leolvasók letölthetők az App Store-ból.
Közvetlen QR kód link a medence falán található a modell szám mellett vagy a szivattyú típustábláján.

REPAIR KIT
Due to shipping restrictions, glue is not provided. Use PVC or
silicone based glue, which is readily available at most retail
stores. Read and follow the warnings and instructions on the
glue package before proceeding with the steps following.
REPAIR INSTRUCTIONS:
• Clean area thoroughly where repair is to be made. NOTE: To
allow better adhesion on flocked airbed surfaces, apply some
glue to the repair area and rub away the flocked texture until
a smooth surface is exposed.
• Cut patch material to size.
• Use only enough liquid cement to wet the back to repair area.
• Press tightly to repair area.
• If article is an inflatable, do not inflate for 12 hours.
Debido a restricciones en el transporte, no se incluye cola
de pegado. Utilice una cola de pegado con base de PVC o
silicona y que se encuentra disponible en la mayoría de
hipermercados. Antes de proceder con los siguientes pasos, lea y siga
las instrucciones que aparecen en el manual de la cola de pegado.
INSTRUCCIONES PARA REPARACIÓN:
•
Limpie cuidadosamente el área a reparar. ADVERTENCIA: Para lograr
una mejor adherencia en las superficies rugosas coloque un poco de
pegamento en la zona a ser reparada y frótelo hasta que se suavice
la textura de la superficie.
• Corte parche según sea necesario.
• Sólo use liquido necesario para humedecer la parte posterior del parche.
• Presione fuertemente en el área a reparar.
• Si el artículo es inflable, no lo infle por 12 horas.
Aufgrund von Transportbeschränkungen ist kein Kleber enthalten.
Verwenden Sie Kleber auf PVC- oder Silikonbasis, welcher in den
meisten Geschäften leicht erhältlich ist. Lesen und befolgen Sie die
Warnhinweise und Anweisungen auf der Verpackung des Klebers,
bevor Sie mit den folgenden Schritten fortfahren.
REPARATUR-ANLEITUNG:
• Reinigen Sie die beschädigte Stelle gründlich vor der Reparatur.
ANMERKUNG: Um eine bessere Haftung auf beflockten
Luftbett-Oberflächen zu ermöglichen, geben Sie etwas Klebstoff auf
die zu reparierende Stelle und reiben Sie die beflockte Textur
solange weg, bis eine glatte Oberfläche erscheint.
• Schneiden Sie den Flicken auf die entsprechende Größe zu.
• Verwenden Sie nur soviel flüssigen Kleber, daß der Flicken gut
angefeuchtet ist.
• Drücken Sie den Flicken fest auf die beschädigt Stelle auf.
• Aufblasbare Artikel erst nach 12 Stunden wieder aufblasen.
A causa delle restrizioni nelle spedizioni, la colla non viene
fornita. Usare una colla a base PVC o silicone, che trovate
disponibile nella maggior parte dei negozi al dettaglio. Leggere e
seguire le avvertenze e le istruzioni sulla confezione della colla
prima di procedere con i punti successivi.
INSTRUZIONI PER KIT DI RIPARAZIONE:
• Pulire accuratamente la zona in cui si deve effettuare lariparazione.
NOTE: Per permettere una migliore adesione alle superfici dei lettini ad
aria, applicare uno strato di colla sulla superficie da riparare e
strofinare fino a che la superficie non diventi liscia.
• Tagliare il materiale per la pezza nelle dimensioni necessaire.
• Usare la quantitá di adesivo liquido sufficiente solo ad inumidire il
retro della pezza.
• Premere fortemente sulla zona da riparare.
• Se l’articolo riparato é di tipo gonfia bile, non gonfiare per
almeno 12 ore.
Vanwege restricties in verband met vervoer is lijm niet
inbegrepen. Wij raden u aan lijm specifiek voor PVC of lijm op
basis van silicoon te gebruiken.
AANWIJZINGEN:
• Maak de te repareren plaats goed schoon en droog. OPMERKING:
Om betere adhesie op gevlokte luchtbedoppervlakken toe te staan,
breng wat lijm aan op het reparatiegebied en veeg de gevlokte
textuur weg totdat een glad oppervlak vrijkomt.
• Knip een plakstuk op maat.
• Gebruik net genoeg lijm om de achterkant van het plakstuk nat te
maken (randen!)
• Op het lek plakken en goed aandrukken.
• Na reparatie minimaal 12 uur NIET opblazen.
(201) REPAIR KIT ENGLISH, FRENCH, SPANISH, GERMAN, ITALIAN, DUTCH SIZE: 7.5'' x 4.25'' 05/14/2021
På grund af forsendelsesrestriktioner medfølger ikke lim. Brug
PVC- eller silikonebaseret lim, som kan fås i de fleste udsalg. Læs
og følg advarslerne og instruktionerne på pakningen, inden du
fortsætter.
REPARATIONSSÆT INSTRUKTION:
• Rengør og aftør omhyggeligt området. OBS: For at tillade bedre
adhærence på fløjls luftmadrasse overflader, påsætte lidt lim til
reparations området og gnubbe fløjsstrukturen væk indtil en glat
overflade ses.
• Klip lappen til i korrekt størrelse.
• Fugt bagsiden af lappen med lim helt ud til kanten.
• Tryk lappen omhyggeligt fast på hullet.
• Et oppustelige produkt må ikke fyldes med luft før 12 timer
efter reparation.
Ze względu na ograniczenia transportowe, klej nie jest
zawarty w zestawie. Użyj kleju do PCV lub silikonowego, dostępnych w
ogólnej sprzedaży. Zapoznaj się z instrukcją stosowania kleju, zanim
przejdziesz do kolejnych kroków.
Instrukcja obsługi:
• Dokładnie oczyść miejsce naprawy. UWAGA: W celu zapewnienia lepszej
przyczepności do powierzchni materaca, nałóż klej na obszar wymagający
naprawy i pocieraj do uzyskania gładkiej powierzchni.
• Wytnij odpowiedni kawałek łatki.
• Nanieś klej na spód łatki.
• Przycisnij dokładnie do naprawianego miejsca.
• Jeśli urządzenie wymaga napompowania, nie pompuj go przez co najmniej
12 godzin.
Ремонтный комплект включает в себя виниловый цемент,
который при неосторожном использовании может
являться причиной дефектов при деторождаемости и
влиять на детскую репродуктивность.
РЕМОНТНЫЙ НАБОР
• Тщательно очистить и просушить ремонтируемую поверхность.
ПРИМЕЧАНИЕ: Для достижения большего склеивания
сморщенных поверхностей надувного матраца при ремонте
используйте небольшое количество клея и протирайте
сморщенную текстуру до тех пор, пока она не стане гладкой.
• Вырезать заплатку нужного размера
• Промазать внутреннюю сторону заплатки достаточным
количеством клея
• Плотно прижмите заплатку к месту повреждения
• Не надувать надувные изделия в течение 12ч.
(201) REPAIR KIT PORTUGUESE, DANISH, POLISH, RUSSIAN, JAPANESE, CHINESE SIZE: 7.5'' x 4.25'' 05/14/2021
Devido a restrições de embarque, a cola não é fornecida. Use cola
à base de PVC ou silicone, a qual é facilmente encontrada em
lojas de varejo. Leia e siga os avisos e instruções na embalagem
da cola antes de prosseguir com os passos seguintes.
INSTRUЗХES PARA O KIT DE REPARO:
• Limpe cuidadosamente a бrea adjacente ao furo e seque-a.
NOTE: Para permitir melhor aderкncia na superfнcie flocada do
colchгo, aplique um pouco de cola para reparar a бrea e
esfregue a textura flocada atй que superfнcie lisa fique exposta.
• Corte o remendo ao tamanho necessбrio
• Utilize a cola suficiente para humedecer a parte de trбs do remendo
• Pressione firmemente sobre a бrea a reparar.
• Aguarde 12 Horas, antes de voltar a encher o inflбvel
201-***-R0-2205
REPARATUR-SET
KIT REPARO (LÂMINA DE PVC E COLA VINIL)
РЕМОНТНЫЙ КОМПЛЕКТ
REPARATIONSSÆT ZESTAW NAPRAWCZY
KIT DI RIPARAZIONE REPARATIE SET
KIT DE RÉPARATION PARCHE DE REPARACIÓN
En raison des restrictions de transport, la colle n’est pas
fournie. Utilisez de la colle à base de PVC ou de silicone,
disponible dans de nombreux magasins. Lisez et suivez les
avertissements et les instructions sur l’emballage de la colle
avant de procéder aux étapes suivantes.
MODE D’EMPLOI :
• Nettoyer soigneusement la surface à réparer. REMARQUE: Pour
permettre une meilleure adhérence sur les surfaces floquées des
airbeds, appliquez de la colle sur la zone réparée puis frottez la
surface floquée jusqu’à ce que la surface soit lisse.
• Couper la pièce de réparation aux dimensions,
• Poser un lèger fil de colle au dos de la pièce,
• Presser femement et uniformément sur la
surface à réparer,
• Ne pas gonfler pendant 12 heures.
201
修理包
受运输条件限制,此产品不附带胶水。您可以很方便的从很多零售
店里购买到适合修补的聚氯乙烯或硅树脂胶水。在进行以下步骤前,
请先认真阅读并遵循附在胶水背卡彩纸上的警语及修补说明。
修补步骤:
• 洗净并烘干修补处。
注意,若使用于植毛空气床,为使其达到更好的粘附效果请先在
需要修补的表面上涂抹一层胶水,然后再将植毛去除,直到出现
亮滑的表面。
• 剪下修补片。
• 先在修补片背部上胶。
• 再与修补处粘合。
• 粘合后,12 小时内请勿充气。
201
補修手順:
• 補修箇所の汚れを落として、きれいにしてください。
注:表面がフロック式のエアーベッド製品等は、
補修箇所に油性接着剤を塗布しますと、フロック
部分が簡単に取り除くことができ、PVC の底面が
平らな状態になります。
• 補修箇所のサイズに合うように補修パッチを切断
してください。
• 補修パッチの裏面全体に接着剤をつけてください。
• 補修箇所にしっかりと貼ってください。
• 補修後、12 時間は空気を入れないでください。

200
(200) SERVICE CENTER LIST 7.5” X 10.3” 07/05/2022
AUTHORIZED SERVICE CENTERS / SERVICES CONSOMMATEURS AGREES /
CENTROS DE ATENCIÓN AUTORIZADOS / AUTORISIERTE SERVICE CENTER /
CENTRI ASSISTENZA AUTORIZZATI / SERVICE CENTERS / CENTRO DE
SERVIÇOS AUTORIZADOS / GEAUTORISEERDE SERVICECENTRUMS /
AUTORYZOWANE CENTRA SERWISOWE / ОФИЦИАЛЬНЫЕ СЕРВИСНЫЕ
ЦЕНТРЫ / 委任されたサービスセンター /官方售后服务中心
For service questions or to order replacement parts, please contact the appropriate office listed below or visit www.intexcorp.com for answers to
most frequently asked questions.
Pour tout renseignement et commande de pièces détachées, contactez votre revendeur local de la liste ci-dessous ou visitez www.intexcorp.com
pour consulter la liste des questions les plus fréquemment posées.
Para preguntas sobre los servicios o para pedir piezas de repuesto, por favor contacte con la oficina apropiada indicada en la lista abajo indicada
o visite nuestra página web www.intexcorp.com para encontrar las respuestas a las preguntas más frecuentes.
Für Service-Fragen oder um Ersatzteile zu bestellen wenden Sie sich bitte an die entsprechende Vertretung oder besuchen Sie www.intexcorp.
com, dort finden Sie Antworten auf die am häufigsten gestellten Fragen.
Per avere maggiori informazioni riguardo la manutenzione, riparazione, ordinazione delle parti di ricambio contattate uno degli uffici elencati nella
lista sotto o visitate il sito www.intexcorp.com per consultare le risposte alle domande più frequenti.
Dit is de adressenlijst van alle Intex afdelingen. Voor vragen over service of het bestellen van onderdelen, gelieve contact op te nemen met het
adres in uw regiogebied. U kunt ook de website www.intexcorp.com bezoeken.
Para dúvidas ou pedir peças de reposição, por favor contate o escritório apropriado listado abaixo ou visite o site www.intexcorp.com para
resposta de questões comuns.
Hvis der er spørgsmål til produkterne eller man ønsker at bestille reservedele kan man kontakte et af de nedennævnte kontorer, eller besøge
www.intexcorp.com hvor man kan finde svar på hyppigt stillede spørgsmål.
W przypadku pytań lub zamówienia części skontaktuj się z odpowiednim biurem serwisowym z poniższej listy lub wejdź na stronę www.intexcorp.com.
При возникновении каких-либо вопросов по обслуживанию продукции, либо вопросов, связанных с приобретением запасных часте и
комплектующих, пожалуста, обращатесь в Сервисные Центры, указанным ниже. Так же Вы можете обратиться на сат www.intexcorp.
com для получения ответов на часто задаваемые вопросы.
当社の製品をお買い上げいただきありがとうございます。製品や部品のお問い合わせ、ご質問などは当社のウェブサイトでお調べください。
如有任何问题或要替换零件,请与下面所列出的相应地址联系或到访 www.intexcorp.com 咨询常见的问题。
200-***-R1-2307
• ALGERIA SARL NEW TOYS IMPORT & EXPORT
ZEA NO. 15 SETIF, ALGERIA
: 00213661141747
: 00213661523735
: +213 36 82 0051
• ARGENTINA JARSE INDUSTRIAL Y COMERCIAL S.A.
MANUEL GARCIA 124 (CP1284)
CIUDAD AUTÓNOMA DE BUENOS
AIRES, ARGENTINA.
: (5411)4308-2606
: www.intexargentina.com.ar
•AUSTRALIA IDEAL SOURCES PTY LTD
UNIT 3, 310 GOVERNOR ROAD,
BRAESIDE VICTORIA AUSTRALIA 3195
: 1800 359 947
: 03-9587-7766
: www.idealsources.com.au
• AUSTRIA STEINBACH INTERNATIONAL GMBH
L. STEINBACH PLATZ 1
4311 SCHWERTBERG
: helpdesk.steinbach.at
• BENELUX INTEX TRADING B.V.
(BELGIUM/ ETTENSEWEG 46, 4706 PB ROOSENDAAL
NETHERLANDS/
THE NETHERLANDS
LUXEMBURG) : 31-(0)165-593939
(for Dutch/English language only)
: www.intex.eu
• BRASIL
KONESUL BRASIL DISTRIBUIDORA LTDA – ME
RUA AMARANTINA, 167 - BAIRRO
BETÂNIA - CEP: 30580-280 - BELO
HORIZONTE - MG
: +55 31 3110-8866
: +55 31 3110-8866
: www.intexbrasil.com
•CHILE DOREL JUVENILE
SAN IGNACIO 901, QUILICURA, SANTIAGO, CHILE
: 56-2-24971467
: 56-9-51790390
: www.intex-chile.cl
• CHINA INTEX INDUSTRIES (XIAMEN) CO., LTD
858# WENGJIAO ROAD, XINYANG
INDUSTRIAL ZONE, HAICANG, XIAMEN,
CHINA 361022
: 400-8800655
: 0592-6893850
• COLOMBIA CENTURY PRODUCTS, SAS
CALLE 98 SUR # 48-270 CONJUNTO SAN
SEBASTIÁN BODEGA N 20. KM 3 VARIANTE
A CALDAS. LA ESTRELLA, ANTIOQUIA.
COLOMBIA
: 18000410200
: (054) 268 71 30
• CYPRUS A.HADJIKYRIACOS SPRORTING CO., LTD.
4 RIGENIS STR. 8200 YEROSKIPOS,
PAPHOS, CYPRUS
: 00357-26961237
: 00357-26961539
: www.bloomcy.com
• CZECH INTEX TRADING S.R.O.
REPUBLIC / BENESOVSKA 23, 101 00 PRAHA 10,
EASTERN CZECH REPUBLIC
EUROPE : +420-267 313 188
: +420-267 312 645
: www.intexcorp.cz
• DENMARK AMO TOYS
SLETVEJ 38, 8310 TRANBJERG J, DENMARK
: 45-50805002
: www.intexservicenordic.com
•ECUADOR / FCD IMPORT AND EXPORT S.A.
EL SALVADOR /
CI CIRCUNVALACION, DOS MARES
HONDURAS / VIEW 1 #5C, PANAMA, REP. DE PANAMA
NICARAGUA /
: 507-390-0973
PANAMA / : [email protected]
PARAGUAY : www.intexpanama.com
• EGYPT M.R. IMPORT & EXPORT
4 SAUDIE BUILDING, NOZHA STREET,
FLOOR 7 APT 3 EGYPT
: 202-2414-8550/01222303557
: 202-2414-8660
: www.intexegypt.com
• FINLAND AMO OY
ANSATIE 5, 01740 VANTAA
: 020-163 0530
: www.intexservicenordic.com
• FRANCE / UNITEX / INTEX SERVICE FRANCE S.A.S
GUDELOUPE /
Z.A. DE MILLEURE
MARTINIQUE /
BOIS DU BAN - N°4
REUNION / 71480 LE MIROIR
MAYOLTE ISLAND /
:
Conseil avant achat : 0890 71 20 39 (0,25€/min)
TAHITI / :
Service Après-Vente : 03 85 75 53 98 (coût appel local)
NEW CALEDONIA
: www.intex.fr
• GERMANY STEINBACH INTERNATIONAL GMBH
: helpdesk.steinbach.at
•
GUATEMALA /
CENTURY USA, LLC
VENEZUELA
/
7175 LAKE WORTH RD. LAKE WORTH, FL., USA
COSTA RICA
: +1 (561) 530-7781
: +1 (561) 469-9005
•HUNGARY BABYCARE LTD/RICKI LTD
H-2040 BUDAÖRS, BITEP, GYÁR U.2.
BANKI DONÁT U.24.410M. HUNGARY
: +36 30 228 7761
: www.intexcorp.hu
• ISRAEL ALFIT TOYS LTD
HAYARDEN 13, YAVNE, 81101, ISRAEL
: WT-052-4399903
: www.intex.co.il
• ITALY UNITEX ITALIA S.R.L.
VIA LIGURIA 3 - 24041 BREMBATE (BG),
ITALY
: (+39) 0399396500
: www.intexitalia.com (general)
: www.intexgaranzie.it (after sales)
: www.intexricambi.it (spare parts sales)
• JAPAN NOZOMI TRADING CO., LTD
1-6 HOSHOEN, TAKARAZUKA-SHI,
HYOGO-KEN, JAPAN
: +81-797-72-2561
: +81-797-72-2561
Table of contents
Other Intex Swimming Pool manuals

Intex
Intex 88PO User manual

Intex
Intex Family User manual

Intex
Intex 128454GN User manual

Intex
Intex 28214 User manual

Intex
Intex 87PO User manual

Intex
Intex 10' (305cm) User manual

Intex
Intex FRAME 126378NP User manual

Intex
Intex 128907GH User manual

Intex
Intex Easy Set User manual

Intex
Intex Ultra Frame User manual

Intex
Intex Easy Set 128142GN User manual

Intex
Intex PureSpa SC-10 User manual

Intex
Intex 177-1/4'' x 86-5/8'' x 33-1/2'' User manual

Intex
Intex 57173NP User manual

Intex
Intex Easy Set User manual

Intex
Intex Ultra Frame 118PO User manual

Intex
Intex 28274 User manual

Intex
Intex ULTRA XTR 126784GN User manual

Intex
Intex 126368NP User manual

Intex
Intex Prism Frame 126720GN User manual