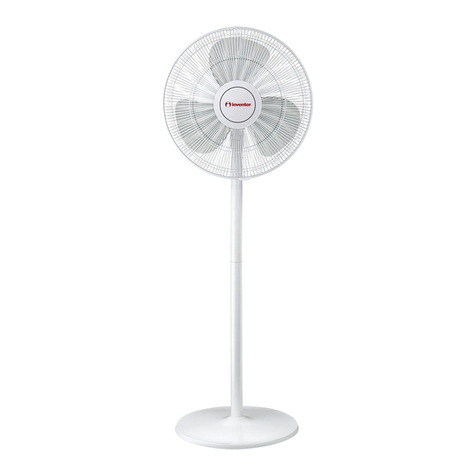
INVENTOR FN40-INV User manual

• USER’S MANUAL
• ΕΓΧΕΙΡΙΔΙΟ ΧΡΗΣΗΣ
• MANUAL UTILIZATORULUI
• BEDIENUNGSANLEITUNG
• MANUEL D’UTILISATEUR
• MANUALE DELL’ UTENTE
• MANUAL DEL PROPIETARIO
ENGLISH | ΕΛΛΗΝΙΚΑ | ROMANA | DEUTSCH |
FRANÇAIS | ITALIANO | ESPAÑOL
FLOOR FAN
MODEL:
FN40-INV


LANGUAGES
ENGLISH .................................................................................................................4
ΕΛΛΗΝΙΚΑ.............................................................................................................12
ROMANA ..............................................................................................................20
DEUTSCH ..............................................................................................................28
FRANÇAIS .............................................................................................................36
ITALIANO..............................................................................................................44
ESPAÑOL ..............................................................................................................52

4ΕΝ
For safe operation please read and follow the below Instructions carefully.
1.If the supply cord is damaged, it must be replaced by the manufacturer or its service agent or a
similarly qualied person in order to avoid a hazard.
2.Domestic use only.
3.To avoid the risk of electrical shock, do not immerse the unit, cord or plug in water or any other
liquids.
4. This appliance is not intended for use by persons (including children) with reduced physical,
sensory or mental capabilities, or lack of experience and knowledge, unless they have been
given supervision or instruction concerning use of the appliance by a person responsible for
their safety.
Minors should be supervised at all times, to avoid the mistreatment of the unit and/or possible
injury.
5.When the appliance is not operating, and, prior to cleaning, please unplug from the power
socket.
6. When assembling the fan, make sure that the protective fan grill covers are properly installed.
7. Do not dispose this product as unsorted municipal waste. This appliance requires special
treatment for disposal. It is prohibited to dispose of this appliance in domestic household
waste. To prevent possible harm to the environment or human health from uncontrolled waste
disposal, recycle it responsibly to promote the sustainable reuse of material resources.
To return your used device, contact the retailer, it is possible they may dispose of it at a
recycling facility.
CAUTION
WARNING
RULES FOR SAFE OPERATION
1.While the fan is operating, no sharp objects, such as pencils, should be inserted through the
protective grill. Be extra cautious when handling and be certain no ngers penetrate beyond
the protective grill area, this should be strictly avoided at all times.
2. Be certain that the fan is disconnected when repositioning from one location to another.
3.Be certain that the fan is on sturdy grounds while operating, to avoid accidental tipping.
4.Be extra cautious when operating near a window as rain may cause electric shock.
5. This device is intended for domestic use only.

5
ΕΝ
INSTALLATION INSTRUCTIONS
■ Name of components
Useful Tip:
Prior to installation,
remove the fan leaf
lock nut and the mesh
hood lock nut from the
fuselage
Installation:
Install by rotating (screwing)
the pole to the base.
Motor
Pole
Base
Cable
Rear grill
Install by
aligning

6ΕΝ
Align the front with the back
protective fan grill, then secure
as shown in the gure.
Locknut of
Protective Grill
Screw the locknut
clockwise, and then
install the front
cover of the fan.
Fan Blade
Move the fan
blade and rotate
after installation,
to ensure that it
rotates smoothly.
Casing Screw Nut
Screw the cover nut
counterclockwise
and then install
the fan's front
protective grill.
Firmly hold on both (front
& back) Protective Fan
Grills together
Screw
Guard
Catch
Front grill
Front and back protective Fan Grill Installation:

7
ΕΝ
INSTRUCTIONS FOR USE
■ Remote control functions:
SPEED button
Useful Tip:
The remote control operates best when it is within a range of 5 meters from the fan, and with an
angle no more than 30°.
ON/OFF button
SWING button TIMER button
Battery*
*Batteries are not included

8ΕΝ
INSTRUCTIONS FOR USE
■ Instructions for main unit:
Tilt Adjustment
Manual
Height Adjustment
Turn counterclockwise to
adjust to the preferred
height level.
Air Speed Button:
Press for a short period
of time to adjust the air
speed, prolonged pressing
(two seconds), to set the
timer.
Control Adjustment
SPEED
SWING
ON/OFF

9
ΕΝ
This fan requires limited maintenance. Do not attempt to x on your own. Always refer to
qualied personnel if any service is required.
1.Prior to cleaning and assembling, the fan must be unplugged.
2.To ensure adequate air circulation, vents should be free of dust at all times. Do not disassemble
the fan in order to remove the dust.
3.The exterior parts of the device may be wiped with a soft and damp, with a mild detergent,
cloth.
4.The use of any abrasive detergents or solvents should be avoided as this may result in
scratching the surface. The use of gasoline or paint thinner, for cleaning purposes, should be
avoided.
5.Water or any other liquids in the motor housing or interior parts of the device, must be avoided
at all times.
1.Prior to performing any cleaning the device must be unplugged.
2. All plastic parts of the device should be cleaned with a soft moist cloth and with mild soap.
Thoroughly clean any soap excess with a dry cloth.
MAINTENANCE INSTRUCTION
CLEANING
All the pictures in the manual are for explanatory purposes only. The actual shape of the unit you
purchased may be slightly dierent, but the operations and functions are the same.
The company may not be held responsible for any misprinted information. The design and the
specications of the product for reasons, such as product improvement, are subject to change
without any prior notice.
Please consult with the manufacturer at +30 211 300 3300 or with the Sales agency for further
details. Any future updates to the manual will be uploaded to the service website, and it is advised
to always check for the latest version.
Scan here to download the latest version of this manual.
www.inventorappliances.com/manuals

10 ΕΝ
Full Name*
Address*
Postal Code*
Phone Number*
E-mail*
Unit Type*
Serial Number of the unit*
Date of Purchase*
Invoice Number*
Additional Details
Subscribe to Inventor's Newsletter
Owner details Unit details
To activate the warranty card, please ll in the following elds
Activate your Warranty
l Fill all the elds as shown below
þ
once the warranty submission has been completed a conrmation message will
be sent to your email
* Required eld
With the current warranty card you accept the terms and conditions.
SEND
l Visit our web site and activate your warranty via the below link or by scan-
ning the QR code
https://www.inventorappliances.com/warranty-card


12 GR
Για ασφαλή λειτουργία, ακολουθήστε προσεκτικά τις παρακάτω οδηγίες.
ΠΡΟΣΟΧΗ
ΠΡΟΕΙΔΟΠΟΙΗΣΗ
ΟΔΗΓΙΕΣ ΓΙΑ ΑΣΦΑΛΗ ΛΕΙΤΟΥΡΓΙΑ
1. Μην εισάγετε τα δάχτυλά σας ή άλλα αιχμηρά αντικείμενα εντός των προστατευτικών
καλυμμάτων & ενώ ο ανεμιστήρας βρίσκεται σε λειτουργία.
2. Βεβαιωθείτε ότι ο ανεμιστήρας έχει αποσυνδεθεί προτού τον μετατοπίσετε από τη μια θέση
στην άλλη.
3. Βεβαιωθείτε ότι ο ανεμιστήρας είναι τοποθετημένος & λειτουργεί σε σταθερό έδαφος,
προκειμένου να αποφύγετε πιθανή ανατροπή.
5. ΜΗΝ λειτουργείτε τον ανεμιστήρα κοντά σε παράθυρο, καθώς η βροχή μπορεί να προκαλέσει
ηλεκτροπληξία.
5. Προορίζεται μόνο για οικιακή χρήση.
1. Εάν το καλώδιο τροφοδοσίας είναι κατεστραμμένο, πρέπει να αντικατασταθεί από τον
κατασκευαστή ή τον αντιπρόσωπο σέρβις ή από αδειοδοτημένο τεχνικό για να αποφύγετε τον
κίνδυνο.
2. Προορίζεται μόνο για οικιακή χρήση.
3. Για να αποφύγετε τον κίνδυνο ηλεκτροπληξίας, μην βυθίζετε τη μονάδα, το καλώδιο ή το
βύσμα στο νερό ή σε άλλου είδους υγρά.
4. Αυτή η συσκευή δεν προορίζεται για χρήση από άτομα (συμπεριλαμβανομένων παιδιών)
με μειωμένες σωματικές, αισθητηριακές ή διανοητικές ικανότητες ή έλλειψη εμπειρίας
και γνώσης, εκτός εάν έχουν εποπτεύονται ή έχουν δοθεί οδηγίες σχετικά με τη χρήση της
συσκευής από άτομο υπεύθυνο για την ασφάλειά τους. Οι ανήλικοι πρέπει να εποπτεύονται
ανά πάσα στιγμή, ώστε να αποφευχθεί η κακομεταχείριση της μονάδας και / ή πιθανός
τραυματισμός.
5. Προτού προβείτε στον καθαρισμό της συσκευής, φροντίστε να την έχετε αποσυνδέσει την
από την πρίζα.
6. Όταν συναρμολογείτε τον ανεμιστήρα, φροντίστε για την σωστή εγκατάσταση των
προστατευτικών καλυμμάτων της φτερωτής.
7. Οδηγίες Απόρριψης του προϊόντος
Αυτή η ένδειξη ορίζει ότι το προϊόν αυτό δεν πρέπει να απορρίπτετε όπως τα αστικά
απορρίμματα εντός της Ευρωπαϊκής Ζώνης. Αυτή η συσκευή απαιτεί ειδική επεξεργασία για τη
διάθεση. Προκειμένου να αποφευχθεί πιθανή μόλυνση του περιβάλλοντος ή του ανθρώπινου
οργανισμού από την ανεξέλεγκτη διάθεση των αποβλήτων, ανακυκλώστε με υπευθυνότητα
ώστε να ενισχύσετε την βιώσιμη επαναχρησιμοποίηση των υλικών πόρων. Για να επιστρέψετε
τη χρησιμοποιημένη συσκευή σας, επικοινωνήστε με τον κατάστημα από όπου αγοράσατε το
προϊόν, ώστε να αναλάβει αυτό την ανακύκλωσή του.

13
GR
ΟΔΗΓΙΕΣ ΕΓΚΑΤΑΣΤΑΣΗΣ
■ Ονομασία εξαρτημάτων
Συμβουλή:
Πριν από την
εγκατάσταση, θα πρέπει
να αφαιρέσετε τα δυο
παξιμάδια που είναι
προεγκατεστημένα στο
σώμα του κινητήρα.
Εγκατάσταση:
Εγκαταστήστε
περιστρέφοντας τον
κορμό του σωλήνα.
Κινητήρας
Κορμός
Σωλήνα
Βάση
Καλώδιο
τροφοδοσίας
Προστατευτικό
κάλυμμα
Εγκαταστήστε
με
ευθυγράμμιση

14 GR
Ευθυγραμμίστε το μπροστινό
με το πίσω κάλυμμα
ασφαλίζοντας όπως
παρουσιάζεται στην παρακάτω
εικόνα.
Παξιμάδι
Βιδώματος
Φτερωτής
Βιδώστε
αριστερόστροφα
το παξιμάδι και
στη συνέχεια
εγκαταστήστε
το μπροστινό
κάλυμμα του
ανεμιστήρα.
Φτερωτή
Κινήστε τη
φτερωτή
για να την
περιστρέψετε
μετά την
εγκατάσταση
και για να
εξασφαλίσετε
ότι περιστρέφετε
ομαλά.
Παξιμάδι
Βιδώματος
Καλύμματος
Βιδώστε
δεξιόστροφα το
παξιμάδι του
καλύμματος
και έπειτα
εγκαταστήστε
το πίσω
προστατευτικό
κάλυμμα του
ανεμιστήρα.
Πιέστε τις γρίλιες
διαδοχικά με τα 2 χέρια.
Βιδώστε.
Ασφάλεια
Προστατευτικών
Καλυμμάτων
Μπροστινό
Κάλυμμα
Εγκατάσταση του μπροστινού & πίσω καλύμματος

15
GR
ΟΔΗΓΙΕΣ ΧΡΗΣΗΣ
■ Οδηγίες για τα πλήκτρα του τηλεχειριστηρίου
Πλήκτρο
Ταχύτητας
SPEED
Συμβουλή:
Το τηλεχειριστήριο λειτουργεί καλύτερα όταν βρίσκεται σε εμβέλεια 5 μέτρων και με γωνία όχι
μεγαλύτερη των 30 μοιρών.
Πλήκτρο
Λειτουργίας
ON/OFF
Πλήκτρο
Κίνησης
SWING
Πλήκτρο
Χρονοδιακόπτη
TIMER
Μπαταρία*
* Οι μπαταρίες δεν συμπεριλαμβάνονται

16 GR
ΟΔΗΓΙΕΣ ΧΡΗΣΗΣ
■ Οδηγίες για την λειτουργία της συσκευής
Προσαρμογή Κλίσης
Χειροκίνητα
Προσαρμογή Ύψους
Περιστρέψτε
αριστερόστροφα
για να ρυθμίσετε
το ιδανικό ύψος.
Ρύθμιση Πλήκτρων:
Πλήκτρο ταχύτητας
αέρα: Πιέτε για μικρό
χρονικό διάστημα
ώστε να ρυθμίσετε
την ταχύτητα αέρα.
Πιέστε παρατεταμένα
για 2 δευτερόλεπτα
ώστε να ρυθμίσετε τον
χρονοδιακόπτη.
Ρύθμιση Πλήκτρων
SPEED
SWING
ON/OFF

17
GR
Ο ανεμιστήρας απαιτεί περιορισμένη συντήρηση. Μην επιχειρήσετε να τον επιδιορθώσετε
μόνοι σας. Πάντα να απευθύνεστε σε αδειοδοτημένο τεχνικό εάν απαιτείται κάποια υπηρεσία.
1. Φροντίστε να αποσυνδέσετε τον ανεμιστήρα από το ρεύμα προτού προχωρήσετε στον
καθαρισμό και τη συναρμολόγηση του ανεμιστήρα.
2. Για να εξασφαλίσετε επαρκή ανακυκλοφορία του αέρα, φροντίστε οι αεραγωγοί να είναι
απαλλαγμένοι από σκόνη. Μην αποσυναρμολογείτε τον ανεμιστήρα για να απομακρύνετε την
σκόνη.
3. Τα εξωτερικά μέρη της συσκευής μπορούν να καθαριστούν με ένα μαλακό υγρό πανί,
εμποτισμένο με ήπιο απορρυπαντικό.
4. Αποφύγετε τη χρήση λειαντικών απορρυπαντικών, βενζίνης ή διαλυτικών. Υπάρχει κίνδυνος
να προκληθεί διάβρωση της επιφάνειας.
5. Μην ρίχνετε νερό ή άλλου είδους υγρά στο περίβλημα του κινητήρα ή στα εσωτερικά μέρη
της συσκευής.
1. Πριν από κάθε καθαρισμό, φροντίστε να αποσυνδέετε την συσκευή.
2. Όλα τα πλαστικά μέρη της συσκευής πρέπει να καθαρίζονται με ένα μαλακό υγρό πανί,
εμποτισμένο με ήπιο απορρυπαντικό. Απομακρύνετε κάθε περίσσεια σαπουνιού με ένα
στεγνό πανί.
ΟΔΗΓΙΕΣ ΣΥΝΤΗΡΗΣΗΣ
ΚΑΘΑΡΙΣΜΟΣ
Όλες οι εικόνες στο παρόν εγχειρίδιο εξυπηρετούν επεξηγηματικούς σκοπούς.
Το προϊόν που προμηθευτήκατε μπορεί να εμφανίζει ορισμένες διαφορές ως προς το σχήμα,
ωστόσο οι λειτουργίες και τα χαρακτηριστικά παραμένουν ίδια.
Η εταιρεία δεν φέρει ευθύνη για τυχόν τυπογραφικά λάθη. Ο σχεδιασμός και οι προδιαγραφές
του προϊόντος μπορεί να τροποποιηθούν χωρίς προηγούμενη ειδοποίηση με σκοπό τη
βελτίωση των προϊόντων.
Για λεπτομέρειες, απευθυνθείτε στον κατασκευαστή στο 211 300 3300 ή στον αντιπρόσωπο.
Τυχόν ενημερώσεις του εγχειρίδιου θα αναρτηθούν στην ιστοσελίδα του κατασκευαστή,
παρακαλούμε να ελέγξετε για την πιο πρόσφατη έκδοση.
Σαρώστε εδώ για να κατεβάσετε την τελευταία έκδοση του εγχειριδίου.
www.inventoraircondition.gr/media-library

18 GR
Ονοματεπώνυμο*
Διεύθυνση*
Τ.Κ.*
Τηλέφωνο*
Διεύθυνση email*
Τύπος μηχανήματος*
Σειριακός αριθμός εσωτερικού μηχανήματος*
Σειριακός αριθμός εξωτερικού μηχανήματος*
Ημερομηνία αγοράς μηχανήματος*
Αριθμός παραστατικού*
Επιπλέον στοιχεία
Να εγγραφώ στο newsletter της Inventor
Στοιχεία ιδιοκτήτη Στοιχεία μηχανήματος
Για να ενεργοποιήσετε την εγγύηση, παρακαλούμε συμπληρώστε τα παρακάτω πεδία
Υποβολή Εγγύησης
l Επισκεφθείτε τη σελίδα μας και ενεργοποιήστε την εγγύησή σας μέσω
του παρακάτω link ή σκανάροντας το QR code
https://www.inventoraircondition.gr/egiisi-inventor
l Συμπληρώστε όλα τα πεδία όπως φαίνονται παρακάτω
þ
Μόλις ολοκληρωθεί η υποβολή της εγγύησης θα λάβετε την επιβεβαίωση
κατοχύρωσης στο email σας
* Απαραίτητο πεδίο
Αποστέλοντας τη φόρμα εγγύησης αποδέχεστε τους όρους και τις προϋποθέσεις.
AΠΟΣΤΟΛΗ


20 RO
Citiți cu atenție regulile pentru operarea sigură și instrucțiunile.
1. Dacă cablul de alimentare este deteriorat, acesta trebuie înlocuit de către producător, de
agentul de service sau de o persoană calicată, pentru a evita un pericol.
2. Doar pentru uz intern.
3. Pentru a vă proteja împotriva riscului de electrocutare, nu scufundați unitatea, cablul sau
ștecherul în apă sau în alt lichid.
4. Acest aparat nu este destinat utilizării de către persoane (inclusiv copii) cu capacități zice,
senzoriale sau mentale reduse sau lipsă de experiență și cunoștințe, cu excepția cazului în
care au fost supravegheate sau instruite cu privire la utilizarea aparatului de către o persoană
responsabilă de siguranța acestora.
Copiii mici trebuie să e supravegheați pentru a se asigura că nu se joacă cu aparatul.
5. Când aparatul nu este folosit și înainte de curățare, deconectați-l de la priză.
6. Din momentul asamblării ventilatorului, carcasa de protecție a paletelor rotorului nu trebuie
scoasă.
7. Eliminarea corectă a acestui produs
Acest marcaj indică faptul că acest produs nu trebuie aruncat împreună cu alte deșeuri
menajere în întreaga UE. Pentru a preveni posibilele daune asupra mediului sau sănătății
umane cauzate de eliminarea necontrolată a deșeurilor, reciclați-l în mod responsabil
pentru a promova reutilizarea durabilă a resurselor materiale. Pentru a returna dispozitivul
utilizat, utilizați sistemele de returnare și de colectare sau contactați distribuitorul unde a fost
achiziționat produsul. Aceștia pot lua acest produs pentru reciclarea ecologică sigură.
ATENȚIONARE
AVERTIZARE
REGULI PENTRU UTILIZARE ÎN SIGURANȚĂ
1. Nu introduceți niciodată degetele, creioane sau orice alt obiect prin grila ventilatorului în
funcțiune.
2. Scoateți ventilatorul din priză, atunci când îl mutați dintr-un loc în altul.
3. Pentru a evita răsturnarea, asigurați-vă că ventilatorul în funcțiune este poziționat pe o
suprafață plană.
4. NU puneți ventilatorul în funcțiune lângă fereastră, deoarece ploaia poate cauza pericole
electrice.
5. Doar pentru uz casnic.
Table of contents
Languages:
Other INVENTOR Fan manuals
Popular Fan manuals by other brands

Honeywell
Honeywell Turbo Force HYF500 Series owner's manual

Pelonis
Pelonis FS45-3ER owner's manual

PROGRESS LIGHTNING
PROGRESS LIGHTNING AirPro P2598 installation manual

Helios
Helios KWL EC 700 D Pro / WW Installation and operating instructions

Midea
Midea FS40-18BR owner's manual

Hunter
Hunter 25745 Parts guide