6www.i-sens.com www.i-sens.com 7
Limitations
• Do not use for diagnosis of or screening for diabetes
mellitus.
• The system should not be used to test neonates.
• Do not test samples other than fresh capillary whole
blood obtained from the fingertip.
• Do not use the system at altitudes above 10,000 feet
(3000 meters).
• Do not use when hematocrit is outside the acceptable
hematocrit range for testing of 20 % to 55 %.
• Severe dehydration (excessive water loss) may cause
inaccurate results. If you believe you are suffering from
severe dehydration, consult your healthcare professional
immediately.
• For in vitro diagnostic use only
• Critically ill patients should not be tested with this device.
• Inaccurate results may occur in severely hypotensive
individuals or patients in shock.
• Incorrect result may occur in individuals who are
dehydrated.
• The meter and lancing device are for single patient use.
Do not share these items with anyone, including other
family members! Do not use on multiple patients!
• Do not reuse; each test strip is for single use only.
• Do not use when humidity is higher than 90 % and lower
than 10 %, as extremes in humidity may affect results.
• For single patient use only.
• For over-the-counter use
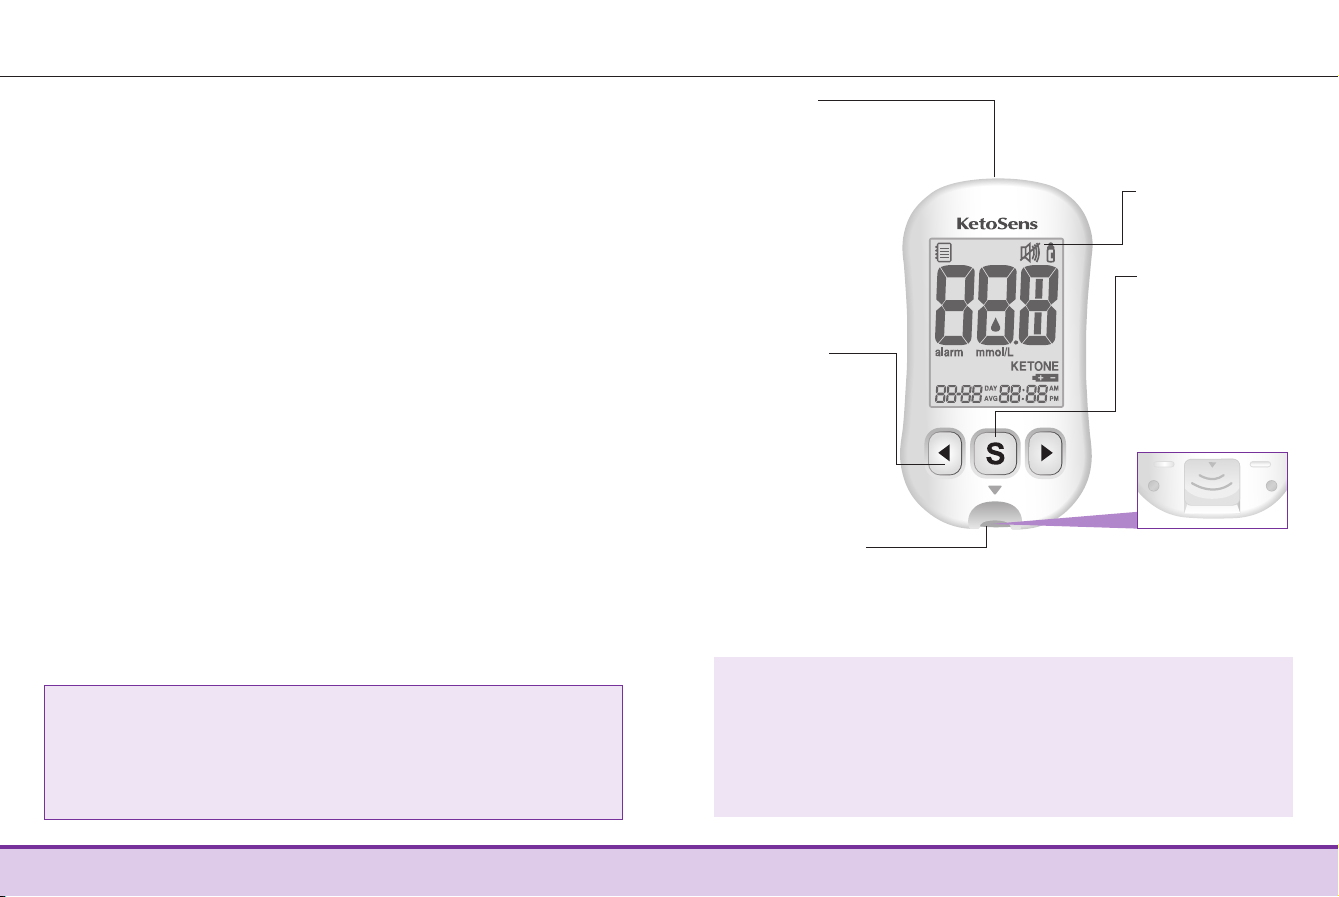
Important Information
•
The KetoSens Blood β-Ketone Monitoring System
is intended for self-testing outside the body (in vitro
diagnostic use).
• β-Ketone
in blood samples reacts with the chemical in
the test strip to produce a small electrical current. The
KetoSens meter detects the electrical current which
reflects the amount of β-Ketone in the blood sample.
•
The KetoSens Blood β-Ketone Meter is designed to
minimise code related errors in monitoring by using
the no-coding function.
•
The KetoSens Blood β-Ketone Meter should be used
only with the KetoSens Test Strips.
If you need assistance, please contact Customer Service:
1-800-429-5001 Mon–Sat, 9 am–9 pm EST. At all other
times or in case of emergency, contact your healthcare
professional or emergency medical response.
This device is not intended for use in healthcare or
assisted-use settings such as hospitals, physician offices
or long-term care facilities because it has not been cleared
by the FDA for use in these settings, including for routine
assisted testing or as part of glycemic control procedures.
Use of this device on multiple patients may lead to the
transmission of Human Immunodeficiency Virus (HIV),
Hepatitis C Virus (HCV), Hepatitis B Virus (HBV), or other
bloodborne pathogens.