КОМПЛЕКТАЦИЯ
PARTS LISTING
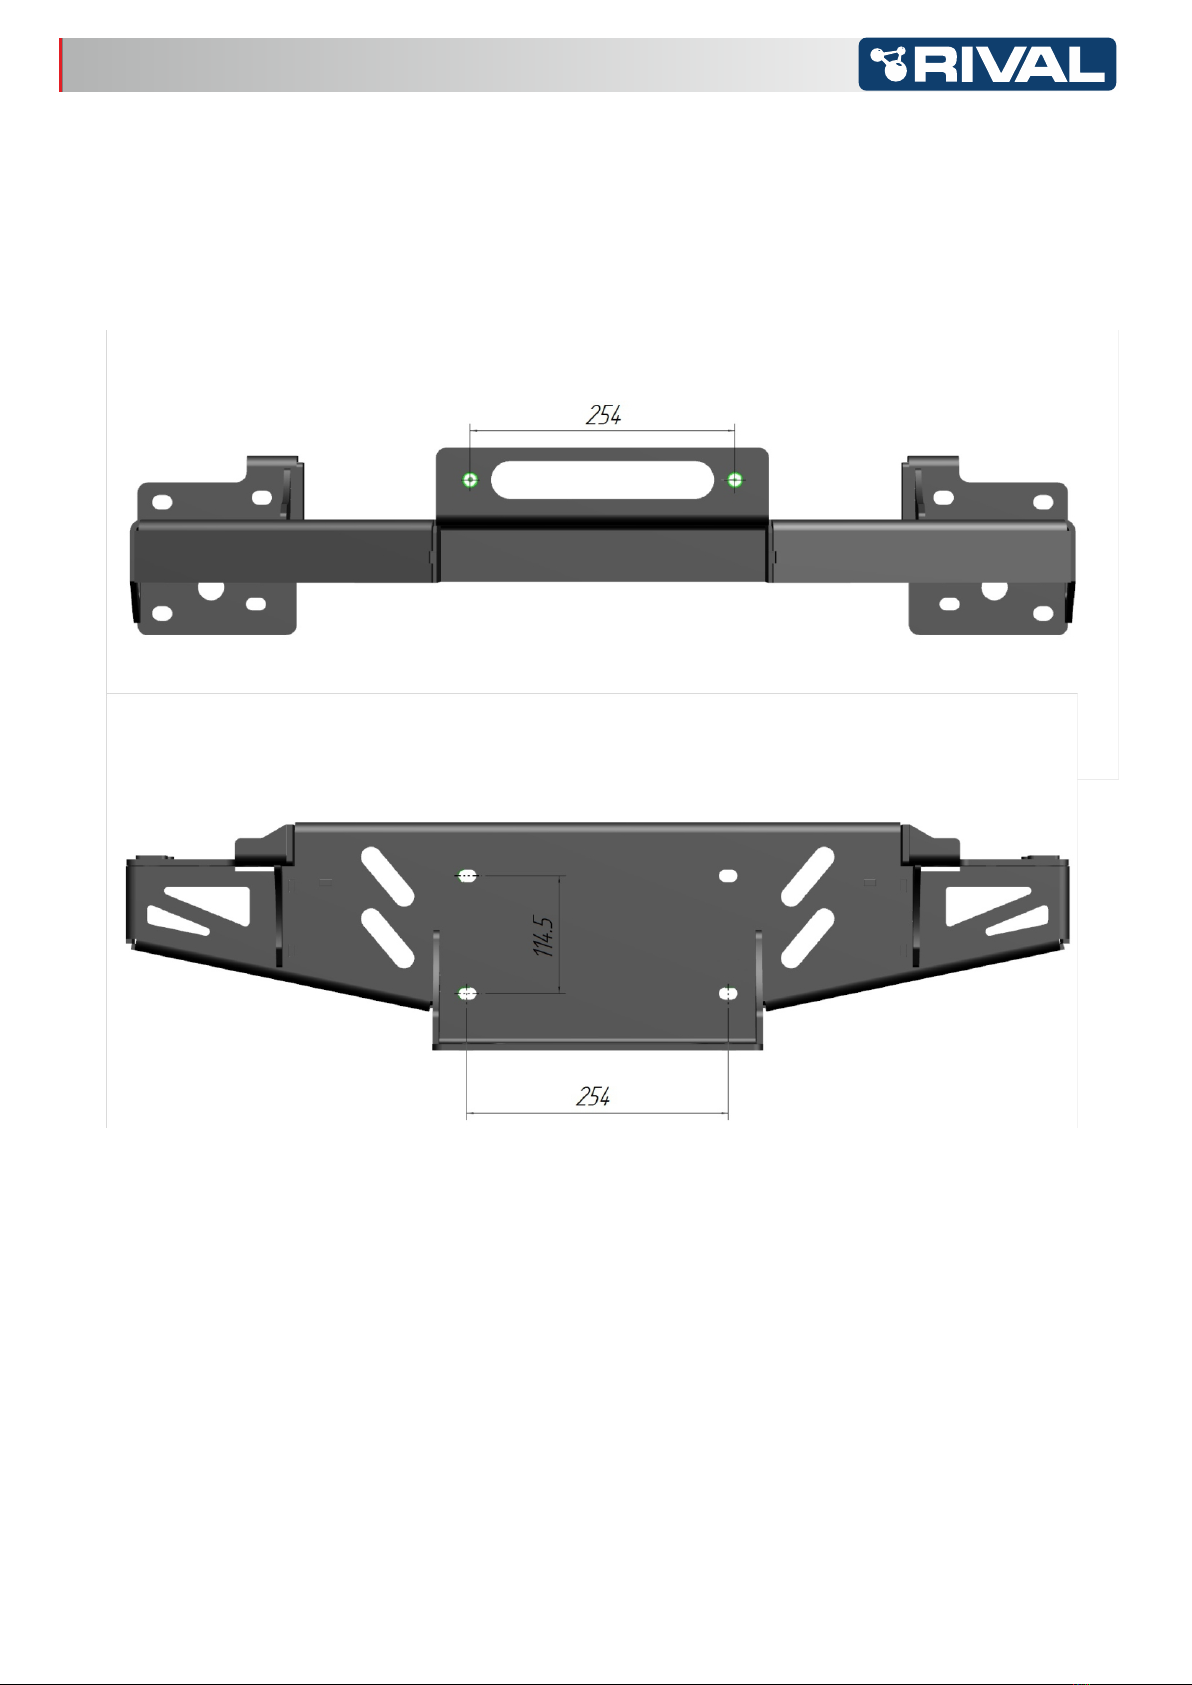
3
1
7
2
4
8
56
9
1. License plate.................................
2. Winch bracket...............................
3. External left bracket.......................
4. External right bracket....................
5. Internal left bracket........................
6. ......................Internal right bracket
7. Small end bushing.........................
8. Large end bushing.........................
9. Insert nut М12 ...............................
10. М6х20..............................Screw
11. М8х25.............. ..................Bolt ..
22. М1 ................... ................Nut 0...
19. . ..........Adjusting washer М12 .....
18. ................................Washer М12
20. М6................. ....................Nut ...
16. М6.................................Washer
17. М10 Adjusting washer ................
21. М8.................. ...................Nut ...
23. М12.......................... ........Nut ....
13. ......... ......................Bolt 10х110 ..
14 Bolt 12х40. ........................ ...........
15. ..... ..........................Bolt 12х110 ..
12. ............. ....................Bolt 10х35 ..
3 pc.
2 pc.
2 pc.
1 pc.
2 pc.
1 pc.
1 pc.
1 pc.
2 pc.
1 pc.
4 pc.
8 pc.
10 pc.
6 pc.
1 pc.
2 pc.
3 pc.
2 pc.
6 pc.
12 pc.
2pc.
12 pc.
8 pc.
25. 390х4,8 ......Tie wrap mm.......
24. .. Pressure sensitive liner........
6 pc.
5 pc.
www.rival4x4.com
Date: 30.05.2019 Installation manual 2L.9101.1
< Page 3 of 16 >