iSystem Infineon TC377TE User manual

Infineon TC377TE Emulation Adapter
User Manual
V2.7
September 2022

This document and all documents accompanying it are copyrighted by iSYSTEM AG and all rights are
reserved. Duplication of these documents is allowed for personal use. In all other cases, written consent
from iSYSTEM is required.
iSYSTEM AG. All rights reserved.
All trademarks are property of their respective owners.
www.isystem.com

Contents
Infineon TC377TE
Package content ...................................................................................................................................... 6
Options ....................................................................................................................................................... 7
Target adaptation .............................................................................................................................................................................................................7
Measurement board .....................................................................................................................................................................................................10
Operation ................................................................................................................................................ 11
How to connect .................................................................................................................................................................................................................11
Configuration .....................................................................................................................................................................................................................11
Connectors ..........................................................................................................................................................................................................................14
Standalone operation ..................................................................................................................................................................................................15
Mechanical information ....................................................................................................................... 17
Emulation Adapter .........................................................................................................................................................................................................17
Solder parts ........................................................................................................................................................................................................................17
Extenders .............................................................................................................................................................................................................................19
Assembly ................................................................................................................................................. 20
QFP Fixed ..............................................................................................................................................................................................................................20
QFP Flex ................................................................................................................................................................................................................................22
BGA ...........................................................................................................................................................................................................................................23
Accessories ............................................................................................................................................. 25
Schematics ............................................................................................................................................. 26
User Notes .............................................................................................................................................. 27
Infineon TC377TE
Introduction to iSYSTEM Emulation Adapter (Video Tutorial)
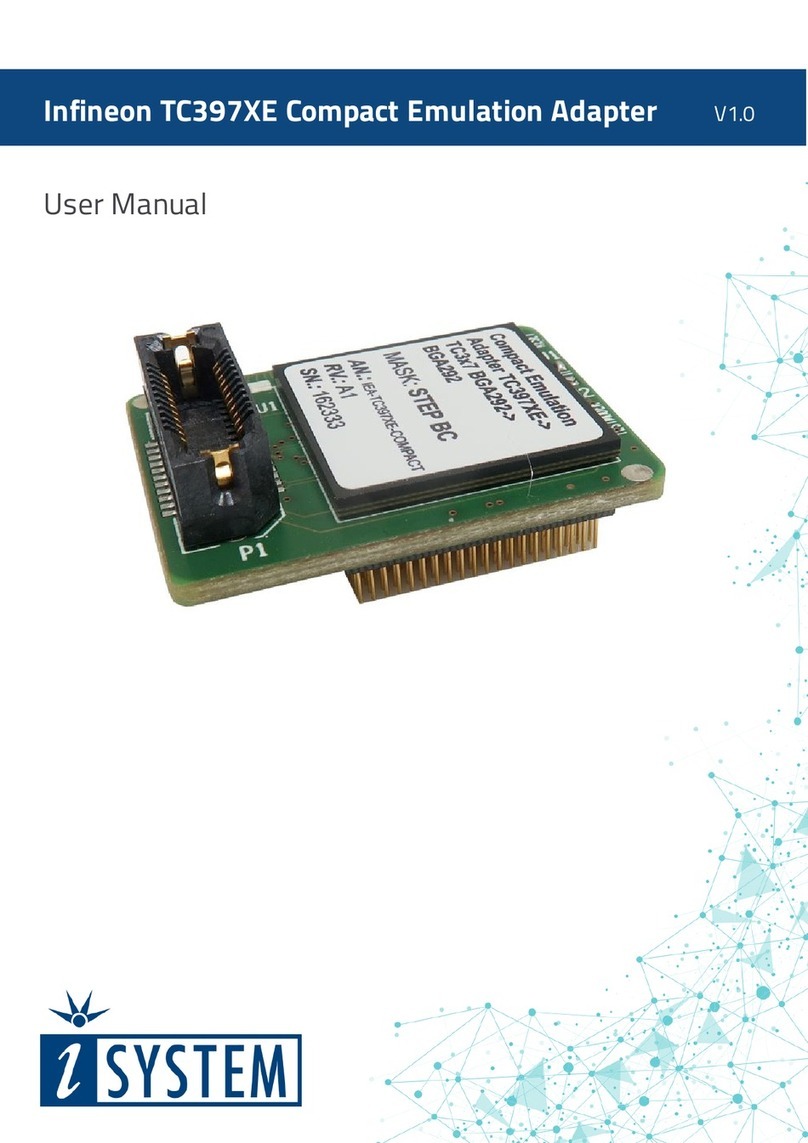
Infineon TC377TE Emulation Adapter is based on the 292-pin TC377TE superset device and
provides full trace capabilities for the:
·
TC332
·
TC323, TC333
·
TC324, TC334
·
TC364
·
TC365
·
TC375
·
TC327LP, TC337LP, TC367DP, TC377TP
(BGA)
microcontrollers where the trace port is not available or lacks the full trace capability.
The Emulation Adapter might differ in some peripherals from the target device,
therefore the device datasheet should be checked.
Infineon TC377TE Emulation Adapter supports the following debug and trace interfaces:
·
DAP
·
DAPE
·
AGBT (Aurora Gigabit Trace)
The Emulation Adapter can also be used as a standalone device for microcontroller evaluation
purposes or for development and testing of an embedded application ahead of target board
availability.
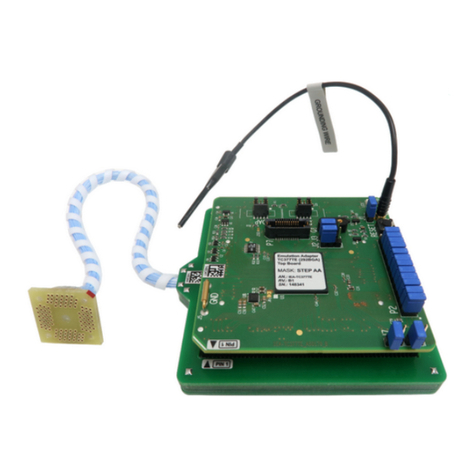
Top / Bottom side of the Emulation Adapter

iSYSTEM Debug and Trace solutions
Trace provides non-intrusive and deep insight in the embedded application without influencing
real-time behavior. It can be used to debug the most difficult and complex code defects and
offers a complete trace history capture of the program execution.
iSYSTEM BlueBox On-Chip Analyzer combined with the:
·
Infineon AGBT Active Probe or
·
Infineon DAP/DAPE Active Probe or
·
10-pin 1.27 mm Infineon DAP2 Wide Debug Adapter or
·
10-pin 1.27 mm DAP Adapter via Infineon AGBT Active Probe
provides high-speed connection to the target device using a variety of debug/trace interfaces.
Furthermore, IOM6 accessories enable the synchronous capture of analog and digital signals
in parallel to trace information. Hardware tools coupled with winIDEA IDE enable reliable
recording of program flow and data trace. The integrated measurement and visualization tool
Analyzer provides a graphical presentation of execution time analysis and much more.
For more information, visit www.isystem.com or send us an email to
sales@isystem.com.

Package content
Infineon TC377TE Emulation Adapter is delivered with all the components required for a
standalone operation. Target adaptation parts for the Target board adaptation must be
ordered separately.
Infineon TC377TE
Emulation Adapter
with Infineon microcontroller
TC377TE
Power supply package
Power converter
Power adapter
Ordering code:
IEA-TC377TE-TOP
Ordering code:
IEA-PS
Ordering code:
IT9V-PS
GND Wire
Crystal 20 MHz
User Manual
Ordering code: BB-WIRE

Options
Target adaptation
The Emulation Adapter adaptation to a specific target microcontroller pincount and package
is done via a Conversion board and a Solder part. Sometimes also an optional Extender and
Socket cover are available. Conversion boards connect between the Emulation Adapter and
the matching Solder part, which is being soldered on the embedded target side.
Available Conversion boards, Connecting parts, the Extender, Solder parts and the Socket
covers are listed in the table below.
Package
(Pitch)
MCU
Conversion board
Type
Connecting part
Extender
Solder part
Socket cover
QFP80
(0.4 mm)
TC332
IEA-TC377TE-
TC332W
Flex
Wire
IAYQPACK80SE
/
IANQPACK80SE
IAHQPACK80SE
QFP100
(0.4 mm)
TC323, TC333
IEA-TC377TE-
BTQ100W
Flex
Wire
IAYQPACK100SE
IANQPACK100SE
IAHQPACK100SE
QFP144
(0.4 mm)
TC324, TC334
IEA-TC377TE-
TC334W
Flex
Wire
IAYQPACK144SE
IANQPACK144SE
IAHQPACK144SE
TC364
IEA-TC377TE-
TC364W4
Flex
Wire
IAYQPACK144SE
QFP144
(0.5 mm)
TC364
IEA-TC377TE-
TC364W5
Flex
Wire
/
IA144TQ-SOLDER
/
TC364
IEA-TC377TE-
TC364F5
Fixed
QFP176
(0.5 mm)
TC365
IEA-TC377TE-
TC365F5
Fixed
IA176TQ-SOLDER
TC365
IEA-TC377TE-
TC365W5
Flex
Wire
TC375
EA-TC377TE-
TC375W5
Flex
Wire
TC375
IEA-TC377TE-
TC375F5
Fixed
TC375
IEA-TC377TE-
TC375FP5
Flex
PCB
BGA292
TC327, TC337,
TC367, TC377
IEA-TC377TE-
TC377
BGA
IA292LFBGA-
EXTENDER
IA292LFBGA-
SOLDER
The embedded system can behave differently when running the user application on the
Emulation Adapter and when running it on a final mass production device without the
hardware debugger attached. An optional Socket cover makes testing this possible. The
Emulation Adapter connects to the target through the Solder part being soldered on the Target
instead of the original microcontroller. With the use of the Socket cover, the same Target setup
can be tested with a mass production device. Disconnect the Emulation Adapter and put a
mass production device into the Solder part (IANQPACK…) and cover it with the Socket cover
(IAHQPACK…), which must be tightened with the provided screws.
Note that Socket cover is not available with all target adaptations.

QFP Fixed Adaptation
For information about assembly, refer to the chapter Assembly.
This adaptation is delivered with a slot screw, which can be optionally used to achieve a more
solid and stable fixing of the Conversion board and the Solder part.
Conversion board
Solder part
QFP Flex Adaptation – Wire adapter
As an alternative to the fixed connection, this adaptation provides a flexible connection of the
Conversion board to the Solder part via a Connecting part.
Refer to the chapter Assembly for more information about the assembly procedure.
IANQPACKxxx Solder part
Conversion board
Connecting part
Solder part
Socket cover (optional)
IAxxxTQ-SOLDER Solder part
Conversion board
Solder part

QFP Flex Adaptation –Flex PCB adapter
This part provides a flexible connection of the Emulation Adapter to the Solder part as an
alternative to the fixed connection.
Refer to the chapter Assembly for more information about the assembly procedure.
Flex PCB adapter
Solder part
BGA Adaptation
Refer to the chapter Assembly for more information about the assembly procedure.
Conversion board
Extender (optional)
Solder part

Measurement board
The Measurement board is an optional extension to the Emulation Adapter. Because
embedded targets often do not have access to all the MCU pins / connected signals to connect
with measurement equipment (oscilloscope, logic analyzer), its use provides easy access to all
MCU pins respectively.
When ordered, it is delivered together with an applicable Layout board (black panel where all
the chip signals are clearly marked) that matches your order.
The Measurement board connects between the Emulation Adapter and the Conversion board.
The black panel is placed over the Measurement board.
Measurement board (optional)
Layout board example for the Measurement
board
Ordering code:
IAMTC377TE
The Measurement board is not available for every Emulation Adapter or every MCU pin
count.
See below table for available pin count layout boards:
Target board
Pin number
Pin count layout board
TC332 (0.4 pitch)
80
TC331 TQFP-80
TC323, TC333 (0.4 pitch)
100
TC333 TQFP-100
TC324, TC334 (0.4 pitch)
144
TC334 TQFP-144
TC364 (0.4 pitch)
144
TC364 TQFP-144
TC364 (0.5 pitch)
144
TC364 LQFP-144
TC365 (0.5 pitch)
176
TC365 LQFP-176
TC375 (0.5 pitch)
176
TC375 LQFP-176

Operation
How to connect?
How to connect Emulation Adapter (Video Tutorial)
How to connect iSYSTEM Hardware (Video Tutorial)
Configuration
J1: Target reset configuration
Jumper J1 connects the Emulation Adapter reset line and the user target board reset line and
is populated by default. The Emulation Adapter also features a Reset push button (SW1).
When having problems establishing the initial debug session with the Emulation Adapter,
remove J1 and try again.
J2 and J3: Clock source configuration
Jumpers J2 and J3 select clock source for the emulation device.
Position 1-2 (default position) selects the crystal circuit oscillator
on the Target board.
Position 2-3 selects an external clock source (Q1 socket on the
Emulation Adapter).
The Emulation Adapter may not operate when user target board’s crystal circuit is used
as the clock source. Typical design guideline is that the crystal should be as close as
possible to the microcontroller. The crystal on the user target board might not oscillate
in conjunction with the Emulation Adapter when the clock lines (TP21_2, TP21_3)
between the crystal and the emulation device on the Emulation Adapter become too
long, thus affecting the impedance of the crystal circuit.
Enclosed in the Emulation Adapter package is a separately packed 20 MHz crystal. The
crystal can be used as a 20MHz external clock (XOSC) source to the emulation device.
If a different clock frequency is required, insert appropriate crystal into the Q1 socket
and replace C7 (default 10pF populated) and C8 (default 10pF populated)
accordingly.
Crystal socket Q1 is per default not populated (NP).

Crystal socket Q1 schematics below:
J4 & J5:GND connection points
In case a good ground connection is required, connection points bridge J4 and pin J5 provide
easy access to the Emulation Adapter's GND potential.
J6 & J7: VFLEX & VAREF
VFLEX - If the target’s VFLEX pin isn’t exposed, bridge the jumper J6 to connect VEXT from the
target to power VFLEX.
Setting the jumper when emulating the BGA device may prevent establishing a debug
connection or, in the worst case, can damage the Target board.

VAREF - If the target’s VAREF2 pin isn’t exposed, bridge the jumper J7 to connect VAREF1 from
the target to power VARE2
Setting the jumper if VAREF2 is present on the device may prevent establishing a debug
connection or, in the worst case, can damage the Target board.
P2: Power supply configuration
EA Power supply is configured via the unshrouded 26-pin 2.54 mm header (P2).
Signal direction
Signal
Pin
Pin
Signal
Signal direction
Target board
TVEXT
1
2
VEXT
Emulation device
Target board
TVDDM
3
4
VDDM
Emulation device
Target board
TVAREF1
5
6
VAREF1
Emulation device
Target board
TVAREF2
7
8
VAREF2
Emulation device
Target board
TVEVRSB
9
10
VEVRSB
Emulation device
Target board
TVFLEX
11
12
VFLEX
Emulation device
Not connected
NC
13
14
NC
Not connected
Not connected
NC
15
16
NC
Not connected
Not connected
NC
17
18
NC
Not connected
Not connected
NC
19
20
NC
Not connected
Ground
GND
21
22
GND
Ground
Ground
GND
23
24
GND
Ground
Ground
GND
25
26
KEY
P2 Signal description
By default, all jumpers are set to connect user target power supply to the microcontroller
residing on the Emulation Adapter. Only pins 1-2, 3-4, 5-6, 7-8, 9-10 and 11-12 must be bridged,
but for the convenience and ease of use, all jumpers are set, except for pins 25-26.
Pin 26 is the polarizer key preventing incorrect connection of the IEA-PS Power converter, when
being plugged in.
If a different power source is used (e.g., a Standalone operation), remove all jumpers and apply
3V3 or 5V to:
·
VEXT (pin 2),
·
VDDM (pin 4),
·
VAREF1 (pin 6),
·
VAREF2 (pin 8),
·
VEVRSB (pin 10),
·
VFLEX (pin 12).
Enclosed Power supply package (Power converter and Power adapter) simply plugs into the
P2 header row, providing the necessary power supply for EA operation. LED1 indicates if power
is supplied to the EA.
Refer to the microcontroller documentation for more details about power voltage designations.

Connectors
Be aware that debug and trace signals from the Emulation adapter superset device are
not connected to the target board. They are exposed only to the connectors on the
Emulation adapter.
P1: DAP
P1 connector exposes DAP debug interface and has the following pinout:
Signal
Direction
Signal Description
Signal
Pin
Pin
Signal
Signal Description
Signal
Direction
I
Reference Voltage
Vref
1
2
DAP1
DAP Data pin
I/O
Ground
GND
3
4
DAP0
DAP clock
O
Ground
GND
5
6
DAP2
Optional 2nd Data pin
I/O
Not Connected
NC
7
8
DAPEN
Output
O
Ground
GND
9
10
nRESET
Reset
I/O
10-pin Infineon DAP pinout
Signal Direction is described from the BlueBox perspective.
iSYSTEM BlueBox solution supporting Infineon DAP debug and trace interface connects to the
P1 connector.
P8: DAPE
P8 connector exposes DAPE debug interface and has the following pinout:
Signal
Direction
Signal Description
Signal
Pin
Pin
Signal
Signal Description
Signal
Direction
I
Reference Voltage
Vref
1
2
DAPE1
DAP Data pin
I/O
Ground
GND
3
4
DAPE0
DAP clock
O
Ground
GND
5
6
DAPE2
Optional 2nd Data pin
I/O
Not Connected
NC
7
8
DAPEN/DAP3
Output
I/O
Ground
GND
9
10
NC
Not Connected
10-pin DAPE pinout
Signal Direction is described from the BlueBox perspective.
iSYSTEM BlueBox supporting Infineon DAPE debug and trace interface connects to the P8
connector.

P7: AGBT
P7 connector exposes AGBT interface and has the following pinout:
Signal
Direction
Signal Description
Signal
Pin
Pin
Signal
Signal Description
Signal
Direction
I
AGBT TX0_P
TX0_P
1
2
Vref
Reference Voltage
I
I
AGBT TX0_N
TX0_N
3
4
DAP0
DAP clock
O
Ground
GND
5
6
DAP1
DAP Data pin
I/O
Not Connected
NC
7
8
NC
Not Connected
Not Connected
NC
9
10
DAP2
Optional 2nd Data pin
I/O
Ground
GND
11
12
nTRST/DAPEN
JTAG/Output
O
Not Connected
NC
13
14
CLK+
AGBT Clock
O
Not Connected
NC
15
16
CLK-
AGBT Clock
O
Ground
GND
17
18
TGO*
AGBT Trigger out
I
Not Connected
NC
19
20
AGBT ERR
AGBT Error
Not Connected
NC
21
22
RESET
Reset
I/O
22-pin AGBT pinout (Revision C1)
Signal Direction is described from the BlueBox perspective.
Blue color marks the trace signals.
* Pin 18: TGO (AGBT Trigger out) is connected to the pin TP32.6. Before Revision C1 pin 18 was
NC (Not Connected).
iSYSTEM BlueBox solution supporting AGBT (Aurora GigaBit Trace) interface connects to the
P7 connector.
Standalone operation
Infineon TC377TE Emulation Adapter is delivered with all components required for a
Standalone operation.
Power supply
Use the enclosed IEA-PS Emulation Adapter Power converter and adapter.
A Power supply package, which is delivered with the Emulation Adapter, is required when:
·
The Emulation Adapter is used as a standalone device .
·
The target board doesn’t provide an accurate supply voltage.
·
The target board doesn’t provide sufficient current for the Emulation Adapter operation.

The Power converter can supply either 3.3 V or 5 V. The array of jumpers J0–J9 selects 3.3 V
or 5 V voltage on the P3 connector, which connects to the Emulation Adapter.
Signal
Pin
Pin
Signal
NC
1
2
J0
NC
3
4
J1
NC
5
6
J2
NC
7
8
J3
NC
9
10
J4
NC
11
12
J5
NC
13
14
J6
NC
15
16
J7
NC
17
18
J8
NC
19
20
J9
GND
21
22
GND
GND
23
24
GND
GND
25
26
KEY
P3 connector and J0–J9 jumper correlation table
For example, when J2 is in the 3V3 position, it supplies 3.3 V to pin 6 of the P3 connector.
When J2 is in the 5V position, it supplies 5 V to pin 6 of the P3 connector pin.
Be careful not to supply 5 V to the microcontroller power supply pin, which has declared
a maximum voltage 3.3 V! Refer to the microcontroller documentation for detailed
information on power supply.
P3 connector on the Power Supply board
External power supply requirements:
Min Voltage
Max Voltage
Min Power
8 V
12 V
18 W
Clock source
If the user target’s crystal circuit microcontroller oscillator (if available) is not an adequate
clock source, insert appropriate crystal into the Q1 socket, replace the default 10pF C7 and C8
capacitors when necessary and place jumpers J2 and J3 in 2-3 position.

Mechanical information
Emulation Adapter
Side view of the Emulation adapter complete setup -QFP Fixed Adaptation
Top view of the Emulation Adapter
Top view of the Conversion board
Ordering code
Unit (mm)
M
N
P
R
S
T
V
IEA-TC377TE-TOP
70
70
32.6
36.4
47.5
IEA-TC377TE-xxxxxx
70
70
Solder parts
QFP
Solder part Solder pad view
Top view of the Solder part
In the case of soldering the Solder part manually, it’s highly recommended to prolong the
solder pad E on the outer side (e.g., for 1.5–2 mm) during the PCB design. Note that without
this modification, it’s very difficult to solder the Solder part manually.

Recommended PCB footprint dimensions:
Ordering code
Unit (mm)
A
B
C
D
E
K
L
IANQPACK80SE
11.1
11.1
0.2
0.4
1
19
19
IANQPACK100SE
13.1
13.1
0.2
0.4
1
21
21
IANQPACK144SE
17.1
17.1
0.2
0.4
1
25
25
IA144TQ-SOLDER
19.5
19.5
0.25
0.5
1.625
25.05
25.05
IA176TQ-SOLDER
23.5
23.5
0.25
0.5
1.625
29.05
29.05
QFP Flex – Wire adapter
Ordering code
Unit (mm)
Q
IEA-TC377TE-TC332W
170
IEA-TC377TE-BTQ100W
170
IEA-TC377TE-TC334W
170
IEA-TC377TE-TC364W4
170
IEA-TC377TE-TC364W5
170
IEA-TC377TE-TC365W5
170
EA-TC377TETC375W5
170
QFP Flex – Flex PCB adapter
Ordering code
Unit (mm)
U
V
IEA-TC377TETC375FP5
166
255

Extenders
Side view of the Extender
Top view of the Extender
Ordering code
Unit (mm)
W
Z
IA292LFBGA-EXTENDER
22
3.25

Assembly
QFP Fixed
Watch out that the pin 1 position and alignment of all pins match when connecting two
parts together.
To prevent breaking of the hardware setup or just part of it, avoid disassembling and
reassembling the hardware setup too frequently.
1. Solder the Solder part [B] on the embedded target PCB [A] to get a BA setup.
Use the Surface Mount Technology (SMT) to solder the Solder parts to the user target
board instead of the original microcontroller. iSYSTEM provides this soldering service
on request too.
2. Assemble the Emulation Adapter [E], the optional Measurement board if used [D], and the
Conversion board [C] in this order together to get an E(D)C setup.
3. Assemble the E(D)C setup with the BA setup by connecting the Conversion board of the
E(D)C setup to the Solder part of the BA setup.
Other manuals for Infineon TC377TE
4
Table of contents
Other iSystem Adapter manuals

iSystem
iSystem MPC5 /SPC5 Series User manual

iSystem
iSystem Infineon TC377TE User manual

iSystem
iSystem Infineon TC377TE User manual

iSystem
iSystem Infineon TC397XE User manual

iSystem
iSystem NXP S32K148 User manual

iSystem
iSystem iC5000 User manual

iSystem
iSystem AURIX IEA-GI-AURIX User manual

iSystem
iSystem CoreSight 20-pin User manual

iSystem
iSystem Infineon TC377TE Instruction Manual

iSystem
iSystem Aurora MPC5 Series User manual