Ivoclar digital PrograScan PS3 User manual

ivoclardigital.com
PrograScan PS3 / PS5
Operating Instructions | Bedienungsanleitung |
Mode d‘emploi | Istruzioni d‘Uso | Instrucciones
de uso | Instrução de uso

Table of Contents
2
Table of Contents
1 About this Document 4
1.1 Signs and symbols 5
1.2 Safety labels on the scanner 6
1.3 Marking 7
1.4 Customer support 7
2 Safety 7
2.1 Intended use 8
2.2 Intended environment 9
2.3 Operator’s obligations 9
2.4 Personnel qualifications 10
2.5 Sta obligations 11
2.6 Personal protective equipment 11
2.7 Safety instructions for individual operating phases 12
3 Design and Function 14
3.1 Design of the PrograScan PS3 /PS5 15
3.2 PrograScan PS3 / PS5 connection panel 16
3.3 Accessories 17
4 Transportation and Assembly 18
4.1 Unpacking the scanner 18
4.2 Choosing the installation site 19
4.3 Lifting points 20
4.4 Example set-up 21

Table of Contents
3
5 Installation 22
5.1 Installing the scanner 22
5.2 Installing the computer 23
5.3 Installing the software 23
6 Operation 23
7 Cleaning and Maintenance Work for the User 24
7.1 Recalibration 24
7.2 Cleaning 24
7.3 Repair / Troubleshooting 25
8 Disposal 26
9 Technical Data 26
10 Product Drawings 28
11 Declaration of Conformity 29

About this Document
4
1 About this Document
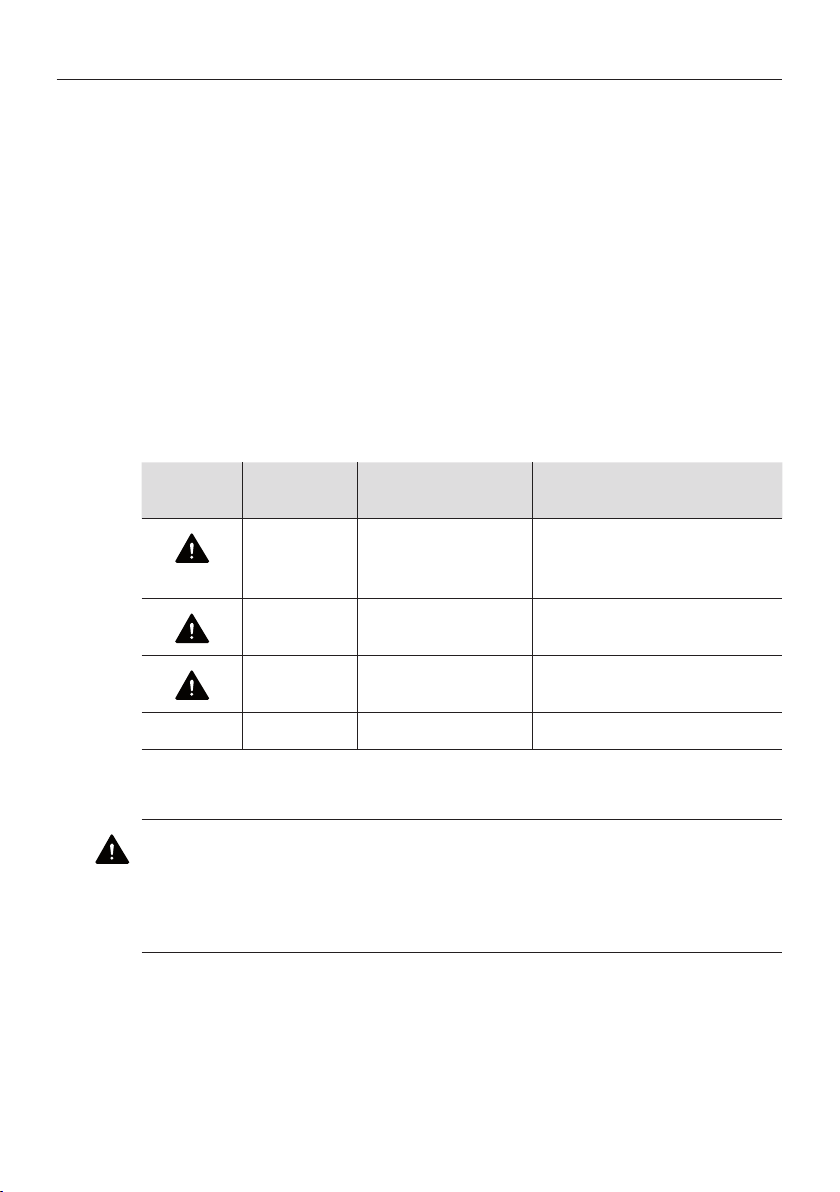
WARNING! Improper use of the scanner.
Risk to the patient and the user.
fThese Operating Instructions contain important information on
the safety of the scanner: Please read the Operating Instructions
thoroughly prior to installation and operation.
This optical 3D scanner (henceforth “scanner”) is a product which
guarantees the highest level of operational safety with state of
the art technology. However, the scanner can be dangerous if
used improperly, by untrained personnel or in a manner other
than intended. Possible dangers are detailed in chapter “Safety“,
page7, as well as being indicated in safety instructions
throughout these Operating Instructions.
These Operating Instructions explain how to safely work on and with
this scanner. The safety instructions it contains must be observed.
These Operating Instructions contain the relevant information for
the assembly, commissioning, operation, maintenance and disposal
of the scanner.
These Operating Instructions are intended to enable persons to work
with the scanner without danger.
Observing the instructions in these Operating Instructions helps to
avoid risks and prevents damage to the scanner.
All persons must have these Operating Instructions at hand when
working on and with the scanner and must observe the relevant
information and notes. These Operating Instructions must always be
complete and clearly legible.
Ivoclar Vivadent AG is not liable for technical or typographical errors
in these Operating Instructions, nor is any liability assumed for
damages that are directly or indirectly attributable to the delivery,
performance, or use of these Operating Instructions.

About this Document
5
1.1 Signs and symbols
1.1.1 Warnings and additional information
Warnings
Warnings are used in these Operating Instructions to warn you of a
risk of injury to persons and/or damage to property.
1. Please always read and observe these warnings.
2. Follow all measures marked with the warning symbol and
warning word.
Depending on the severity and probability of the danger, the
following warning levels are distinguished:
Warning
symbol
Warning
word Danger level
Consequences resulting
from non-observance
DANGER Immediate
imminent
danger
Death, severe personal
injury
WARNING Potential danger Death, severe personal
injury
CAUTION Potential danger Slight personal injury
-NOTICE Potential danger Damage to property
Clarification of the structure of a warning:
WARNING! Name of source of danger, cause of hazard or type of
risk.
Consequences of non-compliance with instructions.
fAction in order to avoid danger.

About this Document
6
Hazard example:
DANGER! Residual energies may still be stored in the scanner,
which may be unexpectedly released during maintenance.
Death or severe personal injury due to electric shock.
fEnsure that work is carried out only by qualified personnel and
avoid any method of operation that could impair the safety of
the scanner.
fEnsure that unauthorised persons cannot perform any work on
the scanner.
Additional informationen
Symbol Significance
Additional information, e.g. for better understanding,
for simplifying workflows or for further information
1.2 Safety labels on the scanner
Safety labels indicating possible dangers/residual dangers are
mounted on the scanner. The safety labels on the scanner must be
followed under all circumstances. If they become faded or damaged
during the scanner’s lifetime they must be replaced immediately.
Their readability and completeness must be checked at regular
intervals. The moment the labels are not immediately recognizable
and understandable at first glance, the optical 3D scanner must be
taken out of operation until new labels have been attached.
The pictograms for warnings, prohibitions and commands on the
scanner and their meanings:
Symbol Significance
Danger of crushing.
This pictogram is located in the area of the swivel arm
and is designed to warn of a possible crushing hazard
between scanner and swivel arm.

Safety
7
1.3 Marking
The scanner can be uniquely identified by means of its identification
plate.
CE mark in accordance with:
•EMC Directive 2014/30/EU
•Low voltage directive 2014/35 EU
•RoHS Directive 2011/65/EU
1.4 Customer support
In case of technical problems, please contact your customer support.
2 Safety
These Operating Instructions are structured according to the
applicable EU regulations and contain safety instructions. The
company operating the scanner is responsible for ensuring that
operating personnel receive the necessary safety information and
that they have read and understood the Operating Instructions
before using the scanner. It is the responsibility of the individual to
comply with the safety instructions.
This chapter contains a general introduction to the safety
instructions. It also contains important information on accident
prevention.
Even if the greatest care is taken when designing and building the
scanner and if all safety aspects are taken into account, residual
dangers may still exist, which have been evaluated by means of a risk
assessment. All residual risks and warnings from the risk assessment
are listed in this chapter.
The scanner complies with the latest technology and with the
applicable health and safety regulations.

Safety
8
Nevertheless, the following dangers can occur in case of incorrect
operation or misuse:
•Risk of fatal or personal injury to operator or third party
•Damage to the scanner or material assets of the operating
company
•Risk to the eciency of the scanner
2.1 Intended use
The intended use of the scanner PrograScan PS3/PS5 covers the
three-dimensional, optical measurement of human jaw models in
combination with the supplied software. The scanner also allows the
measurement of articulated models, using the appropriate Ivoclar
accessories.
Only impressions and plaster casts of jaws as well as articulators with
such may be used (1500g maximum). Dimensions W x L x H: 200
mm x 200 mm x 160 mm. Only accessories specified by Ivoclar may
be used. The scanner is designed to be mounted at an ergonomic
height (observe the health and safety regulations in your country).
Any other use requires the written consent of Ivoclar Vivadent AG.
Incorrect use can lead to danger to persons and damage to the
scanner. The PrograScan PS3 / PS5 must be loaded manually, it does
not function independently. For this reason the product may only
be operated after the operator has read and understood these
Operating Instructions.
Furthermore, liability and warranty claims are invalid if the scanner
is used in a manner other than intended. The PrograScan PS3/PS5
may only be operated in accordance with the operating conditions
specified in these Operating Instructions.
2.1.1 Potential improper use
The information contained in these Operating Instructions describes
the product’s properties without guaranteeing them. No liability will
be assumed for damage caused by:
•Improper use of the scanner.
•Ignoring these Operating Instructions.
•Unauthorized changes to the scanner.

Safety
9
•Working on and with the scanner incorrectly.
•Operating the scanner with defective safety devices or improperly
installed or non-functioning safety or protection devices and
provisions.
•Insucient monitoring of system parts which are subject to wear.
•Repairs which are carried out incorrectly.
•Unauthorized, improper modification of operating parameters.
•Adverse events resulting from foreign objects and force majeure.
2.2 Intended environment
The conditions for the scanner’s operation are limited as follows:
•Ambient temperature: 18°C to 30°C
•Clean and dry space
•Install horizontally on a stable, vibration-absorbing workstation
•Relative humidity: 20% - 80% - not suitable for humid areas
•Use only indoors
2.3 Operator’s obligations
The operator is responsible for the safe operation of the scanner.
fEnsure that only instructed, trained or qualified persons work
with the scanner.
fEnsure that every person working with the scanner for the first
time has read and understood these Operating Instructions.
fPay special attention to the safety instructions in these Operating
Instructions and on the scanner.
fKeep these Operating Instructions in the scanner area and pass it
on to new personnel.
fMake sure that nobody works on the scanner who does not have
sucient technical knowledge.
fEnsure that the operating personnel is instructed at regular
intervals about safe scanner operating practices.

Safety
10
fConsider the national employee protection conditions as well as
the national safety and accident prevention regulations.
fEnsure that during service, maintenance or cleaning work,
safeguards are in place to prevent the scanner from being started
up without authorization.
fOnly use original replacement parts approved by the
manufacturer. Otherwise guarantee regulations and product
liability risks could be aected.
fEnsure that the notes attached to the scanner when delivered
remain clearly legible. Missing or damaged warning signs must be
replaced immediately.
2.4 Personnel qualifications
These Operating Instructions are intended for the personnel who
operate and maintain the scanner.
The operating and maintenance personnel must be selected by the
operating company and must fulfil the following requirements:
•Basic technical skills
•Read and understand these operating and maintenance
instructions.
•Operators must not be visually impaired.
•The person must be strong enough to lift the scanner and move it
to its final location.
The following measures must be carried out by the operating
company to ensure appropriate knowledge of the scanner’s
operation:
•Product training (written confirmation by the trained persons)
•Regular safety instruction
•Inspection, maintenance, cleaning and repair may only be carried
out by technical specialists with product-specific training
•Mechanical and/or electrical training

Safety
11
2.5 Sta obligations
fObserve the safety instructions and operating instructions
contained in these Operating Instructions at all times.
fEnsure that the scanner is only operated by suitably qualified
personnel. These persons must be familiar with all safety
instructions and with the corresponding measures relating
to operation, maintenance and cleaning contained in these
Operating Instructions and on the scanner.
fBefore carrying out repair or maintenance work, disconnect the
electrical and pneumatic supply to the scanner safely and properly
safeguard it against being switched on.
fDisconnect the optical 3D scanner from the mains before
cleaning, maintenance and repair work.
2.6 Personal protective equipment
The optical 3D scanner is designed such that persons working on the
scanner do not require any additional protective equipment beyond
the operating company’s required standard (e.g. work clothing, work
shoes, etc.)
fWhen carrying out cleaning and maintenance work, comply with
the prescribed measures for the corresponding cleaning agents
(e.g. gloves for cleaning agents, splash guard, etc.).

Safety
12
2.7 Safety instructions for individual operating phases
2.7.1 Transportation and set-up
fOnly transport the scanner if it is properly packed and secured.
fWhen handling the scanner, pay attention to the risk of bending
the scanner. Especially when putting down the scanner after it has
been transported.
fThe scanner is designed to be mounted at an ergonomic height
(check the health and safety regulations in your country). Ensure
that the base underneath the scanner is capable of bearing at
least twice the weight of the scanner.
fPay attention to trip hazards when cables are laid on the floor.
Always lay the cables along walls. The cables must not be
tensioned under any circumstances.
fChoose the scanner’s location such that possible vibrations during
the scanning operation can be absorbed without any problems,
i.e. the load capacity of the base (workbench, table, etc.) must be
at least twice the value specified in the technical specifications.
fEnsure that the base is stable enough to absorb the vibrations.
fDo not use the scanner in damp rooms.
fEnsure that no liquids come into contact with the scanner. Do not
place any vessels containing liquids on the scanner.
2.7.2 Installation and operation
fThe operating and maintenance personnel must be instructed
regularly on how to operate the system as well as its dangers. It is
mandatory to read the operating instructions.
fEnsure that only qualified personnel installs the system.
fBefore starting up the scanner, ensure that no persons are in the
danger zone. In case of danger, the scanner must be disconnected
from the mains immediately.
fKeep children away from the scanner. Only qualified personnel
may work with the scanner.
fOnly operate the optical 3D scanner in perfect and clean
condition.

Safety
13
fReport faults or damage to the operating company immediately.
These faults must be removed immediately with original parts.
fDo not remove, modify, bridge or bypass any protective, safety or
monitoring device.
fThe swivel arm moves during operation. Do not reach into the
danger area as this may result in injury to fingers.
fWhen operating the scanner inserts, pay attention to the possible
danger of crushing.
fIf the scanner is not going to be used for an extended period of
time, disconnect it from the power supply and switch it o using
the power switch on the back of the scanner.
fDo not place objects or tools on the scanner.
fKeep the area around the scanner clean and tidy. Remove all
objects and containers that are not required for the work process
from the scanner area.
fDo not climb the scanner.
2.7.3 Improper maintenance, modifications and repairs
Retrofitting additional devices from third-party manufacturers is
not permitted, nor is the modification of protective devices without
consultation with Ivoclar Vivadent AG or the manufacturer of the
respective additional device.
fEnsure that only Ivoclar service personnel repairs the system.
fOpening the scanner is strictly prohibited. Ensure that the scanner
is only opened by Ivoclar service personnel.
fOnly clean the scanner with a dry cloth.
fDo not convert or modify the scanner without written approval
from Ivoclar Vivadent AG.
fDisconnect the scanner from the power supply when carrying out
repairs.
fOnly use original replacement parts.
fAfter maintenance or repair work, ensure that all protective
devices/claddings are mounted before the optical 3D scanner is
started.

Design and Function
14
3 Design and Function
Optical 3D scanners are used in the dental field to measure
and digitize human jaw models in three dimensions. Using the
“structured-light scanning” principle, a stripe pattern of light is
projected onto an optical mirror, which deflects the test pattern
onto the object which is being measured. The distortion of the light
pattern caused by the depth of the jaw model is registered and
processed by two high-resolution cameras which are mounted on a
tripod together with the mirror, and thus subsequently digitized into
a virtual, three-dimensional model.

Design and Function
15
3.1 Design of the PrograScan PS3 /PS5
The connection panel is located on the rear of the scanner. The
scanner’s main components are as follows.
1
3
4
5
2
No. Description
1 Master switch and connection panel
2 Swivel bracket
3 Scan unit
4 Optical unit
5 Model holding fixture

Design and Function
16
3.2 PrograScan PS3 / PS5 connection panel
The connection panel is located on the rear of the scanner and is laid
out as follows:
No. Description
1 Power switch
2 Power supply connection
3 USB 3.0 port

Design and Function
17
3.3 Accessories
NOTICE! Usage of non-original parts.
Damage to the scanner and aected guarantee regulations and
product liability risks.
fUse original parts only.
No. Description
1 Calibration body
2 Model holder with screw
3 Multi die adapter
4 Arti base
5 Model holder with Blu Tack (optional)
6 Quarter tray adapter (optional)
7 Model fixator (optional)

Transportation and Assembly
18
No. Description
8 Automated impression axis (optional for PrograScan PS5
only)
9 Split Cast compatible with (optional):
•Artex / Adesso
•Bioart A7
•Denar Mark2
•KaVo Protar
•Quicksplit
•SAM
4 Transportation and Assembly
NOTICE! Transportation in inadequate or faulty packaging.
Damage to the scanner.
fEnsure that the scanner is transported exclusively in the
packaging provided.
fDo not expose the scanner to moisture or heat at any point
during transport.
fWhen stored for extended periods, keep the scanner in a dry
place in its original packaging. This should prevent corrosion and
contamination.
4.1 Unpacking the scanner
Dispose of the packaging in an environmentally friendly way
(paper into paper recycling, plastic into plastic recycling, etc.). We
recommend keeping the packaging in case of returns.
fCarefully unpack the scanner from its packaging and check that
all parts included in the delivery form are present.

Transportation and Assembly
19
Scope of delivery
•1x PrograScan PS3 / PS5 3D scanner
•1x 3D calibration body
•1x object holder
•1x multi die adapter
•1x power supply unit
•1x power cable
•1x USB 3.0 cable
4.2 Choosing the installation site
WARNING! Scanner exposed to direct sunlight or strong
extraneous light.
Fire hazards and damage to the scanner due to overheating
and unwanted reflections on the scanner’s monitor and sensor
technology.
fDo not expose the scanner to direct sunlight and avoid direct
proximity to heat sources (e.g. radiators, other electrical
appliances, fireplaces, etc.).
fEnsure generous air circulation around the scanner.
fEnsure that the installation site is level and is free from vibrations
and contamination.
fEnsure that no extraordinary exposure to dust or toxic or corrosive
gases and vapours or to impermissible heat eects occurs at the
installation site.
fEnsure that the installation site is free of increased
electromagnetic radiation.
fEnsured that the installation site is equipped with the necessary
power and network connections.
fEnsure that the power and bus lines are suciently long.

Transportation and Assembly
20
fSelect a mounting or installation site which prevents children
from touching the appliance and its connections unattended.
The installation site must allow for the safe positioning of all
connected cables.
fEnsure that power supply cables and feeder cables are not
damaged or crushed by other objects.
fSelect a mounting or installation site where liquids or objects
cannot enter the scanner under any circumstances (e.g.
condensation, roof leaks, spills, etc.)
fEnsure that the mains plug of the power supply unit is always
accessible.
fOnly use the scanner indoor.
4.3 Lifting points
The two lifting points (1) and (2) are for carrying the scanner. Hold
the scanner at these two points with your left and right hand. The
scanner weighs 12 kg and can be carried by one person, with the
open side of the scanner facing away from the body.
2
1
This manual suits for next models
1
Table of contents
Languages:
Other Ivoclar digital Dental Equipment manuals
Popular Dental Equipment manuals by other brands

RAMVAC
RAMVAC CustomAir 1000 Series user guide

RAM
RAM MICROLAB 350 user manual

RAM PRODUCTS
RAM PRODUCTS BP50 owner's manual

Durr Dental
Durr Dental Power Tower Silence 200 Installation and operating instructions

EKOM
EKOM DO 2.1 Installation, operation and maintanance manual

EMS
EMS AirFlow Master Piezon Operation instructions

Dentsply Sirona
Dentsply Sirona CEREC Primescan AC Unpacking and installation instructions

EMS
EMS AIR-FLOW handy 3.0 Instructions for use

Dr. Mach
Dr. Mach Mach LED 2 SC user manual

SCHEU
SCHEU IMPRIMO Clean Operation manual

DentalEZ
DentalEZ StarDental Titan 3 257506 instruction manual

Waterpik
Waterpik WF-10W012 manual