55Memory Function
8Important Note
9Specication
8
9
66Setting the Clock
FM Transmitter
QSG-iFMT11-120810V2
GB-5GB-4
DSG Retail Ltd. • Maylands Avenue Hemel Hempstead • Hertfordshire HP2 7TG England
Notes for battery disposal:
The batteries used with this product contain chemicals that are harmful to the environment. To
preserve our environment, disposal of used batteries according to your local laws or regulations.
Do not dispose of batteries with the normal household waste.
For more information, please contact the local authority or your retailer where you purchased
the product.
DSG International Sourcing declares that this unit complies with the essential requirements and
other relevant provisions of Directive 1999/5/EC.
This symbol on the product or in the instructions means that your electrical and
electronic equipment should be disposed at the end of its life separately from your
household waste. There are separate collection systems for recycling in the EU.
For more information, please contact the local authority or your retailer where you
purchased the product.
• For best results, choose a medium-strengh radio station signal. A strong radio
station signal will drown out the transmitter’s signal beyond a certain distance.
• The transmitter’s background signal noise will become noiser as the batteries
weaken.
• Turn o the unit when you are not using it to save battery power.
• Batteries normally last for at least 9 hours.
• Transmission Frequency: 87.6MHz to 107.9MHz with 100KHz step
• Operating Range: 2M - 3M (a distance of 2M or less will minimize interference
and provide the strongest signal)
• LCD displays with orange backlight
• Operates with 2 x AAA battery
This unit can memorise up to 10 FM frequencies.
1. Press the or button to select the desired frequency.
2. Press and hold the button.
3. “MI” will display and the number will ash.
4. Press the or button to select memory number that you want to save to.
5. Press the button to conrm.
6. Press the or button to select the preset memory slot.
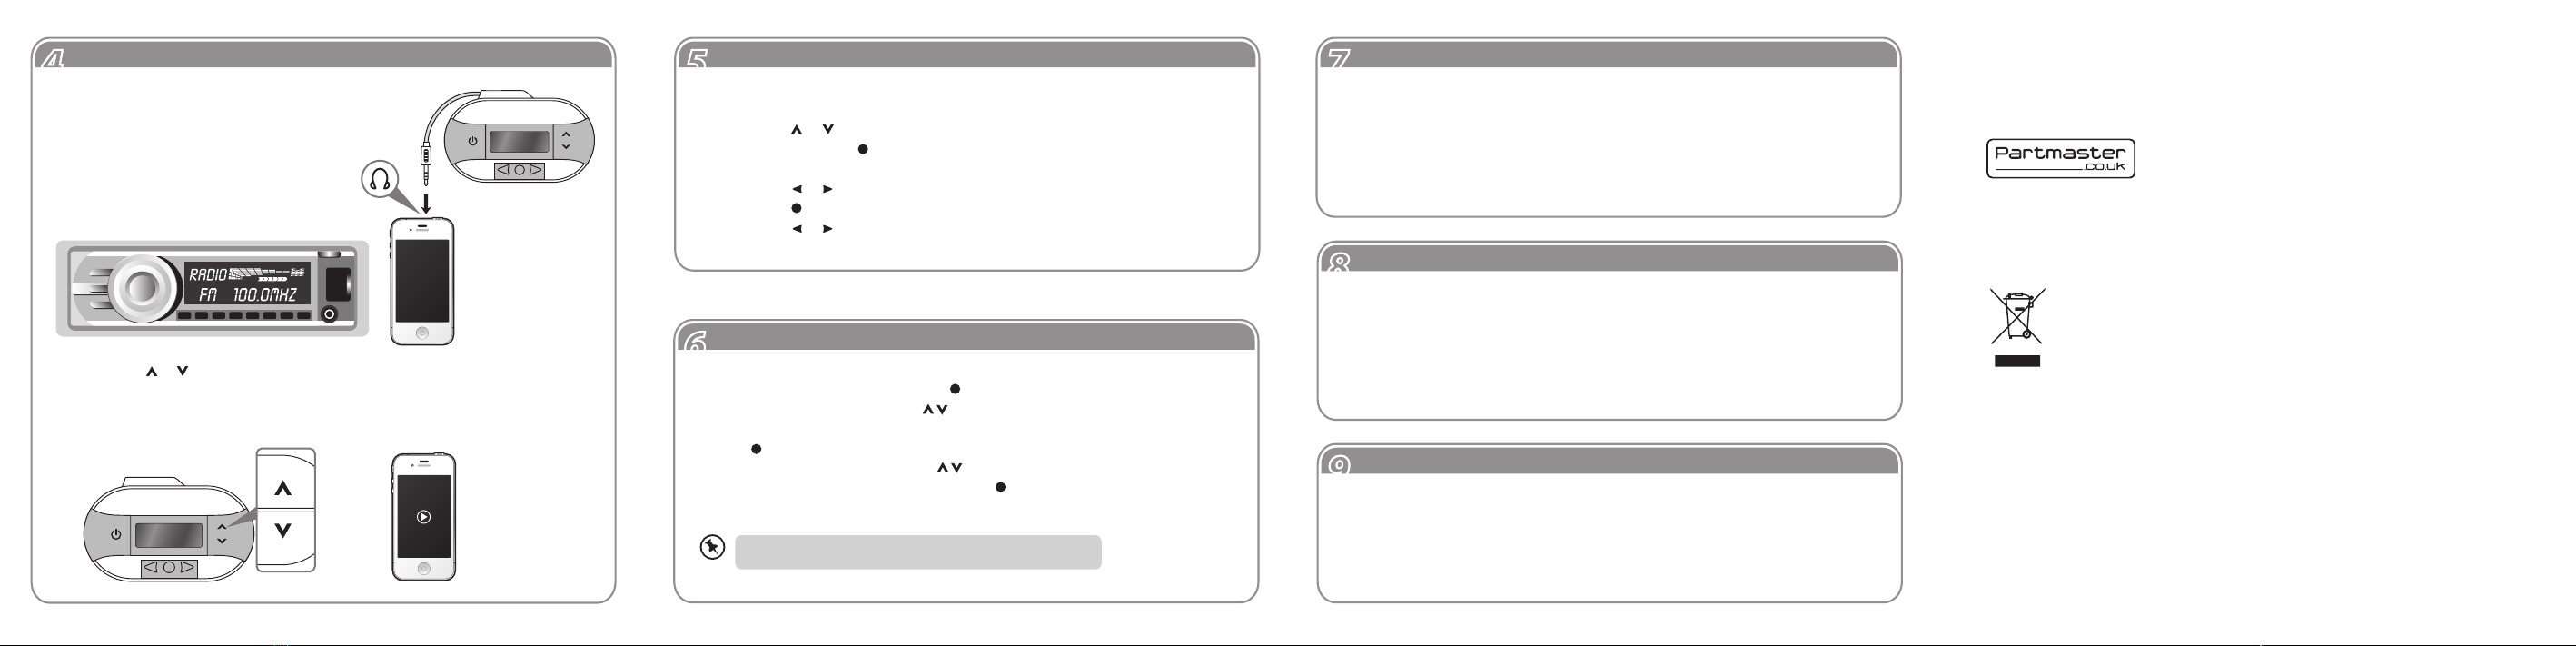
44Operation
1. Plug the unit into the headphone
socket of your mobile audio device.
2. Tune your FM radio (eg. car stereo)
to the clearest FM signal from 87.6 -
107.9MHz.
(e.g. FM 100.0 MHz)
3. Press the or button to select the
same frequency on your FM
transmitter.
4. Now play the songs you wish
to listen to from your mobile
audio device through the
speakers of your FM radio.
Audio device
FM transmitter
Visit Partmaster.co.uk today for the easiest way to buy electrical
spares and accessories. With over 1 million spares and accessories
available we can deliver direct to your door the very next day. Visit
www.partmaster.co.uk or call 0844 800 3456 (UK customers only) Calls charged at National Rate.
• In STANDBY mode, press and hold .
• The HOUR digits will flash. Use to adjust the hour.
• After setting the hour and while the hour digits are still flashing press and
hold .
• The minutes digits will flash. Use to adjust the minutes.
• To conrm the clock settings either press or wait for the digits to stop
ashing.
77Alternative Power Inputs
This unit also includes 2 alternative power inputs to the batteries:
1. DC Adapter (12V) for in-car use only
The DC adapter (not included) must be 12 V only.
2. USB Power (5V) Input
Plug in the USB cable (not included) to the USB port on the unit and then to
a USB port on the computer or USB adapter (not included).
This is a 24 hour clock.
GB-6
FM Transmitter
iFMT11_IB_120810_Zell.pdf 2 10/8/12 5:42 PM


