J.ASSY KIT APOLLO User manual

USER GUIDE

User Guide
v. 1.0
Kit Apollo

3
User Guide | Apollo Kit
Contents
Introduction 4
Technical Specications 5
Installation 6
Pre-Assembly Instructions 6
Assembly Instructions 7
Maintenance and Storage 9
Storage 9
Cleaning 9
Application of spray graphite 9
End of Life Signs 10
Troubleshooting 11
Excessive skips 11
Excessive doubles 11
High *COV or low **SRI 12
Improper seed population 13
Motor stability, voltage and current 14
Disposal 15
* COV = Coefcient of Variation
** SRI = Seed Distribution Index

4
User Guide | Apollo Kit
Soybean
Corn
The Kit Apollo is a technology specically developed and patented by
J. Assy for use in pneumatic seed meters*.
Developed to offer a high level of planting performance, low maintenance
and zero adjustments, the Kit Apollo is a compact and practical solution
that replaces the seed metering disk, singulators, and ejector wheels,
enabling a faster and more efcient planting operation.
*Compatible with vSet® 2 by Precision Planting® only. Trademarks not owned by J. Assy (including, but not limited
to, vSet® and Precision Planting®) are the property of their respective owners and the use of such trademarks
does not imply any afliation between the trademark owners and J. Assy.
Key Features of the Kit Apollo
More crops coming soon.
No adjustments required.
Easy to assemble.
Compact and practical
solution, a single part for
each crop.
Efcient crop switching
without the risk of losing
components.
Excellent seed distribution
and singulation.
Introduction

5
User Guide | Apollo Kit
*under optimized pressure conditions
Technical Specifications
Metering disk color
Number of holes
Hole diameter
Bafe position
Vacuum pressure
Seed size
Maximum seeding rate
Expected singulation
Estimated service life
Part number
Yellow
27
4.5
mm
2
1000 – 3100
(seeds/lb)
38
(seeds/s)
>99%*
1000h at 80 RPM or
3500 ac/row at 37000 seeds/ac
18-30
(”H
2
O)
45-75
(mbar)
CORN
2.02.0205
Lilac
56
4.2
mm
2
1700 – 5300
(seeds/lb)
120
(seeds/s)
>99%*
1000h at 110 RPM or
2600 ac/row at 140000 seeds/ac
SOYBEAN
18-24
(”H
2
O)
45-60
(mbar)
2.02.0206

6
User Guide | Apollo Kit
Next, remove the secondary
spring located at the top of
the interior of the seed meter.
02
02
Installation
Pre-Assembly Instructions
The rst step in installing the Kit Apollo is removing the springs
holding the previous singulator installed inside the seed meter.
Remove the two Philips head
screws and remove the
primary spring supporting
the previous singulator.
Once the old parts have been removed, the meter is ready for the
installation of Kit Apollos.
01
01
01
02

7
User Guide | Apollo Kit
Assembly Instructions
Important
Remove the lock from the
pin located on the
meter’s cover.
Insert the desired Kit
Apollo, aligning the center
hole with the cover’s
central pin.
01 02
The upper pad must be
properly aligned with
the recess located on
the meter cover.
01
Align the two guide
pins with any two of the
metering disk’s center holes.
02
Make sure the gear’s
teeth are aligned with
the disk’s teeth.
03
Make sure not to crush
or fold the vacuum seal.
04

8
User Guide | Apollo Kit
Place the locking pin back
into position in order to
fasten the kit to the unit.
Adjust the bafe position
according to the crop.
Check the table of technical
specications for the
desired crop.
03 04
Helpful tip
To better align the
pins with the center
holes on the metering
disk, turn the handle
located behind the
meter’s cover.
Attention
Do not force the disk teeth against the meter’s drive gear.
Check to make sure that the vacuum seal is not
crumpled and is in good condition.

9
User Guide | Apollo Kit
Maintenance and Storage
Storage
Cleaning
Application of graphite spray
When not in use, the Kit Apollo must be stored either in its original
packaging or in another appropriate package in order to ensure
that it is properly protected.
Keep the Kit Apollo away from sunlight when it is stored for long
periods of time, in order to prevent deterioration in the unit’s parts
and loss of color.
Do not expose the Kit Apollo to temperatures above 203°F or
below -22°F.
Place the Kit Apollo in a
horizontal position and apply
lubricant spray across the
disk’s surface.
Allow the disk to dry for at
least 30 minutes (disassembling
the kit is not required). See the
image on the right.
Step by step
instructions for applying graphite
to the metering disk:
Place the Kit Apollo in
a horizontal position.
Use a dry cloth and compressed air.
Do not use harsh chemical cleaning
products (Solupan, Metasil and others).
It is recommended that the Kit Apollo
be cleaned at the end of each
planting season.

10
User Guide | Apollo Kit
End-of-Life Signs
The Kit Apollo will begin to show signs of wear after several years of
use. The kit is designed to maintain optimum performance even after
the rst signs of wear appear.
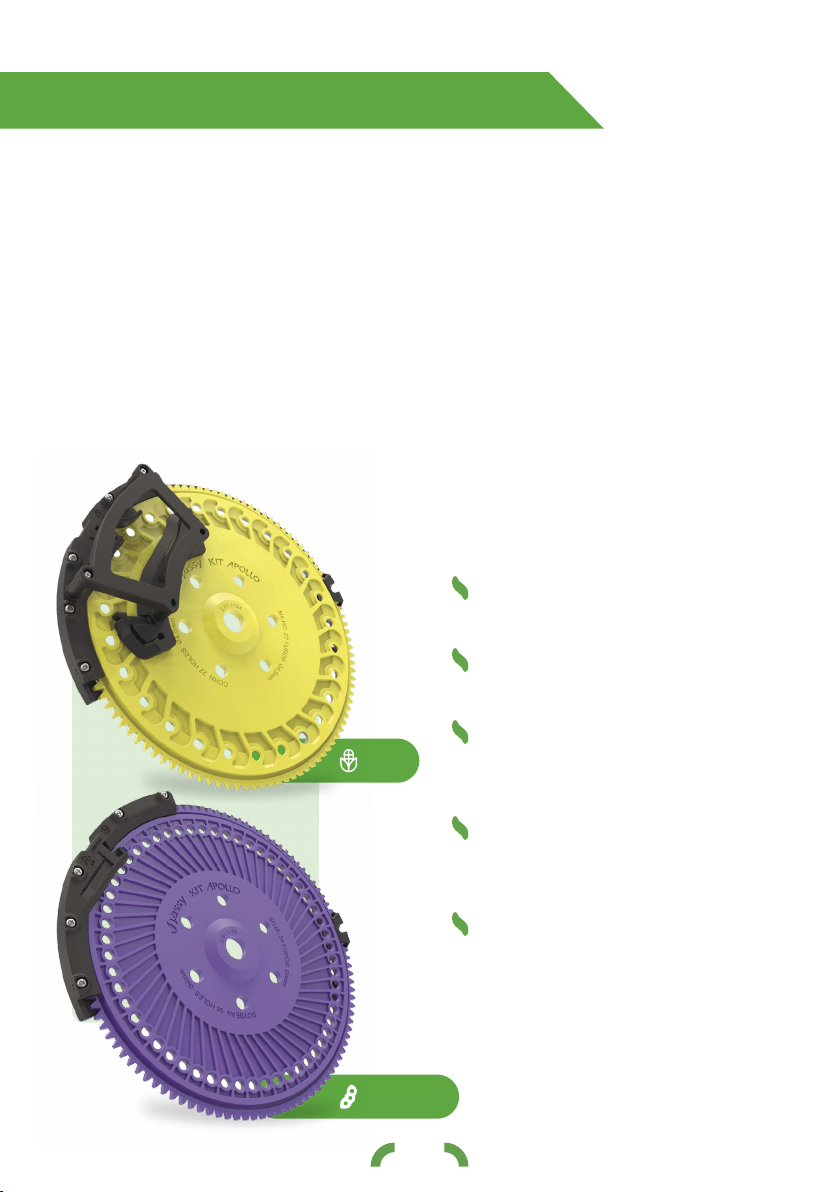
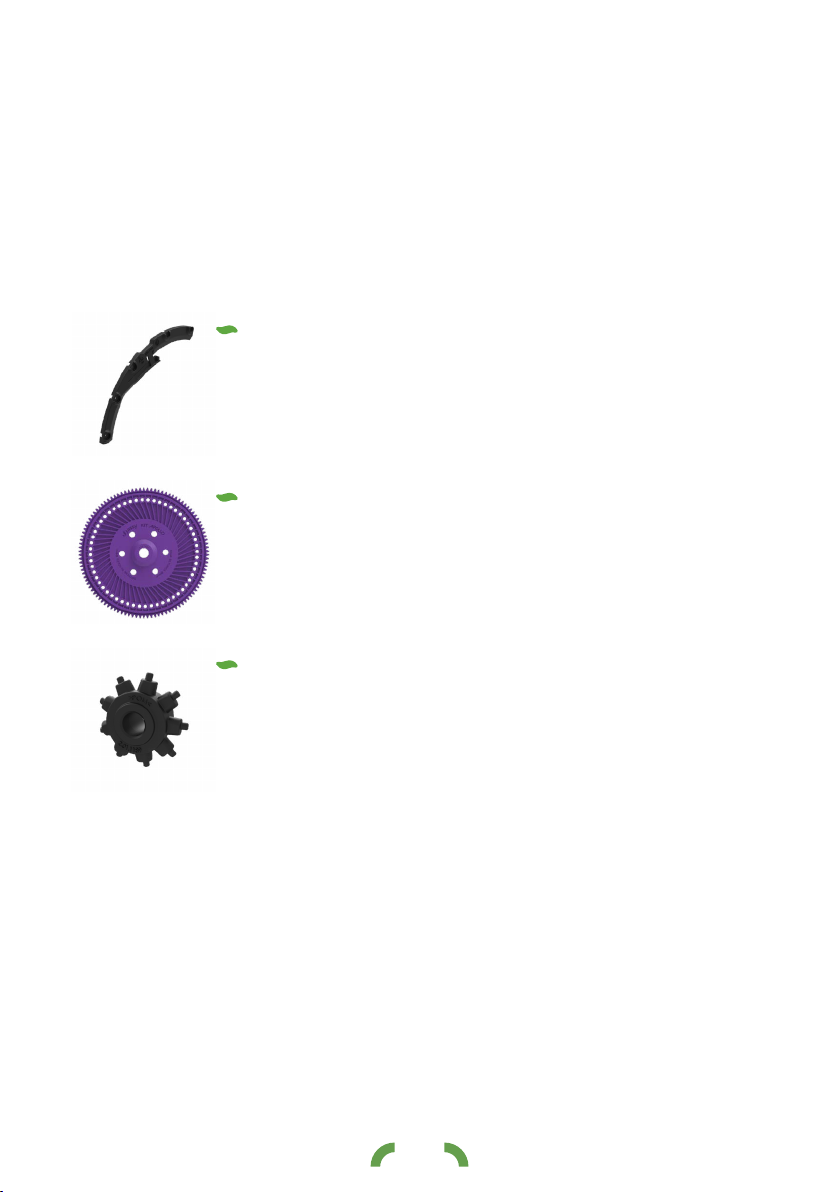
Upper pads: When the upper pad is subjected to
excessive wear, the kit’s singulation is affected,
resulting in an increased number of multiples or an
excessive number of skips. It is recommended that
the kit be replaced whenever a drop in singulation
performance occurs.
It is recommended that the following criteria be used to determine
whether it is time to replace a kit due to wear in its parts:
Metering disk: The contour of the disk holes may
present signs of wear over time and affect the
distribution of seeds in the soil. If seed distribution
has been greatly impaired and the disk holes are
visibly deformed, it is recommended that the kit be
replaced.
Ejector wheel: The ejector wheel’s teeth must be
capable of penetrating the disk holes in order to
remove any debris and ensure the holes are kept
clean. If any of the ejector wheel’s teeth are worn
to the point where they are no longer able to reach
through the disk holes, it is recommended that the
kit be replaced.

11
User Guide | Apollo Kit
Troubleshooting
Check that the kit being used is appropriate for the crop being
planted. Verify that the bafe position is adjusted correctly. For
more information, see the section ‘Technical Specications’ on
page 5 of this manual.
Make sure that the vacuum pressure is correctly set. If the skips
(lack of seeds) persist, try to increase the vacuum pressure until
the skips have been reduced as much as possible.
Check that the seeds have been properly lubricated. It is
recommended that dry powdered graphite, talc or a mixture of
both be applied to the seeds and mixed in a uniform manner to
ensure that seeds move easily within the seed meter.
Check to make sure that there are no debris stuck inside the
metering disk’s holes.
Check the vacuum seal to make sure that it is in good condition
and does not show signs of wear.
Check the kits for signs of excessive wear. For more information,
see the section End-of-Life Signs on page 10 of this manual.
Check that the kit being used is appropriate for the crop being planted.
Verify that the bafe position is adjusted correctly. For more information,
see the section ‘Technical Specications’ on page 5 of this manual.
Skips are characterized by a lack of seeds in the disk holes resulting
in a low seed population. These issues can be reduced by taking the
following measures:
Multiples refer to the presence of two or more seeds in disk holes
resulting in a high population. The amount of multiples in the Kit Apollo
can be reduced by taking the following measures:
Excessive skips
Excessive multiples

12
User Guide | Apollo Kit
If the spacing between seeds in the soil, which is measured by
COV (Coefcient of Variation) or SRI (Seed Distribution Index), is not
sufcient, we recommend that the following actions be taken:
High COV or low SRI
Make sure that the vacuum pressure is correctly set. If multiples
persist, decrease the vacuum pressure until the multiples have been
reduced as much as possible.
Check that the seeds have been properly lubricated. It is
recommended that dry powdered graphite, talc or a mixture of both
be applied to the seeds and mixed in a uniform manner to ensure
that seeds move easily within the meter.
Check the kits for signs of excessive wear. For more information see
the section End-of-Life Signs on page 10 of this manual.
Check the meter’s seed outlet and the seed tube. Debris inside
the seed tube and poorly installed seed sensors can result in
interference when guiding the seeds to the soil, which in turn
affects the seed distribution.
Check the meter’s drive system. Make sure the system is in proper
operating condition and well lubricated.
Check for objects preventing the Kit Apollo from rotating continuously.
Check that the seeds have been properly lubricated. It is
recommended that dry powdered graphite, talc or a mixture of both
be applied to the seeds and mixed in a uniform manner to ensure
that seeds move easily within the meter. This will ensure that the
seeds are released from the metering disk at the right time.
Reduce speed to check if the problem is being caused by
excessive vibration.
If the seed tube includes a seed sensor, check to make sure that it

13
User Guide | Apollo Kit
If the seed population in the soil is not at desired levels, the following
steps can be taken:
is properly installed. The sensor must not extend beyond the seed
tube’s inner wall.
Check that the teeth on the metering disk’s gear and pinion are in
good condition. Replace parts with damaged teeth.
Check the kits for signs of excessive wear. For more information
see the section End-of-Life Signs on page 10 of this manual.
Check that the kit is correctly installed inside the meter.
If the meter is driven by a hydraulic or electric motor, check that
the number of holes in the disk is correctly set on the monitor
controlling the motors.
If the meter is driven by the planter’s drive wheel, check
to make sure that the gears being used are in line with the
recommendations included in the seed distribution rate table.
Improper seed population

14
User Guide | Apollo Kit
If the electric motor driving the meter is having difculty maintaining
the correct speed, an alert for low stability may be triggered.
If the motor is not receiving the power required for operations, the
monitor may also display a low voltage alert. We recommend that the
following steps be taken in such cases:
Check to make sure that settings for seed population, crop
and number of disk holes are correct on the control monitor
and that the electric motor’s rotation speed does not exceed
technical specications.
Make sure the power supply is properly sized for the planter that
you are using. It is possible in such cases that a certain system
element is consuming a large amount of energy, and there is not
enough energy left to drive the meter’s electric motors. If slowing
down the tractor resolves stability issues, this is a sign that an
element of the system is consuming an excessive amount of energy.
Check that the teeth on the metering disk’s gear and pinion are in
good condition. Replace parts with damaged teeth.
Check for any form of debris preventing the kit from rotating. If
the disk is jamming, an excessive level of current may be required
from the electric motor, triggering an alarm.
Check that the graphite coating applied to the rear of the disk is
in good condition and, if necessary, reapply the graphite spray.
Motor stability, voltage and current

15
User Guide | Apollo Kit
Disposal
Equipment must be sent to your nearest J.Assy reseller partner, or
to the OEM in cases involving a direct purchase, at the end of its
service life. The equipment will then be properly disposed of by those
responsible for this process.

www.jassy.ag
Instruction Manual | Kit Apollo
Table of contents
Other J.ASSY Farm Equipment manuals