4
4.0 Montering
Innsatsen er fortungt. Pass på å sikre at innsatsen ikke faller
forover ved montering!
Sørg for hjelp når det skal settes opp og monteres.
Det følger 3 manualer med produktet:
• Generell bruks- og vedlikeholdsmanual.
• Jøtul S 16 - I 400 (omrammingen).
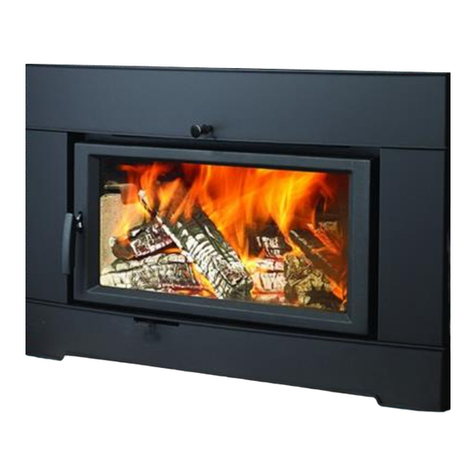
• Jøtul I 400 (innsatsen).
Det anbefales at man prøveoppstiller omrammingen for å justere
innsatsen og røykrørstilkobling før røykrørstilkoblingen mures
fast til skorsteinen.
Delene til omrammingen på fig. 23-1 og 23-2 skal ikke brukes
når Jøtul I 400 benyttes som innsats. (Det samme gjelder
senterforskyver.)
4.1 Forberedelser
Basis produkt leveres i 2 kolli:
• Innsats og
• Betongelementer med monteringsdetaljer.
Kontroller at innsatsen ikke har synlige skader ved utpakking og
at betjeningshåndtakene beveger seg lett.
Før installasjon må beslutning taes om:
• Hvor røykuttaket skal være
• Eventuell bruk og plassering av uteluftstilkobling
• Eventuell bruk av askeløsning.
Se egne manualer for montering.
P.g.a forskjellige takhøyder, må høyden på omrammingen
tilpasses:
• Omrammingen avsluttes min . 20 mm fra tak.
• Skjær evt. litt av øvre toppelement.
Når innsatsen er pakket ut, tas esken med røykklokke,
kubbestopper (fig. 4C), pakning og skruepose ut av innsatsen.
Fjern deretter luftkanalen (fig. 4D), hvelv (fig. 5B), ledeplate (fig.
5A),sidebrennplater (fig. 4E) og deretter bakre brennplate (fig. 4F).
4.2 Skorstein og røykrør
• Ildstedet kan tilknyttes skorstein og røykrør godkjent for
fastbrensel fyrt ildsted med røykgasstemperatur som angitt
i «2.0 Tekniske data» i Installasjonsmanualen til innsatsen.
• Skorsteinstverrsnittet måminimumværelikrøykrørstverssnitt.
Ved beregning av riktig skorsteinstverrsnitt;se «2.0 Tekniske
data» i Installasjonsmanualen til innsatsen.
• Flere fastbrenselfyrte ildsteder kan tilknyttes samme pipeløp
dersom skorsteinstverrsnittet er tilstrekkelig. Kontakt dine
lokale bygningsmyndigheter angående restriksjoner og
installasjonskrav.
• Tilslutning til skorstein må utføres i henhold til
skorsteinsleverandørenes monteringsanvisninger.
• Før det tas hull i skorsteinen,bør ildstedet prøveoppstilles for
riktig avmerking for plassering av ildsted og hull i skorsteinen.
Se fig. 1 for minimumsmål.
• Se til at røykrøret får stigning hele veien frem til skorsteinen.
Vær obs på at det er særdeles viktig at tilslutninger har en viss
fleksibilitet. Dette for å forhindre at bevegelser i installasjonen
fører til sprekkdannelser.
Anbefalt skorsteinstrekk, se «2.0 Tekniske data» i
Installasjonsmanualen til innsatsen.
4.3 Jøtul S 16 C/W består av følgende
deler, (fig. 2 og 3):
DEL BENEVNELSE ANTALL
Del 1: Sokkelplate 1 stk
Del 2: Sokkel 1 stk
Del 3: Bæreplate 1 stk
Del 4: Benkeplate, skifer 3-delt 1 stk
Del 6: Sidevanger 2 stk
Del 7: Kappe 1 stk
Del 8: Ventiler 2 stk
Del 9: Stålplate 1 stk
Del 10: Rockwool 1 stk
Del 11: Toppelement 2 stk
Del 12: Bakplate sokkel (kun for hjørneversjon) 1 stk
Gulvplate og hylleplate i marmor er ekstrautstyr.
Bruk medfølgende acrylmasse i alle skjøter.
1. Fjern skjermplatene ved å skru ut de to skruene, M8x20 mm
på hver side (fig. 6-1A) av innsatsen.
2. Legg innsatsen forsiktig ned på ryggen. Bruk gjerne trepallen
og pappemballasjepå gulvet for å beskytte dette mot riper etc.
3. Monter skjermplaten på undersiden av innsatsen ved hjelp av
medfølgende skruer og hylser (fig. 8-1A). Se fig. 8-2 for ferdig
montert skjermplate.
4. Ved bruk av ekstrautstyr «Uteluft for Jøtul I 400» (kat.341279)
må hullet i skjermplaten åpnes nå. Se egen manual.
5. Skru fotskruen min.45 mm fra bunnen av beinet på innsatsen
til skiven på fotskruen (fig. 7). Gjør det samme med de to
andre beina.
6. Reis produktet forsiktig opp.
• Tilbakemonter skjermplaten på brennkammeret med de
samme skruene den tidligere var festet med. Skru ut de tre
plateskruene (fig. 6-2B), og snu skjermplaten opp-ned (fig.
6-2C). Se fig. 6-2 for ferdig monterte skjermplater.
7. Sokkelplaten (del 1) legges på plass.
8. Sokkelen (del 2) settes på plass inntil vegg.Legg på et vater og
rett opp evt. skjevheter med lim, mørtel eller små stålskiver.
Det er svært viktig at sokkelen står stødig og er i vater. Fig.
9-1 og 9-2. NB! Ved bruk at utelufttilkobling,se «3.6 Uteluft».
9. For Jøtul S 16 C: Bakplate sokkel (del 12) settes på plass og
limes til vegg. Fig. 9-2A.
10. Legg på bæreplaten (del 3). Fig. 10-1 og 10-2.
11. Plasser innsatsen i nedsenkningene på bæreplaten (del 3).
Se fig. 11-1A-B og 11-2A-B.
12. Ved bruk av «Uteluft for Jøtul I 400» (kat. 341279) og
«Uteluftstilkobling Ø100» (kat.nr.341296) må dette monteres
ferdig nå. Se fig. 12-1 og 12-2, og fig. 13-1 og 13-2 for uteluft
ferdig montert.Forslag til plassering av fordelingsboks,se fig.
12-1 og 12-2. Fordelingsboksen kan skrues fast på et egnet sted.
13. Juster innsatsen i forhold til sokkelen slik at det er lik avstand
på begge sider.
14. Finjuster fotskruene fra siden slik at innsatsen står i vater.
Spalten i underkant av innsatsen skal være parallelt med
oversiden på sokkelen (del 2 og 3), og være tilpasset tykkelsen
på marmorplaten (del 4). Beregn ekstra spalte mellom
underkanten på innsatsens front og marmorplaten til ca 3 mm.
16. Monter medfølgende pakning ipakningssporet på undersiden
av kanten på røykklokka (fig. 14A).
15. Monter røykklokken utenfra ved å feste den med de fire
medfølgendeM8x20mmskruene(fig.14B)ogskivene(fig.14C).
16. Roter så røykklokken til ønsket stilling (fig. 15). Stram til
skruene. Ved bruk av stålskorstein: Stussen på røykklokken
må stå symmetrisk i bakre stilling.
NORSK


