manuals.online logo
Brands
  1. Home
  2. •
  3. Brands
  4. •
  5. j5 create
  6. •
  7. Adapter
  8. •
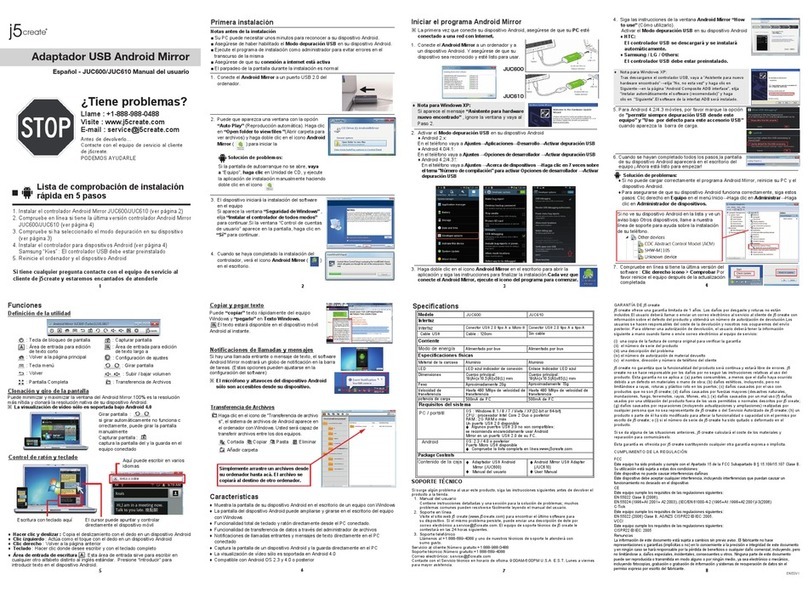
  9. j5 create JCA374 User manual

j5 create JCA374 User manual

Mac Users : The Ethernet function requires
driver installation. Please download the
driver from
https://en.j5create.com/pages/drivers#JCA374
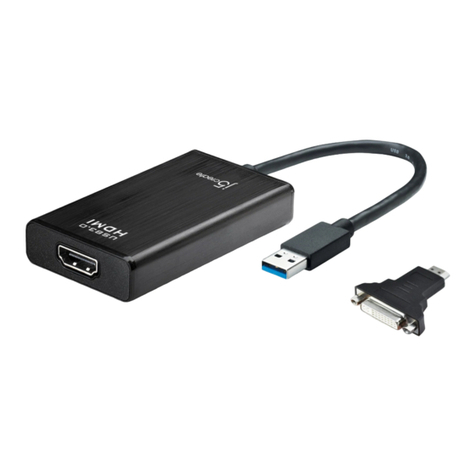
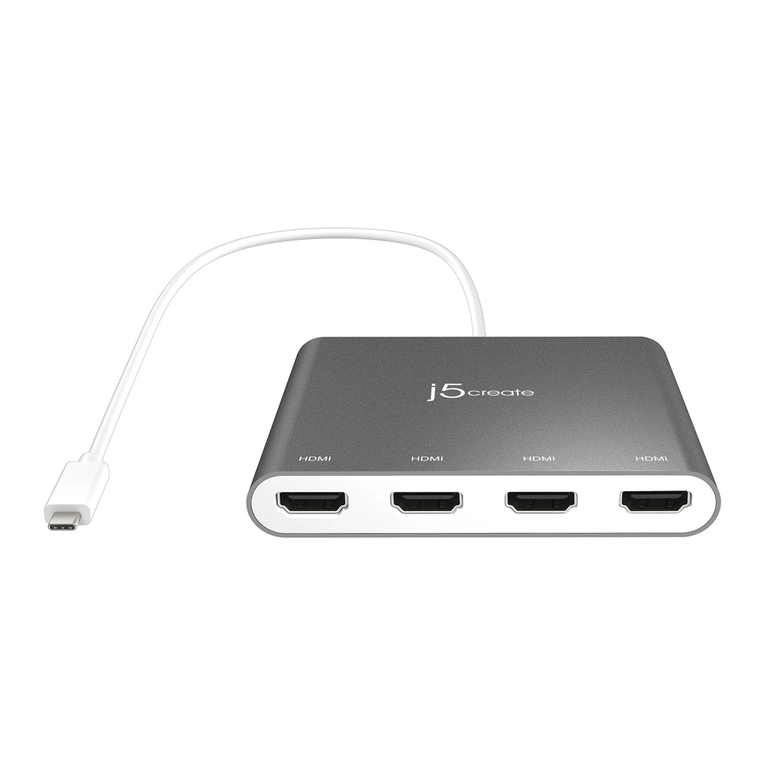
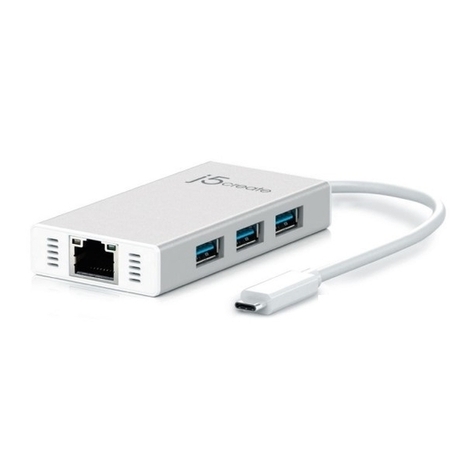
USB Type-C Multi-Adapter
HDMI / Ethernet / USB 3.1 HUB / PD 2.0
JCA374
Ethernet Driver Installation - Mac
Mac Users : The Ethernet function requires driver
installation. Please download the driver from
https://en.j5create.com/pages/drivers#JCA374
Step 1
Please download the latest driver from https://en.j5create.com/pages/drivers#JCA374. Under Support
& Services –scroll down to the product’s driver you are installing and download the latest driver for
your operating system.
(Note: If you have trouble downloading this driver your security settings may need to be adjusted to
allow for “downloading from anywhere”)
Step 2
Follow the prompts to install the driver (You may have to click on Finder>downloads and choose
j5UsbEthernetAdapter to begin installation).
Step 3
Once initial installation has completed, click Restart to finish installing the software. After your
computer has restarted, first connect the j5create USB 3.0 Multi Adapter to your power adapter, HDMI,
Ethernet, etc. and then to your computer. Now you are ready to use your j5create USB 3.0 Type-C
Multi-Adapter.
Step 1 Step 2
● HDMI port supports 4K @ 30 Hz or 1080p @ 60 Hz
● USB 3.0 port: 5 Gbps and backwards compatible with USB 2.0 and USB 1.1 devices
● Supports upstream charging & power delivery 2.0 via USB Type-C charging port
Features
Notes
● If you are using a high-powered USB device please attach the Type-C
power adapter to the JCA374 power delivery port to ensure maximum performance
● To ensure files copy completely, do not remove the Type-C power adapter while copying files
● Available USB Type-C Port (USB 3.1 Gen1 Type-C is recommended)
● Available Display Alternate Mode over USB Type-C connector
Perfect for MacBook and Chromebook
● Available USB Power delivery over USB Type-C to support upstream charging
● DisplayPort v1.2 on graphics card must support 4K @ 30 Hz resolution
● Mac OS X 10.6 or later
● Driver not required for Chrome OS 3.8 & Windows 10
System Requirements
Paso 1
Por favor, descargue el controlador más reciente de https://en.j5create.com/pages/drivers#JCA374.
Bajo Soporte & Servicios: desplácese hasta el controlador del producto que está instalando y
descargue el controlador más reciente para su sistema operativo. (Nota: si tiene problemas para
descargar este controlador, es posible que tenga que ajustar la configuración de seguridad permitir
"descargar desde cualquier lugar")
Paso 2
Siga las instrucciones para instalar el controlador (Puede tener que hacer clic en Finder> descargas y
elegir j5UsbEthernetAdapter para comenzar la instalación)
Paso 3
Una vez que la instalación inicial se haya completado, haga clic en reiniciar para finalizar la
instalación del software. Después de que su equipo se haya reiniciado, conecte primero el adaptador
multi j5create USB 3.0 para el adaptador de corriente, HDMI, Ethernet, etc., y luego a su ordenador.
Ahora ya está listo para usar su j5create USB 3.0 Tipo-C Multi-adaptador
Usuarios de Mac : La función de Ethernet requiere la
instalación del controlador . Por favor, descargue el
controlador desde
https://en.j5create.com/pages/drivers#JCA374
Instalación del controlador Ethernet - Mac
● Puerto HDMI es compatible con 4K @ 30 Hz o 60 Hz 1080p
● Puerto USB 3.0 5Gbps compatible con dispositivos USB 2.0 y USB 1.1
● Soporta carga ascendente y suministro de potencia 2.0 vía USB Tipo-C puerto de carga
Caracteristicas
Requisitos del Sistema
● Puerto USB Tipo C disponible (se recomienda USB 3.1 Gen1 Tipo-C)
● Modo de visualización alternativo disponible sobre el conector USB Tipo-C
Perfecto para MacBook y Chromebook
● Disponible USB de suministro de energía a través de USB Tipo-C para admitir carga en sentido
ascendente
● DisplayPort v1.2 en la tarjeta gráfica debe soportar 4K @ 30 Hz de resolución
● Mac OS X 10.6 or posterior
● El controlador no es necesario para Chrome OS 3.8 y Windows 10
Notas
● Si está utilizando un dispositivo USB de alta potencia, adaptador de corriente al puerto de suministro
de energía JCA374 para garantizar el máximo rendimiento
● Para asegurar los archivos de copia por completo, no retire el adaptador de alimentación de
Tipo-C, mientras que la copia de archivos
Paso 1 Paso 2
● HDMI-Anschluss unterstützt 4K @ 30 Hz oder 1080p bei 60 Hz
● USB 3.0-Port 5 Gbps rückwärtskompatibel mit USB 2.0 und USB 1.1-Geräte
● Unterstützt das Upstreamladen & Stromversorgung 2.0 über den USB Typ-C Ladeanschluss
Eigenschaften
● Verfürgbarer USB-Typ-C-Anschluss (USB 3.1 Gen 1 Typ-C wird empfohlen)
● Verfügbare Alternativmodes des Bildschirmes über den USB-Typ-C-Stecker.Perfekt für MacBook und
Chromebook
● Verfügbare USB Stromversorgung über den USB Typ-C zur Unterstützung des Upstream Ladens
● Displayport v1.2 auf Grafikkarte muss 4K @ 30 Hz Auflösung unterstützen.
● Mac OS X 10.6 oder höher
● Der Treiber ist nicht erforderlich für Chrome OS 3.8 & Windows-10
Notizen
● Wenn Sie ein High Power USB Gerät verwenden, verbinden Sie bitte den Typ C Adapter an die JCA374
Stromversorgunganschluss um eine maximale Performance sicherzustellen.
● Um sicherzustellen, dass Dateien vollständig kopiert werden, entfernen Sie nicht den
Typ-C-Netzadapter beim Kopieren von Dateien
Schritt 1
Bitte laden Sie den aktuellsten Treiber von https://en.j5create.com/pages/drivers#JCA374. Unter "Support
& Service" scrollen Sie bis zum Produkttreiber, den Sie installieren wollen und laden Sie den aktuellesten
Treiber für Ihr System herunter.
Notiz: Sollten Sie Probelme beim Herunterladen dieses Treibers haben,müssen Ihre Sicherheitseinstellun
gen vermutlich auf das Erlauben von "Download von überall" geändert werden.
Schritt 2
Folgen Sie den Aufforderungen um den Treiber zu installieren. ( Sie müssen vermutlich auf
Finder>Downloads und j5usbEthernetAdapter anklicken um die Installierung zu starten. )
Schritt 3
Wenn Ihre Installation fertig ist, klicken Sie auf Neustart um die Installierung der Software zu beenden.
Nachdem Ihr Computer neugestartet ist, verbinden Sie den j5create USB 3.0 Multi Adapter an Ihren
Poweradapter, HDMI, Ethernet etc. und dann an Ihren Computer. Nun sind Sie bereit Ihren j5create
USB 3.0 Typ- C Multi Adapter zu benutzen.
Schritt 1
Ethernet-Treiber-Installation - Mac
Für Mac-User : Ethernet-Funktion erfordert Treiberin-
stallation. Bitte laden Sie den Treiber von
https://en.j5create.com/pages/drivers#JCA374
Schritt 2
English
Installazione del driver Ethernet – Mac
Utenti Mac: la funzione Ethernet richiede l'installazione
del driver. Scaricare il driver dal sito
https://en.j5create.com/pages/drivers#JCA374
Passo 1
Scaricare il driver più recente dal sito https://en.j5create.com/pages/drivers#JCA374. In Supporto e
servizi – scorrere verso il basso sul driver del prodotto che si sta installando e scaricare il driver più
recente per il sistema operativo.
(Nota: In caso di problemi di download del driver, è necessario regolare le impostazioni di protezione
per consentire il "download da ovunque")
Passo 2
Seguire le istruzioni per installare il driver. (Potrebbe essere necessario fare clic su Finder > Download e
selezionare j5UsbEthernetAdapter per avviare l'installazione)
Passo 3
Una volta completata l'installazione, fare clic su Riavvia per terminare l'installazione del software. Una
volta riavviato il computer, collegare la scheda multipla USB 3.0 j5create all'alimentatore, a HDMI, a
Ethernet, ecc., quindi al computer. Quindi, si è pronti per utilizzare la scheda multipla USB 3.0 tipo C
j5create.
Passo 1 Passo 2
● La porta HDMI supporta 4K a 30 Hz o 1080p a 60 Hz
● Porta USB 3.0: 5 Gbps e retrocompatibile con dispositivi USB 2.0 e USB 1.1
● Supporta carica e alimentazione upstream 2.0 tramite porta di carica USB tipo C
Caratteristiche
Note
● Se si utilizza un dispositivo USB ad alta potenza, collegare l'adattatore di alimentazione tipo C alla
porta di alimentazione JCA374 per garantire prestazioni massime
● Per garantire la copia completa dei file, non rimuovere l'adattatore di alimentazione tipo C durante la
copia dei file
● Porta USB tipo C disponibile (si consiglia USB 3.1 Gen1 tipo C)
● Modalità alternativa del display disponibile su connettore USB tipo C, perfetta per MacBook e
Chromebook
● Alimentazione USB disponibile su USB tipo C per il supporto della carica upstream
● DisplayPort v1.2 su scheda video deve supportare una risoluzione 4K a 30 Hz
● Mac OS X 10.6 o successivo
● Driver non necessario per Chrome OS 3.8 e Windows 10
Requisiti di sistema
Italian
Installatie Ethernet-stuurprogramma - Mac
Mac-gebruikers: Voor de Ethernet-functie moet een stuurprogramma
worden geïnstalleerd. Download het stuurprogramma van
https://en.j5create.com/pages/drivers#JCA374
Stap 1
Download het stuurprogramma van https://en.j5create.com/pages/drivers#JCA374 onder Support &
Services – blader omlaag naar het stuurpgoramma van het product dat u installeert en download het
nieuwste stuurprogramma voor uw besturingssysteem.
(Opmerking: Als u problemen ondervindt bij het downloaden van het stuurprogramma moeten
mogelijk uw beveiligingsinstellingen worden aangepast om "Downloaden overal vandaan" toe te staan.)
Stap 2
Volg de aanwijzingen om het stuurprogramma te installeren (mogelijk moet u klikken op Finder >
downloads en j5UsbEthernetAdapter kiezen om de installatie te starten).
Stap 3
Klik na afloop van de installatie op Opnieuw starten om de installatie van de software af te ronden.
Verbind nadat de computer is herstart eerst de j5create USB 3.0 Multi Adapter met uw voedings-
adapter, HDMI, Ethernet enz. en dan met uw computer. Nu bent u klaar om uw j5create USB 3.0 Type C
Multi Adapter te gebruiken!
Stap 1 Stap 2
● HDMI-poort ondersteunt 4K bij 30 Hz of 1080p bij 60 Hz
● USB 3.0-poort: 5 Gbps en terugwaarts compatibel met USB 2.0 en USB 1.1 apparaten
● Ondersteunt upstream laden en stroomtoevoer 2.0 via USB Type-C-oplaadpoort
Opties
Opmerkingen
● Als u een USB-apparaat met hoog vermogen gebruikt, verbind dan de Type-C voedingsadapter met de
JCA374 stroomtoevoerpoort voor maximale prestaties
● Om er voor te zorgen dat bestanden volledig worden gekopieerd, moet u de Type-C voedingsadapter
niet verwijderen tijdens het kopiëren van bestanden.
● Beschikbare USB Type-C poort (USB 3.1 Gen1 Type-C wordt aanbevolen)
● Beschikbare alternatieve schermmodus over USB Type-C connector Perfect voor MacBook en
Chromebook
● Beschikbare USB stroomtoevoer over USB Type-C ter ondersteuning van upstream laden
● DisplayPort v1.2 op de grafische kaart meot 4K bij 30 Hz resolutie ondersteunen
● Mac OS X 10.6 of later
● Geen stuurprogramma nodig voor Chrome OS 3.8 en Windows 10
Systeemvereisten
DutchEspañol
Deutsch
Systemanforderungen
RJ-45
HDMI
USB 3.1/3.0/2.0 Devices
Hard drive, Camera,
Mouse, Keyboard, etc.
9.8 in. /25 cm
USB Type-C
Power Delivery
DC in 5V
-
20V
USB Type-C
● Port HDMI prend en charge 4K @ 30 Hz ou 1080p @ 60 Hz
● Port USB 3.0 rétrograde à 5 Gbps avec les appareils USB 2.0 et 1.1
● Soutient chargement et alimentation 2.0 à travers le port USB Type C de Chargment
Système Requis
Caractéristiques
● Port USB Type C disponible (USB 3.1 Gen1 Type-C est recommandé)
● Mode d'affichage alternatif disponible à travers la connexion USB Type-C
Parfait pour MacBook et Chromebook
● Livraison d'alimentation USB disponible sur USB Type C pour soutenir la charge en amont
● DisplayPort v 1.2 requis sur les cartes graphiques pour le soutient de résolution 4K @ 30 Hz
● Mac OS X 10.6 ou plus
● Logiciel non requis avec Chrome OS 3.8 & Windows 10
A Noter
● Si vous utilisez des appareils USB à haute consomation, veuillez brancher la
prise Type C dans le port d'alimentation du JCA374 pour assurer une performance maximale
● Pour vous assurez du copiage complet de fichiers, ne dé-branchez pas la prise
Type C pendant le copiage
Étape 1
Si vous avez accès à l'Internet, il est fortement recommandé de télécharger le dernier logiciel à partir de
https://en.j5create.com/pages/drivers#JCA374 dans Support & Services – faites défiler vers le bas jusqu'au
logiciel du produit que vous installez et téléchargez le dernier logiciel pour votre système d'opération.
(A noter: Si vous avez des problèmes lorsque vous téléchargez ce logiciel, vos paramètres de sécurité
peuvent avoir besoin d'être ajustés pour permettre le "téléchargement à partir de n'importe où")
Étape 2
Suivez les instructions pour installer le logiciel. (Vous devrez peut-être cliquer sur Trouver > Télécharge-
ments et choisir j5UsbEthernetAdapter pour commencer l'installation).
Étape 3
Une fois l'installation initiale terminée, cliquez sur Redémarrer pour terminer l'installation du logiciel. Une
fois que votre ordinateur a redémarré, connectez l’adaptateur multiple USB 3.0 de j5create à votre prise de
courant ; HDMI ; VGA ; Ethernet ; Audio en premier et ensuite votre ordinateur. Maintenant, vous êtes prêt
à utiliser la Station d'accueil USB 3.0 j5create.
Étape 1 Étape 2
Installation du logiciel - Mac
Pour utilisateur de Mac : Pour les fonctions Ethernet,
l'installation du logiciel est requis. Veuillez
télécharger le logiciel à
https://en.j5create.com/pages/drivers#JCA374
Francais
201710-V3
E
N
: Quick Installation Guide
E
S
: Guía De Instalación Rápida
D
E : Kurzanleitung Für Installation
FR : Guide D'installation Rapide
IT
: Guida rapida all'installazione
NL
: Beknopte installatiehandleiding
PT
: Guia de instalação rápida
SV
: Snabbinstallationsguide
日本語 : クイックインストールガイド
繁中文 : 快速安裝手冊
KN : 빠른설치가이드
繁中文
日本語
Instalação do controlador Ethernet no Mac
Utilizador de Mac: A função Ethernet requer a instalação
de controlador. Transfira o controador a partir de
https://en.j5create.com/pages/drivers#JCA374
Passo 1
Transfira o controador mais recente a partir de https://en.j5create.com/pages/drivers#JCA374. Em
Suporte e Serviços, desloque-se até ao controlador do produto que está a instalar e transfira o
controlador mais recente para o seu sistema operativo.
(Nota: Caso tenha dificuldade em transferir este controlador, poderá ser necessário ajustar as suas
definições de segurança para permitir “transferir de qualquer local”)
Passo 2
Siga as instruções apresentadas para instalar o controlador (Poderá ser necessário clicar em
Finder>transferências e escolher j5UsbEthernetAdapter para iniciar a instalação)
Passo 3
Quando a instalação inicial terminar, clique em Reiniciar para concluir a instalação do software. Após o
reinício do computador, ligue o Multi-adaptador USB 3.0 j5create ao transformador, HDMI, Ethernet,
etc. e, em seguida, ligue-o ao computador. Estará assim preparado para utilizar o seu Multi-adaptador
USB 3.0 Tipo C j5create.
Passo 1 Passo 2
● A porta HDMI suporta 4K a 30 Hz ou 1080p a 60 Hz
● Porta USB 3.0: 5 Gbps e retrocompatível com dispositivos USB 2.0 e USB 1.1
● Suporta carregamento e fornecimento de energia 2.0 através da porta de carregamento USB Tipo C
Características
Notas
● Se estiver a utilizar um dispositivo USB de alta potência, ligue o transformador Tipo C à porta de
fornecimento de energia do JCA374 para garantir o máximo desempenho
●
Para garantir a cópia de todos os ficheiros, não remova o carregador Tipo C durante o processo de cópia
● Porta USB Tipo C disponível (USB 3.1 de 1ª geração Tipo C recomendado)
● Modo de Monitor Alternativo atraves do conector USB Tipo C. Ideal para MacBook e Chromebook
● Fornecimento de energia USB através de USB Tipo C para suportar carregamento
● DisplayPort v1.2 na placa gráfica deve suportar a resolução 4K a 30 Hz
● Mac OS X 10.6 ou mais recente
● Controlador não necessário para Chrome OS 3.8 e Windows 10
Requisitos do sistema
Portuguese
Installera drivrutin för Ethernet – Mac
Mac-användare: Ethernet-funktionen kräver att drivrutinen
installeras. Hämta drivrutinen från
https://en.j5create.com/pages/drivers#JCA374
Steg 1
Hämta den senaste drivrutinen från: https://en.j5create.com/pages/drivers#JCA374. Under Support
&Services –skrolla ner till produktens drivrutin som du installerar och hämta den senaste drivrutinen för
ditt operativsystem.
(Obs: Om du har problem med att hämta denna drivrutin kan det bero på att dina säkerhetsinställnin-
gar måste ändras till att tillåta "Hämta från alla platser")
Steg 2
Följ uppmaningarna på skärmen för att installera drivrutinen (du måste kanske klicka på Sökare >
Hämtade filer och klicka på j5UsbEthernetAdapter för att starta installationen)
Steg 3
När den initiala installationen har slutförts, klicka på Starta om för att slutföra installationen av
programvaran. Efter att datorn har startats om, anslut först j5create USB 3.0 Multi Adapter till din
strömadaptern, HDMI, Ethernet osv. och sedan till din dator. Nu kan du använda din j5create USB 3.0
Type-C Multi-Adapter.
Steg 1 Steg 2
● HDMI-porten stöder 4K vid 30 Hz eller 1080p vid 60 Hz
● USB 3.0-port: 5 Gbps och bakåtkompatibel med USB 2.0- och USB 1.1-enheter
● Stöder uppströms ladding och strömförsörjning 2.0 via USB Type-C-laddningsport
Funktioner
Obs
● Om du använder en USB-enhet med hög effekt, anslut Type-C-strömadaptern till JCA374-
strömförsörjningsporten för att garantera en maximal prestanda
● För att säkerställa att filkopieringen är komplett, ta inte bort Type-C-strömadaptern under kopiering av
filer.
● Tillgänglig USB Type-C-port (USB 3.1 Gen1 Type-C rekommenderas)
● Tillgängligt alternativt läge för bildskärm över Type-C-kontakten är perfekt för MacBook och
Chromebook
● Tillgänglig USB-strömförsörjning via USB Type-C för att stödja laddning uppström
● DisplayPort v1.2 på grafikkortet måste stödja upplösningen 4K vid 30 Hz
● Mac OS X 10.6 eller senare
● Drivrutin krävs inte för Chrome OS 3.8 eller Windows 10
Systemkrav
Swedish
한국어
● HDMI解析度支援4K @ 30 Hz或1080p @ 60 Hz,
● USB 3.0埠,高達5 Gbps傳輸速率,向下兼容USB 2.0和1.1設備
● USB Type-C埠支援USB Power Delivery 2.0 ,提供向上充電功能
系統需求
特色
● USB Type-C埠(建議USB 3.1 Gen 1 )
● Type-C 埠需支援DP Alt-Mode,完整支援MacBook和Chromebook
● 電源供應可透過Type-C埠向上充電
● 顯示卡需求為DisplayPort v1.2規格以支援4K @ 30 Hz
● Mac OS X 10.6 以上
● Chrome OS 3.8 & Windows 10不需安裝驅動
注意
● 如果您使用的是高功率USB設備請附上Type-C電源適配器插入JCA374電源輸出
口 ,以確保最佳的性能
● 為確保檔案完整性,請避免在複製檔案時插拔Type-C 電源配適器
步驟1
我們�力建議直接造訪 https://en.j5create.com/pages/drivers#JCA374「技術支援」下載最新版驅
動程式來進行安裝。(注意: 如果下載驅動發生問題,請將安全性設定選擇�「下載自任何來源」)
步驟2
跟著螢幕提示安裝驅動程式。 (你可能需要至「Finder」>「下載項目」點選 j5UsbEthernetAdapter 打
開檔案開始安裝)
步驟3
驅動程式成功安裝後,請點選完成立即重新開機。確定重新開啟電腦後先連接電源充電器、HDMI、網
路至 USB 3.0 Type-C多功能擴充卡,再連接USB 3.0線端至電腦。.
步驟1 步驟2
驅動程式安裝流程 - Mac
在Mac作業系統下,使用網路功能時,
必須先下載安裝驅動程式
https://en.j5create.com/pages/drivers#JCA374
이더넷 드라이버 설치- Mac
Mac 사용자의 경우 : 이더넷기능은 드라이버 설치가
필요하므로https://en.j5create.com/pages/drivers#JCA374
에서 드라이버를 다운로드 하십시오
1단계
https://en.j5create.com/pages/drivers#JCA374 에서 최신 드라이버를 다운로드 하십시오. 해당 사이트의
“Support & Services” 메뉴에서 드라이버를 다운로드 받으실 수있습니다.
(참고 : 드라이버를 다운로드 하는 경우, 보안설정의 조정이 필요할 수있습니다.)
2단계
드라이버를 설치하는 지시에 따라서 진행합니다.
(경우에 따라서 “j5UsbEthernetAdapter” 를선택해야 할수있습니다.)
3단계
드라이버 설치가 완료되면, “Restart”를선택하여 PC시스템을 재시작 합니다. PC시스템이 다시 시작되면,
제품에 전원아답터, HDMI, 이더넷 등을 연결하고 사용할 수있습니다.
1단계 2단계
● HDMI포트 연결해상도 : 4K @ 30 Hz or 1080p @ 60 Hz
● USB 3.0 포트 : 5 Gbps의및 USB 2.0 및 USB 1.1 장치와 호환
● 는USB 타입 C 충전을 통해 전달 2.0 충전 및전원 상류 지원
특성
주의
● 만약 고전력 USB 장치를 사용하는 경우, 타입 C 부착주세요 JCA374 전원 공급 포트에 전원 어댑터는
최대
보장공연.
● 파일을 완전히 복사 보장하기 위해 유형-C 전원을 제거하지 마십시오 어댑터는 파일을 복사하는 동안
● USB Type-C Port (USB 3.1 세대 1 타입 C 권장)
● USB Type-C 연결이 가능한 MacBook 또는 Chromebook과같은 소스장치(Display Alternate Mode를
지원해야 합니다)
● USB Type-C 전원공급 시, 연결된 장치의 충전을 지원
● 그래픽 카드에 디스플레이 포트 1.2는 30 Hz로해상도 @ 4K를지원해야합니다
● Mac OS X 10.6또는 나중에
● 드라이버 필요하지 Chrome OS 3.8 & Windows 10
시스템 요구사항
Limited Warranty
j5create offers a limited 2-year warranty. User’s wear & tear damage is not included.
The user shall call or e-mail j5create's customer service with information regarding the defect(s) of the product and obtain
a return authorization number. Users are responsible for one-way return freight cost and we will take care of one-way
freight back. In order to obtain a return authorization number, users should have the following information handy when
calling or emailing the service team:
(i) a copy of the original purchase invoice to verify your warranty
(ii) a product serial number
(iii) a description of the problem
(iv) customer’s name, address, and telephone number
j5create does not warrant that the operation of the product will be uninterrupted or error-free. j5create is not responsible
for damage arising from failure to follow instructions relating to the product’s use. This warranty does not apply to: (a)
consumable parts, unless damage has occurred due to a defect in materials or workmanship; (b) cosmetic damage,
including but not limited to scratches, dents, and broken plastic on ports; (c) damage caused by use with non-j5create
products; (d) damage caused by natural disasters (flood, fire, earthquake, lighting strike, typhoon, etc.); (e) damage caused
by human misuse (lost, accident, abuse, misuse or other external causes); (f) damage caused by operating the product
outside the permitted or intended uses described by j5create; (g) damage caused by service (including upgrades and
expansions) performed by anyone who is not a representative of j5create or a j5create Authorized Service Provider; (h) a
product or part that has been modified to alter functionality or capability without the written permission of j5create; or (i) if
any j5create serial number on the product has been removed or defaced. If such a situation occurs, j5create will calculate
the cost of materials and repair for your reference. This warranty is given by j5create in lieu of any other warranties
expressed or implied.
Copyright© 2017 j5create. All rights reserved. All trade names are registered trademarks of their respective owners.
Features and specifications are subject to change without notice. Product may not be exactly as shown in the diagrams.
Regulatory Compliance
FCC
This equipment has been tested and found to comply with FCC Part 15 Subpart B and Canada Standard ICES-003 Issue 5,
Class B, ANSI C63.4: 2009
Operation is subject to the following two conditions:
• This device may not cause harmful interference
• This device must accept any interference, including interference that may cause undesired operation of the device.
CE
This equipment is in compliance with the requirements of the following regulations:
European Standard EN 55022:2010/AC: 2011 Class B,
EN61000-3-2:2006/A1: 2009 and /A2: 2009 , EN61000-3-3: 2008 and EN55024: 2010 (IEC61000-4-2: Edition 2.0 2008-12
IEC61000-4-3: Edition 3.2 2010-04 , IEC61000-4-4: Edition 3.0 2012-04, IEC61000-4-5: Edition 2.0 2005-11, IEC61000-4-6:
Edition 3.0 2008-10 , IEC61000-4-8: Edition 2.0 2009-09 , IEC61000-4-11: Edition 2.0 2004-03)
RCM
This equipment is in compliance with the requirements of the following regulations:
AS/NZS CISPR 22:2009+ A1:2010
BSMI
This equipment is in compliance with the requirements of the following regulations:
CNS 134338
手順1
https://en.j5create.com/pages/drivers#JCA374から最新のドライバーをダウンロードしてくだ
さい。(ダウンロードできない場合は、セキュリティ設定で“ダウンロード” “ファイルのダウンロー
ド”の下にある“有効にする”を選択して“OK”をクリックします。)
手順2
画面の指示に従って、“ドライバーをインストール”をクリックしてインストールを開始します。
(自動的に起動しない場合は、“ファインダー”-“ダウンロード”フォルダーを開き、
”j5UsbEthernet-Adapter”を選択して実行してください。)
手順3
インストール完了後、“再起動”をクリックし、コンピューターを再起動します。再起動後、本製品にAC
アダプター、HDMI、イーサーネットなどを接続してから、パソコンのUSBポートに接続してください。
Macユーザーの皆様:イーサネット機能を使用する際に
はドライバーのインストールが必要です。
https://en.j5create.com/pages/drivers#JCA374からドラ
イバーをダウンロードしてご使用ください。
イーサネットドライバーのインストール - Mac
● HDMIポート:4K@30Hz1080p@60Hz対応
● USB3.0ポート:超高速5Gbps(理論値)USB2.0、USB1.1下位互換性
● USBType-C充電ポート:パワーデリバリー2.0対応で機器の充電が可能
特徵
必須環境
● 利用可能なUSBType-Cポート(USB3.1のGen1Type-C推奨)
● 利用可能なDisplayAlternateModeに対応したType-Cコネクタ。MacBookやChromebookに最適
● 利用可能なパワーデリバリー対応のUSBType-Cポート
● 4K30Hz解像度表示にはグラフィックカードがDisplayPortv1.2に対応している必要があります。
● MacOSX10.6以降
● ChromeOS3.8、Windows10でご使用の際はドライバーのインストールは不要です。
ご注意
● を必要とするUSB機器を使用する場合は、Type-C電源アダプターをJCA374のパワーデリバリー
ポートに接続してください。
● ファイルをコピーする際は、コピーが完了するまで、Type-Cの電源アダプターを外さないでください。
手順1 手順2

Other j5 create Adapter manuals

j5 create ScreanCast JVAW56 User manual

j5 create

j5 create ScreanCast JVAW56 User manual

j5 create JUH470 User manual

j5 create

j5 create JUH470 User manual

j5 create USB VGA Display Adapter User manual

j5 create

j5 create USB VGA Display Adapter User manual

j5 create JUA350 User manual

j5 create

j5 create JUA350 User manual

j5 create JUH470 User manual

j5 create

j5 create JUH470 User manual

j5 create JLA160 User manual

j5 create

j5 create JLA160 User manual

j5 create JUH450 User manual

j5 create

j5 create JUH450 User manual

j5 create JUA210 User manual

j5 create

j5 create JUA210 User manual

j5 create JCA366 User manual

j5 create

j5 create JCA366 User manual

j5 create JUC600 User manual

j5 create

j5 create JUC600 User manual

j5 create JUE220 User manual

j5 create

j5 create JUE220 User manual

j5 create JUA350 User manual

j5 create

j5 create JUA350 User manual

j5 create JUA375 User manual

j5 create

j5 create JUA375 User manual

j5 create Display Adapter User manual

j5 create

j5 create Display Adapter User manual

j5 create JUH470 User manual

j5 create

j5 create JUH470 User manual

j5 create JCH471 User manual

j5 create

j5 create JCH471 User manual

j5 create JUD480 User manual

j5 create

j5 create JUD480 User manual

j5 create JUH450 User manual

j5 create

j5 create JUH450 User manual

j5 create JUA210 User manual

j5 create

j5 create JUA210 User manual

j5 create JUE303 User manual

j5 create

j5 create JUE303 User manual

j5 create JUA250 User manual

j5 create

j5 create JUA250 User manual

j5 create JCC111 User manual

j5 create

j5 create JCC111 User manual

j5 create JUH410 User manual

j5 create

j5 create JUH410 User manual

j5 create JUA 310 User manual

j5 create

j5 create JUA 310 User manual

Popular Adapter manuals by other brands

Kurzweil Air MIDI user manual

Kurzweil

Kurzweil Air MIDI user manual

Bafo USB-810 user manual

Bafo

Bafo USB-810 user manual

Cooper Lighting HALO Home HWAD1BLE40AWH instructions

Cooper Lighting

Cooper Lighting HALO Home HWAD1BLE40AWH instructions

Sonnet Twin10G Thunderbolt 2 Edition user guide

Sonnet

Sonnet Twin10G Thunderbolt 2 Edition user guide

Internatonal Resources 2416 Owner's instruction manual

Internatonal Resources

Internatonal Resources 2416 Owner's instruction manual

X-media NE-WN1201D Quick installation guide

X-media

X-media NE-WN1201D Quick installation guide

TRENDnet TPL-406E user guide

TRENDnet

TRENDnet TPL-406E user guide

BASETech BT-305 operating instructions

BASETech

BASETech BT-305 operating instructions

Poly ATA 400 Series Quick tips

Poly

Poly ATA 400 Series Quick tips

Dayna DaynaPORT user guide

Dayna

Dayna DaynaPORT user guide

Philips VOIP1211S/05 user manual

Philips

Philips VOIP1211S/05 user manual

Neousys Technology PCIe-PoE550X user manual

Neousys Technology

Neousys Technology PCIe-PoE550X user manual

TiGHT AV DANTE AU-BT2-DA user manual

TiGHT AV

TiGHT AV DANTE AU-BT2-DA user manual

GERMAN METERING OP-730 user manual

GERMAN METERING

GERMAN METERING OP-730 user manual

Siemens AlgoRex DBZ1196 manual

Siemens

Siemens AlgoRex DBZ1196 manual

Aztech WL562USB user manual

Aztech

Aztech WL562USB user manual

3idee hp-s Assembly instructions

3idee

3idee hp-s Assembly instructions

Lindy 10/100/1000Mbps PCI user manual

Lindy

Lindy 10/100/1000Mbps PCI user manual

manuals.online logo
manuals.online logoBrands
  • About & Mission
  • Contact us
  • Privacy Policy
  • Terms and Conditions

Copyright 2025 Manuals.Online. All Rights Reserved.