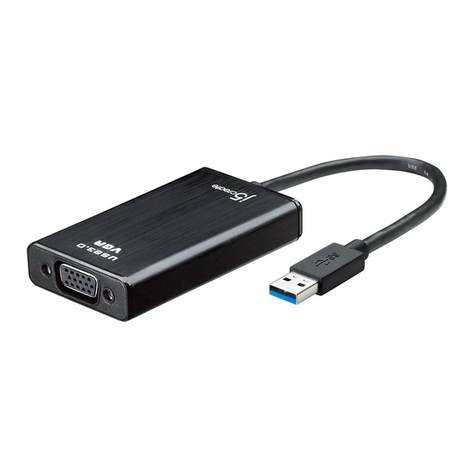
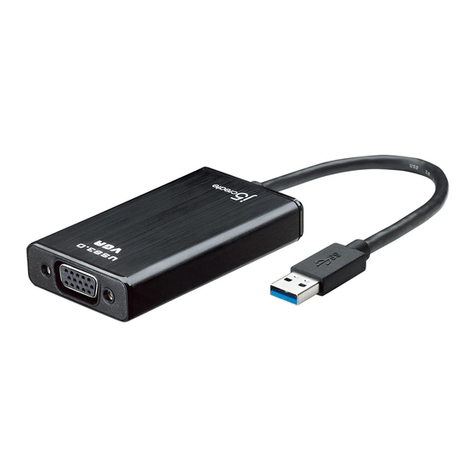
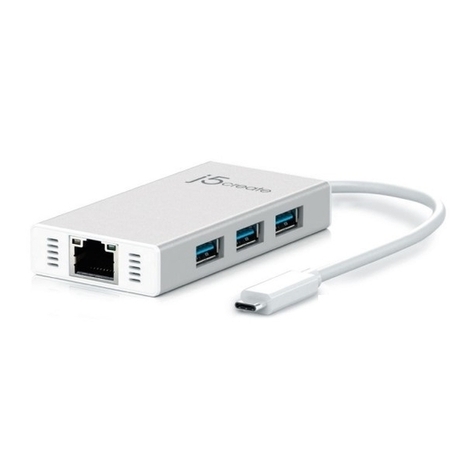
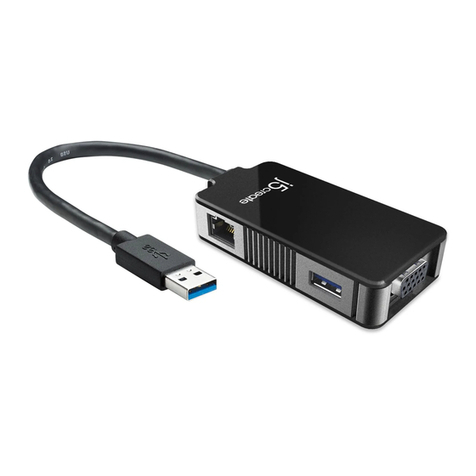
manuals.online logo
Brands
  1. Home
  2. •
  3. Brands
  4. •
  5. j5 create
  6. •
  7. Adapter
  8. •
  9. j5 create JUD480 User manual

j5 create JUD480 User manual

English Español Française
Windows - Driver Installation
Mac - Driver Installation
Step 1 Step 2 Étape 1 Étape 2
Step 1
If you have internet access it is highly recommended that you download the latest
driver from www.j5create.com under Support & Services –scroll down to the
product’s driver you are installing and download the latest driver for your operating
system. (Note: If possible run as an administrator)
Step 2
Follow the prompts to install the driver (You may have to click on My Computer >
downloads and choose j5Usb3.0MultiAdapter to begin installation).
Step 3
Once initial installation has completed, click Restart to finish installing the software.
After your computer has restarted, first connect the j5create USB3.0 Docking Station
to your power adapter, HDMI, VGA, Ethernet, audio, etc. and then to your computer.
Now you are ready to use your j5create USB3.0 Docking Station!
Step 1 Step 2 Étape 1 Étape 2
Windows - Installation du pilote
Mac - Installation du pilote
Étape 1
Si vous avez accès à Internet, il est fortement recommandé de télécharger le dernier
pilote à partir de www.j5create.com dans Support & Services – faites défiler vers le bas
jusqu'au pilote du produit que vous installez et téléchargez le dernier pilote pour votre
système d'exploitation. (Remarque : Si possible, connectez-vous en tant qu'administrateur).
Si vous n'avez pas accès à l'Internet, insérez le CD dans le lecteur
de CD-ROM de votre ordinateur. (Le programme d'installation
devrait démarrer automatiquement). Autrement, allez dans
Mon ordinateur et cliquez sur votre lecteur optique et démarrez manuellement le CD
d'installation en double-cliquant sur Setup.exe (l'invite peut prendre une minute avant
d'apparaître).
Étape 1
Si vous avez accès à Internet, il est fortement recommandé de télécharger le dernier
pilote à partir de www.j5create.com dans Support & Services – faites défiler vers le bas
jusqu'au pilote du produit que vous installez et téléchargez le dernier pilote pour votre
système d'exploitation.
(Remarque : Si vous avez des problèmes lorsque vous téléchargez ce pilote, vos paramètres
de sécurité peuvent avoir besoin d'être ajustés pour permettre le "téléchargement à partir
de n'importe où")
Do NOT plug the j5create USB
3.0 Docking Station into the
computer until the driver is
completely installed.
Installez entièrement le pilote avant
d'insérer le câble j5create USB 3.0
Docking Station USB dans votre
ordinateur
Windows - Instalación del controlador
Mac - Instalación del controlador
Paso 1 Paso 2
Paso 2
Siga las instrucciones para instalar el controlador. (Es posible que deba hacer clic en Equipo
> Descargar y seleccionar j5Usb3.0MultiAdapter para iniciar la instalación).
Paso 1 Paso 2
NO enchufe USB Docking Station
3.0 j5create en la computadora hasta
que el conductor esté completa-
mente instalado.
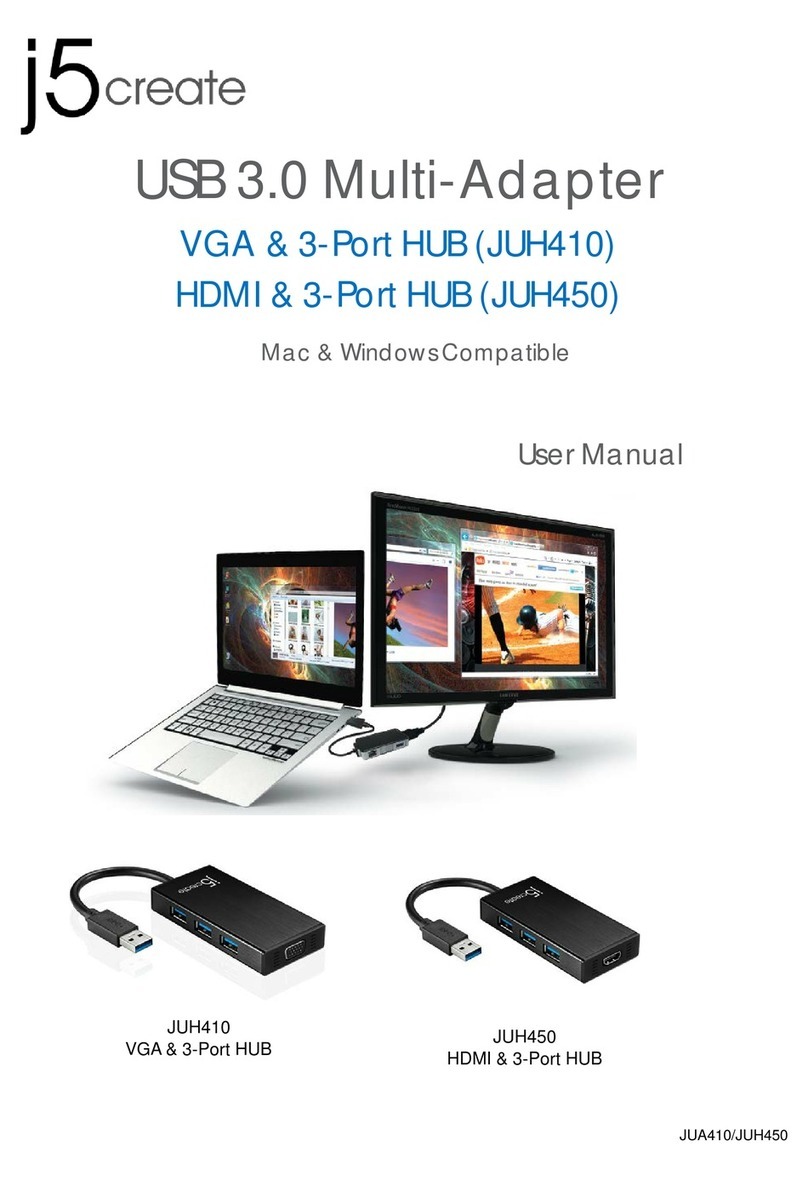
● Thank you for purchasing the j5create USB3.0 Docking Station! j5create's
USB3.0 Docking Station enables you to add a 2nd monitor instantly via HDMI
or VGA connectors. When you need to get things done fast, simply connect your
monitor, keyboard, mouse, Ethernet, speakers, microphone, etc. to your laptop
with a single USB3.0 cable. It is the perfect solution for expanding your
Ultrabook or MacBook®into a full sized workstation.
● ¡Gracias por adquirir la estación de conexión USB 3.0 j5create! La estación de
conexión inteligente USB 3.0 j5create le permite agregar un 2do monitor de forma
instantánea a través de los conectores HDMI y VGA. Cuando necesite llevar a cabo las tareas
de forma rápida, simplemente conecte el monitor, teclado, ratón, Ethernet, altavoces y
micrófono al equipo portátil con un cable USB 3.0. Es la solución perfecta para transformar
una Ultrabook o MacBook®en una estación de trabajo de tamaño completo y, además,
mejorar la productividad gracias a su capacidad multitarea en diferentes plataformas.
Paso 1
Si posee acceso a Internet, le recomendamos que descargue el controlador más reciente
desde www.j5create.com dentro de la sección Support & Services (Asistencia y servicios).
Desplácese hasta el controlador del producto que desea instalar y descargue el controlador
más reciente para su sistema operativo. (Nota: Si es posible, ejecute como administrador).
● Nous vous remercions d'avoir choisi la Station d'accueil USB 3.0 j5create Cette Station
d'accueil USB 3.0 j5create intelligente j5create vous permet d'ajouter un 2ème moniteur
instantanément via les connecteurs HDMI ou VGA. Lorsque vous avez besoin de faire des
choses rapidement, il suffit de connecter votre moniteur, clavier, souris, Ethernet,
haut-parleurs et microphone à votre ordinateur portable avec un câble USB 3.0. C'est la
solution idéale pour l'expansion de votre Ultrabook ou MacBook®en un poste de travail
complet et il augmente la productivité grâce à sa capacité d'effectuer plusieurs tâches
multi-plateformes.
Paso 3
Una vez que se instaló el controlador, seleccione Sí y haga clic en Finalizar para reiniciar el
equipo y completar la instalación del controlador. Una vez que se reinicia el equipo, conecte
en primer lugar la estación de conexión USB 3.0 j5create al adaptador de alimentación,
HDMI, VGA, Ethernet y audio y, a continuación, realice la conexión con el equipo. ¡Ahora ya
podrá utilizar la estación de conexión USB 3.0 j5create!
Step 1
If you have internet access it is highly recommended that you download the latest
driver from www.j5create.com under Support & Services –scroll down to the
product’s driver you are installing and download the latest driver for your operating
system. (Note: If you have trouble downloading this driver your security settings may
need to be adjusted to allow for “downloading from anywhere”)
If you do not have internet access, insert the Driver CD into your computer's CD-ROM
drive. Click on Finder under Devices and choose j5create. Then select the
mac-install folder and open the dmg file.
Step 2
Follow the prompts to install the driver (You may have to click on Finder>downloads
and choose j5Usb3.0MultiAdapter to begin installation).
Step 3
Once initial installation has completed, click Restart to finish installing the software.
After your computer has restarted, first connect the j5create USB3.0 Docking Station
to your power adapter, HDMI, VGA, Ethernet, audio, etc. and then to your computer.
Now you are ready to use your j5create USB3.0 Docking Station!
Step 4
Go to , and then System Preferences and select Sound and speaker Output
options. Here you can select which device has sound output.
Paso 1
Si posee acceso a Internet, le recomendamos que descargue el controlador más reciente
desde www.j5create.com dentro de la sección Asistencia y servicios. Desplácese hasta el
controlador del producto que desea instalar y descargue el controlador más reciente para
su sistema operativo.
(Nota: Si existe algún problema para descargar este controlador, es posible que deba ajustar
la configuración de seguridad para permitir las descargas desde cualquier ubicación).
Si no posee acceso a Internet, inserte el CD con controladores en la unidad de CD-ROM del
equipo. Haga clic en Finder y, dentro de Dispositivos, seleccione j5create. Haga clic en la
carpeta mac-install y abra el archivo dmg.
Paso 2
Siga las instrucciones para instalar el controlador. (Es posible que deba hacer clic en Finder
> Descargas y seleccionar j5Usb3.0MultiAdapter para iniciar la instalación).
Paso 3
Una vez que se haya completado la instalación inicial, haga clic en Reiniciar para finalizar la
instalación del software. Una vez que se reinicia el equipo, conecte en primer lugar la
estación de conexión USB 3.0 j5create al adaptador de alimentación, HDMI, VGA, Ethernet y
audio y, a continuación, realice la conexión con el equipo.¡Ahora ya podrá utilizar la
estación de conexión USB 3.0 j5create!
Paso 4
Diríjase a y "Preferencias del sistema” y seleccione "Sonido" - "Salida". Puede
seleccionar un dispositivo para la salida de sonido haciendo clic en éste.
Do NOT plug the USB 3.0
Docking Station into the
computer until the driver is
completely installed.
If you do not have internet access insert the Driver CD into
your computer’s CD-ROM drive. (The setup program should
launch automatically) If not, go to My computer and click
on your optical drive and manually run the setup CD by double-clicking on
Setup.exe (the prompt may take a minute to appear).
Si no posee acceso a Internet, inserte el CD con controladores
en la unidad de CD-ROM del equipo. (El programa de
instalación deberá ejecutarse de forma automática). De lo
contrario, diríjase a Equipo , haga clic en la unidad óptica y ejecute manualmente el CD de
instalación haciendo doble clic en Setup.exe (el aviso podría demorarse 1 minuto en
aparecer). Étape 2
Suivez les instructions pour installer le pilote. (Vous devrez peut-être cliquer sur Mon
ordinateur > Téléchargements et choisir j5Usb3.0MultiAdapter pour commencer
l'installation)
Étape 3
Une fois que le pilote a été installé, choisissez Oui et cliquez sur Finir pour redémarrer votre
ordinateur et finir l'installation du pilote. Une fois que votre ordinateur a redémarré,
connectez la Station d'accueil USB 3.0 j5create à votre Adaptateur secteur ; HDMI ; VGA ;
Ethernet ; Audio en premier et ensuite votre ordinateur. Maintenant, vous êtes prêt à utiliser
la Station d'accueil USB 3.0 j5create !
Étape 2
Suivez les instructions pour installer le pilote. (Vous devrez peut-être cliquer sur
Trouver > Téléchargements et choisir j5Usb3.0MultiAdapter pour commencer
l'installation).
Étape 3
Une fois l'installation initiale terminée, cliquez sur Redémarrer pour terminer
l'installation du logiciel. Une fois que votre ordinateur a redémarré, connectez la
Station d'accueil USB 3.0 j5create à votre Adaptateur secteur ; HDMI ; VGA ; Ethernet ;
Audio en premier et ensuite votre ordinateur. Maintenant, vous êtes prêt à utiliser la
Station d'accueil USB 3.0 j5create !
Étape 4
Allez dans , puis “Préférences du système” et sélectionnez “Son” Les options
“Sortie” du haut-parleur. Vous pouvez sélectionne un périphérique pour la sortie du
son en cliquant dessus.
Si vous n'avez pas accès à l'Internet, insérez le CD du pilote dans le lecteur de
CD-ROM de votre ordinateur. Cliquez sur Trouver dans l'onglet Périphériques et
choisissez j5create. Cliquez sur le dossier mac-install et ouvrez le fichier dmg.
Universal USB Docking Station
USB Multi Adapter
● Microsoft Windows 8.1, 8 , 7, XP (32-bit ou 64-bit)
● Mac OS X 10.6~10.10
● Un port USB disponible (USB 3.0 recommandé)
● Configuration minimale requise
CPU : Intel i3 Dual Core 1.5 GHz
Intel Atom “Bay Trail" Quad Core 1.33 GHz
RAM : 2 Go ou plus
* Windows XP utilisateur :“Windows Media Player” est recommandé
* Suggérons Windows XP & Mac USB 2.0 pour « l’application de bureau » seulement
System Requirements
● Microsoft Windows 8.1 / 8 / 7 / XP (32-bit or 64-bit)
● Mac OS X 10.6~10.10 Compatible
● Available USB port (USB 3.0 is recommended)
● Minimum System Requirements
CPU : Intel i3 Dual Core 1.5 GHz
Intel Atom “Bay Trail" Quad Core 1.33 GHz
RAM : 2 GB or higher
* Windows XP users : “Windows Media Player” is recommended
* Windows XP & MAC USB 2.0 for "office applications only" is recommended.
Deutsch
Schritt 1 Schritt 2
Schritt 1 Schritt 2
Windows - Treiberinstallation
Mac - Treiberinstallation
Schritt 1
Wenn Sie über einen Internetanschluss verfügen, empfehlen wir, dass Sie den neuesten
Treiber von www.j5create.com unter Support & Services herunterladen – blättern Sie in der
Liste nach unten, bis Sie den Treiber für Ihr Produkt gefunden haben. Downloaden Sie dann
den neuesten Treiber für Ihr Betriebssystem. (Hinweis: Wenn möglich, sollten Sie diesen
Vorgang als Administrator durchführen.)
Falls Sie nicht über einen Internetanschluss verfügen, legen Sie die
Treiber-CD in das CD-ROM-Laufwerk Ihres Computers ein. (Das
Setup-Programm sollte automatisch starten. Ist das nicht der Fall,
gehen Sie zu (Mein) Computer, klicken auf das optische Laufwerk und starten die
Setup-CD durch Doppelklicken auf Setup.exe. Es kann eine Minute lang dauern, bis die
Benutzerführung erscheint.)
Installieren Sie zuerst den Treibererst
vollständig, bevor Sie das USB-Kabel
des j5create USB 3.0 Docking Station
an den Computer anschließen.
● Vielen Dank, dass Sie sich für die Dockingstation j5create USB 3.0 entschieden haben!
Diese intelligente Dockingstation j5create USB 3.0 ermöglicht es Ihnen, augenblicklich
einen zweiten Bildschirm über einen HDMI- oder VGA-Anschluss zu verwenden. Wenn Sie
eine Arbeit schnell erledigen müssen, schließen Sie einfach mithilfe eines USB 3.0-Kabels die
folgenden Geräte an Ihren Laptop an: Bildschirm, Tastatur, Maus, Ethernet, Lautsprecher und
Mikrofon. Dies ist die perfekte Lösung, um Ihr Ultrabook oder MacBook®in eine vollwertige
Workstation zu erweitern und so die Produktivität dank plattformübergreifender
Multitasking-Fähigkeiten zu erhöhen.
Schritt 1
Wenn Sie über einen Internetanschluss verfügen, empfehlen wir, dass Sie den neuesten
Treiber von www.j5create.com unter Support & Services herunterladen – blättern Sie in der
Liste nach unten, bis Sie den Treiber für Ihr Produkt gefunden haben. Downloaden Sie dann
den neuesten Treiber für Ihr Betriebssystem.
(Hinweis: Wenn Sie Probleme beim Downloaden dieses Treibers haben, ist ggf. eine
Anpassung der Sicherheitseinstellungen erforderlich; wählen Sie bei „Download von
Programmen erlauben“ die Option „Überall“.)
Falls Sie nicht über einen Internetanschluss verfügen, legen Sie die Treiber-CD in das
CD-ROM-Laufwerk Ihres Computers ein. Klicken Sie auf Finder und wählen j5create unter
GERÄTE. Klicken Sie auf den Ordner mac-install und öffnen die dmg-Datei.
Schritt 2
Folgen Sie den Anweisungen zur Installation des Treibers. (Gegebenenfalls müssen Sie auf
Finder > Downloads klicken und dann j5Usb3.0MultiAdapter wählen, um mit der
Installation zu beginnen.)
Schritt 3
Wenn die anfängliche Installation abgeschlossen ist, klicken Sie zum Abschließen der
Softwareinstallation auf Neustart. Nachdem Ihr Computer neut gestartet wurde, schließen
Sie die Dockingstation j5create USB 3.0 zunächst an Netzteil, HDMI, VGA, Ethernet, Audio
und zuletzt an Ihren Computer an. Ihre Dockingstation j5create USB 3.0 ist jetzt einsatzbe-
reit!
Schritt 4
Rufen Sie und dann „Systemeinstellungen” auf, wählen Sie „Ton” gefolgt von den
„Ausgabe“-Optionen für die Lautsprecher. Sie können das Gerät für die Tonausgabe durch
Anklicken wählen.
Schritt 2
Folgen Sie den Anweisungen zur Installation des Treibers. (Gegebenenfalls müssen Sie auf
(Mein) Computer > Downloads klicken und dann zum Starten der Installation
j5Usb3.0MultiAdapter wählen.)
Schritt 3
Nachdem der Treiber installiert wurde, wählen Sie Ja und klicken zum Durchführen eines
Computerneustarts und zum Abschließen der Treiberinstallation auf Beenden. Nachdem Ihr
Computer neu gestartet wurde, schließen Sie die Dockingstation j5create USB 3.0 zunächst
an Netzteil, HDMI, VGA, Ethernet und Audio und anschließend an Ihren Computer an. Ihre
Dockingstation j5create USB 3.0 ist jetzt einsatzbereit!
● Microsoft Windows 8.1 / 8 / 7 / XP (32-bit or 64-bit)
● Mac OS X 10.6~10.10
● Verfügbarer USB-Port (USB 3.0 empfohlen)
● Systemvoraussetzungen (mindestens)
CPU : Intel i3 Dual Core 1.5 GHz
Intel Atom “Bay Trail" Quad Core 1.33 GHz
RAM : 2 GB oder mehr
* Windows XP-Nutzer : “Windows Media Player” Empfohlen
* Empfehlen Windows XP & Mac USB 2.0 nur für den ‘Bürogebrauch
Systemanforderungen
Environnement requis
Entorno requerido
● Microsoft Windows 8.1, 8 , 7, XP (32 bits o 64 bits)
● Mac OS X 10.6~10.10
● Puerto USB disponible (USB 3.0 recomendado)
● Procesador : Intel i3 Dual Core 1.5 GHz
Intel Atom “Bay Trail" Quad Core 1.33 GHz
Memoria RAM : 2 GB o más
* Usuario Windows XP: “Windows Media Player” es recomendado
* Sugerimos el uso de Windows XP & Mac USB 2.0 para “aplicación de
ofcina” únicamente.
EN : Quick Installation Guide
ES : Guía De Instalación Rápida
FR : Guide D'installation Rapide
DE :
Kurzanleitung Für Installation
CZ : Rychlý Průvodce Instalací
HU
: Gyors Telepítési Útmutató
JP : クイックインストールガイド
TC : 快速安裝手冊
mini ultra station
JUD530SE/GE
Boomerang station
JUD480
JUA375
Multi Adapter
JUA370/
JUA370BE
STOP!
If you have any problems with this product please contact our technical
support team before returning it to the store.
SOPORTE TÉCNICO
Número gratuito: +1-888-988-0488
Horario de atención:
Lun-Vier. 10:00 a.m – 6:00 U.S.A-E.S.T
Email: [email protected]
TECHNISCHER SUPPORT
Kostenloser Anruf bei:+1-888-988-0488
Sprechstunden:
Mon.-Frei. 10.00 – 18.00 U.S.A-E.S.T
E-mail:[email protected]
SUPPORT TECHNIQUE
Numéro gratuit: +1-888-988-0488
Heures d’ouverture:
lun.-Ven. 10:00 a.m – 06:00 U.S.A-E.S.T
Email: [email protected]
201503-V5
TECHNICAL SUPPORT
Customer Service:
888-988-0488
Technical Support:
888-689-4088
Email:
[email protected]
Live Chat:
www.j5create.com/livechat
Support Ticket:
tickets.j5create.com
TECHNIKAI SEGÍTSÉG
Vevőszolgálat (angol nyelven): 888-988-0488
Technikai támogatás (angol nyelven):
888-689-4088
E-mail: [email protected]
Live Chat: www.j5create.com/livechat
Support Ticket: tickets.j5create.com
テクニカルサポート
お客様相談センター:03-5540-9010
電子メール:j5[email protected]
テクニカルサポートやその他のご相談は下記
の時間にくださいますようお願い申し上げます
営業時間:平日:9:30˜11:30/13:30˜17:30
技術支援資訊
美國客服專線:+1-888-988-0488
台灣客服專線:+886-2-2269-5533#19
客服時間:
星期一至星期五9:30 AM-6:00PM (台灣時間)
Email信箱:[email protected]
TECHNICKÁ PODPORA
Zákaznická linka: 888-988-0488
Technická podpora: 888-689-4088
E-mail: [email protected]
Online Chat: www.j5create.com/livechat
Žádost o pomoc: tickets.j5create.com
Limited Warranty
j5create offers a limited 1-year warranty. User’s wear & tear damage is not included.
The user shall call or e-mail j5create's customer service with information regarding
the defect(s) of the product and obtain a return authorization number. Users are
responsible for one way return freight cost and we will take care of one way freight
back. In order to obtain a return authorization number, users should have the
following information handy when calling or emailing the service team:
(i) a copy of the original purchase invoice to verify your warranty
(ii) a product serial number
(iii) a description of the problem
(iv) customer’s name, address, and telephone number
j5create does not warrant that the operation of the product will be uninterrupted or
error-free. j5create is not responsible for damage arising from failure to follow
instructions relating to the product’s use. This warranty does not apply to:(a)
consumable parts, unless damage has occurred due to a defect in materials or
workmanship; (b) cosmetic damage, including but not limited to scratches, dents ,
and broken plastic on ports; (c) damage caused by use with non-j5create products;
(d) damage cause by natural disasters (flood, fire, earthquake, lighting strike,
typhoon etc.,); (e) damage caused by human misuse (lost, accident, abuse, misuse or
other external causes); (f) damage caused by operating the product outside the
permitted or intended uses described by j5create; (g) damage caused by service
(including upgrades and expansions) performed by anyone who is not a representa-
tive of j5create or a j5create Authorized Service Provider; (h) a product or part that
has been modified to alter functionality or capability without the written permission
of j5create; or (i) if any j5create serial number on the product has been removed or
defaced. If such a situation occurs, j5create will calculate the cost of materials and
repair for your reference. This warranty is given by j5create in lieu of any other
warranties expressed or implied.
Copyright© 2015 j5create. All rights reserved. All trade names are registered
trademarks of their respective owners. Features and specifications are subject to
change without notice. Product may not be exactly as shown in the diagrams.
Windows - 驅動程式安裝流程
Mac - 驅動程式安裝流程
Windows-ドライバーのインストール
Mac-ドライバーのインストール
日本語 繁中文
手順1 手順2
手順1 手順2 步驟1 步驟2
步驟1 步驟2
ドライバーのインストー ルが完了して
から、本製品をコンピューターのポー
トに挿 入してください 。
驅動程式安裝完成之前,請勿將
USB 3.0筆電擴充基座接到電腦
USB埠上。
● このたびはj5createUSB3.0ドッキングステーションのお買い上げ、誠にありがと
う ご ざ い ま す 。こ の j5createUSB3.0ドッキングステーションを使用 することで 、
HDMIまたはVGAコネクタを介して簡単にモニターを増設することができます。
USB3.0ケーブル1本で、ノートパソコンにモニター、キーボード、マウス、イーサネット、
スピーカー、マイクを接続することが可能です。
󱾀透過聰明方便的j5create USB 3.0筆電擴充基座,您可以快速的增加以
HDMI或VGA為介面的第二台螢幕。兩台主機,只需要一條USB3.0,就可以
擴充您的螢幕、鍵盤、滑鼠、游標、網路、喇叭及麥克風。j5create USB
3.0筆電擴充基座是一個全方位的工作站,是擴展您Ultrabook與MacBook®完
美的解決方案,增加您與主機之間跨平台的多工力與生產力!
手順1
www.j5create.com/jpn/の ダ ウ ン ロ ード から製品を選択してWindowsDriver
か ら最 新ド ラ イ バ ーをダウンロードしてください。
インターネット接続環境がない場合、コンピューターの
CD-ROMドライブにドライバーCDを挿入し、インストールして
ください。セットアッププログラムが自動的に起動します。自動的
に起動しない場合は、マイコンピューターを開き、その中にある光学式ドライブの上を
クリッ クし 、Setup.exeをダブルクリックして手動でセットアップを実行してください。
手順2
ダウンロードしたZIPファイルを解凍して、中のEXEファイルをダ ブ ル ク リック し ま す 。画
面上の表示に従いドライバーをイ ン スト ー ル してくださ い 。
手順3
インストール完了後、終了をク リック し て 、コンピューターを再起動します。再起動後、
本製品にACアダプターを接続してください。必要に応じて本製品にHDMI・VGA・イーサ
ー ネ ット を 接続してから、パソコンのUSB3.0ポートに接続してください。
步驟1
我們強力建議直接造訪www.j5create.com/tw/「技術支援」下載最新版驅動
程式來進行安裝。
若無法連接網路下載,將驅動程式光碟放入光碟機中,
安裝精靈會自動開始執行。 如果自動安裝沒有執行,
可手動啟動安裝,請至「電腦」下點選「磁碟機」,並雙擊「Setup.exe」
即可。
步驟2
跟著螢幕提示安裝驅動程式。 (你可能需要至「我的電腦」>「下載項目」
點選j5Usb3.0MultiAdapter打開檔案開始安裝)
步驟3
驅動程式成功安裝後,請點選完成立即重新開機。確定重新開啟電腦後先
連接電源充電器、HDMI、VGA、麥克風、喇叭、網路至USB 3.0筆電擴充基
座,再連接USB 3.0線端至電腦。
手順1
www.j5create.com/jpn/の ダ ウ ン ロ ード から製品を選択してMacDriverから
最新ドライバーを ダ ウ ン ロ ード し て く だ さ い 。
インターネット接続環境がない場合、コンピューターのCD-ROMドライブにドライバー
CDを挿入し、インストールしてください。セットアッププログラムが自動的に起動します。
自動的に起動しない場合は、ファインダー上のデバイスアイコンを開きます。さらに
j5creatフォルダーを開き、mac-install中のdmgを実行してください。
手順2
ドライバーをインストールをク リック し て インストールを開始し、画面の指示に従
います。
手順3
インストール完了後、終了をクリックして、コンピューターを再起動します。再起動後、
本製品にACアダプターを接続してください。必要に応じて本製品にHDMI・VGA・イーサ
ー ネ ット を 接続してから、パソコンのUSB3.0ポートに接続してください。
手順4
を クリッ クし てシステム環境設定の中のサ ウ ン ド で出力スピーカーを選択して
くださ い 。
步驟1
我們強力建議直接造訪www.j5create.com/tw/「技術支援」下載最新版驅動
程式來進行安裝。(注意: 如果下載驅動發生問題,請將安全性設定選擇為
「下載自任何來源」)
若無法連接網路下載,將驅動程式光碟放入光碟機中,點擊Finder中的設備
下選擇j5create。點擊「mac_install」文件夾並打開dmg檔案。
步驟2
跟著螢幕提示安裝驅動程式。 (你可能需要至「Finder」>「下載項目」點
選j5Usb3.0MultiAdapter打開檔案開始安裝)
步驟3
驅動程式成功安裝後,請點選完成立即重新開機。確定重新開啟電腦後先
連接電源充電器、HDMI、VGA、麥克風、喇叭、網路至USB 3.0筆電擴充基
座,再連接USB 3.0線端至電腦。
步驟4
在 點選「系統偏好設定」。選擇「聲音」如需要變更聲音輸出,可以
直接點選並測試聲音輸出位置。
必須環境
󱾀MicrosoftWindows8.1/8/7/XP(32ビットまたは64ビット)
󱾀MacOSX10.6~10.10
󱾀USBポート使用可能(USB3.0を推奨)
󱾀最低システム要件
CPU:Inteli3DualCore1.5GHz
IntelAtomBayTrail"QuadCore1.33GHz
メモリ:2GBRAMもしくはそれ以上
*WindowsXPユーザー:WindowsMediaPlayerでのビデオ再生をお勧めします。
*WindowsXP,MacUSB2.0で本製品をご使用になる際は、「オフィスアプリケーション」でのご使
用をお勧めいたします。
使用環境需求
󱾀支援 Microsoft Windows 8.1 / 8 / 7 / XP (32-bit or 64-bit)
󱾀支援Mac OS X 10.6~10.10
󱾀USB埠(建議USB 3.0 )
󱾀系統規格需求
CPU處理器 : Intel i3 Dual Core 1.5 GHz
Intel Atom “Bay Trail" Quad Core 1.33 GHz
RAM記憶體 : 2 GB 或以上
* Windows XP 使用者 : 建議使用「Windows Media Player」
* 建議 Windows XP & MAC 2.0使用在「文書處理」軟體上
A
C D
B
EN :
A : Extended Mode
B : Mirror Mode
C : Primary Mode
D : Display Rotation
* Not Supported on Mac
ES :
A : Modo Extendido
B : Modo Espejo
C : Modo Primario
D : Rotación de pantalla
* Esta función no está disponible
para MAC
CZ :
A : Rozšířený režim
B : Duplicitní režim
C : Primární režim
D : Otáčení displeje
* Nepodporováno na Macu
HU :
A : Bővített Mód
B : Tükör Mód
C : Elsődleges Mód
D : Kijelző Forgatás
* Mac-en nem támogatott
DE :
A : Erweiterter Modus
B : Spiegelmodus
C : Primärer Modus
D : Drehung der Anzeige
* Diese Funktion ist auf MAC
nicht verfügbar
FR :
A : Le mode étendu
B : Le mode miroir
C : Le mode primaire
D : Tour de l’affichage
* Cette fonction n’est pas sur MAC
JP:
A:拡張表示モード
B:ミラーモード
C:プライマリーモード
D:画面の向き
*この機能はMACでサポートされ
ていません。
TC :
A : 延伸螢幕
B : 複製螢幕
C : 主螢幕切換
D : 旋轉螢幕
* 旋轉螢幕功能不支援Mac系統
Windows - Illesztőprogram telepítése
Mac - Illesztőprogram telepítése
1. lépés 2. lépés
2. lépés
Kövesse az utasításokat az illesztőprogram telepítéséhez! (Lehet, hogy a Sajátgép >
Letöltések mappából ki kell választania a j5Usb3.0MultiAdapter fájlt, hogy elkezdhesse a
telepítést)
1. lépés 2. lépés
● Köszönjük, hogy megvásárolta a j5create USB3.0 Boomerang Station-t! A j5create
Univeral USB Docking Station lehetővé teszi, hogy egy második monitort azonnal
csatlakoztathasson HDMI vagy VGA csatlakozókon keresztül. Ha fontos a
gyorsaság, egyszerűen csatlakoztasson monitort, billentyűzetet, egeret,
Ethernetet, hangszórókat, mikrofont, stb.-t laptopjához egyetlen egy USB3.0
kábellel! Ez a tökéletes megoldás arra, hogy kiterjessze Ultrabookját vagy
MacBookját egy teljes méretű munkaállomássá.
1. lépés
Ha van internet hozzáférése, azt javasoljuk, töltse le a legújabb illesztőprogramot a
www.j5create.com oldalról! A program a Support & Services menüpont alatt található, csak
görgessen le a termékhez tartozó illesztőprogramig és töltse le az operációs rendszeréhez
tartozó legújabb verziót! (Megjegyzés: Ha lehetséges, futtassa rendszergazdaként!)
3. lépés
Ha az illesztőprogram telepítése sikeres volt, kattintson az Igenre és a Befejezésre a
számítógép újraindításához és a telepítés befejezéséhez! Ha a számítógép újraindult,
először csatlakoztassa a j5create USB3.0 Docking Station-t a hálózati adapterhez,
HDMI-hez, VGA-hoz, Ethernet-hez, audiohoz, stb., majd a számítógépéhez! Most már
használhatja a j5create USB3.0 Boomerang Station-t!
Krok 1
Pokud máte přístup k internetu, doporučujeme Vám, abyste si stáhli nejnovější ovladač z
internetových stránek www.j5create.com v sekci Support & Services – vyberte Váš
produkt a stáhněte si ovladač podle operačního systému, který používáte. (Poznámka:
Pokud máte problém se stáhnutím tohoto ovladače, váš bezpečnostní systém
pravděpodobně není přizpůsobený na „Stahovat odkudkoliv“).
Pokud nemáte přístup k internetu, vložte CD s ovladačem do CD mechaniky Vašeho
počítače. Klikněte na Finder a v části Zařízení vyberte j5create. Klikněte na složku
mac-install a otevřete soubor dmg.
Krok 2
Vyberte příslušný operační systém a postupujte podle instrukcí. (Pokud jste si stáhli
aktuální ovladač z internetu, instalaci ovladače spustíte dvojklikem na stažený soubor).
Krok 3
Jakmile byl ovladač nainstalován, klikněte na Restart a tím dokončíte instalaci softwaru.
Poté co Váš počítač znovu naběhne, k dokovací stanici nejdříve připojte napájecí adaptér,
periferie (monitor, klávesnici atp.) a nakonec připojte stanici k Vašemu počítači. Nyní je
vše připraveno k použití.!
Krok 4
Jděte > , dále vyberte System Preferences a zvolte možnost Sound -> Output. Zde
můžete zvolit, jaké zařízení bude bude mít zvukový výstup.
Ha nem rendelkezik internet hozzáféréssel, helyezze a Driver
CD-t számítógépe CD-meghajtójába. (a telepítés automatikusan
elindul)Ha mégsem indul el, nyissa meg a Sajátgépet
(Számítógép), kattintson az CD-meghajtójára és futtassa a telepítő CD-t manuálisan, duplán
kattintva a Setup.exe fájlra! (egy percig is eltarthat mire az ablak felugrik)
● Microsoft Windows 8.1 / 8 / 7 / XP (32 bitový nebo 64 bitový)
● Mac OS X v10.6~v10.10
● USB port (doporučujeme USB 3.0)
● Minimální systémové požadavky
● CPU : Intel i3 Dual Core 1.5 GHz
Intel Atom “Bay Trail" Quad Core 1.33 GHz
● RAM : 2 GB
* Pro uživatele Windows XP : doporučujeme používat “Windows Media Player”.
* Windows XP & MAC : Při použití USB 2.0 doporučujeme pouze pro
“kancelářské aplikace".
Systémové požadavky
Windows – instalace ovladače
Mac – instalace ovladače
Krok 1 Krok 2
Krok 1
Pokud máte přístup k internetu, doporučujeme Vám, abyste si stáhli nejnovější ovladač z
internetových stránek www.j5create.com v sekci Support & Services- vyberte Váš produkt
a stáhněte si ovladač podle operačního systému, který používáte. (Poznámka: Z buďte
přihlášení jako správce.)
Krok 2
Pro nainstalování ovladače postupujte podle kroků. (Pokud jste si stáhli aktuální
ovladač z internetu, instalaci ovladače spustíte dvojklikem na stažený soubor).
Krok 3
Jakmile byl ovladač nainstalován, klikněte na Restart a tím dokončíte instalaci softwaru.
Poté co Váš počítač znovu naběhne, k dokovací stanici nejdříve připojte napájecí adaptér,
periferie (monitor, klávesnici atp.) a nakonec připojte stanici k Vašemu počítači. Nyní je
vše připraveno k použití.
Krok 1 Krok 2
Pokud nemáte přístup k internetu, vložte CD s ovladačem
do CD mechaniky Vašeho počítače. Instalační program by
se měl spustit automaticky. Pokud se tak nestane,
manuálně spusťte soubor Setup.exe uložený na optickém disku. (Spuštění aplikace
může trvat i jednu minutu)
NE csatlakoztassa az Universal USB
Docking Station-t számítógépéhez,
amíg az illesztőprogram nincsen
teljesen feltelepítve!
1. lépés
Ha van internet hozzáférése, azt javasoljuk, töltse le a legújabb illesztőprogramot a
www.j5create.com oldalról! A program a Support & Services menüpont alatt található, csak görgessen le
a termékhez tartozó illesztőprogramig és töltse le az operációs rendszeréhez tartozó legújabb verziót!
(Megjegyzés: Ha nem sikerül letöltenie az illesztőprogramot, a biztonsági beállításokat úgy módosítsa,
hogy a letöltést bárhonnan engedélyezze![„downloading from anywhere”])
Ha nem rendelkezik internet hozzáféréssel, helyezze a Driver CD-t számítógépe CD-meghajtójába.
Kattintson a keresőre (Finder) és az Eszközök (Devices) menüpont alatt válassza a j5create-t. Kattintson a
mac-install mappára és nyissa meg a .dmg fájlt!
2. lépés
Válassza ki a megfelelő operációs rendszert s kövesse az utasításokat az illesztőprogram telepítéséhez!
(Lehet, hogy a Finder > Downloads mappából a j5Usb3.0MultiAdapter-re kell kattintania a telepítés
megkezdéséhez)
3. lépés
Ha az illesztőprogram telepítése sikeres volt, kattintson az Igenre és a Befejezésre a számítógép
újraindításához és a telepítés befejezéséhez! Ha a számítógép újraindult, először csatlakoztassa a j5create
USB3.0 Docking Station-t a hálózati adapterhez, HDMI-hez, VGA-hoz, Ethernet-hez, audiohoz, stb., majd
a számítógépéhez! Most már használhatja a j5create USB3.0 Boomerang Station-t!
4. lépés
Kattintson a ( ) ikonra, majd a System Preferences-re és válassza a Sound and speaker Output
opciókat! Itt kiválaszthatja, melyik eszköz szolgáljon hangkimenetként.
● Microsoft Windows 8.1 / 8 / 7 / XP (32-bit vagy 64-bit)
● Mac OS X v10.6~v10.10 kompatibilis
● Meglévő USB port (USB 3.0 javasolt)
● Minimum rendszerkövetelmények
● CPU : Intel i3 Dual Core 1.5 GHz
Intel Atom “Bay Trail" Quad Core 1.33 GHz
RAM : 2 GB vagy magasabb
* Windows XP felhasználók : “Windows Media Player” javasolt
* Windows XP & MAC USB 2.0 csak irodai alkalmazásra ajánlott
Rendszerkövetelmények
Magyarország
●Děkujeme Vám za zakoupení USB 3.0 Boomerang Station! Tato dokovací stanice
ve tvaru bumerangu Vám umožňuje během chvíle přidat druhý monitor přes port
HDMI nebo VGA. Když nemáte dostatek času, jednoduše připojte monitor,
klávesnici, myš, Ethernet, sluchátka, mikrofon, atd. k Vašemu laptopu jediným
kabelem USB 3.0. Je to perfektní řešení jak rozšířit Váš Ultrabook nebo MacBook
na plnohodnotné pracovní prostředí.
Česky
Dokud kompletně nenainstalujete
ovladač, nezapojujte Universal USB
Docking Station do Vašeho počítače.
Technikai segítségért vagy esetleges meghibásodás esetén kérjük, keresse fel a vásárlás helyét!
Amennyiben beszél angolul, támogatásért az alábbi elérhetőségeken felveheti a kapcsolatot a
nemzetközi ügyfélszolgálattal is. A gyártó által üzemeltetett nemzetközi ügyfélszolgálat a magyar
nyelven beérkező kérdésekre sajnos nem tud válaszolni.

Other manuals for JUD480

1

This manual suits for next models

4

Other j5 create Adapter manuals

j5 create JUA370 User manual

j5 create

j5 create JUA370 User manual

j5 create JUH470 User manual

j5 create

j5 create JUH470 User manual

j5 create JDA213 User manual

j5 create

j5 create JDA213 User manual

j5 create JUH470 User manual

j5 create

j5 create JUH470 User manual

j5 create JUA210 User manual

j5 create

j5 create JUA210 User manual

j5 create JUC600 User manual

j5 create

j5 create JUC600 User manual

j5 create JUH450 User manual

j5 create

j5 create JUH450 User manual

j5 create JUH470 User manual

j5 create

j5 create JUH470 User manual

j5 create JUH410 User manual

j5 create

j5 create JUH410 User manual

j5 create ScreanCast JVAW56 User manual

j5 create

j5 create ScreanCast JVAW56 User manual

j5 create JUA250 User manual

j5 create

j5 create JUA250 User manual

j5 create JUA210 User manual

j5 create

j5 create JUA210 User manual

j5 create JUA 310 User manual

j5 create

j5 create JUA 310 User manual

j5 create JCA366 User manual

j5 create

j5 create JCA366 User manual

j5 create JCC111 User manual

j5 create

j5 create JCC111 User manual

j5 create Display Adapter User manual

j5 create

j5 create Display Adapter User manual

j5 create USB VGA Display Adapter User manual

j5 create

j5 create USB VGA Display Adapter User manual

j5 create JCA111 User manual

j5 create

j5 create JCA111 User manual

j5 create JCH471 User manual

j5 create

j5 create JCH471 User manual

j5 create JUA310 User manual

j5 create

j5 create JUA310 User manual

j5 create JLA160 User manual

j5 create

j5 create JLA160 User manual

j5 create JUA330 User manual

j5 create

j5 create JUA330 User manual

j5 create JUA350 User manual

j5 create

j5 create JUA350 User manual

j5 create JUA350 User manual

j5 create

j5 create JUA350 User manual

Popular Adapter manuals by other brands

Patton electronics 400 user manual

Patton electronics

Patton electronics 400 user manual

Aurora Design BT-2.5 User's operation manual

Aurora Design

Aurora Design BT-2.5 User's operation manual

Samsung HD2018GH user manual

Samsung

Samsung HD2018GH user manual

Adaptec 29320ALP installation guide

Adaptec

Adaptec 29320ALP installation guide

IOGear GBP301 user manual

IOGear

IOGear GBP301 user manual

TP-Link TL-PA4020P user guide

TP-Link

TP-Link TL-PA4020P user guide

ActionTec HCB1000 Specifications

ActionTec

ActionTec HCB1000 Specifications

Sonorix OBA-0110 user manual

Sonorix

Sonorix OBA-0110 user manual

Leviton Quickport F-Type Adapters 40831-0Bx specification

Leviton

Leviton Quickport F-Type Adapters 40831-0Bx specification

eSTUFF ES623006WH user manual

eSTUFF

eSTUFF ES623006WH user manual

Ampetronic ATT100-T60 manual

Ampetronic

Ampetronic ATT100-T60 manual

ZyXEL Communications ZyXEL NWD2105 user guide

ZyXEL Communications

ZyXEL Communications ZyXEL NWD2105 user guide

Platinum PT-PU3GEA quick start guide

Platinum

Platinum PT-PU3GEA quick start guide

Airlink101 AWLL6077V2 installation instructions

Airlink101

Airlink101 AWLL6077V2 installation instructions

Sony AC-V615 operating instructions

Sony

Sony AC-V615 operating instructions

D-Link DWA-182 Quick install guide

D-Link

D-Link DWA-182 Quick install guide

Belkin F5D4074 - Powerline AV Starter user manual

Belkin

Belkin F5D4074 - Powerline AV Starter user manual

Fluke BC190/830 instruction sheet

Fluke

Fluke BC190/830 instruction sheet

manuals.online logo
manuals.online logoBrands
  • About & Mission
  • Contact us
  • Privacy Policy
  • Terms and Conditions

Copyright 2025 Manuals.Online. All Rights Reserved.