manuals.online logo
Brands
  1. Home
  2. •
  3. Brands
  4. •
  5. Jabra
  6. •
  7. Headset
  8. •
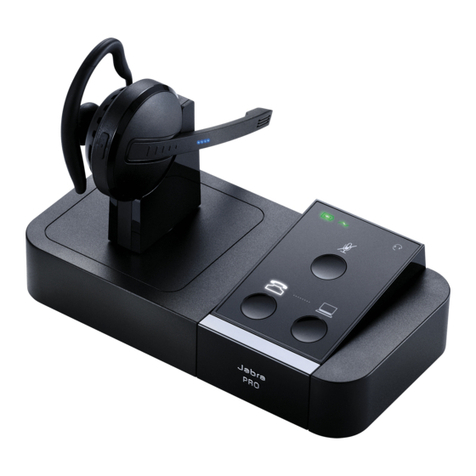
  9. Jabra Pro 92 Series Installation guide

Jabra Pro 92 Series Installation guide

FAQ - All questions
Setup for Desk Phones
How do I connect my Jabra Pro 92x with Cisco 7942G, 7945G, 7962G, 7965G, 7975G?
Prerequisites:
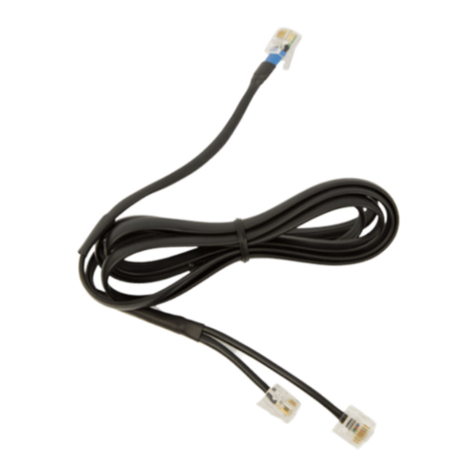
Jabra Pro 92x + Jabra Link 14201-16
In combination with one of the following phones:
Cisco 7942G
Cisco 7945G
Cisco 7962G
Cisco 7965G
Cisco 7975G
Important:
If you are connecting the Jabra Pro 925 wireless headset to a Cisco desk phone infrastructure that
uses LAN switches, while also using the included Jabra USB cable between the base and a
computer, then we recommend that you use the latest version of the Jabra Link 14201-43
(marked B) instead of the Jabra Link 14201-16 EHS cable. This will ensure the stable use of the
Cisco desk phone.
System:
Cisco Unified Call Manager (CUCM)
Cisco Call Manager Express (CME) from version 4.1, and phone firmware 8.3.3. When
downloading from Cisco, the required IOC version will be marked.
To use remote call control, the following prerequisites must be met :
Voip-phones SCCP (Cisco protocols) require: phone firmware 8.3(3), and the Cisco
Unified Communications Manager (CUCM) from release 3.3, 4.0, 4.1, 4.2, 4.3, 5.0, 6.0,
7.0, and 8.0.
SIP phones require: phone firmware 8.3(3), and the Cisco Unified Communications
Manager (CUCM) from release 5.0, 5.1, 6.0, 7.0, and 8.0.
Remote call control is also possible in combination with the expansion modules 7915 and 7916.
Connection:
1. Take the supplied RJ10 to RJ10 connection cable and insert one end in the headset
interface of the Cisco phone, and the other end in the socket marked with the phone icon
on the Jabra Pro 92x.
2. Connect the EHS adapter to the AUX socket of the Cisco phone and to the AUX interface
of the base.
Now you can set up the headset for your phone using the automatic configuration or manually.
Automatic configuration:
To start the automatic configuration, have someone call you on the phone and wait at least 10
seconds before you answer. Now the appropriate EHS mode should be set up.
If the automatic configuration did not work, manually select the DHSG mode. See the user
manual for the headset for more information.
Base setup:
Set the dial tone switch to position "B".
Microphone volume setup:
Put on the headset and make a test call.
Now you can select the microphone volume using the +/-button.
Communication Manager setup:
Under Phones>Wireless Headset Hookswitch Control, enable answer/end for each terminal
phone.
Was this useful?
How do I connect my Jabra Wireless headset with the Jabra GN1000 Remote Handset Lifter
(RHL) to my standard desk phone so I have remote call control using my headset?
Connection:
1. Connect the AC adapter (supplied with the headset) to the headset base, and connect the
other end to an electrical outlet.
2. Disconnect the phone handset from the phone base, and then connect it to the socket that
is marked with a handset icon on the headset base.
3. Connect the modular connector (supplied with the headset) to the headset interface on
your desk phone, and connect the end with the blue band to the headset base socket that is
marked with a phone icon.
4. Connect the attached cable of the GN1000 RHL to the AUX interface on the headset
base.
5. Mount the GN1000 RHL onto the handset cradle of the desk phone using the provided
adhesive.
6. Rest the desk phone handset on the GN1000 RHL arm and ensure that it presses the desk
phone hook switch.
Configuration:
1. Follow the setup instructions for your Jabra wireless headset. If the headset base requires
manual configuration, set the Electronic Hook Switch setting to "RHL" and set the dial
tone switch to position “A”.
2. Make a call to the headset. If the volume of your voice is too loud or quiet to the person
you are calling, adjust the headset microphone volume until you achieve the optimum
level.
Was this useful?
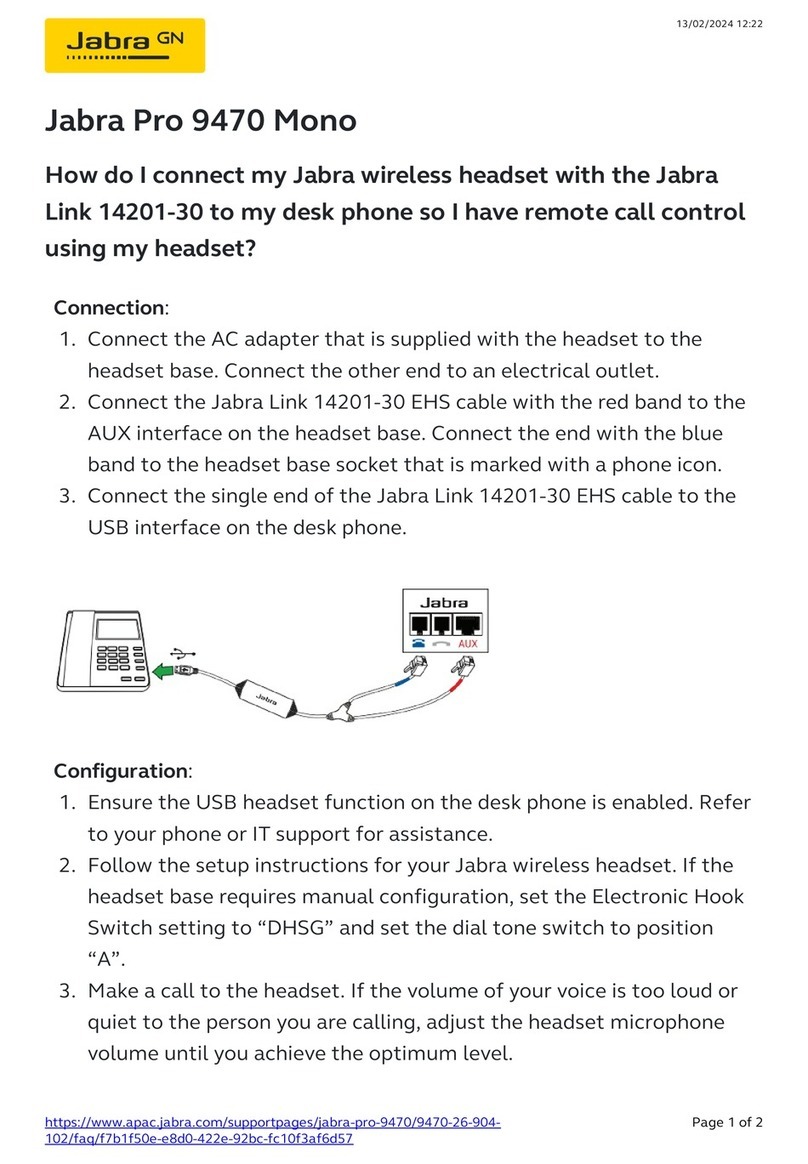
How do I connect my Jabra wireless headset with the Jabra Link 14201-10 to my Aastra desk
phone so I have remote call control using my headset?
Prerequisites
Jabra Link 14201-10
DHSG connection cable from Aastra
Connection:
3. Connect the AC adapter that is supplied with the headset to the headset base, and connect
the other end to an electrical outlet.
4. Connect the Jabra Link 14201-10 EHS cable with the red band to the AUX
interface on the headset base, and connect the end with the blue band to the
headset base socket that is marked with a phone icon.
5. Connect the Jabra Link 14201-10 EHS cable single end to the RJ45 adapter that is
supplied with your Aastra DHSG Cable Kit.
6. Connect the Aastra DHSG Cable Kit cord with the blue band to the RJ45 adapter.
Connect the Aastra DHSG Cable Kit cord with the green band to the headset
interface on the Aastra desk phone, and connect the end with the yellow band to
the socket for the Aastra phone expansion module.
Configuration:
7. Ensure the Audio Mode is set to “Headset/Speaker”, and the DHSG mode is enabled on
your desk phone. Refer to your phone or IT support for assistance.
8. Follow the setup instructions for your Jabra wireless headset. If the headset base
requires manual configuration, set the Electronic Hook Switch setting to “DHSG”
and set the dial tone switch to position “A”.
9. Make a call to the headset. If the volume of your voice is too loud or quiet to the
person you are calling, adjust the headset microphone volume until you achieve
the optimum level.
Was this useful?
How do I connect my Jabra wireless headset with the Jabra Link 14201-10 to my desk phone so I
have remote call control using my headset?
Connection:
1. Connect the AC adapter that is supplied with the headset to the headset base, and connect
the other end to an electrical outlet.
2. Connect the Jabra Link 14201-10 EHS cable with the red band to the AUX interface on
the headset base, and connect the end with the blue band to the headset base socket that is
marked with a phone icon.
3. Connect the Jabra Link 14201-10 EHS cable single end to the headset interface on the
desk phone.
Configuration:
1. Ensure the headset function is enabled on the desk phone. Refer to your phone or IT
support for assistance.
2. Follow the setup instructions for your Jabra wireless headset. If the headset base requires
manual configuration, set the Electronic Hook Switch setting to “DHSG” and set the dial
tone switch to position “A”.
3. Make a call to the headset. If the volume of your voice is too loud or quiet to the person
you are calling, adjust the headset microphone volume until you achieve the optimum
level.
Was this useful?
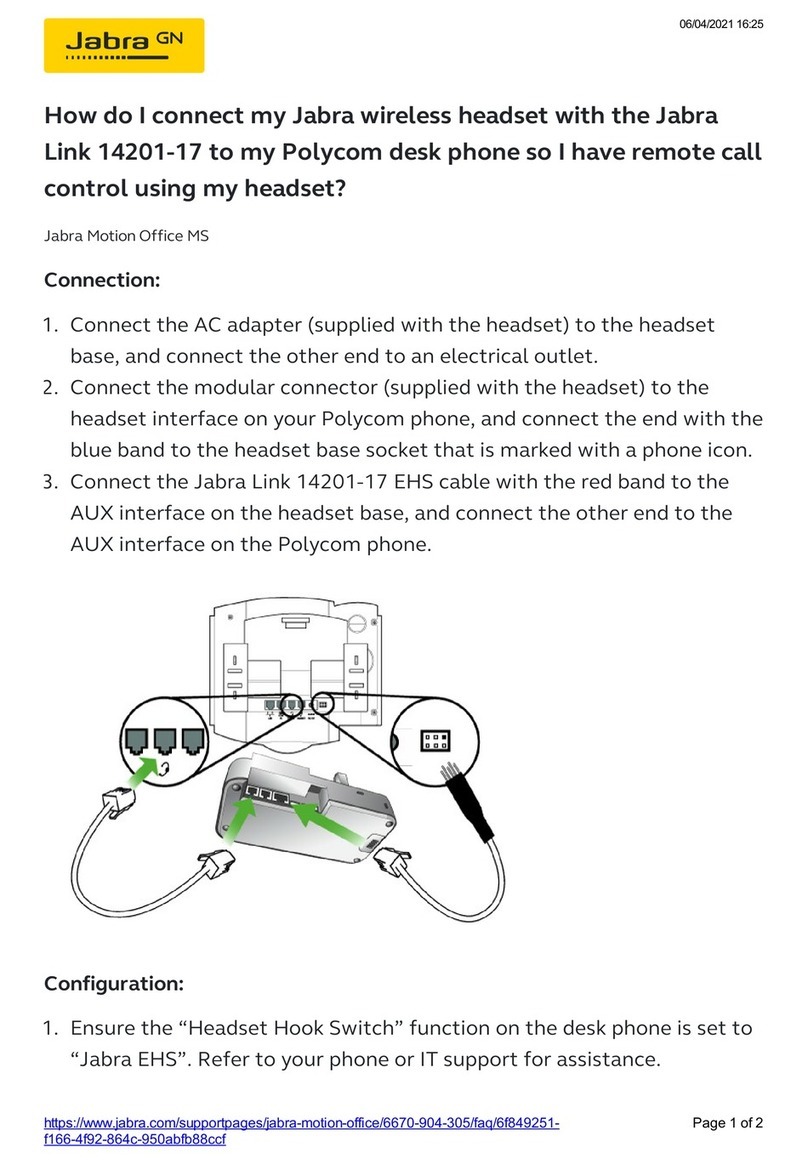
How do I connect my Jabra wireless headset with the Jabra Link 14201-17 to my Polycom desk
phone so I have remote call control using my headset?
Connection:
1. Connect the AC adapter (supplied with the headset) to the headset base, and connect the
other end to an electrical outlet.
2. Connect the modular connector (supplied with the headset) to the headset interface on
your Polycom phone, and connect the end with the blue band to the headset base socket
that is marked with a phone icon.
3. Connect the Jabra Link 14201-17 EHS cable with the red band to the AUX interface on
the headset base, and connect the other end to the AUX interface on the Polycom phone.
Configuration:
1. Ensure the “Headset Hook Switch” function on the desk phone is set to “Jabra EHS”.
Refer to your phone or IT support for assistance.
2. Follow the setup instructions for your Jabra wireless headset. If the headset base requires
manual configuration, set the Electronic Hook Switch setting to “DHSG” and set the dial
tone switch to position “A”.
3. Make a call to the headset. If the volume of your voice is too loud or quiet to the person
you are calling, adjust the headset microphone volume until you achieve the optimum
level.
Was this useful?
How do I connect my Jabra wireless headset with the Jabra Link 14201-33 to my Avaya desk
phone so I have remote call control using my headset?
Connection:
1. Connect the AC adapter that is supplied with the headset to the headset base, and connect
the other end to an electrical outlet.
2. Connect the Jabra Link 14201-33 EHS cable with the red band to the AUX interface on
the headset base, and connect the end with the blue band to the headset base socket that is
marked with a phone icon.
3. Connect the single end of the Jabra Link 14201-33 EHS cable to the headset interface on
the Avaya desk phone.
Configuration:
1. Ensure the headset function on the desk phone is enabled. Refer to your phone or IT
support for assistance.
2. Follow the setup instructions for your Jabra wireless headset. If the headset base requires
manual configuration, set the Electronic Hook Switch setting to “DHSG” and set the dial
tone switch to position “A”.
3. Make a call to the headset. If the volume of your voice is too loud or quiet to the person
you are calling, adjust the headset microphone volume until you achieve the optimum
level.
Was this useful?
How do I connect my Jabra wireless headset with the Jabra Link 14201-43 to my Cisco desk
phone so I have remote call control using my headset?
Connection:
1. Connect the AC adapter (supplied with the headset) to the headset base, and connect the
other end to an electrical outlet.
2. Connect the modular connector (supplied with the headset) to the headset interface on
your Cisco phone, and connect the end with the blue band to the headset base socket that
is marked with a phone icon.
3. Connect the Jabra Link 14201-43 EHS cable with the red band to the AUX interface on
the headset base, and connect the other end to the AUX interface on the Cisco phone.
Important:
If you are connecting the Jabra Engage, Jabra Pro 9400, Jabra Pro 925, Jabra Motion Office, or
Jabra Go 6470 wireless headset to a Cisco desk phone infrastructure that uses LAN switches,
while also using the included Jabra USB cable between the base and a computer, then we
recommend that you use the latest version of the Jabra Link 14201-43 (marked B) instead of the
Jabra Link 14201-43 EHS cable (marked A) to ensure the stable use of the Cisco desk phone.
Configuration:
1. Ensure the Headset Hook Switch Control function is enabled on the desk phone. Refer to
your phone or IT support for assistance.
2. Follow the setup instructions for your Jabra wireless headset. If the headset base requires
manual configuration, set the Electronic Hook Switch setting to “IQ” and set the dial tone
switch to position “B”.
3. Make a call to the headset. If the volume of your voice is too loud or quiet to the person
you are calling, adjust the headset microphone volume until you achieve the optimum
level.
Was this useful?
How do I connect my headset with a Polycom IP 320, IP 321, IP 330, IP 331, IP 335, IP 430, IP
450, IP 550, IP 560, IP 650, IP 670 or VVX 1500 so I can answer and end calls electronically?
Requirements:
Jabra Pro 920 or Jabra Pro 925 with latest firmware
Jabra Link 14201-17
Jabra 8800-00-75 (for Polycom IP 320, IP 321, IP 330, or IP 331)
Used in combination with one of the following Polycom desk phones:
SoundPoint IP phones running: SIP software v 3.0 or later, and BootROM 4.1.0 or later
Polycom IP 321, IP 331 running: SIP software v 3.1.2 rev. C or later
Polycom IP335 running: SIP software v 3.1.2 rev. B or later
VVX series running: SIP software v 3.1.2 rev. B or later, and BootROM 4.1.2 or later
To connect your headset to your desk phone, use the following steps:
1. Plug one end of the EHS adapter into the serial port on the back of your phone.
2. Plug the other end into the Jabra base socket marked AUX.
3. Connect the RJ-9 connector of the headset to the base marked with a phone icon, and
connect the other end to the back of the phone marked with a headset icon (use Jabra
8800-00-75 cable for SoundPoint IP phone models 320, 321, 330, or 331).
To configure your headset and desk phone, use the following steps:
1. Set the phone setup switch to position "A".
2. Ask someone to call the phone and wait at least 10 seconds before answering. The
appropriate EHS mode will be set automatically.
3. Place a test call and adjust the volume level of the microphone accordingly.
Note:
All Polycom desk phones that support EHS functionality using the Jabra Link 14201-17 require a
change in the setup of the phone. Ensure you make the change when the phone is not being used
for an active call. Use the following steps:
1. In the setup menu, navigate to Settings > Basic > Preferences > Headset > Analog
Headset (or Hook switch Mode).
2. Change the default setting Regular Mode to the correct Jabra mode by selecting Jabra
DHSG or Jabra EHS, depending on the firmware version of the desk phone.
3. Press the Select soft key.
After this change, the setup for Polycom SoundPoint desk phones is complete and ready for use.
However, the Polycom VVX series desk phones will restart, which takes approximately 2
minutes.
Was this useful?
How do I ensure the Remote Call Control feature works with the Cisco phone?
1. For the following headsets, make sure the firmware version meets the specified requirement.
• Jabra Pro 9400 Series: version 3.11.2 or later
• Jabra Motion Office series: version 1.17 or later
• Jabra Pro 925 series: version 1.4.0 or later
• Jabra Pro 920: version 2.5.4 or later
2. Make sure the firmware for the Cisco desk phone meets the following requirements.
• SCCP (Signalling Connection Control Part) 9-4-1 or later
• SIP (Session Initiation Protocol) 9-4-1 or later
3. Make sure the EHS feature is activated on the Cisco phone on the Preferences menu as shown
in the following screenshot.
Note: The EHS setup is done on the phone itself, and nothing is done on the Cisco CallManager
(CUCM).
Was this useful?
How to connect my JABRA PRO 92X with Alcatel IP Touch 4028 EE, 4038 EE, 4068 EE
Prerequisite:
Jabra PRO 92x + Jabra LINK 14201-20
In combination with one of the following phones:
IP Touch 4028 EE
IP Touch 4038 EE
IP Touch 4068 EE
EE = Extended Edition
Connection:
1. Take the supplied connection cable RJ10 to RJ10 of the Jabra PRO 92x and insert into
the socket of your Jabra PRO 92x base marked "phone" and the other end into the socket
of the EHS adapter marked with the “phone” symbol.
2. Now connect the end of the RJ45 to RJ45 connection cable (EHS adapter) marked in red
with the socket of the EHS adapter marked with "AUX" and the socket of your Jabra
PRO 92x base marked with "AUX".
3. Now connect the white RJ10 to the 3.5 mm jack connection cable marked "D" to the
socket of the EHS adapter marked with "Handset / Headset" and with the “headset”
socket of your phone.
4. Now connect the orange RJ12 to RJ12 connection cable marked with "A" to the socket of
the EHS adapter marked with "COM" and with the "bell" socket of your phone.
Please note that full functionality is only available when all the color-marked parts of the cables
are inserted into the EHS adapter. See photo.
Now you can setup the headset for your phone with the automatic or manual configuration.
Automatic configuration:
To start the automatic configuration, please let someone call you on this phone; wait at least 10
seconds before you pick up the phone. Now the appropriate EHS mode should be set up.
If the automatic configuration did not work, please manually select the DHSG mode. See User
Manual.
Base setup:
Set the phone setup switch to position "A".
Microphone volume setting:
Put on the headset and call a colleague, for example.
Now you can select the desired microphone volume using the +/-button.
Phone setup with system software 9.xx and higher:
No settings are required on the phone for the use of a headset. Following the correct adaptation
of the audio jack, a headset symbol should appear in the “Phone display”. If the headset symbol
does not appear, please check the following settings:
Menu> Settings> Phone> Audio Jack> Headset Activate/Select.
Phone setup with system software lower than 9.xx:
Important: The “Force Headset” function must not be activated on the phone, as otherwise it
will not be possible to accept external calls!
Menu> Settings> Phone> Audio Jack>Force Headset OFF
Menu> Settings> Phone> Socket > Activate Headset
Dial tone transfer / phone setup:
Important: The dial tone signal in the headset is only transmitted if one of the following
ringtones is used, e.g. Standard/ Classic / Cold River / Dooing-Dooing. > Menu> Settings> Dial
Tone > Internal / External
Should the dial tone signal transfer not work although you have setup the correct ringtone, please
check the following settings:
Menu > Settings > Phone > Internal/External, more options
No sound, Progressive, Beeps> all points must be set to "OFF".
Was this useful?
How to connect my Jabra PRO 920 with Avaya 1408, 1416, 1608, 1616, 9404, 9408, 9504,
9508, 9608, 9610, 9611G, 9620, 9620C, 9620L, 9621G, 9630, 9630G, 9640C, 9640G, 9641G,
9650, 9650C, 9670
Prerequisite:
Jabra PRO 920 + Jabra LINK 14201-20
In combination with one of the following Avaya phones:
1408 / 1416
1608 / 1616
9404 / 9408
9504 / 9508
9608 / 9610 / 9611G / 9620 / 9620C / 9620L / 9621G
909630 / 9630G / 9640C / 9640G / 9641G / 9650 / 9650C / 9670
Connection:
1. Take the supplied connection cable and insert it into the socket marked “phone” on your
Jabra PRO 920 base and the other end into the socket of the EHS adapter marked with a
“phone” symbol.
2. Now connect the end of the cable marked red with the socket of the EHS adapter marked
with "AUX" and the socket of your Jabra PRO 920 base marked with "AUX".
3. Now connect the white cable marked with "C" to the socket of the EHS adapter marked
with "Handset / Headset" and the “headset” socket of your phone.
Important: For 1408/1416 and 9404/9408 phones the cable marked white with "A" must
be used (instead of the "C" cable).
4. Connect the dial tone sensor with the EHS adapter and attach it to the center of the phone
speaker.
Please note that full functionality is only available when all the color-marked parts of the cables
are inserted into the EHS adapter, see photo.
Now you can setup the headset for your phone with the automatic or manual configuration.
Automatic configuration:
To start the automatic configuration, please let someone call you on this phone; wait at least 10
seconds before you pick up the phone. Now the appropriate EHS mode should be set up.
If the automatic configuration does not work, please manually select the DHSG mode. (See
manual)
Base setup:

This manual suits for next models

1

Other Jabra Headset manuals

Jabra BIZ 2400 II User manual

Jabra

Jabra BIZ 2400 II User manual

Jabra BT100 User manual

Jabra

Jabra BT100 User manual

Jabra WAVE User manual

Jabra

Jabra WAVE User manual

Jabra EXTREME2 User manual

Jabra

Jabra EXTREME2 User manual

Jabra Connect 5t Titanium Black User manual

Jabra

Jabra Connect 5t Titanium Black User manual

Jabra BT2010 - ANNEXE 746 User manual

Jabra

Jabra BT2010 - ANNEXE 746 User manual

Jabra WHB003BS User manual

Jabra

Jabra WHB003BS User manual

Jabra Elite Active 65t User manual

Jabra

Jabra Elite Active 65t User manual

Jabra BT160 User manual

Jabra

Jabra BT160 User manual

Jabra Stratus Mobile User manual

Jabra

Jabra Stratus Mobile User manual

Jabra STONE User manual

Jabra

Jabra STONE User manual

Jabra PERFORM 45 User manual

Jabra

Jabra PERFORM 45 User manual

Jabra PRO 9460 Duo User manual

Jabra

Jabra PRO 9460 Duo User manual

Jabra SPORT User manual

Jabra

Jabra SPORT User manual

Jabra Talk 15 Specification sheet

Jabra

Jabra Talk 15 Specification sheet

Jabra Pro 920 Duo User manual

Jabra

Jabra Pro 920 Duo User manual

Jabra Ellipse User manual

Jabra

Jabra Ellipse User manual

Jabra EASYGO User manual

Jabra

Jabra EASYGO User manual

Jabra Engage 75 User manual

Jabra

Jabra Engage 75 User manual

Jabra BT2070 - Headset - In-ear ear-bud User manual

Jabra

Jabra BT2070 - Headset - In-ear ear-bud User manual

Jabra PRO 9460 Duo User manual

Jabra

Jabra PRO 9460 Duo User manual

Jabra BIZ 2400 MS USB User manual

Jabra

Jabra BIZ 2400 MS USB User manual

Jabra EASYGO User manual

Jabra

Jabra EASYGO User manual
Jabra BT2090 User manual

Jabra

Jabra BT2090 User manual

Popular Headset manuals by other brands

TekNmotion Yapster Blaster quick start guide

TekNmotion

TekNmotion Yapster Blaster quick start guide

Nokia BH-902 user guide

Nokia

Nokia BH-902 user guide

Nacon RIG 800 PRO HX quick start guide

Nacon

Nacon RIG 800 PRO HX quick start guide

Nacon GH-300SR instruction manual

Nacon

Nacon GH-300SR instruction manual

Sony DR-EX230DP operating instructions

Sony

Sony DR-EX230DP operating instructions

SteelSeries ARCTIS 1 WIRELESS Product information guide

SteelSeries

SteelSeries ARCTIS 1 WIRELESS Product information guide

Nokia HS-123W user guide

Nokia

Nokia HS-123W user guide

Macaw T1000 user manual

Macaw

Macaw T1000 user manual

Centrios 1713161 owner's manual

Centrios

Centrios 1713161 owner's manual

Motorola H800 - Headset - Over-the-ear user guide

Motorola

Motorola H800 - Headset - Over-the-ear user guide

LG LG TONE PRO HBS-780 user manual

LG

LG LG TONE PRO HBS-780 user manual

Ambar Bluetooth Headset with Mic user manual

Ambar

Ambar Bluetooth Headset with Mic user manual

Arctic P311 Specifications

Arctic

Arctic P311 Specifications

Plantronics DuoSet H141 user guide

Plantronics

Plantronics DuoSet H141 user guide

VXi BlueParrott B250-XT+ user guide

VXi BlueParrott

VXi BlueParrott B250-XT+ user guide

Tellur Pulse user guide

Tellur

Tellur Pulse user guide

ALOFT Clarity Aloft BluLink user manual

ALOFT

ALOFT Clarity Aloft BluLink user manual

Tronsmart Shadow user manual

Tronsmart

Tronsmart Shadow user manual

manuals.online logo
manuals.online logoBrands
  • About & Mission
  • Contact us
  • Privacy Policy
  • Terms and Conditions

Copyright 2025 Manuals.Online. All Rights Reserved.