manuals.online logo
Brands
  1. Home
  2. •
  3. Brands
  4. •
  5. Jamara
  6. •
  7. Controllers
  8. •
  9. Jamara CR40EP User manual

Jamara CR40EP User manual

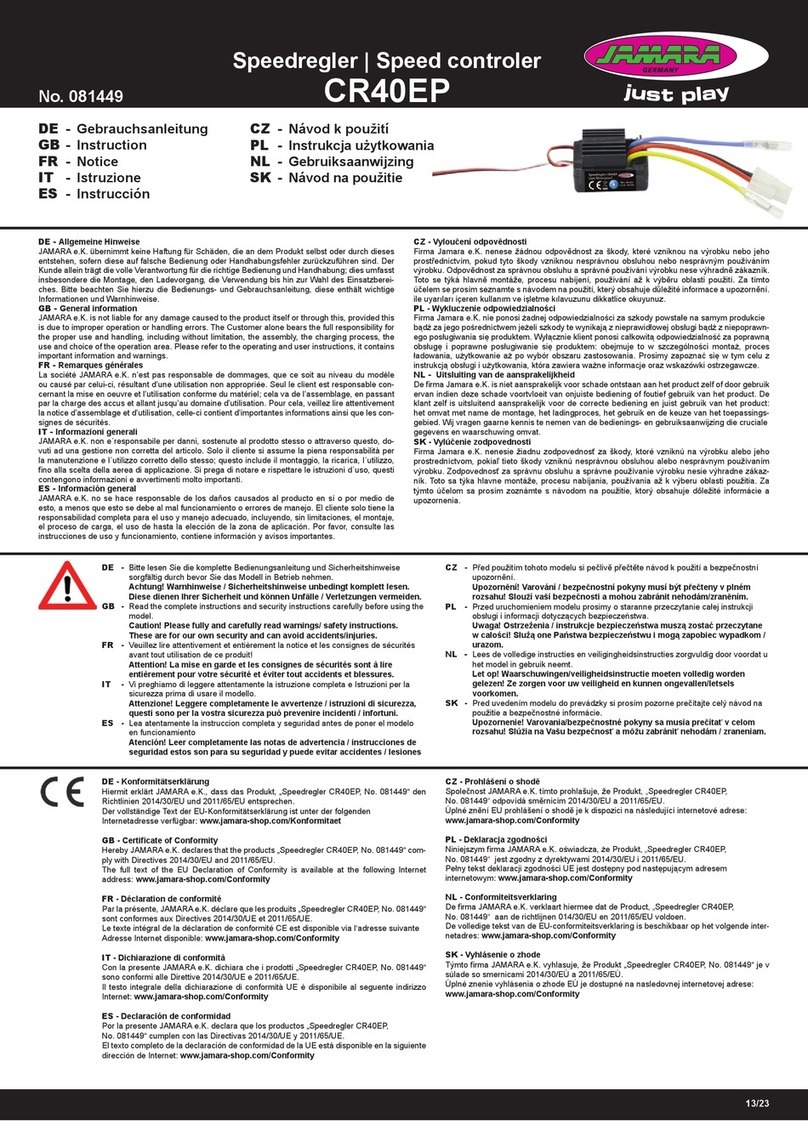
Regulateur CR40EP
LiPo Waterproof
FR - Notice d’assemblage
GB - Instruction Réf. | Ord. No.
081449
FR - Données techniques:
Tension d‘alimentiation 7,2 - 11,1 V
Accu 2 - 3 Lipo | 5 - 9 NiCd/NiMh
Résistace interne Fwd: 0.002 Ohm, Bwd: 0.004 Ohm
Tension BEC BEC 2A/5V (Linear mode BEC)
Domaine d‘utilisation RC-Car 1:10
Système de sécurité Courant constatn admis.
Courant constant admis. 40 A
Dimensions ~ 45 x 32 x 26 mm
GB - Technical Data:
Operating Voltage 7,2 - 11,1 V
Battery Pack 2 - 3 Lipo | 5 - 9 NiCd/NiMh
Internal Resistance Fwd: 0.002 Ohm, Bwd: 0.004 Ohm
BEC Voltage BEC 2A/5V (Linear mode BEC)
Intended use RC-Car 1:10
Protection Circuit Under voltage cut off
Continuous load 40 A
Size ~ 45 x 32 x 26 mm
05/19
2
FR - Remarques générales
La société Jamara e. K. n’est pas responsable de dommages,
que ce soit au niveau du modèle ou causé par celui-ci, résultant
d’une utilisation non appropriée. Seul le client est responsable
concernant la mise en oeuvre et l’utilisation conforme du matériel;
cela va de l’assemblage, en passant par la charge des accus et
allant jusqu’au choix du lieu d’utilisation. Pour cela, veillez à lire
attentivement la notice d’utilisation, elle contient d’importantes in-
formations ainsi que les consignes de sécurité.
GB - General information
Jamara e.K. is not liable for any damage caused to the product
itself or through this, provided this is due to improper operation or
handling errors. The Customer alone bears the full responsibility
for the proper use and handling, including without limitation, the
assembly, the charging process, the use and choice of the ope-
ration area. Please refer to the operating and user instructions, it
contains important information and warnings.
FR - Consignes de recyclage
Les appareils électriques ne doivent strictement pas
être jetés dans les ordures ménagères, mais doivent
être jetés séparément. Vous êtes tenuesdans la pos-
sibilité – de déposer vos piles et appareils électriques
dans les centres communaux de collectes. Si des
informations personnelles sont présents sur les ap-
pareils électriques, celles-ci doivent être retirés par
vous-même avant tout élimination du produit.
GB - Disposal restrictions
Electrical appliances must not be disposed of in dome
stic waste and must be disposed of separately. You are
obliged to take out the batteries, if possible, and to dis
pose of the electrical equipment at the communal coll
ection points. Should personal data be stored on the
electrical appliance you must remove them by yourself.
FR - Consignes de sécurités
Lors du branchement de l’appareil avec le moteur électrique,
celuici risque de démarrer intempestivement. De plus, les mo-
teurs déjà connectés à l’accu peuvent se mettre en marche
suite à un défaut technique ou mécanique. Cela est également
valable si votre radiocommande n’est pas allumée. Dans ces
cas il y a réel danger de blessure corporelle.
De ce fait, il est absolument déconseillé de ce trouvé dans les
environs immédiats des pièces en mouvements. Veillez à ce
qu’il n’y ait pas de pièces qui pourraient toucher les pièces
tournantes de la propulsion. Les propulsions de grande puis-
sance peuvent êtres extrêmement dangereux. Les forts cou-
rants nécessaires à la propulsion peuvent faire en sorte que
les éléments de l’accu ainsi que les éléments de commandes
chauffent en conséquence. De ce fait il y a risque d’inammation
ou de brûlure de la peau.
Le régulateur est uniquement conçu pour être utilisé dans le
domaine du modèle réduit. N’utilisez jamais ce régulateur avec
une alimentation. Protégez le contre les vibrations, la poussière
ou l’humidité ainsi que contre les contraintes mécaniques. Ne
l’exposez pas à la chaleur ou au froid. Respectez les indications
du fournisseur de votre accu. Vériez régulièrement votre ré-
gulateur s’il n’est pas endommagé. N’effectuez aucune modi-
cation sur votre appareil. Cela est également valable pour le
connecteur d’accu qui ne doit en aucun cas être rallongés.
Le connecteur d’accu n’est pas protégé contre l’inversion de po-
larité. Si vous inversez la polarité, votre régulateur sera irrémé-
diablement défectueux. La polarité du connecteur est matéria-
lisée par une couleur. Branchez le plus sur le câble rouge et le
moins sur le câble noir. Si le moteur devait tourner dans le mau-
vais sens, inversez deux des trois connections au niveau du
moteur. N’inversez jamais la polarité au niveau de l’alimentation
du régulateur, cela entraînerait la destruction de celui-ci.
Pour une bonne utilisation de votre régulateur veillez
respecter ces quelques règles:
• N’utilisez que des accus dans les limites des spécications
techniques.
• Laissez le régulateur sufsamment refroidir après l’avoir
utilisé.
• Après chaque utilisation, sortez l’accu du modèle.
• Mettez toujours en marche l’émetteur en premier puis le
récepteur, dans l’ordre inverse lorsque vous souhaitez
éteindre l’ensemble.
• N’utilisez que des câbles de liaisons de grande qualité ainsi
que les connecteurs.
• Veillez à avoir toujours une circulation d’air sufsante an de
efroidir correctement le régulateur. Le radiateur qui équipe le
régulateur doit toujours être libre an de pouvoir laisser
passer beaucoup d’air pour assurer un bon refroidissement.
GB - Safety Instructions
It is possible that an electric engine may begin to rotate when
connected to a power source, this may be due to a technical
fault, connecting the ESC to the receiver when the transmitter is
not switched on, or interference.
For this reason, it is imperative that care is taken every time a
battery is connected that the rotating parts are free from ob-
structions and in particular that no part of the body can come
into contact with the rotating parts should they begin to rotate.
Modern high power drive systems use large amounts of energy
which can create heat, to the degree that batteries, ESC’s, en-
gines or even the cable may become hot enough to start a re
or to cause injury by burning.
The ESC’s are designed exclusively for use with rechargeable
batteries. Never connect the ESC to a stabilised power sup-
ply, protect it from vibration, dust and physical impacts. Do not
expose the ESC to extreme heat or cold. Always observe man-
ufacturers recommendations for whichever battery packs you
choose to use. Regularly inspect the ESC for damage. Never
modify the ESC, this also applies to the battery connection ca-
bles which should never be lengthened.
The controller is not protected against crossed polarity, con-
necting
the controller to the battery incorrectly may result in irreparable
damage to the ESC. The battery connecting wires are colour
coded, always connect the red cable to the plus (+) pole of the
battery and the black cable to the minus (-) pole. If the motor
runs in the wrong direction, it can be changed by swapping any
2 wires to the engine, never swap the battery cables.
When using the controller please observe the following
safety notes:
• Use only batteries which not exceed the max. operating
voltage (2 - 3 Lipo | 5 - 9 NiCd/NiMh).
• Allow the ESC to cool down completely before operating it
again.
• Remove the battery from the model when not in use.
• Always switch off the receiver rst and then the transmitter.
On switching on, switch on the transmitter rst and then the
receiver.
• Only use top quality cables and connectors.
• Make sure that the ESC is adequately cooled and never
wrap the unit in anything that insulates.
3
FR - Déclaration de conformité
Par la présente, la société Jamara e. K. déclare que
ce modèle „Régulateur Speed CR40 EP LiPo Wa-
terproof, No. 081449“ est conforme en tous points
avec les textes de la directive de l’union européenne
2011/65/EU ainsi que 2014/30/EU.
Si vous avez des questions à ce sujet, veillez vous adresser à
notre service:
Jamara e. K. •Inh. Manuel Natterer
Am Lauerbühl 5 •DE-88317 Aichstetten
Tel. +49 (0) 7565/9412-0 •Fax +49 (0) 7565/9412-23
www.jamara.com •[email protected]
Vous pourrez également trouver des informations sur notre site
Internet: www.jamara-shop.com/Conformity
GB - Certicate of Conformity
JAMARA hereby declare that „Controller CR40 EP LiPo Water-
proof, No. 081449“ follow the regulations and requirements as well
as any ther relivant directives of the EEC directive 2011/65/EU and
2014/30/EU.
Please direct any queries that you may have regarding conformity
to our service department at:
Jamara e. K. •Inh. Manuel Natterer
Am Lauerbühl 5 •DE-88317 Aichstetten
Tel. +49 (0) 7565/9412-0 •Fax +49 (0) 7565/9412-23
www.jamara.com •[email protected]
Further information can also be found at:
www.jamara-shop.com/Conformity
FR - Mise en place et branchement
Placez votre régulateur dans la voiture de telle manière que
celui-ci soit protégé de toute humidité, de chocs violents et de
vibrations. De plus veillez à ce que celui-ci soit bien refroidi, il
ne faut en aucun l’emballer dans de la mousse par exemple. Il
est conseillé de xer le régulateur avec du ruban adhésif double
face dans votre modèle. Fixez l’interrupteur à un endroit bien
protégé mais facilement accessible. Veillez respecter les indica-
tions du fabricant de votre modèle.
Au cas où vous utilisez un accu Lipo, vous devez activer le
mode Lipo à travers Jumper (pont en chable). Votre variateur
s’éteint ainsi de lui-même avant que votre Accu Lipo n’atteigne
une sous-tension pouvant lui être nuisible. Seulement comme
ça l’accu Lipo est protégé de la décharge à fond ou contre des
dégâts par décharge à fond. En cas d’un seuil de 6 V tensions
entières le régulateur éteindra pour ne pas décharger l’accu
complètement. Utilisez après coup un accu NiMh, ce bouton
doit être mis en OFF. Dans ce cas le régulateur n’éteint pas à
6 V tensions entières, mais il permet une décharge jusqu’à 4 V
tensions entières environ.
Veillez respecter les indications du fabricant de votre modèle.
Branchez le moteur sur le régulateur en veillant à utiliser des
contacts de grande qualité, ou soudez directement les câbles
d’alimentations du moteur sur le régulateur. Assurez-vous que
la connexion soit de très bonne qualité et que l’impédance soit
la plus faible possible, isolez l’ensemble avec de la gaine ther-
morétractable. Gardez la liaison entre le moteur et le régulateur
ainsi que entre l’accu et le régulateur aussi court que possible.
Après avoir établie la liaison de puissance il faut branchez le
câble de commande du régulateur sur le récepteur. Branchez
celui-ci sur la sortie de la fonction Gaz du récepteur.
Si vous voulez désactiver la marche arrière du variateur, vous
devez régler le commutateur sur “désactivé”. Si le commutateur
est réglé sur la position “Activé”, la marche arrière est active.
GB - Installing and connecting
Position the ESC within the vehicle so that it will be protected
from moisture, vibration and impacts ensuring that sufcient air
can circulate to cool the unit. Never wrap the ESC in foam, we
recommend mounting the unit to the vehicle using double sided
sticky tape and that the switch is located where it will be pro-
tected but is also easily accessible. Please refer to your models
instructions for advice of where to situate these components.
This regulator has two battery modes which will be set with
jumpers. If you are using a Lipo battery this jumper has to be
set to Lipo. This function protects the lipo battery against deep
discharge and possible damage due to deep discharge! At a
threshold voltage of 6 V total the esc switches autom. off to safe
the battery from under voltage. If you are using a NiMH battery
this jumper has to be set to NiMh. The controller allows a volt-
age less than 6 V down to 4 V.
Use only high quality connectors ensuring that all soldered
joints are sound and check for resistance. Allways make sure
that the joints must are well insulated using heat shrink tube to
ensure that a short circuit cannot occur and keep the cables as
short as possible. Once the battery pack and motor are con-
nected put the ESC cable into the throttle output of the receiver.
If you want to disable the backward function just set the jumper
to disable. If the jumper is set to enable the backward function
is enabled.
Connexion des piles
Battery connector
Câble de comman-
deSignal wire
ON/OFF
On/Off switch
Connexion des motor
Motor connector
Connexion des motor
Motor connector
FR - Utilisation de votre régulateur
Procédez comme suit pour l’utilisation de votre régulateur:
• Mettez en marche l’émetteur et assurez-vous que le
réglage du servo des gaz est bien +/- 100%.
• Branchez l’accu en vous assurant que la polarité est bien
respectée et que le régulateur est toujours éteint.
• Mettez en marche le système de réception
• Dès que l’accu est branché le régulateur est activé.
Procédez avec prudence, il y a danger de blessure par
mise en marche intempestivement du moteur.
• Branchez l’accu uniquement juste avant l’utilisation de
votre modèle et, une fois terminé, débranchez celui-ci
directement du régulateur.
• Avant d’utiliser votre modèle, effectuer un test de porté
avec votre modèle. Par ce biais véri ez la portée dans
toutes les congurations (plein gaz, mi-gaz et ralenti), et
recherchez les éventuelles perturbations. Pour cela
surveillez la réaction des servos branchés. Un tremblement
du servo ou une position  n de course atteste la présence
de perturbations.
• Si vous souhaitez activer la fonction frein, pendant que
vous faite aller en avant votre voiture et que la gâchette de
gaz se trouve en position marche avant, il faut placer
rapidement celle-ci en  n de course pour la marche
arrière. Pour effectuer une marche arrière, bougez la
gâchette de gaz en position de neutre, attendez un court
moment puis bougez celleci en position marche arrière an
d’atteindre la vitesse de marche arrière souhaitée.
GB - Using your controller
To operate the ESC, proceed as follows:
• Switch on your transmitter and ensure that the throw for
the throttle channel is set to +/- 100%.
• Ensure that the receiver switch is in the OFF position and
connect a battery pack ensuring the correct polarity
(+ and -).
• Switch the receiver system ON.
• Once a battery is connected the system is ‘live‘ and
extreme caution must be exercised to prevent injury due to
the motor suddenly starting to turn.
• Do not connect the battery pack until directly before
operating the model and disconnect the pack immediate
after use.
• Conduct a range test before running the model for the rst
time. This test should be carried out at full, half and low
throttle and if the servos jitter or make uncontrolled
movements do not operate the model until the reason for
the interference has been established and corrected.
• When the vehicle is being driven forwards, pulling the
throttle back past the neutral position will cause the vehicle
to brake. To make the vehicle then reverse, the throttle
stick must rst be moved back to the neutral position for a
short period and then the model will reverse.
FR - Conguration du régulateur
Le régulateur Speed se calibre automatiquement en fonction du
signal d’émission. Pour cela il faut que le trim du canal gaz de
l’émetteur en position de neutre. Mettez en marche l’émetteur
en premier puis le régulateur. Votre régulateur con rme la ca-
libration avec une petite mélodie puis celui-ci est utilisable. Si
votre régulateur Speed ne reconnaît pas un signal ou si le trim
ne se trouve pas en position de neutre, celui-ci ne s’initialise
pas.
GB - Conguring your controller
The speed controller automatically calibrates itself to the trans-
mitter signal. For this, the trim button of the gas channel at
the transmitter must be set to neutral. Turn on the transmitter
and then the speed controller. The speed controller signals the
calibration with a short melody and is ready for use. In case the
speed controller has no clear signal or the trim control is not set
to neutral, the speed controller will not initialize.
FR - ATTENTION
Votre régulateur est protégé contre les éclaboussures mais il
n’est pas étanche à l’eau.
Il éviter les aques d‘eau profondes que le régulateur installé
dans le véhicule. Ne plongez pas le régulateur sous l‘eau. Ap-
rès chaque opération sur le mouillé tout le régulateur doit être
complètement séché. Les dommages causés par une mauvai-
se utilisation, de surcharge ou de manque de soins ne sont pas
couverts par la garantie.
GB - WARNING
Your controller is Splash-proof. Not waterproof.
Avoid puddles that are higher than the controller is installed in
the vehicle. Do not get the model under water. After each ride
in the wet, the complete controller must be thoroughly dried
and lubricate the mechanical components. Damage caused by
improper use overload or lack of maintenance is not covered
under warranty.
Sous réserve de toute erreur ou modication technique. Copyright JAMARA e. K. 2019
Toute copie ou reproduction, même partielle n‘est possible qu‘avec l‘autorisation de la société JAMARA e. K..
All rights reserved. Copyright JAMARA e.K. 2019
Copying or reproduction in whole or part, only with the expressed permission of JAMARA e.K.
JAMARA e.K.
Inh. Manuel Natterer
Am Lauerbühl 5 - DE-88317 Aichstetten
Tel. +49 (0) 75 65/94 12-0 - Fax +49 (0) 75 65/94 12-23
[email protected] ●www.jamara.com
Service - Tel. +49 (0) 75 65/94 12-66
kundenservice@ jamara.com

This manual suits for next models

1

Other Jamara Controllers manuals

Jamara COOL RUNNING 081458 User manual

Jamara

Jamara COOL RUNNING 081458 User manual

Jamara Xetronic User manual

Jamara

Jamara Xetronic User manual

Jamara Speed controller CRB60WP User manual

Jamara

Jamara Speed controller CRB60WP User manual

Jamara COOL RUNNING 081458 User manual

Jamara

Jamara COOL RUNNING 081458 User manual

Jamara COOL RUNNING 081458 User manual

Jamara

Jamara COOL RUNNING 081458 User manual

Jamara COOL RUNNING 081458 User manual

Jamara

Jamara COOL RUNNING 081458 User manual

Jamara CR40EP User manual

Jamara

Jamara CR40EP User manual

Jamara COOL RUNNING 081458 User manual

Jamara

Jamara COOL RUNNING 081458 User manual

Popular Controllers manuals by other brands

Motorola HMGW1075 quick start guide

Motorola

Motorola HMGW1075 quick start guide

TAOS TSL2571 EVM2 Kit quick start guide

TAOS

TAOS TSL2571 EVM2 Kit quick start guide

DIG RBC MVA instruction manual

DIG

DIG RBC MVA instruction manual

Gilbarco PAM 5000 Quick step guide

Gilbarco

Gilbarco PAM 5000 Quick step guide

Armstrong IVS B Installation and operating instructions

Armstrong

Armstrong IVS B Installation and operating instructions

ABB ACS550-01 user manual

ABB

ABB ACS550-01 user manual

IAI PSEL Operation manual

IAI

IAI PSEL Operation manual

VIPA System 100V Series manual

VIPA

VIPA System 100V Series manual

Zamel SRP-03 Manual instruction

Zamel

Zamel SRP-03 Manual instruction

AMX NXI Specifications

AMX

AMX NXI Specifications

Siemens SIMATIC Mobile Client900WXN operating instructions

Siemens

Siemens SIMATIC Mobile Client900WXN operating instructions

ABB ACS 800 Series Hardware manual

ABB

ABB ACS 800 Series Hardware manual

HORNER RCC972 user manual

HORNER

HORNER RCC972 user manual

Sun-Love SR528Q Operation manual

Sun-Love

Sun-Love SR528Q Operation manual

SevenStar D07 Series instruction manual

SevenStar

SevenStar D07 Series instruction manual

Conair Basic 32 Loader Control B32 user guide

Conair

Conair Basic 32 Loader Control B32 user guide

AMX AXC-232 instruction manual

AMX

AMX AXC-232 instruction manual

Enovation Controls Murphy EMS PRO LITE Installation and operation manual

Enovation Controls

Enovation Controls Murphy EMS PRO LITE Installation and operation manual

manuals.online logo
manuals.online logoBrands
  • About & Mission
  • Contact us
  • Privacy Policy
  • Terms and Conditions

Copyright 2025 Manuals.Online. All Rights Reserved.