manuals.online logo
Brands
  1. Home
  2. •
  3. Brands
  4. •
  5. Jamara
  6. •
  7. Controllers
  8. •
  9. Jamara CR40EP User manual

Jamara CR40EP User manual

13/23
No. 081449
Speedregler | Speed controler
CR40EP
DE - Allgemeine Hinweise
JAMARA e.K. übernimmt keine Haftung für Schäden, die an dem Produkt selbst oder durch dieses
entstehen, sofern diese auf falsche Bedienung oder Handhabungsfehler zurückzuführen sind. Der
Kunde allein trägt die volle Verantwortung für die richtige Bedienung und Handhabung; dies umfasst
insbesondere die Montage, den Ladevorgang, die Verwendung bis hin zur Wahl des Einsatzberei-
ches. Bitte beachten Sie hierzu die Bedienungs- und Gebrauchsanleitung, diese enthält wichtige
Informationen und Warnhinweise.
GB - General information
JAMARA e.K. is not liable for any damage caused to the product itself or through this, provided this
is due to improper operation or handling errors. The Customer alone bears the full responsibility for
the proper use and handling, including without limitation, the assembly, the charging process, the
use and choice of the operation area. Please refer to the operating and user instructions, it contains
important information and warnings.
FR - Remarques générales
La société JAMARA e.K. n’est pas responsable de dommages, que ce soit au niveau du modèle
ou causé par celui-ci, résultant d’une utilisation non appropriée. Seul le client est responsable con-
cernant la mise en oeuvre et l’utilisation conforme du matériel; cela va de l’assemblage, en passant
par la charge des accus et allant jusqu’au domaine d’utilisation. Pour cela, veillez lire attentivement
la notice d’assemblage et d’utilisation, celle-ci contient d’importantes informations ainsi que les con-
signes de sécurités.
IT - Informazioni generali
JAMARA e.K. non e´responsabile per danni, sostenute al prodotto stesso o attraverso questo, do-
vuti ad una gestione non corretta del articolo. Solo il cliente si assume la piena responsabilità per
la manutenzione e l´utilizzo corretto dello stesso; questo include il montaggio, la ricarica, l´utilizzo,
no alla scelta della aerea di applicazione. Si prega di notare e rispettare le istruzioni d´uso, questi
contengono informazioni e avvertimenti molto importanti.
ES - Información general
JAMARA e.K. no se hace responsable de los daños causados al producto en sí o por medio de
esto, a menos que esto se debe al mal funcionamiento o errores de manejo. El cliente solo tiene la
responsabilidad completa para el uso y manejo adecuado, incluyendo, sin limitaciones, el montaje,
el proceso de carga, el uso de hasta la elección de la zona de aplicación. Por favor, consulte las
instrucciones de uso y funcionamiento, contiene información y avisos importantes.
CZ - Vyloučení odpovědnosti
Firma Jamara e.K. nenese žádnou odpovědnost za škody, které vzniknou na výrobku nebo jeho
prostřednictvím, pokud tyto škody vzniknou nesprávnou obsluhou nebo nesprávným používáním
výrobku. Odpovědnost za správnou obsluhu a správné používání výrobku nese výhradně zákazník.
Toto se týká hlavně montáže, procesu nabíjení, používání až k výběru oblasti použití. Za tímto
účelem se prosím seznamte s návodem na použití, který obsahuje důležité informace a upozornění.
ile uyarıları içeren kullanım ve işletme kılavuzunu dikkatlice okuyunuz.
PL - Wykluczenie odpowiedzialności
Firma Jamara e.K. nie ponosi żadnej odpowiedzialności za szkody powstałe na samym produkcie
bądź za jego pośrednictwem jeżeli szkody te wynikają z nieprawidłowej obsługi bądź z niepoprawn-
ego posługiwania się produktem. Wyłącznie klient ponosi całkowitą odpowiedzialność za poprawną
obsługę i poprawne posługiwanie się produktem: obejmuje to w szczególności montaż, proces
ładowania, użytkowanie aż po wybór obszaru zastosowania. Prosimy zapoznać się w tym celu z
instrukcją obsługi i użytkowania, która zawiera ważne informacje oraz wskazówki ostrzegawcze.
NL - Uitsluiting van de aansprakelijkheid
De rma Jamara e.K. is niet aansprakelijk voor schade ontstaan aan het product zelf of door gebruik
ervan indien deze schade voortvloeit van onjuiste bediening of foutief gebruik van het product. De
klant zelf is uitsluitend aansprakelijk voor de correcte bediening en juist gebruik van het product:
het omvat met name de montage, het ladingproces, het gebruik en de keuze van het toepassings-
gebied. Wij vragen gaarne kennis te nemen van de bedienings- en gebruiksaanwijzing die cruciale
gegevens en waarschuwing omvat.
SK - Vylúčenie zodpovednosti
Firma Jamara e.K. nenesie žiadnu zodpovednosť za škody, ktoré vzniknú na výrobku alebo jeho
prostredníctvom, pokiaľ tieto škody vzniknú nesprávnou obsluhou alebo nesprávnym používaním
výrobku. Zodpovednosť za správnu obsluhu a správne používanie výrobku nesie výhradne zákaz-
ník. Toto sa týka hlavne montáže, procesu nabíjania, používania až k výberu oblasti použitia. Za
týmto účelom sa prosím zoznámte s návodom na použitie, ktorý obsahuje dôležité informácie a
upozornenia.
DE - Gebrauchsanleitung
GB - Instruction
FR - Notice
IT - Istruzione
ES - Instrucción
CZ - Návod k použití
PL - Instrukcja użytkowania
NL - Gebruiksaanwijzing
SK - Návod na použitie
DE - Bitte lesen Sie die komplette Bedienungsanleitung und Sicherheitshinweise
sorgfältig durch bevor Sie das Modell in Betrieb nehmen.
Achtung! Warnhinweise / Sicherheitshinweise unbedingt komplett lesen.
Diese dienen Ihrer Sicherheit und können Unfälle / Verletzungen vermeiden.
GB - Read the complete instructions and security instructions carefully before using the
model.
Caution! Please fully and carefully read warnings/ safety instructions.
These are for our own security and can avoid accidents/injuries.
FR - Veuillez lire attentivement et entièrement la notice et les consignes de sécurités
avant tout utilisation de ce produit!
Attention! La mise en garde et les consignes de sécurités sont à lire
entièrement pour votre sécurité et éviter tout accidents et blessures.
IT - Vi preghiamo di leggere attentamente la istruzione completa e Istruzioni per la
sicurezza prima di usare il modello.
Attenzione! Leggere completamente le avvertenze / istruzioni di sicurezza,
questi sono per la vostra sicurezza può prevenire incidenti / infortuni.
ES - Lea atentamente la instruccion completa y seguridad antes de poner el modelo
en funcionamiento
Atención! Leer completamente las notas de advertencia / instrucciones de
seguridad estos son para su seguridad y puede evitar accidentes / lesiones
CZ - Před použitím tohoto modelu si pečlivě přečtěte návod k použití a bezpečnostní
upozornění.
Upozornění! Varování / bezpečnostní pokyny musí být přečteny v plném
rozsahu! Slouží vaší bezpečnosti a mohou zabránit nehodám/zraněním.
PL - Przed uruchomieniem modelu prosimy o staranne przeczytanie całej instrukcji
obsługi i informacji dotyczących bezpieczeństwa.
Uwaga! Ostrzeżenia / instrukcje bezpieczeństwa muszą zostać przeczytane
w całości! Służą one Państwa bezpieczeństwu i mogą zapobiec wypadkom /
urazom.
NL - Lees de volledige instructies en veiligingheidsinstructies zorgvuldig door voordat u
het model in gebruik neemt.
Let op! Waarschuwingen/veiligheidsinstructie moeten volledig worden
gelezen! Ze zorgen voor uw veiligheid en kunnen ongevallen/letsels
voorkomen.
SK - Pred uvedením modelu do prevádzky si prosím pozorne prečítajte celý návod na
použitie a bezpečnostné informácie.
Upozornenie! Varovania/bezpečnostné pokyny sa musia prečítať v celom
rozsahu! Slúžia na Vašu bezpečnosť a môžu zabrániť nehodám / zraneniam.
DE - Konformitätserklärung
Hiermit erklärt JAMARA e.K., dass das Produkt‚ „Speedregler CR40EP, No. 081449“ den
Richtlinien 2014/30/EU und 2011/65/EU entsprechen.
Der vollständige Text der EU-Konformitätserklärung ist unter der folgenden
Internetadresse verfügbar: www.jamara-shop.com/Konformitaet
GB - Certicate of Conformity
Hereby JAMARA e.K. declares that the products „Speedregler CR40EP, No. 081449“ com-
ply with Directives 2014/30/EU and 2011/65/EU.
The full text of the EU Declaration of Conformity is available at the following Internet
address: www.jamara-shop.com/Conformity
FR - Déclaration de conformité
Par la présente, JAMARA e.K. déclare que les produits „Speedregler CR40EP, No. 081449“
sont conformes aux Directives 2014/30/UE et 2011/65/UE.
Le texte intégral de la déclaration de conformité CE est disponible via l‘adresse suivante
Adresse Internet disponible: www.jamara-shop.com/Conformity
IT - Dichiarazione di conformità
Con la presente JAMARA e.K. dichiara che i prodotti „Speedregler CR40EP, No. 081449“
sono conformi alle Direttive 2014/30/UE e 2011/65/UE.
Il testo integrale della dichiarazione di conformità UE è disponibile al seguente indirizzo
Internet: www.jamara-shop.com/Conformity
ES - Declaración de conformidad
Por la presente JAMARA e.K. declara que los productos „Speedregler CR40EP,
No. 081449“ cumplen con las Directivas 2014/30/UE y 2011/65/UE.
El texto completo de la declaración de conformidad de la UE está disponible en la siguiente
dirección de Internet: www.jamara-shop.com/Conformity
CZ - Prohlášení o shodě
Společnost JAMARA e.K. tímto prohlašuje, že Produkt, „Speedregler CR40EP,
No. 081449“odpovídá směrnicím 2014/30/EU a 2011/65/EU.
Úplné znění EU prohlášení o shodě je k dispozici na následující internetové adrese:
www.jamara-shop.com/Conformity
PL - Deklaracja zgodności
Niniejszym rma JAMARA e.K. oświadcza, że Produkt‚ „Speedregler CR40EP,
No. 081449“jest zgodny z dyrektywami 2014/30/EU i 2011/65/EU.
Pełny tekst deklaracji zgodności UE jest dostępny pod następującym adresem
internetowym: www.jamara-shop.com/Conformity
NL - Conformiteitsverklaring
De rma JAMARA e.K. verklaart hiermee dat de Product‚ „Speedregler CR40EP,
No. 081449“aan de richtlijnen 014/30/EU en 2011/65/EU voldoen.
De volledige tekst van de EU-conformiteitsverklaring is beschikbaar op het volgende inter-
netadres: www.jamara-shop.com/Conformity
SK - Vyhlásenie o zhode
Týmto rma JAMARA e.K. vyhlasuje, že Produkt „Speedregler CR40EP, No. 081449“ je v
súlade so smernicami 2014/30/EÚ a 2011/65/EÚ.
Úplné znenie vyhlásenia o zhode EÚ je dostupné na nasledovnej internetovej adrese:
www.jamara-shop.com/Conformity
2
DE - Sicherheitshinweise
Beim Anschließen eines Elektromotors kann es zum ungewollten Anlaufen des Motors kommen.
Außerdem können Elektromotoren mit angeschlossenem Antriebsakku durch mechanische oder
technische Defekte plötzlich anlaufen. Auch wenn die Empfangsanlage ohne eingeschalteten Sen-
der betrieben wird, kann der Motor unerwartet anlaufen. Hierdurch kann eine erhebliche Verlet-
zungsgefahr entstehen.
Es darf sich daher niemand im Gefahrenbereich rotierender Teile aufhalten. Achten Sie darauf,
dass keine Gegenstände mit den sich drehenden Komponenten des Antriebs in Berührung kommen
können. Antriebe mit hohen Leistungen können besonders gefährlich sein! Hohe Ströme erhitzen
die Batterie sowie die Zu- und Ableitungen. Dadurch kann es zu Feuer oder Verbrennungen der
Haut kommen.
Der Regler ist ausschließlich für den Betrieb mit Akkus konzipiert. Betreiben Sie den Regler nie an
einem Netzgerät. Schützen Sie den Speedregler vor Vibrationen, Staub, Feuchtigkeit sowie me-
chanischen Belastungen. Setzen Sie ihn weder großer Hitze noch Kälte aus. Berücksichtigen Sie
die Vorgaben der Hersteller der eingesetzten Akkus. Überprüfen Sie den Regler in regelmäßigen
Abständen auf Beschädigungen. An dem Regler dürfen keinerlei Veränderungen vorgenommen
werden. Dies gilt auch für die Akkuanschlusskabel, die keinesfalls verlängert werden dürfen.
Die Akkuanschlüsse des Reglers sind nicht gegen Verpolung geschützt. Wenn die Akkuanschlüsse
vertauscht werden kann der Regler irreparabel beschädigt werden. Die Anschlusskabel sind farb-
lich gekennzeichnet. Verbinden Sie das rote mit dem Pluspol und das schwarze mit dem Minuspol
des Akkus. Läuft der Motor verkehrt, kann durch Vertauschen der Motoranschlüsse, ebenfalls eine
schwarze und rote Leitung, die Drehrichtung geändert werden. Niemals die Akkuanschlüsse um-
polen.
Für den Betrieb des Reglers beachten Sie folgende Sicherheitshinweise:
• Verwenden Sie nur Akkus die die max. Betriebsspannung
nicht übersteigen (2 - 3 Lipo | 5 - 9 NiCd/NiMh).
• Lassen Sie den Regler nach einem Einsatz zunächst gut abkühlen, bevor Sie wieder starten.
• Entnehmen Sie nach jedem Einsatz den Akku aus dem Modell.
• Schalten Sie unbedingt immer zuerst den Sender und dann den Empfänger ein, beim Aus-
schalten gehen Sie in umgekehrter Reihenfolge vor.
• Setzen Sie nur hochwertige Verbindungskabel und Stecker ein.
• Achten Sie auf gute Kühlung des Controllers, wickeln Sie ihn keinesfalls in Schaumgummi oder
ähnlichem ein.
GB - Safety Instructions
It is possible that an electric engine may begin to rotate when connected to a power source, this may
be due to a technical fault, connecting the ESC to the receiver when the transmitter is not switched
on, or interference.
For this reason, it is imperative that care is taken every time a battery is connected that the rotating
parts are free from obstructions and in particular that no part of the body can come into contact with
the rotating parts should they begin to rotate. Modern high power drive systems use large amounts
of energy which can create heat, to the degree that batteries, ESC’s, engines or even the cable may
become hot enough to start a re or to cause injury by burning.
The ESC’s are designed exclusively for use with rechargeable batteries. Never connect the ESC
to a stabilised power supply, protect it from vibration, dust and physical impacts. Do not expose
the ESC to extreme heat or cold. Always observe manufacturers recommendations for whichever
battery packs you choose to use. Regularly inspect the ESC for damage. Never modify the ESC, this
also applies to the battery connection cables which should never be lengthened. The controller is
not protected against crossed polarity, connecting the controller to the battery incorrectly may result
in irreparable damage to the ESC. The battery connecting wires are colour coded, always connect
the red cable to the plus (+) pole of the battery and the black cable to the minus (-) pole. If the motor
runs in the wrong direction, it can be changed by swapping any 2 wires to the engine, never swap
the battery cables.
When using the controller please observe the following safety notes:
• Use only batteries which not exceed the max. operating voltage (2 - 3 Lipo | 5 - 9 NiCd/NiMh).
• Allow the ESC to cool down completely before operating it again.
• Remove the battery from the model when not in use.
• Always switch off the receiver rst and then the transmitter.
On switching on, switch on the transmitter rst and then the receiver.
• Only use top quality cables and connectors.
• Make sure that the ESC is adequately cooled and never wrap the unit in anything that insulates.
FR - Consignes de sécurités
Lors du branchement de l’appareil avec le moteur électrique, celuici risque de démarrer intem-
pestivement. De plus, les moteurs déjà connectés à l’accu peuvent se mettre en marche suite à
un défaut technique ou mécanique. Cela est également valable si votre radiocommande n’est pas
allumée. Dans ces cas il y a réel danger de blessure corporelle.
De ce fait, il est absolument déconseillé de ce trouvé dans les environs immédiats des pièces en
mouvements. Veillez à ce qu’il n’y ait pas de pièces qui pourraient toucher les pièces tournantes
de la propulsion. Les propulsions de grande puissance peuvent êtres extrêmement dangereux. Les
forts courants nécessaires à la propulsion peuvent faire en sorte que les éléments de l’accu ainsi
que les éléments de commandes chauffent en conséquence. De ce fait il y a risque d’inammation
ou de brûlure de la peau.
Le régulateur est uniquement conçu pour être utilisé dans le domaine du modèle réduit. N’utilisez ja-
mais ce régulateur avec une alimentation. Protégez le contre les vibrations, la poussière ou l’humidi-
té ainsi que contre les contraintes mécaniques. Ne l’exposez pas à la chaleur ou au froid. Respectez
les indications du fournisseur de votre accu. Vériez régulièrement votre régulateur s’il n’est pas
endommagé. N’effectuez aucune modication sur votre appareil. Cela est également valable pour le
connecteur d’accu qui ne doit en aucun cas être rallongés. Le connecteur d’accu n’est pas protégé
contre l’inversion de polarité. Si vous inversez la polarité, votre régulateur sera irrémédiablement
défectueux. La polarité du connecteur est matérialisée par une couleur. Branchez le plus sur le câble
rouge et le moins sur le câble noir. Si le moteur devait tourner dans le mauvais sens, inversez deux
des trois connections au niveau du moteur. N’inversez jamais la polarité au niveau de l’alimentation
du régulateur, cela entraînerait la destruction de celui-ci.
Pour une bonne utilisation de votre régulateur veillez respecter ces quelques règles:
• N’utilisez que des accus dans les limites des spécications techniques.
• Laissez le régulateur sufsamment refroidir après l’avoir utilisé.
• Après chaque utilisation, sortez l’accu du modèle.
• Mettez toujours en marche l’émetteur en premier puis le récepteur, dans l’ordre inverse lorsque
vous souhaitez éteindre l’ensemble.
• N’utilisez que des câbles de liaisons de grande qualité ainsi que les connecteurs.
• Veillez à avoir toujours une circulation d’air sufsante an de efroidir correctement le régulateur.
Le radiateur qui équipe le régulateur doit toujours être libre an de pouvoir laisser passer
beaucoup d’air pour assurer un bon refroidissement.
IT - Sicurezza
Quando si collega un motore elettrico alle batterie, si può causare la partenza involontaria del mo-
tore. Inoltre, i motori elettrici collegati a batterie di trazione, a causa di difetti meccanici o tecnici
possono improvvisamente partire. Anche se la ricevente funziona in autonomia dalla trasmittente
spenta, il motore può avviarsi in modo imprevisto. Ciò potrebbe causare gravi lesioni.
Pertanto, nessuno deve trovarsi nella zona di pericolo, come quella interessata da parti di un’elica
rotante. Assicurarsi che nessun oggetto possa entrare in contatto con gli elementi in rotazione. I
sistemi ad alta potenza possono essere molto pericolosi! Correnti elevate, sono in grado di surriscal-
dare la batteria e i cablaggi. Questo può causare incendi o bruciature alla pelle
I regolatori sono stati progettati esclusivamente per essere utilizzati con batterie. Non collegare mai
il regolatore a un dispositivo di rete. Proteggere il regolatore di giri da vibrazioni, polvere, umidità e
pressioni meccaniche. Non esporlo a zone estremamente calde o fredde. Prendere in considerazi-
one le indicazioni del costruttore delle batterie. Dopo danni alle batterie controllare il regolatore a in-
tervalli regolari. Non apportare modiche al regolatore. Questo vale anche per i cavi di connessione
batteria che non possono essere per nessun motivo allungati. Gli attacchi della batteria non sono
protetti dall‘inversione di polarità. Se le connessioni della batteria vengono invertite, il regolatore
può essere danneggiato in modo irreparabile. I cavi di collegamento sono colorati. Collegare il cavo
rosso al polo positivo e il nero a quello negativo della batteria. Qualora il motore girasse in senso
inverso, scambiare semplicemente due cavi del motore per ottenere il senso giusto. Non invertire
mai le polarità della batteria.
Per la messa in funzione del sistema, mettere in atto anche le seguenti precauzioni:
• Mettere solo batterie entro i limiti tecnici consigliati (2 - 3 Lipo | 5 - 9 NiCd/NiMh).
• Lasciare raffreddare bene il regolatore prima di rimetterlo in funzione.
• Rimuovere la batteria dal modello dopo ogni utilizzo.
• Attivare necessariamente sempre prima la trasmettente e poi la ricevente, allo spegnimento del
sistema, procedere in senso inverso.
• Utilizzare solo cavi e connettori di alta qualità.
• Creare un buon condotto di raffreddamento per il regolatore, non avvolgerlo per alcun motivo con
gommapiuma o simili.
DE
Technische Daten:
Betriebsspannung 7,2 - 11,1 V
Akkus 2 - 3 Lipo | 5 - 9 NiCd/NiMh
Innenwiderstand Fwd: 0.002 Ohm, Bwd: 0.004 Ohm
BEC-Spannung BEC 2A/6V (Linear mode BEC)
Einsatzgebiet RC-Car 1:10
Schutzeinrichtung Unterspannungsabschaltung
Dauerbelastung 40 A
Größe ~ 45 x 32 x 26 mm
GB
Technical Data:
Operating Voltage 7,2 - 11,1 V
Battery Pack 2 - 3 Lipo | 5 - 9 NiCd/NiMh
Internal Resistance Fwd: 0.002 Ohm, Bwd: 0.004 Ohm
BEC Voltage BEC 2A/6V (Linear mode BEC)
Intended use RC-Car 1:10
Protection Circuit Under voltage cut off
Continuous load 40 A
Size ~ 45 x 32 x 26 mm
FR
Données techniques:
Tension d‘alimentiation 7,2 - 11,1 V
Accu 2 - 3 Lipo | 5 - 9 NiCd/NiMh
Résistace interne Fwd: 0.002 Ohm, Bwd: 0.004 Ohm
Tension BEC 2A/6V (Linear mode BEC)
Domaine d‘utilisation RC-Car 1:10
Système de sécurité Courant constatn admis.
Courant constant admis. 40 A
Dimensions ~ 45 x 32 x 26 mm
IT
Dati tecnici:
Voltaggio 7,2 - 11,1 V
Batterie 2 - 3 Lipo | 5 - 9 NiCd/NiMh
Resistenza Fwd: 0.002 Ohm, Bwd: 0.004 Ohm
Tensione BEC 2A/6V (Linear mode BEC)
Uso RC-Car 1:10
Protezione Sottotensione
Carico continuo 40 A
Dimensioni ~ 45 x 32 x 26 mm
ES
Datos tecnicos:
Voltaje 7,2 - 11,1 V
Batería 2 - 3 Lipo | 5 - 9 NiCd/NiMh
Resistencia interna Fwd: 0.002 Ohm, Bwd: 0.004 Ohm
BEC-Voltaje BEC 2A/6V (Linear mode BEC)
Utilizable RC-Car 1:10
Protección Baja tensión de bloque
Carga continua 40 A
Tamaño ~ 45 x 32 x 26 mm
CZ
Technické specikace:
Provozní napětí 7,2 - 11,1 V
Baterie 2 - 3 Lipo | 5 - 9 NiCd/NiMh
Vnitřní odpor Fwd: 0.002 Ohm, Bwd: 0.004 Ohm
Napětí BEC BEC 2A/6V (lineární režim BEC)
Oblast použití RC auta1:10
Ochranným zařízením Podpěťová výluka
Trvalé zatížení 40 A
Rozměr ~ 45 x 32 x 26 mm
PL
Specykacja techniczna:
Napięcie robocze 7,2 - 11,1 V
Akumulator 2 - 3 Lipo | 5 - 9 NiCd/NiMh
Rezystancja wewnętrzna Fwd: 0,002 Ohm, Bwd: 0,004 Ohm
Napięcie BEC BEC 2A/6V (tryb liniowy BEC)
Obszar zastosowania Samochodu RC 1:10
Urządzenie zabezpieczające
Blokada podnapięciowa
Ciągłe obciążenie 40 A
Wymiar ~ 45 x 32 x 26 mm
NL
Technische specicaties:
Bedrijfsspanning 7,2 - 11,1 V
Batterij 2 - 3 Lipo | 5 - 9 NiCd/NiMh
Interne weerstand Fwd: 0.002 Ohm, Bwd: 0.004 Ohm
BEC-spanning BEC 2A/6V (BEC lineaire modus)
Toepassingsgebied RC auto 1:10
Beveiligingsapparaat Onderspanningsvergrendeling
Continue belasting 40 A
Afmeting ~ 45 x 32 x 26 mm
SK
Technické špecikácie:
Prevádzkové napätie 7,2 - 11,1 V
Batéria 2 - 3 Lipo | 5 - 9 NiCd/NiMh
Vnútorný odpor Fwd: 0.002 Ohm, Bwd: 0.004 Ohm
Napätie BEC BEC 2A/6V (lineárny režim BEC)
Oblasť použitia RC auta1:10
Ochranným zariadením Podpäťová výluka
Trvalé zaťaženie 40 A
Rozmer ~ 45 x 32 x 26 mm
3
ES - Seguridad
Al conectar un motor eléctrico, puede que este se ponga en marcha de manera inesperada. Además,
un motor eléctrico conectado a una batería puede ponerse en marcha por un fallo mecánico o
eléctrico. Si maneja el receptor con al emisora apagada también puede producirse el arranque
inesperado del motor. Este que puede producir serias lesiones.
Nunca debe haber nada ni nadie en la zona de giro de cualquier pieza móvil, especialmente de la
hélice. No olvide comprobar que ningún objeto puede encontrarse en la zona de giro de cualquier
componente o pieza del motor. ¡Los motores de altas prestaciones son especialmente peligrosos!
Las elevadas corrientes son capaces de calentar la batería y los cables. Esto pude producir un
incendio o provocar quemaduras.
Los reguladores se han diseñado para ser usados exclusivamente con baterías. Nunca conecte
el regulador a una fuente de alimentación. Proteja el regulador de vibraciones, polvo, humedad o
cargas mecánicas. No lo someta a frío o calor extremo. Respete las indicaciones del fabricante
de las baterías utilizadas. Inspeccione regularmente el regulador en busca de desperfectos. Bajo
ningún concepto podrá realizar modicaciones en el regulador. Esto también se aplica a los cables
de conexión de la batería, que no pueden ser prolongados bajo ningún pretexto. La conexión de
baterías del regulador no está protegida ontra inversiones de polaridad. Si se invierte la polaridad
de esta conexión pueden producirse daños irreparables en el regulador. Los cables de conexión
de la batería vienen marcados por colores. Una el cable rojo con el polo positivo de la batería y el
negro con el negativo de la batería. Si el motor girase al revés tan solo tiene que intercambiar dos
cualesquiera de los tres cables que van al motor. Nunca invierta la conexión de la batería.
Además, para poner en marcha y utilizar el reguladore debe respetar lassiguientes
indicaciones:
• Utilice solamente baterías con un número de elementos que se correspondan con los valores
indicados en datos técnicos.
• Deje enfriar el regulador del todo después de su uso antes de volver a arrancarlo.
• Saque la batería del modelo después de cada uso.
• Es imprescindible encender siempre primero la emisora y despuésel regulador. Al apagarlo
sucede lo mismo en el orden contrario.
• Solamente use conectores y cables de calidad.
• Asegúrese de la buena ventilación del regulador. Bajo ningún concepto debe envolverlo en
gomaespuma o similar. Se prohíbe cualquier modicación de la estructura del modelo ya que
anulará la garantía inmediatamente.
CZ - Bezpečnostní pokyny
Je možné, že se elektromotor při připojení ke zdroji roztočí, může to být způsobeno technickou
závadou, připojením ESC k přijímači, když není vysílač zapnutý, nebo rušením.
Z tohoto důvodu je při každém připojení baterie nutné zajistit, aby rotující části nebyly překážkou, a
zejména aby žádná část těla nemohla přijít do kontaktu s rotujícími částmi, pokud se začnou otáčet.
Moderní vysoce výkonné pohonné systémy spotřebovávají velké množství energie, která může ge-
nerovat teplo, až do bodu, kdy se baterie, ESC, motory a dokonce i kabely mohou zahřát natolik, že
způsobí požár nebo popálení.
ESC jsou určeny pouze pro použití s bateriemi. Nikdy nepřipojujte ESC ke stabilizovanému zdroji
napájení, chraňte jej před vibracemi, prachem a fyzickými nárazy. Nevystavujte ESC extrémnímu
teplu nebo chladu. Vždy dodržujte doporučení výrobce pro vybrané baterie. Pravidelně kontrolujte
ESC, zda není poškozen. Nikdy neupravujte ESC, včetně připojovacích kabelů baterie, které by nik-
dy neměly být prodlužovány. Ovladač není chráněn proti přepólování, nesprávné připojení ovladače
k baterii může způsobit neopravitelné poškození ovladače. Připojovací vodiče baterie jsou barevně
označeny, vždy připojte červený kabel ke kladnému (+) pólu baterie a černý kabel k zápornému
(-) pólu. Pokud motor běží nesprávným směrem, lze jej změnit prohozením jakýchkoli 2 vodičů k
motoru, nikdy neproměňujte vodiče baterie.
Při používání ovladače dodržujte následující pokyny ohledně bezpečnosti:
• Používejte pouze baterie, které nepřekračují max. provozní napětí (2 - 3 Lipo |5 - 9 NiCd/NiMh).
• Před opětovným spuštěním nechte ESC úplně vychladnout.
• Pokud model nepoužíváte, vyjměte z něj baterii.
• Vždy nejprve vypněte přijímač a poté vysílač. Při zapínání musíte nejprve zapněte vysílač a poté
přijímač.
• Používejte pouze kabely a konektory nejvyšší kvality.
• Ujistěte se, že je ESC řádně chlazený a nikdy jej nezabalujte do něčeho, co je izolační
PL - Instrukcje bezpieczeństwa
Możliwe, że silnik elektryczny zacznie się obracać po podłączeniu do źródła zasilania, może to
być spowodowane usterką techniczną, podłączeniem ESC do odbiornika, gdy nadajnik nie jest
włączony lub zakłóceniami.
Z tego powodu przy każdym podłączaniu akumulatora konieczne jest upewnienie się, że obracające
się części są wolne od przeszkód, aw szczególności, że żadna część ciała nie może wejść w kon-
takt z obracającymi się częściami, jeśli zaczną się obracać. Nowoczesne układy napędowe o dużej
mocy zużywają duże ilości energii, która może wytwarzać ciepło, do tego stopnia, że akumulatory,
ESC, silniki, a nawet kable mogą nagrzać się na tyle, aby wywołać pożar lub spowodować obrażenia
w wyniku poparzenia.
ESC są przeznaczone wyłącznie do użytku z akumulatorami. Nigdy nie podłączaj ESC do sta-
bilizowanego źródła zasilania, chroń go przed wibracjami, kurzem i uderzeniami zycznymi. Nie
wystawiaj ESC na ekstremalne ciepło lub zimno. Zawsze stosuj się do zaleceń producenta dotyczą-
cych wybranych akumulatorów. Regularnie sprawdzaj ESC pod kątem uszkodzeń. Nigdy nie mody-
kuj ESC, dotyczy to również przewodów przyłączeniowych akumulatora, których nigdy nie należy
przedłużać. Sterownik nie jest zabezpieczony przed zamianą biegunów, nieprawidłowe podłączenie
sterownika do akumulatora może spowodować nieodwracalne uszkodzenie regulatora. Przewody
łączące akumulator są oznaczone kolorami, zawsze podłączaj czerwony kabel do bieguna dodat-
niego (+) akumulatora, a czarny kabel do bieguna ujemnego (-). Jeśli silnik biegnie w złym kierunku,
można to zmienić, zamieniając dowolne 2 przewody do silnika, nigdy nie zamieniaj przewodów
akumulatora.
Podczas korzystania ze sterownika należy przestrzegać następujących wskazówek
dotyczących bezpieczeństwa:
• Używaj tylko baterii, które nie przekraczają maks. napięcie robocze (2 - 3 Lipo |
5 - 9 NiCd/NiMh).
• Przed ponownym uruchomieniem poczekaj, aż ESC całkowicie ostygnie.
• Wyjmij baterię z modelu, gdy nie jest używany.
• Zawsze najpierw wyłączaj odbiornik, a następnie nadajnik. Podczas włączania należy najpierw
włączyć nadajnik, a następnie odbiornik.
• Używaj wyłącznie kabli i złączy najwyższej jakości.
• Upewnij się, że ESC jest odpowiednio schłodzony i nigdy nie owijaj urządzenia w nic, co izoluje
NL - Veiligheidsinstructies
Het is mogelijk dat de elektromotor gaat draaien wanneer deze is aangesloten op een stroombron,
dit kan te wijten zijn aan een technische storing, het aansluiten van de ESC op de ontvanger
wanneer de zender niet is ingeschakeld, of interferentie.
Daarom moet er bij het aansluiten van een accu altijd op worden gelet dat de draaiende delen
vrij zijn van obstakels, en in het bijzonder dat geen enkel lichaamsdeel in contact kan komen met
de draaiende delen als ze beginnen te draaien. Moderne aandrijfsystemen met hoog vermogen
verbruiken grote hoeveelheden energie die hitte kunnen genereren, tot het punt waarop batterijen,
ESC’s, motoren en zelfs kabels heet genoeg kunnen worden om brand of brandwonden te
veroorzaken.
ESC’s zijn alleen voor gebruik met batterijen. Sluit de ESC nooit aan op een gestabiliseerde
stroombron, bescherm hem tegen trillingen, stof en fysieke schokken. Stel de ESC niet bloot
aan extreme hitte of kou. Volg altijd de aanbevelingen van de fabrikant voor de geselecteerde
batterijen. Controleer de ESC regelmatig op beschadigingen. Pas nooit de ESC aan, inclusief
de batterijaansluitkabels, die nooit mogen worden verlengd. De controller is niet beveiligd tegen
omgekeerde polariteit, een verkeerde aansluiting van de controller op de batterij kan onherstelbare
schade aan de controller veroorzaken. De aansluitdraden van de accu zijn kleurgecodeerd, sluit
altijd de rode kabel aan op de pluspool (+) van de accu en de zwarte kabel op de minpool (-). Als
de motor in de verkeerde richting draait, kan deze worden gewijzigd door 2 draden naar de motor
te verwisselen, verwissel nooit de accudraden.
Neem de volgende richtlijnen in acht bij het gebruik van de driver met betrekking tot
veiligheid:
• Gebruik alleen batterijen die de max. bedrijfsspanning (2 - 3 Lipo | 5 - 9 NiCd/NiMh).
• Laat de ESC volledig afkoelen voordat u hem opnieuw start.
• Verwijder de batterij uit het model wanneer het niet in gebruik is.
• Zet altijd eerst de ontvanger uit en dan pas de zender. Bij het inschakelen moet u eerst
Zet eerst de zender aan en daarna de ontvanger.
• Gebruik alleen kabels en connectoren van de hoogste kwaliteit.
• Zorg ervoor dat de ESC goed is afgekoeld en wikkel het apparaat nooit in iets dat isolerend is
SK - Bezpečnostné pokyny
Je možné, že sa elektromotor po pripojení na zdroj roztočí, môže to byť spôsobené technickou
poruchou, pripojením ESC k prijímaču pri nezapnutom vysielači alebo rušením.
Z tohto dôvodu je pri každom pripojení batérie potrebné zabezpečiť, aby rotujúce časti boli bez
prekážok, a najmä aby sa žiadna časť tela nemohla dostať do kontaktu s rotujúcimi časťami, ak sa
začnú otáčať. Moderné vysokovýkonné pohonné systémy spotrebúvajú veľké množstvo energie,
ktorá môže generovať teplo, až do bodu, kedy sa batérie, ESC, motory a dokonca aj káble môžu
zahriať natoľko, že môžu spôsobiť požiar alebo popáleniny.
ESC sú určené len na použitie s batériami. Nikdy nepripájajte ESC k stabilizovanému zdroju
napájania, chráňte ho pred vibráciami, prachom a fyzickými nárazmi. Nevystavujte ESC extrémne-
mu teplu alebo chladu. Vždy dodržiavajte odporúčania výrobcu pre vybrané batérie. Pravidelne
kontrolujte ESC, či nie je poškodený. Nikdy neupravujte ESC vrátane pripojovacích káblov batérie,
ktoré by sa nikdy nemali predlžovať. Ovládač nie je chránený proti prepólovaniu, nesprávne
pripojenie ovládača k batérii môže spôsobiť neopraviteľné poškodenie ovládača. Pripájacie vodiče
batérie sú farebne označené, vždy pripojte červený kábel ku kladnému (+) pólu batérie a čierny
kábel k zápornému (-) pólu. Ak motor beží v nesprávnom smere, je možné ho zmeniť zámenou
akýchkoľvek 2 vodičov k motoru, nikdy nepremieňajte vodiče batérie.
Pri používaní ovládača dodržiavajte nasledujúce pokyny čo sa týka bezpečnosti:
• Používajte iba batérie, ktoré neprekračujú maximálne prevádzkové napätie (2 - 3 Lipo |
5 - 9 NiCd/NiMh).
• Pred opätovným spustením nechajte ESC úplne vychladnúť.
• Keď model nepoužívate, vyberte z neho batériu.
• Vždy najskôr vypnite prijímač a až potom vysielač. Pri zapínaní musíte najskôr zapnite vysielač
a potom prijímač.
• Používajte len káble a konektory najvyššej kvality.
• Uistite sa, že je ESC správne vychladený a nikdy ho nezabaľte do ničoho, čo je izolačné
4
1
2
3
4
3
DE
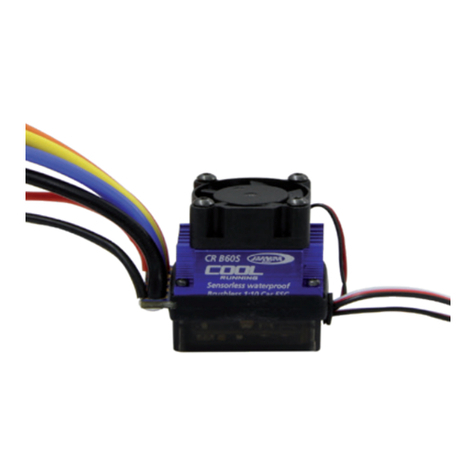
1 ON/OFF 2 Akkuanschluß
3 Motoranschluß 4 Regleranschluß
Einbau und Anschluss
Platzieren Sie den Regler so in Ihrem Fahrzeug, dass er vor Nässe und vor starken Stößen oder Vi-
bration geschützt ist. Außerdem sorgen Sie dafür, dass er gut gekühlt wird, er darf keinesfalls z.B. in
Schaumgummi eingepackt werden. Es empehlt sich den Regler mit Doppelklebeband im Fahrzeug
zu befestigen. Den Schalter befestigen Sie an einer geschützten, aber doch gut zugänglichen Stelle.
Beachten Sie die Hinweise des Herstellers Ihres Modells.
Sollten Sie einen Lipo Akku verwenden müssen Sie den Lipomodus per Jumper (Steckbrücke) aktiv-
ieren. Vor erreichen einer für Ihren Lipoakku schädlichen Unterspannung wird Ihr Regler abschalten.
Nur so wird der Lipo Akku vor Tiefenentladung oder etwaiger Beschädigung durch Tiefenentladung
geschützt! Bei einer Schwelle von 6 V Gesamtspannung wird der Regler abschalten um denAkku nicht
tiefenzuentladen. Sollten Sie einen NiMhAkku verwenden muss dieser Jumper auf NiMh gestellt sein.
Der Regler schaltet dann nicht bei 6 V Gesamtspannung ab sondern erlaubt eine Entladung bis ca.
4 V Gesamtspannung.
Verbinden Sie den Regler mit dem Motor nur über hochwertige Steckkontakte. Stellen Sie sicher,
dass eine gute besonders niederohmige Verbindung vorhanden ist und sorgen Sie für eine gute
Isolierung mittels Schrumpfschlauch. Halten Sie die Verbindung zwischen Motor und Regler, sowie
zwischen Akku und Regler so kurz wie möglich. Nachdem die Hochstrom-Verbindungen hergestellt
sind verbinden Sie den Regler mit dem Empfänger. Stecken Sie das Regleranschlusskabel an den
Empfänger-Gaskanal.
Sollten Sie den Rückwärtsgang des Reglers deaktivieren wollen müssen Sie den Jumper auf disa-
ble stellen. Steht der Jumper auf enable, ist der Rückwärtsgang aktiviert.
GB
1 ON/OFF 2 Battery connector
3 Motor connector 4 Signal wire
Installing and connecting
Position the ESC within the vehicle so that it will be protected from moisture, vibration and impacts
ensuring that sufcient air can circulate to cool the unit. Never wrap the ESC in foam, we recom-
mend mounting the unit to the vehicle using double sided sticky tape and that the switch is located
where it will be protected but is also easily accessible. Please refer to your models instructions for
advice of where to situate these components.
This regulator has two battery modes which will be set with jumpers. If you are using a Lipo battery
this jumper has to be set to Lipo. This function protects the lipo battery against deep discharge and
possible damage due to deep discharge! At a threshold voltage of 6 V total the esc switches autom.
off to safe the battery from under voltage. If you are using a NiMH battery this jumper has to be set
to NiMh. The controller allows a voltage less than 6 V down to 4 V.
Use only high quality connectors ensuring that all soldered joints are sound and check for resist-
ance. Allways make sure that the joints must are well insulated using heat shrink tube to ensure that
a short circuit cannot occur and keep the cables as short as possible. Once the battery pack and
motor are connected put the ESC cable into the throttle output of the receiver.
If you want to disable the backward function just set the jumper to disable. If the jumper is set to
enable the backward function is enabled.
FR
1 ON/OFF 2 Connexion des piles
3 Connexion des motor 4 Câble de commande
Mise en place et branchement
Placez votre régulateur dans la voiture de telle manière que celui-ci soit protégé de toute humidité,
de chocs violents et de vibrations. De plus veillez à ce que celui-ci soit bien refroidi, il ne faut en
aucun l’emballer dans de la mousse par exemple. Il est conseillé de xer le régulateur avec du
ruban adhésif double face dans votre modèle. Fixez l’interrupteur à un endroit bien protégé mais
facilement accessible. Veillez respecter les indications du fabricant de votre modèle.
Au cas où vous utilisez un accu Lipo, vous devez activer le mode Lipo à travers Jumper (pont en
chable). Votre variateur s’éteint ainsi de lui-même avant que votre Accu Lipo n’atteigne une sous-
tension pouvant lui être nuisible. Seulement comme ça l’accu Lipo est protégé de la décharge à fond
ou contre des dégâts par décharge à fond. En cas d’un seuil de 6 V tensions entières le régulateur
éteindra pour ne pas décharger l’accu complètement. Utilisez après coup un accu NiMh, ce bouton
doit être mis en OFF. Dans ce cas le régulateur n’éteint pas à 6 V tensions entières, mais il permet
une décharge jusqu’à 4 V tensions entières environ.
Veillez respecter les indications du fabricant de votre modèle. Branchez le moteur sur le régu-
lateur en veillant à utiliser des contacts de grande qualité, ou soudez directement les câbles
d’alimentations du moteur sur le régulateur. Assurez-vous que la connexion soit de très bonne quali-
té et que l’impédance soit la plus faible possible, isolez l’ensemble avec de la gaine thermorétractab-
le. Gardez la liaison entre le moteur et le régulateur ainsi que entre l’accu et le régulateur aussi court
que possible. Après avoir établie la liaison de puissance il faut branchez le câble de commande du
régulateur sur le récepteur. Branchez celui-ci sur la sortie de la fonction Gaz du récepteur.
Si vous voulez désactiver la marche arrière du variateur, vous devez régler le commutateur sur
“désactivé”. Si le commutateur est réglé sur la position “Activé”, la marche arrière est active.
IT
1 Pulsante ON/OFF 2 Attacco per la batteria
3 Attacco per la motore 4 Cavo die allaciciamento del regolatore
Installazione e collegamento
Installate il variatore nel veicolo al riparo da umidità, colpi e vibrazioni. Creare un buon condotto
di raffreddamento per il regolatore, non avvolgerlo per alcun motivo con gommapiuma o simili.
Applicatelo piuttosto in un punto protetto con due strisce di biadesivo spesso che lo proteggerà da
vibrazioni e da shock.
Fissare l’interruttore in un luogo protetto ma facilmente accessibile. Seguire le istruzioni del produt-
tore del modello..
Se si utilizza una batteria Lipo, é necessario attivare il Lipomodo attraverso il Jumper (connessione
ponticello). Prima di raggiungere la sua tensione minima, il suo regolatore si spegnera. Solo cosi la
batteria Lipo viene protetta del sottocarico o eventuali danni! Sulla soglia di 6 V tensione totale, il
regolatore si spegne per evitare che la batteria si sottocarica. Se si utilizza
una batteria NiMh deve mettere il jumper in posizione NiMh. Il regolatore non si spegne a 6 V di
tensione totale ma permette una scarica di ca. 4 V tensione totale.
Utilizzare solo connettori di alta qualità, assicurandosi che tutti i giunti saldati siano sani e control-
lando la resistenza. Assicurarsi sempre che i giunti siano ben isolati con tubi termorestringenti per
evitare cortocircuiti e mantenere i cavi il più corti possibile. Una volta collegati il pacco batteria e il
motore, inserire il cavo ESC nell’uscita dell’acceleratore del ricevitore.
Se si desidera disabilitare la funzione Indietro è sufciente impostare il ponticello per disabilitare. Se
il ponticello è impostato per abilitare la funzione Indietro è abilitata.
ES
1 Interruptor ON/OFF 2 Conexiones del batería
3 Conexiones del motor 4 Cable de controll
Instalación y conexión
Instalar el variador en el vehículo protegido de la humedad, de los golpes y de las vibraciones. Crear
un buen conducto de refrigeración para el regulador, no lo envuelva con gomaespuma o similar
por ningún motivo. Colóquelo en un lugar protegido con dos tiras de cinta adhesiva espesa que lo
protegerá de las vibraciones y los golpes.
Si está utilizando una batería Lipo, debe activar el Lipomodo a través del Jumper (puente de con-
nexión). Antes de llegar a su minima tension,se va a apagar el regulador. Solo asi la batería lipo está
protegido contra descargas o los daños causados por una descarga profunda! En el umbral de 6 V
de tensión total, el regulador se apaga para no descargar la batería. Si está utilizando una batería
NiMh tienes que poner el Jumper en posicion NiMH. El regulador no se apaga en 6 V de tensión
total pero permite una descarga de unos aprox. 4 voltaje total.
Utilizar sólo conectores de alta calidad, asegurándose de que todas las conexiones soldadas estén
en buen estado y comprobando la resistencia. Asegúrese siempre de que las conexiones estén bien
aisladas con tubos termorretráctiles para evitar cortocircuitos y mantener los cables lo más cortos
posible. Una vez que el pack de baterías y el motor estén conectados, introduzca el cable ESC en
la salida del acelerador del receptor.
Si desea desactivar la función “Atrás”, simplemente congure el puente para que se desactive. Si el
puente está congurado para habilitar, la función “Atrás” está habilitada.
CZ
1 ON/OFF 2 Připojení baterie
3 Připojení motoru 4 Připojení ovladače
Instalace a připojení
Umístěte ovladač do vozidla tak, aby byl chráněn před vlhkostí a silnými nárazy nebo vibracemi.
Navíc dbejte na to, aby byla dobře vychlazená, v žádném případě ji nebalte například do pěnové
gumy. Ovladač je vhodné upevnit ve vozidle oboustrannou lepicí páskou. Upevněte spínač na
chráněném, ale snadno přístupném místě. Postupujte podle pokynů výrobce pro váš model.
Pokud používáte baterii Lipo, musíte aktivovat režim Lipo pomocí propojky. Před dosažením podpětí,
které je škodlivé pro vaši lipo baterii, se váš ovladač vypne. Jedině tak ochráníte baterii Lipo před
hlubokým vybitím nebo jakýmkoli poškozením způsobeným hlubokým vybitím! Při prahu celkového
napětí 6 V se regulátor vypne, aby nedošlo k nadměrnému vybití baterie. Pokud používáte NiMh
baterii, musí být tento jumper nastaven na NiMh. Regulátor se pak nevypne při celkovém napětí 6
V, ale umožňuje vybití až cca. 4V celkové napětí.
Regulátor připojujte k motoru pouze pomocí kvalitních zástrčkových kontaktů. Zajistěte dobré, zv-
láště nízkoimpedanční spojení a zajistěte dobrou izolaci pomocí smršťovací bužírky. Udržujte spo-
jení mezi motorem a ovladačem a mezi baterií a ovladačem co nejkratší. Po provedení připojení
vysokého proudu připojte ESC k přijímači. Zapojte kabel konektoru ESC do kanálu škrticí klapky
přijímače.
Pokud chcete deaktivovat zpátečku ovladače, musíte nastavit propojku na deaktivaci. Pokud je
propojka nastavena na aktivaci, je aktivován zpětný chod.
PL
1 WŁ./WYŁ. 2 Złącze akumulatora
3 Podłączenie silnika 4 Podłączenie sterownika
Instalacja i podłączenie
Umieść sterownik w pojeździe tak, aby był chroniony przed wilgocią oraz silnymi wstrząsami i
wibracjami. Ponadto upewnij się, że jest dobrze schłodzony, w żadnym wypadku nie owijaj go np.
gumą piankową. Zaleca się mocowanie sterownika w pojeździe za pomocą dwustronnej taśmy sam-
oprzylepnej. Zamontuj przełącznik w chronionym, ale łatwo dostępnym miejscu. Postępuj zgodnie z
instrukcjami producenta dla swojego modelu.
Jeśli używasz baterii Lipo, musisz aktywować tryb Lipo za pomocą zworki. Twój kontroler wyłączy
się przed osiągnięciem zbyt niskiego napięcia, które jest szkodliwe dla baterii lipo. Tylko w ten
sposób zabezpieczysz swój akumulator Lipo przed głębokim rozładowaniem lub jakimkolwiek usz-
kodzeniem spowodowanym głębokim rozładowaniem! Przy całkowitym progu napięcia 6 V regulator
wyłącza się, aby zapobiec nadmiernemu rozładowaniu akumulatora. Jeśli używasz baterii NiMh, ta
zworka musi być ustawiona na NiMh. Regulator nie wyłącza się wówczas przy całkowitym napięciu
6 V, ale umożliwia rozładowanie do ok. Całkowite napięcie 4 V.
Podłącz regulator do silnika tylko za pomocą wysokiej jakości styków wtykowych. Zapewnij dobre
połączenie, szczególnie o niskiej impedancji i dobrą izolację za pomocą rurki termokurczliwej. Staraj
się, aby połączenia między silnikiem a sterownikiem oraz między akumulatorem a sterownikiem były
jak najkrótsze. Po wykonaniu połączenia wysokoprądowego podłącz ESC do odbiornika. Podłącz
kabel złącza ESC do kanału przepustnicy odbiornika.
Jeśli chcesz wyłączyć sprzężenie zwrotne kontrolera, musisz ustawić zworkę w pozycji wyłączonej.
Jeśli zworka jest ustawiona w pozycji włączonej, włączony jest bieg wsteczny.
NL
1 AAN/UIT 2 Batterijaansluiting
3 Motoraansluiting 4 Regelaaraansluiting
Installatie en aansluiting
Plaats de controller in uw voertuig zodat deze beschermd is tegen vocht en tegen hevige schokken
of trillingen. Zorg er daarnaast voor dat het goed gekoeld is, het mag in geen geval verpakt zijn
in bijvoorbeeld schuimrubber. Het is raadzaam om de controller in het voertuig te bevestigen met
dubbelzijdig plakband. Bevestig de schakelaar op een beschermde maar goed bereikbare plaats.
Volg de instructies van de fabrikant voor uw model.
Als u een Lipo-batterij gebruikt, moet u de Lipo-modus activeren met een jumper. Voordat je een
onderspanning bereikt die schadelijk is voor je lipo-accu, schakelt je controller uit. Dit is de enige
manier om de Lipo-accu te beschermen tegen diepontlading of schade door diepontlading! Bij een
drempel van 6 V totale spanning schakelt de controller uit om de batterij niet te diep te ontladen. Als
u een NiMh-accu gebruikt, moet deze jumper op NiMh worden gezet. De controller schakelt dan niet
uit bij een totale spanning van 6 V, maar laat een ontlading toe tot ca. 4V totale spanning.
Sluit de besturing alleen met hoogwaardige steekcontacten op de motor aan. Zorg voor een goede,
bijzonder laagohmige verbinding en zorg voor een goede isolatie met krimpkous. Houd de verbind-
ing tussen de motor en controller, en tussen de accu en controller, zo kort mogelijk. Nadat de hoge
stroomverbindingen zijn gemaakt, sluit u de ESC aan op de ontvanger. Steek de ESC-connec-
tordraad in het gaskanaal van de ontvanger.
Als u de achteruitversnelling van de controller wilt deactiveren, moet u de jumper op Uitschakelen
zetten. Als de jumper is ingesteld om in te schakelen, wordt de achteruitversnelling geactiveerd.
5
SK
1 ZAP/VYP 2 Konektor batérie
3 Pripojenie motora 4 Pripojenie ovládača
Inštalácia a pripojenie
Umiestnite ovládač do vozidla tak, aby bol chránený pred vlhkosťou a silnými otrasmi a vibráciami.
Okrem toho dbajte na to, aby bola dobre vychladená, v žiadnom prípade ju neoblepujte napríklad
penovou gumou. Odporúča sa namontovať ovládač do vozidla pomocou obojstrannej lepiacej
pásky. Namontujte spínač na chránené, ale ľahko dostupné miesto. Postupujte podľa pokynov
výrobcu pre váš model.
Ak používate batériu Lipo, musíte aktivovať režim Lipo pomocou prepojky. Váš ovládač sa vypne
pred dosiahnutím príliš nízkeho napätia, ktoré je škodlivé pre lipo batérie. Len tak ochránite vašu
Lipo batériu pred hlbokým vybitím alebo akýmkoľvek poškodením spôsobeným hlbokým vybitím! Pri
celkovom prahu napätia 6 V sa regulátor vypne, aby sa zabránilo nadmernému vybitiu batérie. Ak
používate NiMh batérie, tento jumper musí byť nastavený na NiMh. Regulátor potom nevypína pri
celkovom napätí 6V, ale umožňuje vybitie na celkové napätie cca 4V.
Regulátor pripájajte k motoru iba pomocou kvalitných zástrčkových kontaktov. Zabezpečte dobré
spojenie, najmä nízku impedanciu a dobrú izoláciu pomocou tepelne zmršťovacej hadičky. Snažte
sa, aby spojenia medzi motorom a ovládačom a medzi batériou a ovládačom boli čo najkratšie. Po
vytvorení vysokoprúdového pripojenia pripojte ESC k prijímaču. Pripojte kábel konektora ESC ku
kanálu škrtiacej klapky prijímača.
Ak chcete zakázať spätnú väzbu ovládača, musíte nastaviť prepojku do polohy vypnuté. Ak je pre-
pojka nastavená do zapnutej polohy, je zaradená spiatočka.
DE - ACHTUNG
Ihr Regler ist Spritzwasserfest. Nicht wasserdicht.
Vermeiden Sie also Pfützen die tiefer sind als der Regler im Fahrzeug verbaut ist.
Tauchen Sie den Regler nicht unter Wasser. Nach jedem Betrieb im Nassen muß der
komplette Regler gründlich getrocknet werden. Schäden die durch unsachgemäße
Benutzung, Überlastung oder mangelnde Pege entstanden sind fallen nicht unter
die Gewährleistung.
GB - WARNING
Your controller is Splash-proof. Not waterproof.
Avoid puddles that are higher than the controller is installed in the vehicle. Do not get
the model under water. After each ride in the wet, the complete controller must be
thoroughly dried and lubricate the mechanical components. Damage caused by
improper use overload or lack of maintenance is not covered under warranty.
FR - ATTENTION
Votre régulateur est protégé contre les éclaboussures mais il n’est pas étanche
à l’eau.
Il éviter les aques d‘eau profondes que le régulateur installé dans le véhicule. Ne
plongez pas le régulateur sous l‘eau. Après chaque opération sur le mouillé tout le
régulateur doit être complètement séché. Les dommages causés par une mauvaise
utilisation, de surcharge ou de manque de soins ne sont pas couverts par la garantie.
IT - ATTENZIONE
Il tuo modello è protetto d’antispruzzo. Non impermeabile!
Non guidare in pozzanghere dove l‘acqua è più alta della box ricevente. Non
immergere il regolatore sott‘acqua. Se la ricevente oppure il regolatore all’interno si
bagna, separare immediatamente la rete elettrica e lasciarlo asciugare a sufcienza.
Danni causati da uso improprio o mancanza di manutenzione del modello non sono
coperti dalla garanzia.
ES - ¡Atención!
El modelo está protegido contra salpicaduras de agua, pero no es
impermeable.
Evitar charcos que pueden tener contacto con el regulador montado en el
vehículo. No sumerja el regulador bajo el agua. Después de cada giro en mojado,
el completo regulador se debe estar completamente seco. Daños y accidente
causado por un uso inadecuado o falta de mantenimiento no está cubierto por la
garantía.
CZ - NEBEZPEČÍ
Váš ovladač je odolný proti stříkající vodě. Není vodotěsný.
Vyhněte se tedy loužím, které jsou hlubší, než je ovladač nainstalovaný ve vozidle.
Neponořujte ovladač do vody. Po každé operaci za mokra je nutné celý ovladač
důkladně vysušit. Na škody způsobené nesprávným používáním, přetěžováním
nebo nedostatečnou péčí se záruka nevztahuje.
PL - NIEBEZPIECZEŃSTWO
Twój kontroler jest odporny na zachlapania. Nie wodoodporny.
Dlatego unikaj kałuż, które są głębsze niż sterownik jest zainstalowany w
pojeździe. Nie zanurzaj kontrolera w wodzie. Po każdej pracy na mokrym cały
sterownik należy dokładnie wysuszyć. Uszkodzenia spowodowane niewłaściwym
użytkowaniem, przeciążeniem lub brakiem pielęgnacji nie są objęte gwarancją.
NL - GEVAAR
Je controller is spatwaterdicht. Niet waterdicht.
Vermijd dus plassen die dieper zijn dan de controller in het voertuig is geïnstalleerd.
Dompel de controller niet onder in water. Na elke bewerking op nat wegdek moet de
gehele controller grondig worden gedroogd. Schade veroorzaakt door oneigenlijk
gebruik, overbelasting of gebrek aan zorg vallen niet onder de garantie.
SK - NEBEZPEČENSTVO
Váš ovládač je odolný voči striekajúcej vode. Nie je vodotesný.
Vyhnite sa preto kalužám, ktoré sú hlbšie, ako je ovládač nainštalovaný vo
vozidle. Neponárajte ovládač do vody. Po každej operácii za mokra je potrebné celý
ovládač dôkladne vysušiť. Na škody spôsobené nesprávnym používaním,
preťažením alebo nedostatočnou starostlivosťou sa nevzťahuje záruka.
DE
Inbetriebnahme des Reglers
Bei der Inbetriebnahme des Reglers gehen Sie bitte wie folgt vor:
• Schalten Sie den Sender ein und stellen Sie sicher, dass die Servowegeinstellung für den
Gaskanal auf genau +/- 100% eingestellt ist.
• Schließen Sie den Akku an, stellen Sie dabei sicher, dass der Akku richtig gepolt ange-
schlossen wird und der Regler noch ausgeschaltet ist.
• Schalten Sie die Empfangsanlage ein.
• Sobald der Akku angeschlossen ist, der Regler scharf. Gehen Sie sehr umsichtig vor, es
bestehen erhebliche Verletzungsgefahren durch plötzlich anlaufende Motoren.
• Verbinden Sie den Akku erst direkt vor dem Start mit dem Regler und lösen Sie nach jedem
Einsatz den Akku sofort vom Regler.
• Führen Sie vor dem ersten Einsatz mit einem Modell stets einen Reichweitentest durch. Dabei
prüfen Sie in allen Lastbereichen (Vollgas, Halbgas und Leerlauf), ob irgendwelche Störungen
auftreten. Achten Sie auch auf die angeschlossenen Servos. Ein Zittern der Servos oder unge-
steuerte Ausschläge deuten auf Störungen hin.
• Wenn Sie die Bremse aktivieren wollen, während sich das Fahrzeug vorwärts bewegt und der
Gassteuerknüppel sich in der Vorwärtsposition bendet, müssen Sie den Knüppel schnell
komplett in die Rückwärtsposition bewegen. Um rückwärts zu fahren bewegen Sie den Steuer-
knüppel in die Neutralposition, warten einen kurzen Moment ab und bewegen dann den
Knüppel über diesen Punkt hinaus in die gewünschte Rückwärtsposition.
GB
Using your controller
To operate the ESC, proceed as follows:
• Switch on your transmitter and ensure that the throw for the throttle channel is set to +/- 100%.
• Ensure that the receiver switch is in the OFF position and connect a battery pack ensuring the
correct polarity (+ and -).
• Switch the receiver system ON.
• Once a battery is connected the system is ‘live‘ and extreme caution must be exercised to
prevent injury due to the motor suddenly starting to turn.
• Do not connect the battery pack until directly before operating the model and disconnect the
pack immediate after use.
• Conduct a range test before running the model for the rst time. This test should be carried out
at full, half and low throttle and if the servos jitter or make uncontrolled movements do not
operate the model until the reason for the interference has been established and corrected.
• When the vehicle is being driven forwards, pulling the throttle back past the neutral position will
cause the vehicle to brake. To make the vehicle then reverse, the throttle stick must rst be
moved back to the neutral position for a short period and then the model will reverse.
FR
Utilisation de votre régulateur
Procédez comme suit pour l’utilisation de votre régulateur:
• Mettez en marche l’émetteur et assurez-vous que le réglage du servo des gaz est bien +/-
100%.
• Branchez l’accu en vous assurant que la polarité est bien respectée et que le régulateur est
toujours éteint.
• Mettez en marche le système de réception
• Dès que l’accu est branché le régulateur est activé. Procédez avec prudence, il y a danger de
blessure par mise en marche intempestivement du moteur.
• Branchez l’accu uniquement juste avant l’utilisation de votre modèle et, une fois terminé,
débranchez celui-ci directement du régulateur.
• Avant d’utiliser votre modèle, effectuer un test de porté avec votre modèle. Par ce biais véri ez
la portée dans toutes les congurations (plein gaz, mi-gaz et ralenti), et recherchez les
éventuelles perturbations. Pour cela surveillez la réaction des servos branchés. Un
tremblement du servo ou une position n de course atteste la présence de perturbations.
• Si vous souhaitez activer la fonction frein, pendant que vous faite aller en avant votre voiture et
que la gâchette de gaz se trouve en position marche avant, il faut placer rapidement celle-ci en
n de course pour la marche arrière. Pour effectuer une marche arrière, bougez la gâchette de
gaz en position de neutre, attendez un court moment puis bougez celleci en position marche
arrière an d’atteindre la vitesse de marche arrière souhaitée.
IT
Attivazione del regolatore
Nell’attivazione procedete come segue:
• Accendere la trasmittente e assicurarsi che la regolazione della corsa del canale gas è
impostata esattamente su + / - 100%.
• Collegare la batteria, controllare che la batteria è collegata con la polarità corretta e che il
regolatore non sia ancora acceso.
• Accendere la ricevente.
• Quando la batteria è collegata, il regolatore è pronto. Siate molto cauti, ci sono rischi
signicativi di lesioni, tramite la partenza di motori ad improvviso.
• Collegare la batteria immediatamente prima dell´inizio d´uso con il regolatore e rimuovere
subito dopo l´uso.
• Prima dell’utilizzo del modello, fare un test del raggio d´azione. Cosi controllate tutti i campi
d´uso (tutto gas, a mezzo gas e minimo), se non vi è alcuna interferenza. Prestare inoltre
attenzione ai servi. Un vibrazione dei servi o deviazioni non controllate, segnala inoltre dei
guasti.
• Se si desidera attivare il freno, mentre il veicolo è in movimento in avanti e lo stick del gas è in
posizione avanzata, è necessario spostare lo stick velocemente e invertire la posizione. Per
mettere la retro-marcia, spostare lo stick in posizione neutra, attendere qualche istante e poi
portare lo stick di là di questo punto, nella posizione inversa desiderata.
6
ES
Uso del Regulador
Para el uso del regulador, siga los siguientes pasos:
• Encienda la emisora y asegúrese de que el recorrido del canal del gas (acelerador) está
programado exactamente para un re corrido del +/- 100%.
• Conecte la batería, con el interruptor del receptor todavía apagado, asegurándose de la
polaridad correcta.
• Encienda el interruptor del receptor.
• Con la batería conectada, el regulador esta “vivo”, así que hay que tener mucho cuidado para
evitar posibles lesiones debido a motores que arrancan repentinamente.
• No conecte la batería con el regulador hasta directamente antes de usar el modelo y vuelva a
desconectarla inmediatamente después del uso del modelo.
• Antes del primer uso en un modelo, realice una comprobación de alcance. Haga esto con el
acelerador a tope, a medio gas y al ralentí y compruebe que no haya ningún tipo de
interferencias. Fíjese también en los servos conectados. Temblores en los servos u
oscilaciones no deseadas también son un indicio de interferencias.
• Si quiere activar el freno mientras el modelo va avanzando, teniendo la palanca del acelerador
hacia delante, tiene que cambiar la palanca de golpe totalmente hacia atrás. Para andar hacia
atrás, tiene que mover la palanca del acelerador a la posición neutral, esperar un momento, y
después mover la palanca hacia atrás hasta el punto deseado.
CZ
Uvedení regulátoru do provozu
Při uvádění regulátoru do provozu postupujte následovně:
• Zapněte vysílač a ujistěte se, že je nastavení dráhy serva kanálu plynu nastaveno přesně na
+/- 100 %.
• Připojte baterii a ujistěte se, že je baterie je zapojen se správnou polaritou a regulátor je stále
vypnutý.
• Zapněte přijímací systém.
• Po připojení baterie je ovladač aktivován. Postupujte velmi opatrně, hrozí značné nebezpečí
úrazu náhlým startováním motorů.
• Baterii připojujte k ovladači pouze přímo před spuštěním a odpojte baterii od ovladače
bezprostředně po každém použití.
• Před prvním použitím modelu vždy proveďte test dosahu. Zkontrolujte ve všech rozsazích
zatížení (plný plyn, poloviční plyn a volnoběh), zda se nevyskytují nějaké závady. Pozor také
na připojená serva. Chvění serv nebo nekontrolované výchylky signalizují poruchu.
• Pokud chcete aktivovat brzdu, když se vozidlo pohybuje vpřed a páka plynu je v přední poloze,
musíte páku rychle sešlápnout zcela přesuňte do opačné polohy. Chcete-li couvat, přesuňte
páku do neutrálu, chvíli počkejte a poté přesuňte páku za tento bod do požadované polohy
vzad.
PL
Uruchomienie regulatora
Podczas uruchamiania sterownika należy postępować w następujący sposób:
• Włącz nadajnik i upewnij się, że ustawienie skoku serwa kanału przepustnicy jest ustawione
dokładnie na +/- 100%.
• Podłącz akumulator i upewnij się, że akumulator jest podłączony zgodnie z polaryzacją, a
regulator jest nieruchomy wyłączony.
• Włącz system odbiorczy.
• Po podłączeniu akumulatora sterownik zostaje uruchomiony. Postępuj bardzo ostrożnie, istnieje
poważne niebezpieczeństwo obrażenia spowodowane nagłym uruchomieniem silnika.
• Podłącz akumulator do sterownika tylko bezpośrednio przed uruchomieniem i odłącz
akumulator od sterownika bezpośrednio po każdym użyciu.
• Zawsze przeprowadzaj test zasięgu przed pierwszym użyciem modelu. Sprawdź na wszystkich
zakresach obciążenie (pełna przepustnica, połowa przepustnicy i bieg jałowy), czy występują
jakieś usterki. Uważaj też do podłączonych serwomechanizmów. Wibracje serwomechanizmów
lub niekontrolowane odchylenia wskazują na awarię.
• Jeśli chcesz zaciągnąć hamulec, gdy pojazd porusza się do przodu, a przepustnica jest w
pozycji jazdy do przodu, musisz szybko wcisnąć dźwignię do końca i przesunąć ją w przeciwne
położenie. Przejdź do tyłu dźwignię w położeniu neutralnym, odczekać chwilę, a następnie
przesunąć dźwignię poza ten punkt do żądanej pozycji plecy.
NL
Inbedrijfstelling van de regelaar
Ga bij de inbedrijfstelling van de regelaar als volgt te werk:
• Schakel de zender in en zorg ervoor dat de instelling van de servoslag van het gaskanaal
precies op +/- 100% staat.
• Sluit de batterij aan, zorg ervoor dat de batterij met de juiste polariteit is aangesloten en dat de
controller nog steeds is uitgeschakeld.
• Schakel het ontvangstsysteem in.
• Zodra de batterij is aangesloten, is de controller gewapend. Ga zeer voorzichtig te werk, er
bestaat een aanzienlijk risico op letsel door plotseling startende motoren.
• Sluit de accu alleen direct voor het starten aan op de controller en koppel de accu direct na elk
gebruik los van de controller.
• Voer altijd een bereiktest uit voordat u een model voor de eerste keer gebruikt. Controleer in
alle belastingsbereiken (volgas, halfgas en stationair) of er storingen optreden. Let ook op de
aangesloten servo‘s. Trillingen van de servo‘s of ongecontroleerde uitwijkingen wijzen op
storingen.
• Als u wilt remmen terwijl het voertuig vooruit rijdt en de gashendel in de voorwaartse stand
staat, moet u de gashendel snel helemaal in de achteruitstand zetten. Om achteruit te rijden,
zet u de stick in de neutrale stand, wacht u even en beweegt u de stick vervolgens voorbij dat
punt naar de gewenste achteruitpositie.
SK
Uvedenie regulátora do prevádzky
Pri uvádzaní regulátora do prevádzky postupujte nasledovne:
• Zapnite vysielač a uistite sa, že je nastavenie dráhy serva kanálu plynu nastavené presne na
+/- 100%.
• Pripojte batériu a uistite sa, že je batéria je zapojený so správnou polaritou a regulátor je stále
vypnutý.
• Zapnite prijímací systém.
• Po pripojení batérie je ovládač aktivovaný. Postupujte veľmi opatrne, hrozí značné
nebezpečenstvo úrazu náhlym štartovaním motorov.
• Batériu pripájajte k ovládaču iba priamo pred spustením a odpojte batériu od ovládača
bezprostredne po každom použití.
• Pred prvým použitím modelu vždy vykonajte test dosahu. Skontrolujte vo všetkých rozsahoch
zaťaženie (plný plyn, polovičný plyn a voľnobeh), či sa nevyskytujú nejaké závady. Pozor tiež
na pripojené servá. Chvenie serv alebo nekontrolované výchylky signalizujú poruchu.
• Ak chcete aktivovať brzdu, keď sa vozidlo pohybuje vpred a páka plynu je v prednej polohe,
musíte páku rýchlo zošliapnuť úplne presuňte do opačnej polohy. Ak chcete cúvať, presuňte
páku do neutrálu, chvíľu počkajte a potom presuňte páku za tento bod do požadovanej polohy
vzad.
DE
Konguration des Reglers
Der Speedregler kalibriert sich automatisch auf das Sendersignal. Dazu muß der Trimmregler des
Gaskanals am Sender auf Neutral stehen. Schalten Sie erst den Sender ein und dann den Regler.
Der Speedregler quittiert die Kalibrierung mit einer kurzen Melodie und ist anschließend betriebsbe-
reit. Erkennt der Speedregler kein eindeutiges Signal oder bendet sich der Trimmregler nicht auf
Neutral initialisiert sich der Speedregler nicht.
GB
Conguring your controller
The speed controller automatically calibrates itself to the transmitter signal. For this, the trim button
of the gas channel at the transmitter must be set to neutral. Turn on the transmitter and then the
speed controller. The speed controller signals the calibration with a short melody and is ready for
use. In case the speed controller has no clear signal or the trim control is not set to neutral, the speed
controller will not initialize.
FR
Conguration du régulateur
Le régulateur Speed se calibre automatiquement en fonction du signal d’émission. Pour cela il faut
que le trim du canal gaz de l’émetteur en position de neutre. Mettez en marche l’émetteur en premier
puis le régulateur. Votre régulateur con rme la calibration avec une petite mélodie puis celui-ci est
utilisable. Si votre régulateur Speed ne reconnaît pas un signal ou si le trim ne se trouve pas en
position de neutre, celui-ci ne s’initialise pas.
IT
Congurazione del regolatore
Il regolatore di velocità calibra automaticamente il segnale del trasmettitore. Per ottenere questo,
il controllo trim del canale gas del trasmettitore deve essere in posizione neutro. Accendere prima
la trasmettente e dopo il regolatore. Quando il regolatore di velocità, ha riconosciuto la taratura, lo
segnala con una breve melodia ed è pronto per l´uso. Se il regolatore non rileva un chiaro segnale
o non si trova in una posizione neutra, il regolatore non s’inizializza.
ES
Conguración del Regulador
El regulador se calibra automáticamente con la señal de la emisora. Para esto el trim (ajuste no)
del acelerador de la emisora tiene que estar en posición neutral. Encienda primero la emisora y
después el regulador. El regulador conrma la calibración automática con una melodía corta y
después se encuentra listo para funcionar. Si el regulador no reconoce una señal clara o si el trim
del acelerador no esta en posición neutral, el regulador no se iniciará.
CZ
Kongurace ovladače
Regulátor rychlosti se automaticky zkalibruje na signál vysílače. K tomu musí být ovladač trimování
kanálu plynu na vysílači v neutrální poloze. Nejprve zapněte vysílač a poté ovladač. Regulátor
otáček potvrdí kalibraci krátkou melodií a je připraven k použití. Pokud regulátor rychlosti nerozpoz-
ná jasný signál nebo pokud není regulátor trimu v neutrálu, regulátor rychlosti se neinicializuje.
PL
Konguracja kontrolera
Kontroler prędkości kalibruje się automatycznie do sygnału z nadajnika. W tym celu regulator tryme-
ra kanału przepustnicy na nadajniku musi znajdować się w położeniu neutralnym. Najpierw włącz
nadajnik, a następnie sterownik. Regulator prędkości potwierdza kalibrację krótką melodią i jest
gotowy do użycia. Jeśli kontroler prędkości nie rozpoznaje czystego sygnału lub jeśli kontroler try-
mowania nie jest w położeniu neutralnym, kontroler prędkości nie zostanie zainicjowany.
NL
Conguratie van de besturing
De snelheidsregelaar kalibreert zichzelf automatisch op het zendersignaal. Hiervoor moet de gas-
kanaaltrimregelaar op de zender in de neutrale stand staan. Schakel eerst de zender in en daarna
de controller. De snelheidsregelaar bevestigt de kalibratie met een korte melodie en is dan klaar
voor gebruik. Als de snelheidsregelaar geen duidelijk signaal herkent of als de trimcontroller niet in
neutraal staat, initialiseert de snelheidsregelaar niet.
SK
Kongurácia ovládača
Regulátor rýchlosti sa automaticky kalibruje na signál vysielača. Na tento účel musí byť ovládač tri-
movania kanála plynu na vysielači v neutrálnej polohe. Najprv zapnite vysielač, potom ovládač. Re-
gulátor otáčok potvrdí kalibráciu krátkou melódiou a je pripravený na použitie. Ak regulátor rýchlosti
nerozpozná jasný signál alebo ak regulátor trimu nie je v neutrálnej polohe, regulátor rýchlosti sa
neinicializuje.
7
DE - Entsorgungshinweise
Elektrogeräte dürfen nicht im Hausmüll entsorgt werden, sondern müssen getrennt entsorgt wer-
den. Sie sind verpichtet, die Batterien – wenn möglich – herauszunehmen und das Elektroaltgerät
bei den kommunalen Sammelstellen abzugeben. Sollten sich personenbezogene Daten auf dem
Elektroaltgerät benden, müssen diese von Ihnen selbst entfernt werden.
GB - Disposal restrictions
Electrical appliances must not be disposed of in domestic waste and must be disposed of separately.
You are obliged to take out the batteries, if possible, and to dispose of the electrical equipment at
the communal collection points. Should personal data be stored on the electrical appliance you must
remove them by yourself.
FR - Consignes de recyclage
Les appareils électriques ne doivent strictement pas être jetés dans les ordures ménagères, mais
doivent être jetés séparément. Vous êtes tenues – dans la possibilité – de déposer vos piles et
appareils électriques dans les centres communaux de collectes. Si des informations personnelles
sont présents sur les appareils électriques, celles-ci doivent être retirés par vous-même avant tout
élimination du produit.
IT - Istruzioni per lo smaltimento
Apparecchi elettrici non devono essere smaltiti nei riuti domestici, ma devono essere smaltiti se-
paratamente. Siete obbligati di rimuovere le batterie e portare l´apparecchi elettrici vecchi ai punti di
raccolta comunali. Qualora ci sono dati personali sul apparecchio elettrico, devono essere rimossi
da voi stessi.
ES - Notas sobre el reciclado
Aparatos eléctricos no pueden desecharse en la basura doméstica, pero se deben desechar de
forma separada. Usted está obligado, a quitar las baterías y llevar los aparatos eléctricos viejos en
los puntos de recogida comunales. En caso de que hay datos personales en el aparato eléctrico se
deben remover de usted mismo.
CZ - Informace týkající se likvidace
Elektrická zařízení se nesmí vyhazovat spolu s komunálním odpadem, ale musí být likvidována
zvlášť. Uživatel je povinen - pokud je to možné - odstranit baterii a odevzdat elektrické zařízení
do sběru odpadů. Pokud se na zařízení nacházejí osobní údaje, ty je nutné odstranit samostatně.
PL - Informacje dotyczące utylizacji
Urządzeń elektrycznych nie wolno wyrzucać ze śmieciami z gospodarstw domowych, lecz należy
usuwać je oddzielnie. Użytkownik jest zobowiązany– jeżeli jest to możliwe – do wyciągnięcia ba-
terii oraz do oddania urządzenia elektrycznego w komunalnym punkcie zbiórki odpadów. Jeżeli na
urządzeniu znajdują się dane osobowe, wtedy należy usunąć je samodzielnie.
NL - Informatie over de afvalverwerking
Elektrische apparatuur mag niet met het gewone huisvuil weggegooid worden, maar moet apart
worden verwijderd. De eindgebruiker is verplicht- indien mogelijk - om de accu te verwijderen en
elektrische apparatuur naar stedelijk afvalinzameling te leveren. Staan op het apparaat de persoon-
lijke gegevens dan moeten ze zelfstandig worden verwijderd.
SK - Informácie týkajúce sa likvidácie
Elektrické zariadenia sa nesmú vyhadzovať spolu s komunálnym odpadom, ale musia byť likvidova-
né zvlášť. Užívateľ je povinný – ak je to možné – odstrániť batériu a odovzdať elektrické zariadenie
do zberu odpadov. Ak sa na zariadení nachádzajú osobné údaje, tie je nutné odstrániť samostatne.
Irrtum und technische Änderungen vorbehalten. Copyright JAMARA e.K. 2023
Kopie und Nachdruck, auch auszugsweise, nur mit Genehmigung von JAMARA e.K.
All rights reserved. Copyright JAMARA e.K. 2023
Copying or reproduction in whole or part, only with the expressed permission of JAMARA e.K.
JAMARA e.K.
Inh. Manuel Natterer
Am Lauerbühl 5 - DE-88317 Aichstetten
Tel. +49 (0) 75 65/94 12-0 - Fax +49 (0) 75 65/94 12-23
[email protected] ● www.jamara.com
Service - Tel. +49 (0) 75 65/94 12-777
service@ jamara.com
DE - Servicehändler
GB - Service centre
FR - Revendeur de service
IT - Centro assistenza
ES - Servicio asistencia
CZ - Servisní centrum
PL - Partner serwisowy
NL - Servicepartner
SK - Servisný partner
Reitter Modellbau Versand
Patricia Reitter
Degerfeldstrasse 11
DE-72461 Albstadt
Tel +49 (0) 7432 9802700
Fax +49 (0) 7432 2009594
Mail [email protected]
Web www.modellbauversand.de DE
Mooser T-Trade
Thomas Mooser
Bürgermeister-Koch-Str. 32a
DE-82178 Puchheim
Tel +49 (0) 89 1792 9867
Fax +49 (0) 89 1792 9869
Mail [email protected]
Web www.mooser-t-trade.de DE
Janus Trade D.O.O.
Distributor Jamara for Slovenia
Koroška cesta 53c
SI-4000 Kranj
Mail [email protected]
Web www.janustrade.si SI
JAMARA e.K.
Manuel Natterer
Am Lauerbühl 5
DE-88317 Aichstetten
Tel +49 (0) 7565 9412-0
Fax +49 (0) 7565 9412-23
Mail [email protected]
Web www.jamara.com EU
Modellbau Zentral
Peter Hofer
Bresteneggstrasse 2
CH-6460 Altdorf
Tel +41 79 429 62 25
Mobil +41 41 870 02 13
Mail [email protected]
Web www.modellbau-zentral.ch CH
PenTec s.r.o.
Distributor Jamara for Czech Republic and Slovakia
Veleslavínská 30/19
CZ-162 00 Praha 6
Tel +420 235 364 664
Mobil +420 739 075 380
Mail servis@topdrony.cz
Web www.topdrony.cz CZ
Viva-net d.o.o.
Distributor Jamara for Croatia
Ante Topic - Mimare 8
HR-10000 Zagreb-Susedgrad
Mail [email protected]
Web www.viva-net.hr HR
Nettrade Kft.
Distributor Jamara for Hungary
1033 Budapest, Hévízi út 3/b
Tel +36 30 664 3835
Mail [email protected]
HU

This manual suits for next models

1

Other Jamara Controllers manuals

Jamara Speed controller CRB60WP User manual

Jamara

Jamara Speed controller CRB60WP User manual

Jamara CR40EP User manual

Jamara

Jamara CR40EP User manual

Jamara COOL RUNNING 081458 User manual

Jamara

Jamara COOL RUNNING 081458 User manual

Jamara COOL RUNNING 081458 User manual

Jamara

Jamara COOL RUNNING 081458 User manual

Jamara COOL RUNNING 081458 User manual

Jamara

Jamara COOL RUNNING 081458 User manual

Jamara Xetronic User manual

Jamara

Jamara Xetronic User manual

Jamara COOL RUNNING 081458 User manual

Jamara

Jamara COOL RUNNING 081458 User manual

Jamara COOL RUNNING 081458 User manual

Jamara

Jamara COOL RUNNING 081458 User manual

Popular Controllers manuals by other brands

TERSUS TC50 user manual

TERSUS

TERSUS TC50 user manual

SEW-Eurodrive EMS operating manual

SEW-Eurodrive

SEW-Eurodrive EMS operating manual

Cooper S280-15-1 Maintenance instructions

Cooper

Cooper S280-15-1 Maintenance instructions

York AMR01M installation manual

York

York AMR01M installation manual

Pixlip 410164 user manual

Pixlip

Pixlip 410164 user manual

OJ Electronics OSA4-10 instructions

OJ Electronics

OJ Electronics OSA4-10 instructions

LTH Electronics MTD75 Operation guide

LTH Electronics

LTH Electronics MTD75 Operation guide

Honeywell Spyder 5 WEB-RxxN Series installation guide

Honeywell

Honeywell Spyder 5 WEB-RxxN Series installation guide

controlair 350 Series Installation, operation and maintenance instructions

controlair

controlair 350 Series Installation, operation and maintenance instructions

ABB PSR manual

ABB

ABB PSR manual

Leuze MSI 200 user manual

Leuze

Leuze MSI 200 user manual

AMALGAMATED INSTRUMENT RM4-LN Operation & instruction manual

AMALGAMATED INSTRUMENT

AMALGAMATED INSTRUMENT RM4-LN Operation & instruction manual

SOMFY SKYMAX animeo WM/DRM 220-240 V AC installation guide

SOMFY

SOMFY SKYMAX animeo WM/DRM 220-240 V AC installation guide

Phasefale JouleAlarm manual

Phasefale

Phasefale JouleAlarm manual

Zeck Audio FOCUS 20CT Service manual

Zeck Audio

Zeck Audio FOCUS 20CT Service manual

Anaheim Automation MDC100-050101USB user guide

Anaheim Automation

Anaheim Automation MDC100-050101USB user guide

ANTEK ECE10CM Series Technical documentation

ANTEK

ANTEK ECE10CM Series Technical documentation

Morningstar ProStar MPPT Series quick start guide

Morningstar

Morningstar ProStar MPPT Series quick start guide

manuals.online logo
manuals.online logoBrands
  • About & Mission
  • Contact us
  • Privacy Policy
  • Terms and Conditions

Copyright 2025 Manuals.Online. All Rights Reserved.