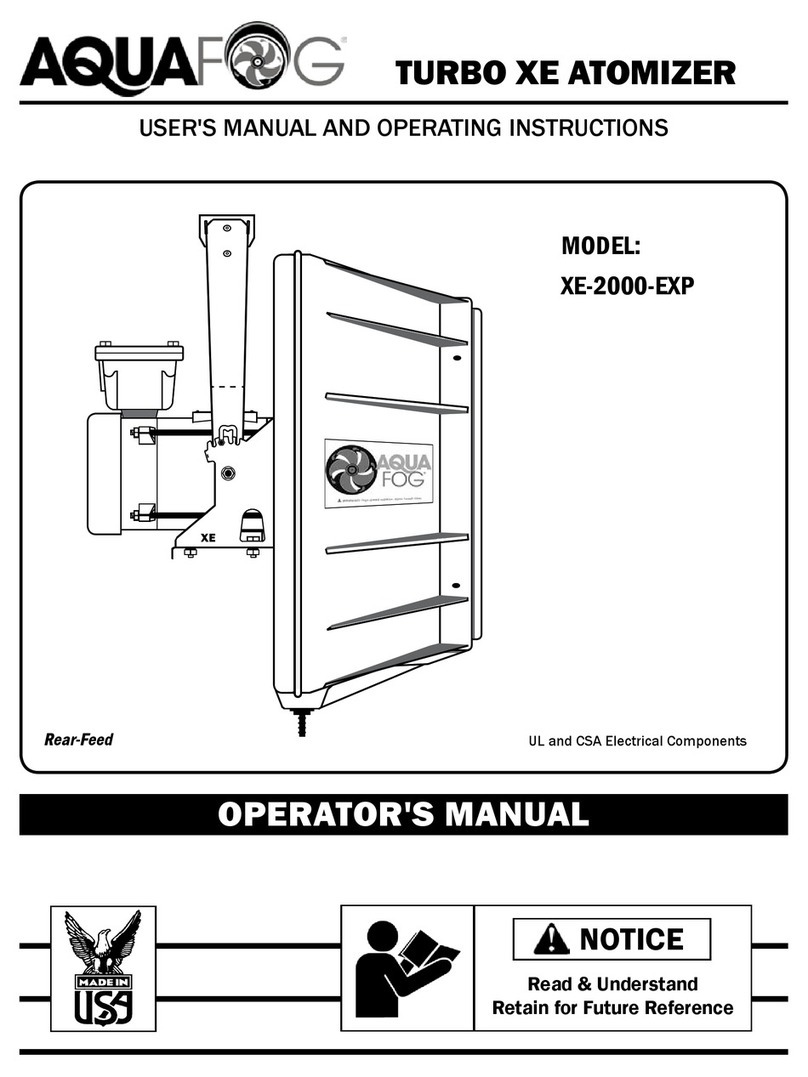
Jaybird Aquafog GT-500 Manual

GT 500
MODEL
o115V 50/60Hz
o230V 60Hz
o240V 50Hz
Read & Understand
Retain for Future Reference
GT-500 ATOMIZER
USER'S MANUAL AND OPERATING INSTRUCTIONS
OPERATOR'S MANUAL
UL and CSA Electrical Components
NOTICE
GT

General Safety . . . . . . . . . . . . . . . . . . . . . . . .
Common Setups . . . . . . . . . . . . . . . . . . . . .
Placement . . . . . . . . . . . . . . . . . . . . . . . .
Unpacking/ Installation . . . . . . . . . . . . . . . .
Pivot/ Utilities . . . . . . . . . . . . . . . . . . . . . . . .
Power Connection . . . . . . . . . . . . . . . . . . . . .
Operation . . . . . . . . . . . . . . . . . . . . . . . . . .
Troubleshooting . . . . . . . . . . . . . . . . .
GT 500 Exploded View . . . . . . . . . . .
Oscillator Exploded View . . . . . . . . . . . . . .
Part Identication List . . . . . . . . . . . . . . . .
Maintenance . . . . . . . . . . . . . . . . . . . . . . . .
Warranty . . . . . . . . . . . . . . . . . . . . . . . . . . .
2
PAGE
3
4
5 - 6
7
8
9
10
11 - 12
13 - 14
15
16
17
18
DESCRIPTION
Aquafog units are intended to condition large
volumes of air using water or other non-hazardous
liquids at air temperatures between 31ºF and 160ºF.
Any other use of these units will void the warranty
and the manufacturer will not be responsible for
problems or damages resulting from misuse.
Safety Guidelines
This manual contains very important information.
This information will help ensure SAFETY and
PREVENT EQUIPMENT PROBLEMS. Use these
symbols to understand safety guidelines.
DANGER DANGER INDICATES AN
IMMINENTLY HAZARDOUS
SITUATION WHICH, IF NOT AVOIDED, WILL RESULT IN
DEATH OR SERIOUS INJURY.
WARNING INDICATES A
POTENTIALLY HAZARDOUS
SITUATION WHICH, IF NOT AVOIDED, COULD RESULT IN
DEATH OR SERIOUS INJURY.
CAUTION INDICATES A
POTENTIALLY HAZARDOUS
SITUATION WHICH, IF NOT AVOIDED, MAY RESULT IN
MINOR OR MODERATE INJURY.
NOTICE INDICATES IMPORTANT
INFORMATION, THAT IF NOT
FOLLOWED, MAY CAUSE DAMAGE TO EQUIPMENT.
TABLE OF CONTENTS
WARNING
CAUTION
NOTICE
Notes

3
9. Keep ngers away from a running unit;
fast moving and hot parts will cause injury
and/or burns.
10. If the equipment starts to vibrate abnormally,
STOP the motor and check immediately for
the cause. Vibration is generally an indication
of trouble.
Fogging Precautions
DANGER
A motionless atomizer may
appear safe, but its blade
could suddenly begin high-
speed rotation without
warning as a result of
control programming.
When GT 500 are automated by controls,
warning signs should be posted near the high-
speed equipment.
Disconnect and lock out power source to inspect
or service the unit.
GENERAL SAFETY
Since the GT 500 uses high-speed components
to atomize liquids, the following safety precautions
must be observed at all times:
1. Read all manuals included
with this product. Be familiar
with the product and controls.
2. Follow United States
Environmental Protection Agency (EPA)
guidelines and regulations when fogging
pesticide or chemical solutions.
3. Follow all local electrical and safety codes
as well as the United States National
Electrical Codes (NEC) and Occupational Safety
and Health Act (OSHA).
4. Only persons well acquainted with these
rules of safe operation should be allowed to
use the atomizer.
5. Keep visitors away and NEVER allow children in
the work area.
6. Before each use, inspect blade assembly
and electrical components for signs of damage,
deterioration, weakness or leakage. Repair or
replace defective items before using.
7. Check all fasteners at frequent intervals for
proper tightness.
MOTORS, ELECTRICAL EQUIPMENT AND
CONTROLS CAN CAUSE ELECTRICAL
ARCS THAT WILL IGNITE FLAMMABLE
LIQUID OR GAS. NEVER OPERATE OR
REPAIR IN OR NEAR FLAMMABLE LIQUID OR GAS.
NEVER STORE FLAMMABLE LIQUIDS OR GASES IN THE
VICINITY OF THE ATOMIZER.
DO NOT ATOMIZE
FLAMMABLE MATERIALS.
1. Humidity and cold air are
two common asthma triggers.
Asthmatic people working
with this equipment need to
be made aware of the risk.
2. When atomizing toxic chemicals, follow the
instructions provided by the chemical
manufacturer.
NEVER OPERATE THE GT 500
WITHOUT THE SAFETY GUARD
IN PLACE IF THE UNIT IS LOWER THAN SEVEN FEET ABOVE
WORKING HEIGHT.
WARNING
WARNING
DANGER
HIGH-SPEED ROTATION
4
COMMON SETUPS
Submersible Pump with head height
rating exceeding fan installation height.
Atomized Solution
7'
GT 500s perform best when mounted
up high. In addition, OSHA regulations
allow fans to be unguarded if
mounted 7 feet above working height.
Removal of the front
guard may produce drier
results, especially when
operating at higher
fogging outputs.
Metering
Pump
Odor Control
Concentrate
Metering pump connects directly to the
GT 500 (usually dosing concentrated
product at about 1 GPH or less).
Flowmeter panel is not required.
Atomized Product
An optional controller
would operate both the
Metering Pump and GT
500 simultaneously.
►
Automated Control
System
GT 500s can also be
set up to do Pesticide/
Fungicide treatments.
Disconnect and bypass
the Flowmeter Panel.
Submersible pump and 1/4 Turn
Valve (not included) connects and
feeds the GT 500 at a low rate (about
3 GPH) suitable for fumigation.
Head
Height
Pre-mixed solution
1/4 Turn
Ball Valve
Chemical Feeder
Pesticide/ Fungicide
(Liquid Concentrate)
Chemical Feeder doses
concentrate into fresh water
going through GT 500's
Flowmeter Panel (usually at
about 5 GPH or less).
Atomized Product
Flowmeter
Panel
Pressurized Water Supply
Atomized Water or
Chemical Solution
1/4 Turn
Ball Valve
Captured rainwater or pre-mixed
chemical solution (located above GT
500). A ball valve is used to start or
stop the ow. Fogging output volume
is dependent on height and mass of
overhead supply.
3/8 Feed tubing
recommended.
Flowmeter Panel
cannot be used.
GT 500s are also usually connected to
automated control panels with water solenoids.
However, if planning to operate the unit
manually (no control) and with a limited
drainage area, adding a water solenoid will
provide security. During power outages, the ow
of water will shut off along with the unit.
Atomized Water
Flowmeter Panel (usually
mounted at lower height
for easy monitoring)
Pressurized Water Supply
Water Solenoid from Control
Panel or controlled by On/Off
switch (optional).
Tee
CHEMICAL INJECTION FEED
SUBMERSIBLE PUMP FEED
7 FEET OR HIGHER WATER FEED (ordinary 30 - 70 PSI)
GRAVITY FEED METERING PUMP FEED
GT
AQUA
FOG
GT
AQUA
FOG
GT
AQUA
FOG
GT
AQUA
FOG
GT
AQUA
FOG
GT
AQUA
FOG

5
Mount the fan high overhead. Allow room in front of and below the fan for the
unobstructed propulsion of fog. Rule of thumb: the higher the better, but mount
at least three feet away from any roong structures.
Mount the fan at the intake end of a ventilated structure. In structures with mild to no
ventilation, propel fog the length of the structure. In large structures, use of an oscillator greatly
enhances coverage and circulation.
DO NOT: Mount the fan near the ground or underneath tables or benches.
DO NOT: Propel the fog into the wind (direction of airow).
DO NOT: Cramp the fan in tight quarters or skinny aisleways.
>
>
>>
>
20'
40'
60'
Intake
End
Intake
End
Control areaIn applications requiring only one unit, mount
the fan high, centered along one wall, with fog
propelling horizontally along the length of the
structure. If there is ventilation, mount the fan
at the intake end of the structure. Generally, no
oscillation is necessary unless the width of the
structure is greater than 20'. The best location
for automated controls is behind the fan, at an
easily accessible level for monitoring.
In large structures equipped with forced
ventilation, the rst fan row should be within a
few feet of the intake end, with rst fan:
- centered along the end wall (or)
- placed no more than 20' from the side wall,
with additional fans in the row equally spaced
no more than 40' apart.
Lengthwise, the fans should be equally spaced
no farther than 60' apart. All fans should be
equipped with oscillation, sweeping 180˚ in the
direction of airow.
Layout Guidelines
Large Structures, Forced Ventilation
Small Structures
PLACEMENT
LOCATE A LEVEL AREA TO SET UP A STAND. TO HANG THE
UNIT, SECURE AND LEVEL 1" PIPE ABLE TO SUPPORT 50 LBS.
NOTICE
Placement Guidelines
>
Direction of airow >

6
PLACEMENT (CONT.)
>
>
>
50'
>
>
50'
>
25'
>
>
25'
Large Structures, Natural Ventilation
In large structures with natural ventilation, propel fog
the length of the structure with the rst fan row no more
than 25' from the end wall. The rst fan should be:
- centered along the end wall (or)
- placed no more than 25' from the side wall,
with additional fans in the row equally spaced no
farther than 50' apart.
Lengthwise, the fans should be equally spaced and no
more than 50' apart. All fans should be equipped with
oscillation, sweeping 360˚.
Large Structures,
Closed or Minimum Ventilation
In closed structures with little to no ventilation, propel
fog the length of the structure with the rst fan row no
more than 40' from the end wall. The rst fan should
either be:
- centered along the end wall (or)
- placed no more than 40' from the side wall,
with additional fans in the row equally spaced
no farther than 80' apart.
Lengthwise, the fans should be equally spaced and no
farther than 80' apart. All fans should be equipped with
oscillation, sweeping 360˚.
>
>
>
80'
>
>
80'
>
40'
>
>
40'

XE 360
INSTALLATION
USING A LADDER TO HANG THE GT 500 IS DANGEROUS.
USE PROPER LIFTING EQUIPMENT LIKE A SCISSOR LIFT.
DANGER
(A) Secure to Pipe
Hanger
Support Bar
(not provided)
Support Bar
(not provided)
1/4-20 U-bolt Package
Oscillator
1/4-20 U-bolt Package
(B) Universal Mount
Drill 5/16"
Clearance Hole
in Support
(C) With Oscillator
Anti-
seize
Required Use
Flat, Level
Surface
7
(1) 1/4-20 Hanger U-bolt Package
(1) 5/16-18 Universial Hanger Bolt Package
(1) 5/32" Allen Wrench
(1) 3/32" Allen Wrench
(6) Wire Tie
►Level
►7/16" Wrenches
►1/2" Wrenches
UNPACKING
C
HECKLIST
T
OOLS
R
EQUIRED
After unpacking the unit, inspect for any
damage that may have occured during
transit. Make sure to tighten ttings, bolts,
etc. before operation.
DO NOT OPERATE UNIT IF
DAMAGED DURING SHIPPING,
HANDLING OR USE. DAMAGE MAY RESULT IN BREAKAGE
AND CAUSE INJURY OR PROPERTY DAMAGE.
WARNING
Lock Washer
Finish Nut
Nylon Lock Nut
Hanger
Nylon Lock Nut
Finish Nut
Lock Washer
Flat Washer
5/16-18
Bolt Package
Hanger
(2) 1/4-20 Bolt
Nylon Lock Nut
Lock Washer
Finish Nut
Nylon Lock Nut
Securing To Pipe - Use U-bolts provided. Tighten securely. The nylon locknut should be
tightened on top of the rst nut to provide added protection.
Universal Mount - The support should be secure, level and at. Drill a 5/16" clearance
hole. It is IMPORTANT to tighten the second nylon locknut on top of the rst nut to
provide added protection. Note: Anti-seize applied to bolt prevents galling.
Installation with Oscillator - Support bar should be level. Use the U-bolts Package
supplied with unit to secure Oscillator to bar. Use (2) 1/4-20 bolts with nylon lock nuts to
attach the GT unit to the oscillator's support plate.
NOTE: Tighten securely using two opposing wrenches to prevent stress on oscillator's
internal gears.

8
P
IVOT
A
DJUSTMENT
After securing the the GT 500, a pivot
adjustment can be made to direct the fogging
output to a desired location.
This unit has a positive pivot locking system
with four available positions.
~ 5º up
~ Horizional
~ 7º down
~ 14º down
To Make an Adjustment
Relieve the weight of the unit and lift one
pivot lock up and rest it in the middle of the
"M". While securely supporting the unit, lift the
second lock up.
Adjust unit to desired angle. Re-engage both
locks into the closest available slot.
NOTE: Use both sides of the "M" to access all
four pivot angles.
Pivot Point
Pivot Locking System
Pivot
Lock
GT
Motor's power cord
Water line
Wire tie
Connect to a
Control Panel
or
Connect to a
hose bib
Plug to a
Control Panel
or
Plug to an 60Hz
electrical outlet
Flowmeter
Panel
Flow
Control
Knob
Inline
Strainer
Drainage
Line
Lead to a
drainage area
AQUA
FOG
UTILITIES
Water
- The Flowmeter Panel is equipped with
a 1/4" tube connector at the base of the inline
strainer and can be connected to a water supply
in various ways:
•Directly to an automated timer
, thermostat
or humidistat contr
ol.
•Directly to a garden hose wat
er supply
connection.
Drainage
- Attach the 1/2" drain tubing (push
t) to the drain tting at the bottom of the fan
housing.
W-2
Universal plug
adapter required
for 50Hz
power connection

9
AQUA
FOG
XE 360
*Grounded and suitable for outdoor use.
Wiring the Oscillator
EXTENSION CORD SPECIFICATIONS*
FOR SINGLE FAN USE ONLY • (AWG - American Wire Gauge)
Voltage 25 to 50 ft. 50 to 100 ft.
115 16 AWG 14 AWG
POWER CONNECTION
GROUND FAULT RECEPTACLE IS RECOMMENDED AND MAY BE
REQUIRED BY LOCAL AND/OR NATIONAL CODE.
PROPERLY
GROUND ALL
CONNECTIONS
Remove the black plug from the the top of the
motor's junction box. Install the oscillator power
cord and connector. This cord is pre-measured to
the appropriate length. DO NOT SHORTEN.
Remove the motor junction box cover. Strip the
ends of the oscillator power cord wires. Using the
wire nuts provided, connect the oscillator cord
wires and GT 500 motor wires as shown in the
appropriate wiring schematic. (See Page 17)
NOTE: GT 500 motors are dual voltage and can
operate either on high or low voltage.
For connection changes, refer to the electrical
schematic located on the motor.
ALL WIRING AND ELECTRICAL
CONNECTIONS MUST BE
PERFORMED BY A QUALIFIED ELECTRICIAN.
WARNING
Oscillator
WARNING
Leave
Slack
On/Off
Switch

10
Turn on the unit and listen for any possible abnormalities, such as the blades rubbing against the
venturi. Make adjustments if necessary. If no problems are detected, slowly turn the owmeter control
knob counter-clockwise until the desired output is achieved. The uid level ball should move up and
down as adjustments are made.
If using an oscillator, check the rotational movement and be SURE THE POWER CORD HAS ENOUGH
SLACK. If there is not enough, try re-mounting the GT 500 with the oscillator power cord falling in
line with its motor.
Note: GT 500 can also be operated dry.
The volume of fog can be regulated by adjusting the
owmeter.
Particle size is smaller at lower outputs, so it is
better to operate the fan at a lower output for a
longer period of time.
Flowmeters maintain a more reliable ow rate if
operated high on their ow scale.
If your desired output volume is close to the
bottom of the scale, it may be benecial to
purchase a smaller owmeter or install a 5
micron sediment lter.
At the base of the owmeter is an in-line strainer
(Part #71) with a removable cap. Periodically check
inside and ush any sediment from the screen.
OPERATION
BEFORE TESTING FAN MAKE SURE ALL OBJECTS ARE OUT OF THE
ROTATION PATH OF THE FAN BLADES. HIGH-SPEED WARNING. KEEP HANDS
CLEAR! MAKE SURE GUARDS ARE INSTALLED OR UNIT IS OUT OF REACH.
LISTEN FOR UNUSUAL NOISE OR VIBRATION.
CAUTION
BUMP START GT 500 and check for proper fan blade rotation (clockwise if looking at
front of unit). If incorrect, nd rotation connection changes on the motor's electrical schematic.
Flowmeter Control
NOTICE CLOGGING OCCURS MORE
FREQUENTLY WHEN OPERATING AT
LOW FLOW RATES.
DANGER
F
LOWMETER
P
ANEL
Flowmeter's Flow
Control Knob
Flowmeter's
Scale
In-line
Strainer

11
1. Fan Does Not Operate
A.) Check voltage requirements on unit and electrical supply. Check for live receptacle, plug,
power line and toggle switch.
B.) Look for any loose connections inside the main motor's junction box.
2. Unusual Noise
A.) Squealing at start-up or during operation may be caused by the motor shaft's bearing
seal. Spray with lubricant at the front of the motor where the shaft exits the motor's
frame.
3. No Fog
A.) If the owmeter is closed, turn the ow control knob counter-clockwise to increase fogging
output. Visually check for sediment clogs within the owmeter's body and remove the
inline strainer's cap to ush any debris from screen. Refer to the maintenance section for
owmeter cleaning instructions.
B.) If the fan is automated and the water is supplied through a water solenoid, check to see if
the solenoid is electrically activated by the control and check the solenoid for clogs.
C.) If after checking both the owmeter and solenoid, you still do not have any fog, begin a
process of elimination starting with the water source. Disconnect and reconnect your
plumbing before and after each device to check for any obstructions.
4. Poor Quality Fog
A.) The feed tube (Part #532) may not be pointing properly into the reservoir. The
feed tube should be aimed slightly downward, into the slot area between the motor shaft
and the stainless steel plate, rear of the blade assembly.
B.) Reservoir or blades may be clogged. Fluid entering a clogged reservoir will sling out of
the reservoir instead of entering the passageways of the fan blades. To clean, remove the
blade assembly from the motor shaft and remove the stainless steel plate. Clean the
reservoir area. Attempt to blow and listen for air through each blade. If clear, assemble
and reinstall. If the blades cannot be unclogged, replace with a new blade assembly
(Part #531).
5. Fog Slowly Decreases
If fog output gradually decreases over time, sediment is slowly clogging the owmeter's
needle valve. Try operating at a higher output or cleaning the inline strainer (Part #71). If the
problem persists, a smaller size owmeter may be required. Flowmeters perform best when
set halfway up the scale or higher.
TROUBLESHOOTING
BEFORE INSPECTION AND/OR SERVICE
DISCONNECT AND LOCK OUT POWER SOURCE.
WARNING

12
Contact Your Sales Representative for Further Assistance.
6. Fan Motor Becomes Excessively Hot
The main fan motor normally becomes very hot to the touch. However, if it gets so hot that it
begins to smell or smoke or the power cord becomes hot, discontinue operation and consult
an electrician to properly evaluate the problem.
7. Electrical Breaker Tripping
If the electrical breaker trips off, there is an overload in the system and there may be a
serious motor problem. Turn off all other devices connected to the same circuit. If the
breaker continues to trip, the motor is probably in need of repair. Consult an electrician
for evaluation.
8. Fan and/or Motor Vibration
A.) If the fan unit begins vibrating severely, rst be sure the blade assembly is fully engaged
and securely tightened on the motor shaft. Next, inspect the blade assembly, particularly
the ends of the blades. Look for wear or cracks - replace as necessary. Look for deposits
of calcium or minerals - clean and remove mineral deposits and/or calcium.
B.) If the vibration seems to be coming from the motor, rst check that the motor mounting
hardware is securely tightened. If hardware is secure, remove the blade assembly and
operate the motor without the blade. If vibration continues, the motor has a serious
mechanical problem and probably needs to be replaced.
9. Liquid Spilling From Fan Housing
If liquid builds up inside the housing, the drain tube is clogged. Clean debris from around
the drain inside the housing and ush drain tube.
10. Plumbing Leaks
Un-thread ttings and clean both the male and female threads. Apply new thread tape
(approximately 2-3 wraps) and reconnect. If a tube tting is leaking, tighten the cap - no
more than 1 turn past nger tightened. If the leak persists, replace the tube tting insert.
TROUBLESHOOTING (CONT.)
BEFORE INSPECTION AND/OR SERVICE
DISCONNECT AND LOCK OUT POWER SOURCE.
WARNING

AQUA
FOG
#531 Fan Blade Assembly Explosion
502
8
44
43
510
114
115
42
13
GT 500 E
XPLODED
V
IEW
511
512
513
400-047
506
428

14
14
531
16
54
49
20
127
Motor's Junction Box
481
45
58
Side view of motor
57
116
395
657
56
Rear of
Housing
32
20
126
125
Oscillator's
power supply port
154
58
32
514
500
658
42
660
57
58
Hanger Options
U-Bolts
Hanger
Bolt
395
116
518
514
13-500
USA
USA
521
532
400-019
519
523
522
35
W14
434
400
406
407
507

15
Flowmeter Panel Exploded View
Entire panel is also
available: part# XE-FP
(must specify flowmeter size)
69
71
113
78
36
68
296
515
295
OSCILLATOR EXPLODED VIEW
115Volt 50/60 hz.
Connect White and Blue Wires
Do Not Use Yellow
230Volt 50/60 hz.
Connect Yellow and Blue Wires
Do Not Use White
132
131
134
153
149
148
147
45
144
146
145
140
142
1
51
139
138
150
117
663
135
136
OSCILLATOR EXPLODED VIEW
32
XE 360
651
609
608
Through
Cover
395
134
139
653
610
656
400-033
650

16
GT 500 COMPONENTS
8 Drain tting 1
13-500 GT Wash down duty motor 1
14 Pinned venturi assembly 1
16 Rear guard 1
20 1/4" Thick washer 10
32 1/4-20 nylon stop nut SST 7
35 Valve washer 3
36 1/8" street elbow 1
42 10-24 nylon stop nut SST 6
43 Drain washer SST 1
44 Drain tubing 16'
45 Liquid-tight connector 1
49 10-24 x 1/2" phillips truss head SST 4
54 1/4-20 x 3/8" button head cap screw 6
56 5/16-18 x 3/4" HH bolt SST 4
57 5/16" lock washer SST 5
58 5/16" at washer SST 7
68 1/4"F x 1/8"M reducing elbow 1
69 1/4" x 1.5" nipple 1
71 In line strainer 1
78 1/8" x 1.5" nipple 1
113 Flowmeter 1
114 Drain tting nut 1
115 Drain gasket 1
116 5/16-18 nish nut 5
125 1/4-20 U-bolt SST 1
126 1/4" lockwasher SST 2
127 1/4-20 x 7/8" HH bolt SST 5
154 1/4-20 nish nut SST 2
295 1/4"M x 1/4" tube tting 1
296 1/8"F x 1/4" tube tting 1
395 5/16-18 nylon stop nut SST 3
400 Foam drip sponge 1
400-019 1/8"M x 1/8" tube 1
400-047 Reservoir plate screw 8
406 Nylon rivet 6
407 Rivet washer 6
428 10-24 x 1/2" Phillips RH SST 4
434 1/8"F x 1/4" tube elbow 1
481 1/2" Black hex plug 1
500 SST Hanger 1
502 Housing 1
506 Safety guard 1
507 115V Power cord 1
511 Blade tip set screw 3
512 Reservoir O-Ring 1
513 SST Reservoir plate 1
514 Motor plate PLS 1
515 SST panel 1
518 5/16-18 x 2" HH bolt SST 1
519 Feed tube support 1
521 10-32 x 3/8" brass standoff 2
522 10-32 x 1/4" button head screw 2
523 #10 Lock washer 2
531 Fan blade assembly 1
532 Feed tube assembly 1
510 Blade set screw 1
657 5/16-18 x 5/8" HH bolt SST 2
658 10-24 x 1" phillips truss MS SST 2
660 Pivot, vinyl cap 2
W-2 Hose connector 1
W-14 1/4" Poly tubing 30'
OSCILLATOR COMPONENTS
32 1/4-20 nylon stop nut SST 2
45 Liquid-tight connector 1
117 1/4-20 x 5/8" HH bolt SST 2
131 Toggle switch boot 1
132 Toggle switch 1
134 3/8" bronze bearing 2
135 115 volt 50/60 Hz. motor 1
136 230 volt 50/60 Hz. motor 1
138 3/32 x 3/4" cotter pin SST 1
139 3/8" spacer 2
140 Thrust bearing 1
142 10 tooth brass gear 1
144 Upper gear stop 1
145 Lower gear stop 1
146 5/16" spacer 1
147 96 tooth brass gear 1
148 1/8 x 3/4" groove pin 1
149 Bearing block assembly 1
150 Drive shaft 1
151 Power cord 1
153 5/16-18 x 2" HH bolt SST 1
395 5/16-18 nylon stop nut SST 1
400-033 Cord grip 1
608 Oscillator plate 1
609 Oscillator housing 1
610 Oscillator cover 1
650 Nylon standoff 3
651 Gear motor screw 3
653 Shaft bearing 1
656 Cover screw 10
663 Cover lock washer 10
ID # Description Qty per Unit
PART IDENTIFICATION LIST
ID # Description Qty per Unit

17
MAINTENANCE
DISCONNECT AND LOCK OUT POWER SOURCE
BEFORE SERVICING
WARNING
ELECTRICAL SCHEMATICS
115V 1Ph 60/50Hz (USA)/ Foreign
N
115 VAC
LINE
1, 3, 8
mtr
FAN
2, 4, 5
115V
Oscillator
White Blue
Tgl Switch
mtr
115V
230V 1Ph 60Hz (USA)
115 VAC
LINE
mtr
FAN
230V
Oscillator
mtr
230V
240V 1Ph 50Hz (Foreign)
N
240 VAC
LINE
mtr
FAN
240V
Oscillator
mtr
240V
Note: All green wires
go to ground
Denotes Line Connection
Denotes Wire Nut Termination
Electrical Schematic Code Designation
115 VAC
LINE
4, 5
1
2, 3, 8
Blue Yellow
Tgl Switch
Yellow Blue
Tgl Switch
4, 5 1
2, 3, 8
1. Inspect Blade Assembly
Clean the the exterior of the blades about
once a year or whenever a lm of calcium or
mineral deposits is visible. While cleaning,
inspect for irregularities or hairline cracks and
replace as necessary.
2. Cleaning Flowmeter
3. Main Motor
The main motor is a permanently lubricated
motor, but occasionally applying some spray oil
to external rusty areas of the motor's body can
help extend the motor's life.
4. Clean Strainer
Periodically clean the inline strainer (Part #71)
at the base of the owmeter by removing cap
and internal screen and ushing any sediment
from screen.
5. Storage
Protect your Aquafog from winter damage.
Expansion due to freezing can burst ttings,
solenoids and owmeters. If storing unit in below
freezing temperatures, be sure all uid is drained
from the unit. Damage due to freezing is not
covered under warranty.
To expose the inside of
the owmeter, use a small
screwdriver to remove the
retaining key by using slot
A. Next, pull the retainer
cap straight up by using
slot B. NOTE: After cap is
removed, be careful not
to lose the internal oat
ball when handling
the owmeter.
A
B
Slot A
Slot B
Top of
Flowmeter

ONE YEAR LIMITED WARRANTY
Aquafog and accessories are warranted to the original purchaser against defects in
material and workmanship under normal use for one full year from date of purchase. Any
part determined to be defective and returned to the manufacturer, shipping cost prepaid,
will be repaired or replaced at Jaybird Manufacturing, Inc.'s discretion without charge. Proof
of purchase date and an explanation of the problem or complaint must accompany the
returned portion of the machine.
Jaybird Manufacturing, Inc. reserves the right to verify the legitimacy of claimed defects.
The provisions of this warranty do not apply to damage resulting from direct or indirect misuse,
negligence, accident, lack of maintenance, or unauthorized repairs or alterations which affect
the machine's performance or reliability.
LIMITATIONS OF LIABILITY. TO THE EXTENT ALLOWABLE UNDER APPLICABLE LAW,
JAYBIRD MANUFACTURING, INC.'S LIABILITY FOR DEATH, INJURIES TO PERSONS OR
PROPERTY, OR FOR CONSEQUENTIAL OR INCIDENTAL DAMAGES ARISING FROM THE USE OF
OUR EQUIPMENT IS EXPRESSLY DISCLAIMED. JAYBIRD MANUFACTURING, INC.'S LIABILITY
IN ALL EVENTS IS LIMITED TO, AND SHALL NOT EXCEED, THE PURCHASE PRICE PAID. NO
OTHER WARRANTY, EXPRESSED OR IMPLIED, IS AUTHORIZED, INCLUDING WARRANTIES OF
MERCHANTABILITY AND FITNESS FOR A PARTICULAR PURPOSE.
This warranty gives you specic legal rights, and you may also have other rights, which vary from state to state.
1
year
Table of contents