Quick Reference Guide
James Burn AlphaDoc Automatic Punch
Note: This Quick Resource Guide provides all co-workers with step-by-step procedures for use of all nationally
supported finishing equipment.
qSet Up Procedures
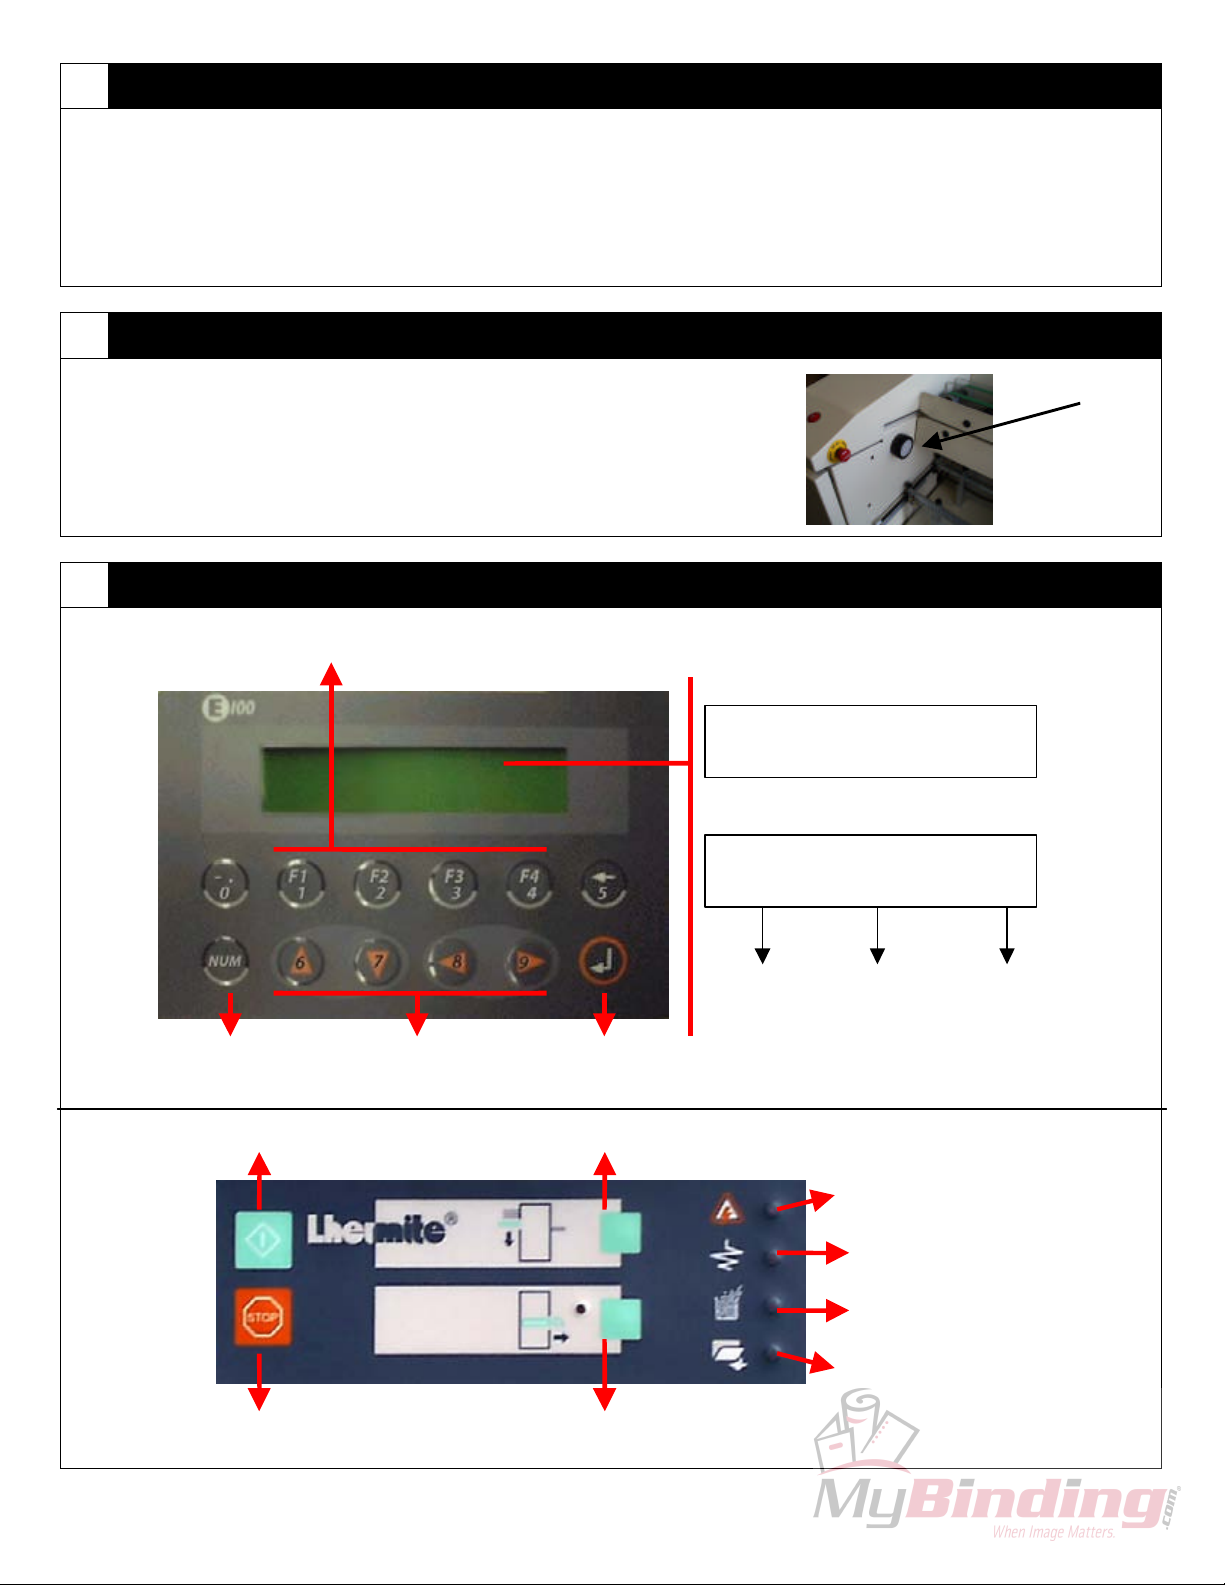
Note: Refer to the Control Panel Diagrams section on page two for button descriptions and locations.
Selecting Pre-Programmed Paper Size
1. From the Main Menu, use the arrow keys to scroll to the Paper Size section. Press the Enter key.
2. Use the arrow keys to scroll up and down until the desired paper size is displayed. Press F1 to select or F4
to return to the previous screen. Once the size has been selected, press the Start button to initialize. After
initialization process, the Ready Screen will be displayed. Press F1 twice to return to the Main Menu
Setting Custom Paper Size
1. From the Ready screen, press F2. Scroll down to CUSTOM:INCH and press Enter. Scroll to Custom 1,2,3
or 4. Press the right arrow key once to select the first paper dimension. To change size, press and hold the
NUM key and enter the first dimension (punched edge first). To enter a decimal, release the NUM key and
press the 0 key twice, quickly. When finished with the first dimension, press Enter. Press right arrow key to
select the second dimension. Follow the same procedure as the first dimension to enter size. When
finished, press Enter. Press F1 to return to the Main Menu.
2. To select a custom size, follow the procedure listed under Selecting Pre-Programmed Paper Size.
Setting Bite Thickness
1. From the Main Menu, move the cursor to the Bite Thickness section. Press the Enter key. Scroll through
the list to select the desired bite thickness. Press F1 to select or F4 to return to the previous menu. Once
the bite thickness has been selected, press the Start button to initialize. When initialization is complete, the
Ready Screen will be displayed. Press F1 twice to return to the Main Menu.
Setting Index or Normal (Index mode for tabs)
1. From the Main Menu, move the cursor to the Normal / Index section. Press the Enter key. Scroll from N
(normal) to I (index) using the up and down arrows. Press F1 to select or F4 to return to the previous
menu. Press the Start button to initialize. When initiation is complete, the Ready Screen will be displayed.
Press F1 twice to return to the Main Menu.
2. Note: If running tabs, choose paper size to accommodate the overall size of the tab sheet. Example: 11” x
9” for tabs to run with 8.5” x 11” paper.
Loading Paper
1. Ensure that the Ready Screen is displayed. If in Main Menu, press the Start button to initialize. When
initialization process is complete, the Ready Screen will be displayed.
2. Press the Feeder Down button on the operator panel to lower the feed table.
3. Lift the paper guide up. Load paper (thoroughly jog paper before loading). Lower the paper feed guide
when finished.
4. Set paper guides to loosely touch paper. (If paper does not reach the guides, press and hold the Start
button to raise the tray. Press Stop before the machine begins to feed the paper).
5. Place a few sheets of paper in the reception area and set the paper guides accordingly. The head guide
should be set ¼” from the paper.