The unit's Wi-Fi status
will
remain active, and the status
LED
will
glow amber.
To
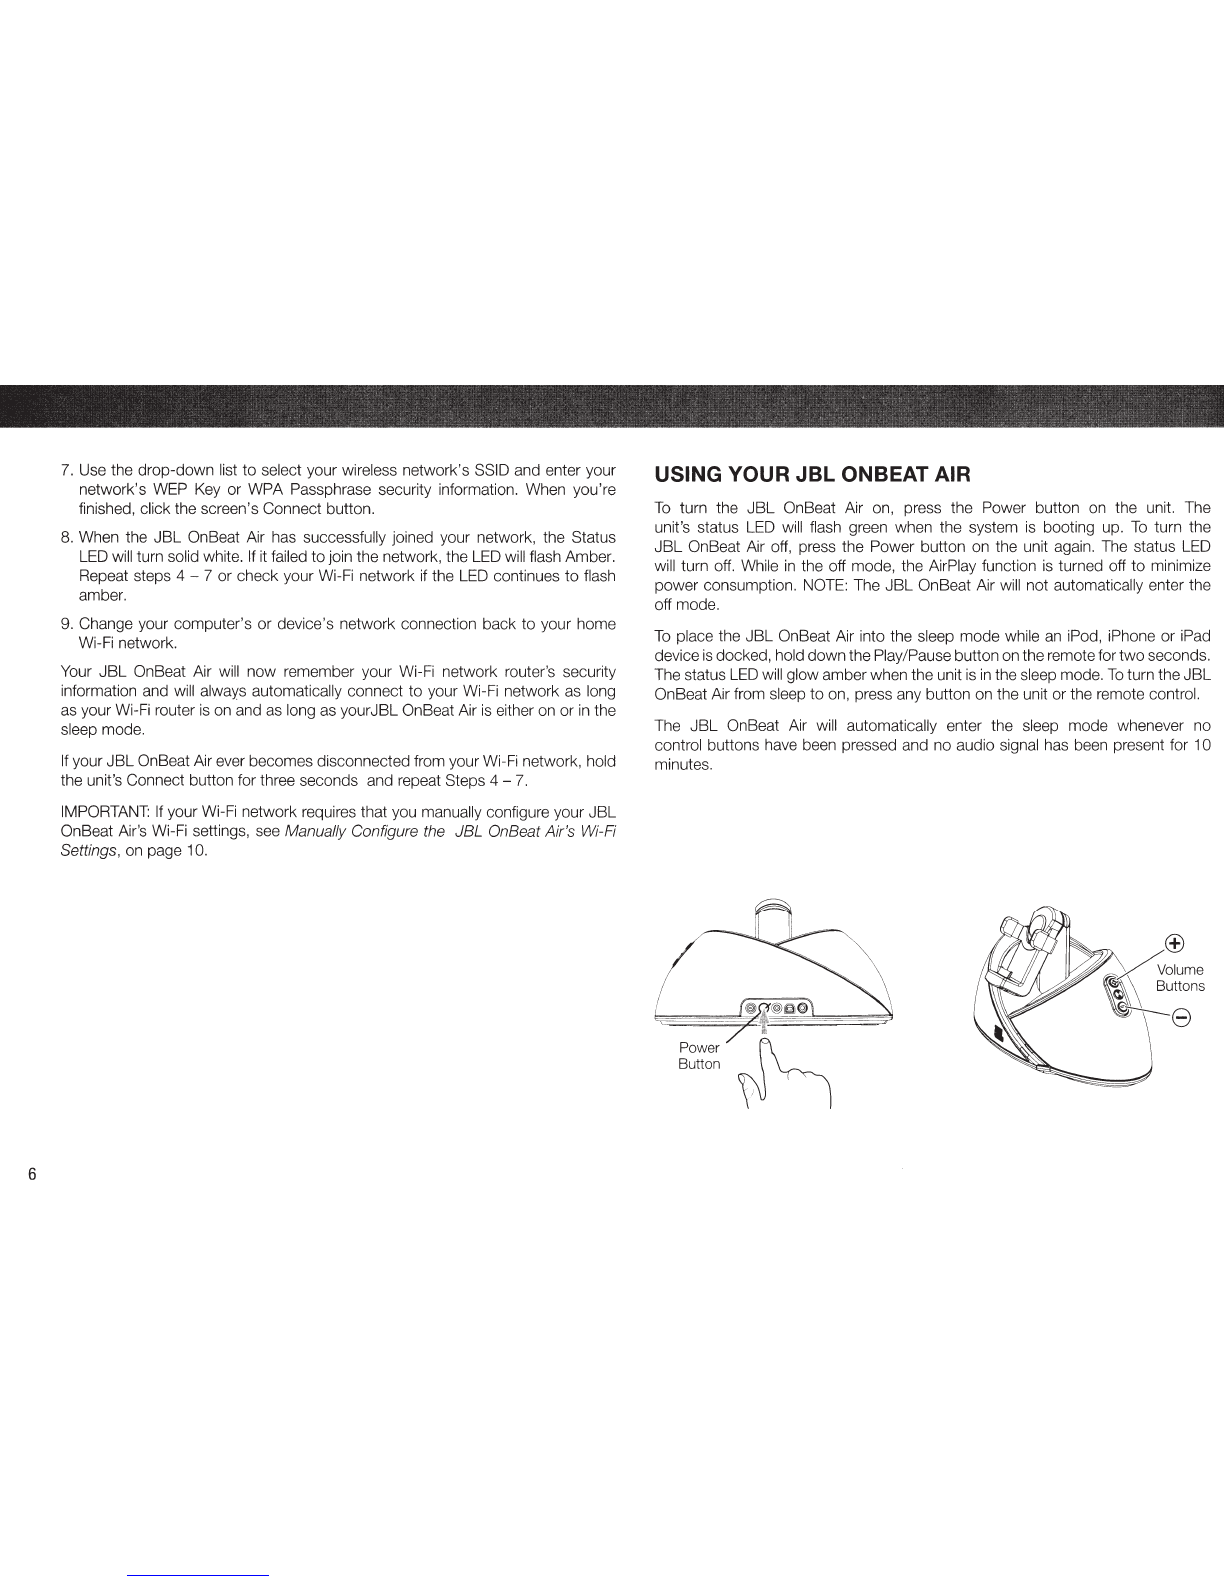
turn the system
off,
press the Power button. The status
LED
will
turn
off.
Adjust the volume using the(+) and(-) buttons. Press both buttons simultaneously
to mute the sound. The status
LED
will flash white. Press either volume button to
unmute the sound.
LISTENING TO AIRPLAY STREAMING AUDIO
Your JBL OnBeat Air can play audio files or
an
Internet radio station that
is
streaming from
iTunes
10.1
(or
newer) on a networked computer or from
an
iPod,
iPhone or iPad device with
iOS
4.2 or
later.
(iTunes
is
a free download for Mac
computers and
PCs,
available
at
www.apple.com/iTunes.)
NOTE:
Before you can begin AirPlay streaming, the JBLOnBeat Air must be joined
in
the Wi-Fi network.
To
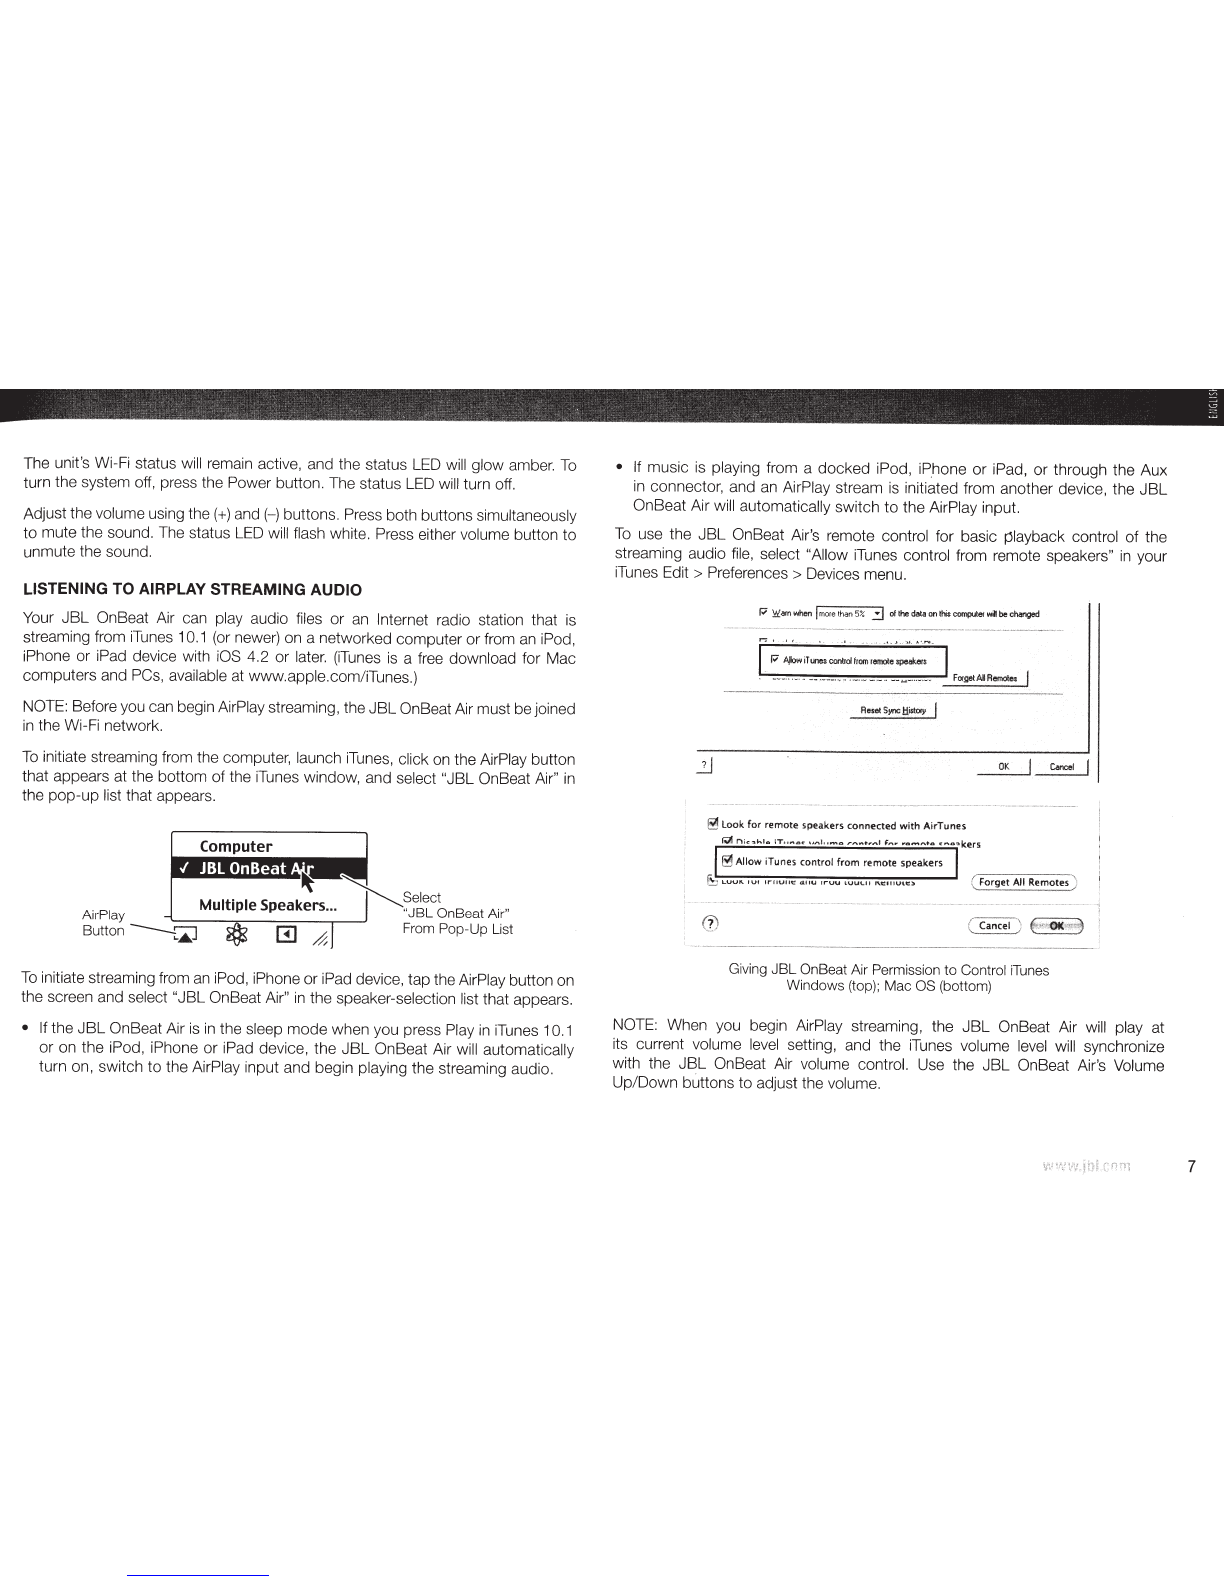
initiate streaming from the computer, launch
iTunes,
click
on
the AirPlay button
that appears at the bottom of the
iTunes
window, and select "JBL OnBeat Air"
in
the pop-up list that appears.
AirPlay
Button~~
Select
JBL
OnBeat Air"
From Pop-Up List
To
initiate streaming from
an
iPod, iPhone or iPad device, tap the AirPlay button on
the screen and select "JBL OnBeat Air"
in
the speaker-selection list that appears.
•
If
the
JBL
OnBeat Air
is
in
the sleep mode when you press Play
in
iTunes 1
0.1
or on the iPod, iPhone or iPad device, the JBL OnBeat Air will automatically
turn on, switch to the AirPlay input and begin playing the streaming audio.
•
If
music
is
playing from a docked iPod,
iP
.hone or iPad, or through the Aux
in
connector, and
an
AirPlay stream
is
initiated from another device, the
JBL
OnBeat Air will automatically switch to the AirPlay input.
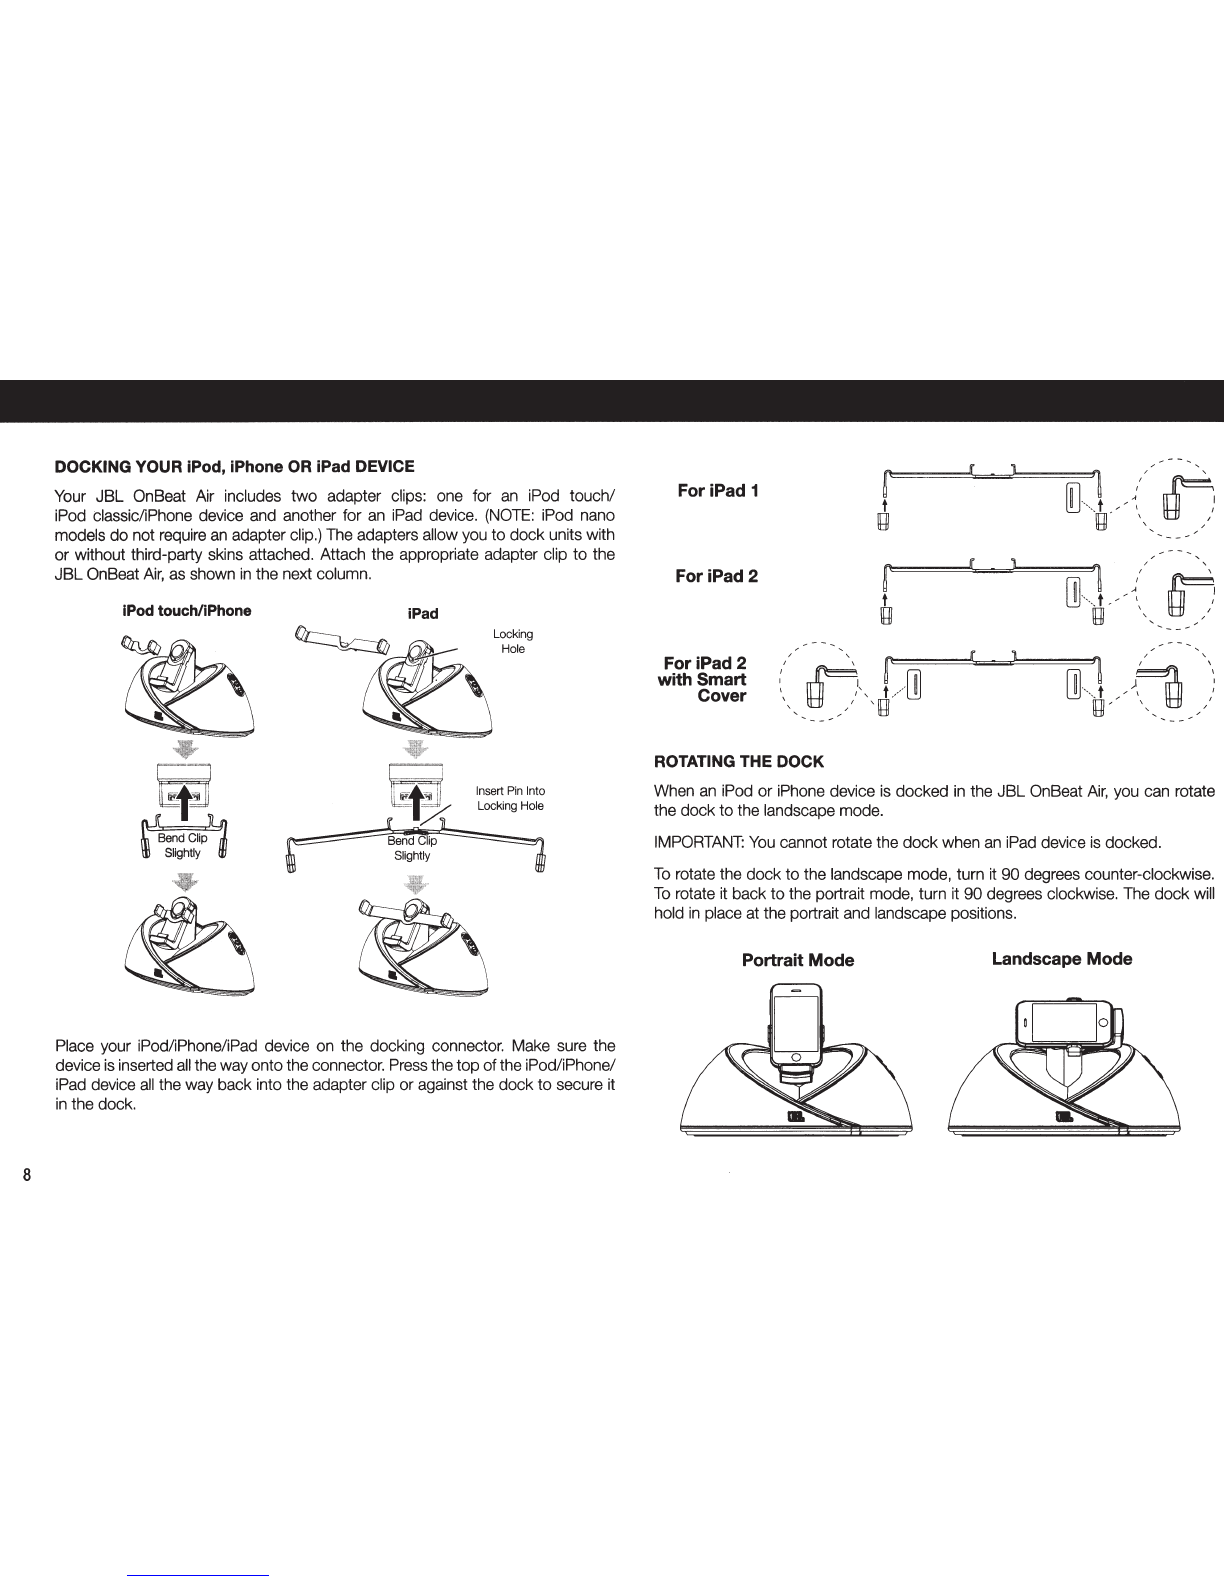
To
use the JBL OnBeat Air's remote control for basic playback control of the
streaming audio
file,
select "Allow
iTunes
control from remote speakers"
in
your
iTunes
Edit>
Preferences> Devices menu.
P
~arn
when
I
more
than
5%
i:]
of
the
data
on
thit
computer
will
be
changed
P
A,llow
iT
unes
conlrol
from
remote
speaker$
~-~--·...,
·
·-
--
·
..
-----
-
--
-
--
...
-.. .
-.- ·
-·-
_-
..
--
..
----,..--
...
--
·-
--
...I
Forget
AI
Remote;
OK
~
look
for
remote
speakers
connected
with AirTunes
~Allow
iTunes control from remote
speakers
~
LUU!<..
lUI
II"F!UIIt:
cUIU
II"UU
lUU\.11
"~I!IUlt::>
( Forget
All
Remotes
>:
Giving
JBL
OnBeat Air Permission to Control iTunes
Windows (top); Mac OS (bottom)
NOTE:
When you begin AirPlay streaming, the JBL OnBeat Air will play at
its current volume
level
setting, and the
iTunes
volume
level
will
synchronize
with the JBL OnBeat Air volume control. Use the JBL OnBeat Air's Volume
Up/Down buttons to adjust the volume.
7