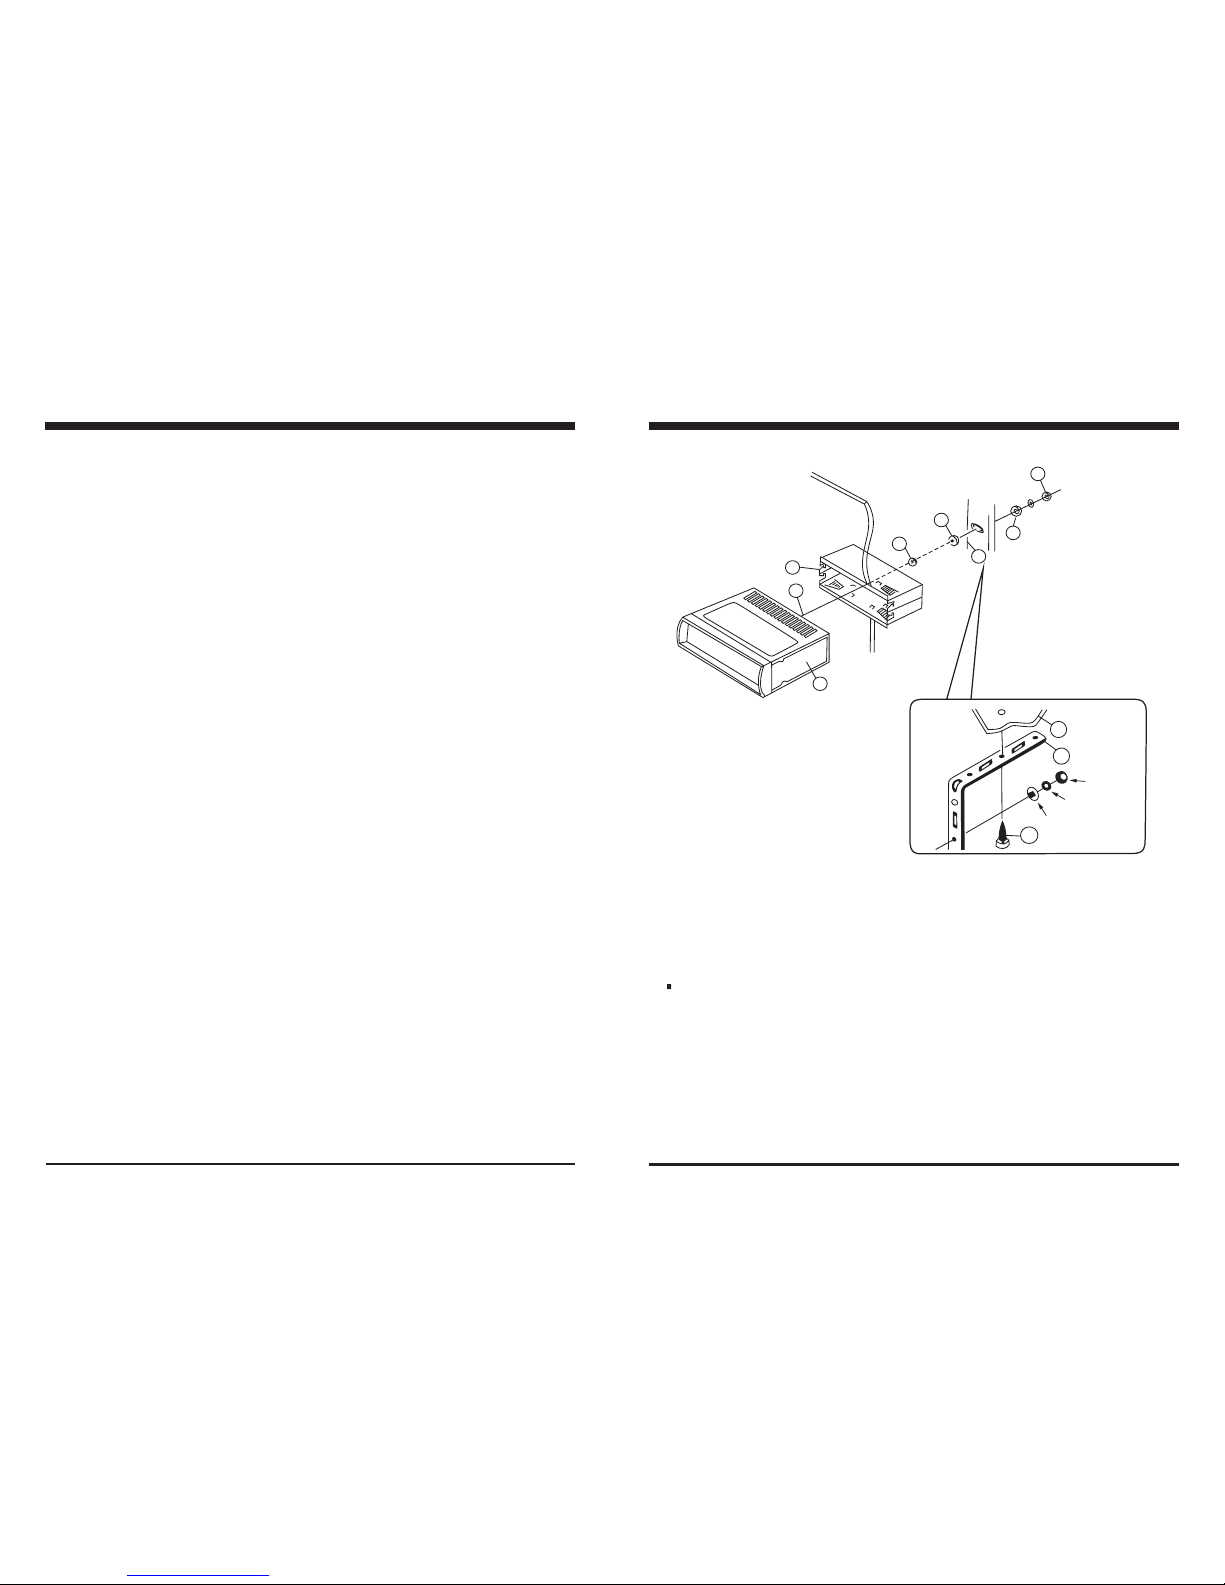
1. UNIT
2. HALF SLEEVE
3. HEX NUT
4. LOCK WASHER
5. PLAIN WASHER
6. BODY
7. REAR SUPPORT STRAP
8. TAPPING SCREW
9. M5 X 20 HEX BOLT
3
5
2
1
4
6
8
HEX
Lock Washer
Plain Washer
7
Accessories subject to change without notice.
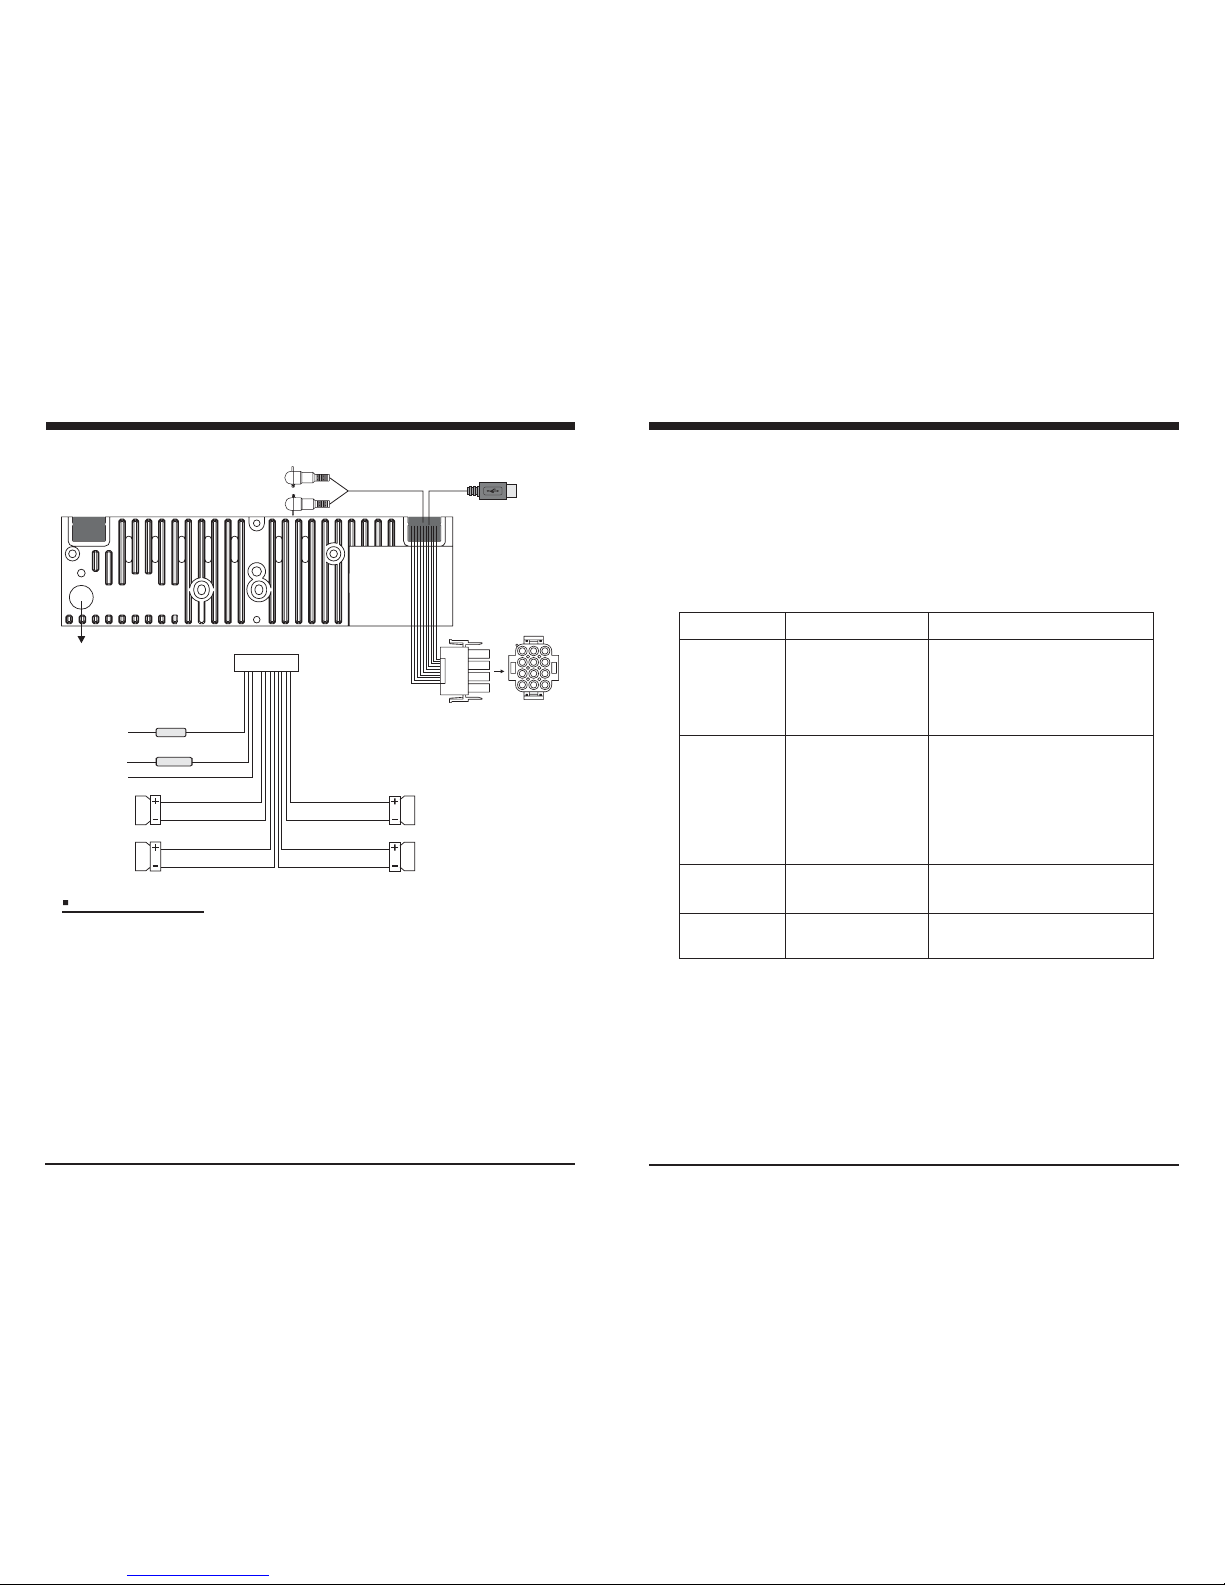
If the fuse blows, check the power connection and replace the fuse. If the fuse blows again
after the replacement, there may be an internal malfunction. In this case, consult your nearest
dealer.
Use the specified amperage fuse for each lead.
Use of a higher amperage fuse may cause serious damage.
1. Fuse replacement
2. Warning
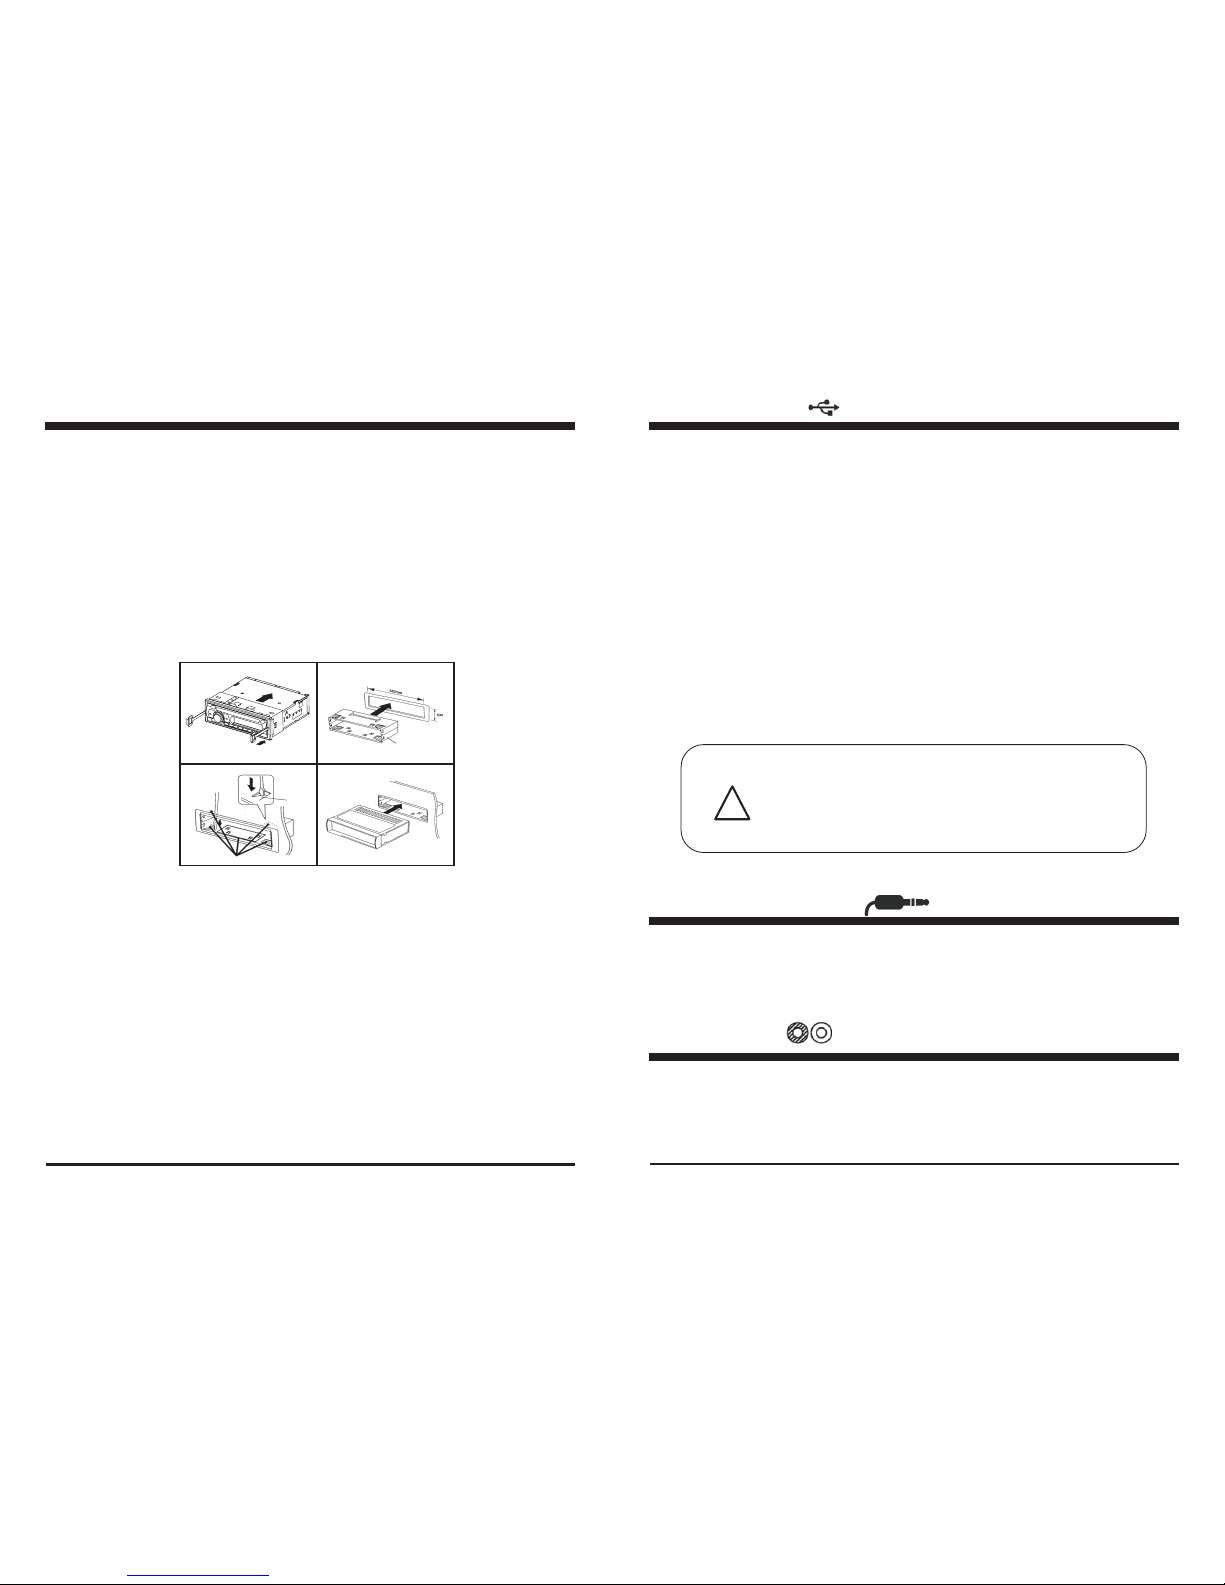
Supporting the unit
3
9
7
5
5. Repeat Play button (10)
6. Random play button (11)
8. SEARCHING VIA A.PS BUTTON
-S
-S
Simply push the Directory UP or Down button to select the next or previous directory.
If it does not contain directories, it would play the track at 10- file when you push DIR-
button (12), and play the track at 10+ file when you push DIR+ button (13).
imply press 3RPT, it will display “S-RPT” on the LCD and play current track repeatedly.
- Press and hold 3RPT for longer than 2s, it will display “D-RPT” on the LCD and repeatedly
play the tracks in current folder.
- Simply press it again to cancel REPEAT feature.
Function of REPEAT folder is only available for MP3/WMA playing mode.
imply press 4RDM, it will display “S-SHF” on the LCD and play the tracks in randomly.
- Press and hold 4RDM for longer than 2s, it will display “D-SHF” on the LCD and randomly
play the tracks in current folder.
- Simply press it again to cancel RANDOM feature.
Function of RANDOM folder is only available for MP3/WMA playing mode.
- If the Disc does not contain any MP3 and WMA file, this function does not operate.
While MP3/WMA disc playing, simply press A.PS button (16) once, the letter “T” will be
displayed on the LCD. Enter the desired file number by turning VOL knob (2) to your
desired track, then press SEL button (2) to confirm selection and begin to play the selected
track.
While MP3/WMA disc playing, simply press A.PS button (16) twice, an asterisk will be
displayed. Select the desired character by turning VOL knob (2) to your desired character,
then press SEL button (2) after each character is selected. Press BAND button to begin
searching for files and directories having the same character inputted.
If the selected name is a directory, “DIR” icon will appear. The user can go into a desired
directory by pressing SEL button (2). Continue to search the file name in the directory by
turning VOL knob (2). The selected file can be played by pressing the SEL button (2).
If the selected name is a file name, turning VOL knob (2) to search a desired file, then press
SEL button (2) for 2 seconds to begin playing.
While MP3/WMA playing, simply press A.PS button (16) for three times, the directory
number will be displayed on the LCD. Turn VOL knob (2) to select your desired Directory.
Then press SEL button to confirm. Continue to search sub-directory or file number as above
operation until your desired file being selected.
Note:
Note:
7. Directory Up & Down button (12, 13)
- Searching Track Directly
- Searching Directory or File Name
- Searching Directory Number
Operating the CD/MP3 Player
12