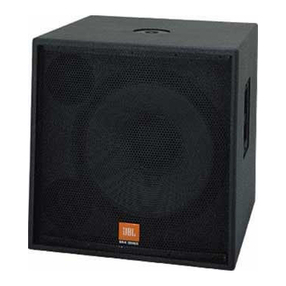
JBL EON7 18S User manual

User’s Guide
EON7 18S


3
CONTENTS
Safety Instructions ................................................................................................................................... 4
Precautions.............................................................................................................................................. 6
Declaration of Conformity........................................................................................................................ 7
Intro to EON718s...................................................................................................................................... 8
Overview ................................................................................................................................................ 9
Application Examples ............................................................................................................................. 10
Mixer Panel............................................................................................................................................ 14
Mixer Panel Functions........................................................................................................................... 15
EasyNav LCD ......................................................................................................................................... 18
Rigging Disclaimer ................................................................................................................................. 20
APP ...................................................................................................................................................... 21
EON718s Specifications ........................................................................................................................ 22
Cables & Connectors............................................................................................................................. 23
Warranty information ............................................................................................................................. 24
Contact information............................................................................................................................... 25

4
The EON718s is covered by this manual is not intended for use in high moisture environments. Moisture can damage the speaker cone and
surround and cause corrosion of electrical contacts and metal parts. Avoid exposing the speakers to direct moisture.
Keep speakers out of extended or intense direct sunlight. The driver suspension will prematurely dry out and finished surfaces may be
degraded by long-term exposure to intense ultra-violet (UV) light. The EON718s can generate considerable energ y. When placed on a
slippery surface such as polished wood or linoleum, the speaker may move due to its acoustical energy output. Precautions should be taken
to assure that the speaker does not fall off a stage or table on which it is placed.
HEARING DAMAGE, PROLONGED EXPOSURE TO EXCESSIVE SPL
The EON718s is capable of generating sound pressure levels (SPL) sufficient to cause permanent hearing damage to performers, production
crew, and audience members. Caution should be taken to avoid prolonged exposure to SPL in excess of 85 dB.
CARE & CLEANING
EON718s may be cleaned with a dry cloth. Do not allow moisture into any of the openings in the system. Ensure that the system is
unplugged from the AC outlet before cleaning.
THIS APPARATUS CONTAINS POTENTIALLY LETHAL VOLTAGES. TO PREVENT ELECTRIC SHOCK OR HAZARD, DO NOT REMOVE CHASSIS,
MIXER MODULE, OR AC INPUT COVERS. NO USER SERVICEABLE PARTS INSIDE. REFER SERVICING TO QUALIFIED SERVICE PERSONNEL.
WEEE Notice
The Directive 2012/19/EU on Waste Electrical and Electronic Equipment (WEEE), which entered into force as European law
on 14/02/2014, resulted in a major change in the treatment of electrical equipment at end-of-life.
The purpose of this Directive is, as a first priority, the prevention of WEEE, and in addition, to promote the reuse, recycling
and other forms of recovery of such wastes so as to reduce disposal. The WEEE logo on the product or on its box indicating
collection for electrical and electronic equipment consists of the crossed-out wheeled bin, as shown below.
This product must not be disposed of or dumped with your other household waste. You are liable of dispose of all your electronic or electrical
waste equipment by relocating over to the specified collection point for recycling of such hazardous waste. Isolated collection and proper
recovery of your electronic and electrical waste equipment at the time of disposal will allow us to help conserving natural resources.
Moreover, proper recycling of the electronic and electrical waste equipment will ensure safety of human health and environment. For more
information about electronica and electrical waste equipment disposal, recovery, and collection points, please contact your local city center,
household waste disposal service, shop from where you purchased the equipment, or manufacturer of the equipment.
RoHS Compliance
This product is in compliance with Directive 2011/65/EU and (EU) 2015/863 of the European Parliament and of the Council of 19.
31/03/2015 on the restriction of the use of certain hazardous substances in electrical and electronic equipment.
REACH
REACH (Regulation No 1907/2006) addresses the production and use of chemical substances and their potential impacts on human health
and the environment. Article 33 (1) of REACH Regulation requires suppliers to inform the recipients if an article contains more than 0.1%
(per weight per article) of any substance(s) on the Substances of Very High Concern (SVHC) Candidate List (‘REACH candidate list’).
This product contains the substance ‘’lead’’ (CAS-No. 7439-92-1) in a concentration of more than 0.1% per weight.
At the time of release of this product, except for the lead substance, no other substances of REACH candidate list are contained in a
concentration of more than 0.1% per weight in this product.
Note: on June 27, 2018, lead was added to the REACH candidate list. The indusion of lead in the REACH candidate list does not mean that
lead-containing materials pose an immediate risk or results in a restriction of permissibility of its use.
SAFETY INSTRUCTIONS

5
1. READ these instructions.
2. KEEP these instructions.
3. HEED all warnings.
4. FOLLOW all instructions.
5. DO NOT use this apparatus near water.
6. CLEAN ONLY with dry cloth.
7. DO NOT block any ventilation openings. Install in accordance with the manufacturer’s instructions.
8. DO NOT install near any heat sources such as radiators, heat registers, stoves, or other apparatus (including amplifiers) that produce
heat.
9. DO NOT defeat the safety purpose of the polarized or grounding type plug. A polarized plug has two blades with one wider than the
other. A grounding type plug has two blades and a third grounding prong. The wider blade or the third prong are provided for your
safety. If the provided plug does not fit into your outlet, consult an electrician for replacement of the obsolete outlet.
10. PROTECT the power cord from being walked on or pinched, particularly at plugs, convenience receptacles, and the point where they
exit from the apparatus.
11. ONLY USE attachments/accessories specified by the manufacturer.
12. USE ONLY with a cart, stand, tripod, bracket, or table specified by the manufacture, or sold with the apparatus. When a cart is
used, use caution when moving the cart/apparatus combination to avoid injury from tip-over.
13. UNPLUG this apparatus during lightning storms or when unused for long periods of time.
14. REFER all servicing to a qualified service personnel. Servicing is required when the apparatus has been damaged in any way, such
as power-supply cord or plug is damaged, liquid has been spilled or objects have fallen into the apparatus, the apparatus has been
exposed to rain or moisture, does not operate normally, or has been dropped.
15. DO NOT expose this apparatus to dripping or splashing and ensure that no objects filled with liquids, such as vases, are placed on the
apparatus.
16. To completely disconnect this apparatus from the AC Mains, disconnect the power supply cord plug from the AC receptacle.
17. Where the mains plug or an appliance coupler is used as the disconnect device, the disconnect device shall remain readily operable.
18. DO NOT overload wall outlets or extension cords beyond their rated capacity as this can cause electric shock or fire.
19. For adequate ventilation, do not install this equipment in a confident or enclosed space, such as a book case or similar unit. Product
ventilation should not be impeded by covering the ventilation openings with items such as newspaper, tablecloths, curtains, etc.
The exclamation point, within an equilateral triangle, is intended to alert the user to the presence of important operating and
maintenance (servicing) instructions in the literature accompanying the product.
The lightning flash with an arrowhead symbol within an equilateral triangle is intended to alert the user to the presence of
uninsulated “dangerous voltage” within the product’s enclosure that may be sufficient in magnitude to constitute a risk of electrical
shock to persons.
WARNING: To reduce the risk of fire or electrical shock, do not expose this apparatus to rain or moisture.
WARNING: No naked flame sources – such as lighted candles –should be placed on the product.
WARNING: Equipment shall be connected to a MAINS socket outlet with a protective earthing connection.

6
WARNING: This product is intended to be operated ONLY from the voltages listed on the back panel. Operation from other voltages other
than those indicated may cause irreversible damage to the product and void the product’s warranty. The use of AC Plug Adapters is cautioned
because it can allow the product to be plugged into voltages in which the product was not designed to operate. If you are unsure of the
correct operational voltage, please contact your local distributor and/or retailer. If the product is equipped with a detachable power cord, use
only the type provided, or specified, by the manufacturer or your local distributor.
OPERATING TEMPERATURE RANGE: -10ºC - 40ºC (14ºF - 104ºF)
WARNING TO REDUCE THE RISK OF ELECTRIC SHOCK,
DO NOT EXPOSE THIS EQUIPMENT TO RAIN OR MOISTURE.
RISQUE DE CHOC ELECTRIQUE NE PAS OUVRIR
CAUTION
RISK OF ELECTRIC SHOCK
DO NOT OPEN
WARNING: Do Not Open! Risk of Electrical Shock. Voltages in this equipment are hazardous to life. No user-serviceable parts inside. Refer
all servicing to qualified service personnel.
Place the equipment near a main power supply outlet and make sure that you can easily access the power breaker switch.
DO NOT UNDER ANY CIRCUMSTANCES OPERATE THE UNIT WITH THE WRONG VOLTAGE SELECTED. DOING SO MAY RESULT IN SERIOUS
DAMAGE TO YOUR PA SYSTEM WHICH WILL NOT BE COVERED BY WARRANTY.
FCC AND CANADA EMC COMPLIANCE INFORMATION: This device complies with Part 15 of the FCC Rules. Operation is subject to
the following two conditions
1. This device may not cause harmful interference, and (2) this device must accept any interference received, including interference that
may cause undesired operation.
CAUTION: Changes or modifications not expressly approved by the manufacturer could void the user’s authority to operate this device.
NOTE: This equipment has been tested and found to comply with the limits for a Class B digital device, pursuant to Part 15 of the FCC
Rules. These limits are designed to provide reasonable protection against harmful interference in a residential installation. This equipment
generates uses and can radiate radio frequency energy and, if not installed and used in accordance with the instructions,
may cause harmful interference to radio communications. However, there is no guarantee that interference will not occur in a particular
installation. If this equipment does cause harmful interference to radio or television reception, which can be determined by turning the
equipment off and on, the user is encouraged to try to correct the interference by one or more of the following measures: Reorient or relocate
the receiving antenna. Increase the separation between the equipment and receiver. Connect the equipment into an outlet on a circuit
different from that to which the receiver is connected. Consult the dealer or an experienced radio/TV technician for help.
CAUTION: This product is for non-residential use only.
WARNING: This equipment is compliant with Class B of CISPR 32. In a residential environment this equipment may cause radio
interference.
CAN ICES-003(B)/NMB-003(B)
Protective earthing terminal. The apparatus should be connected to a mains socket outlet with a protective earthing
connection.
PRECAUTIONS

7
DECLARATION OF CONFORMITY
WIRELESS TRANSMITTER COMPLIANCE INFORMATION: The term “IC:” before the radio certification number only signifies that
Industry Canada technical specifications were met.
Le terme «IC:» avant le numero de certification radio signifie seulement que les specifications techniques d’lndustrie Canada ont ete
respectees.
This device contains licence-exempt transmitter(s)/receiver(s) that comply with Innovation, Science and Economic Development
Canada’s licence-exempt RSS(s). Operation is subject to the following two conditions (1) this device may not cause harmful
interference, and (2) this device must accept any interference, including interference that may cause undesired operation of the device.
Cet appareil contient des émetteurs / récepteurs exemptés de licence conformes aux RSS (RSS) d’Innovation, Sciences et
Développement économique Canada. L’exploitation est autorisee aux deux conditions suivantes : (1) l’appareil ne doit pas produire
de brouillage, et (2) l’utilisateur de l’appareil doit accepter tout brouillage radioelectrique subi, meme si le brouillage est susceptible
d’en compromettre le fonctionnement.
This equipment complies with FCC and IC radiation exposure limits set forth for an uncontrolled environment. This equipment should
be installed and operated with minimum distance 20cm between the radiator and your body. This transmitter must not be co-located or
operating in conjunction with any other antenna or transmitter.
Cet appareil est conforme a FCC et IC !’exposition aux rayonnements limites fixees pour un environnement non controle. Cet appareil
doit etre installe et utilize avec une distance minimale de 20cm entre le radiateur et votre corps. Cet transmetteur ne doit pas etre cositue
ou operant en liaison avec toute autre antenne ou transmetteur.
EU COMPLIANCE INFORMATION:
Hereby, HARMAN Professional, Inc., declares that the equipment type EON718s is in compliance to the following:
European Union Restriction of Hazardous Substances Recast (RoHS2) Directive 2011/65/EU; European Union WEEE (recast)
Directive 2012/19/EU; European Union Registration, Evaluation, Authorization and Restriction of Chemicals (REACH) Directive
1907/2006; European Radio Equipment Directive (RED) 2014/53/EU
You may obtain a free copy of the full Declaration of Conformity by visiting:
http://www.jblpro.com/www/product-support/downloads
This product contains batteries that are covered under the 2006/66/EC European Directive, which cannot be disposed of with normal
household waste. Please follow local regulations.
WIRELESS FREQUENCY RANGE AND WIRELESS OUTPUT POWER:
2402MHz - 2480MHz
6.00mW
Prevention of hearing loss
Caution: Permanent hearing loss may occur if earphones or headphones are used at high volume for prolonged periods of time.
Note: To prevent possible hearing damage, do not listen at high volume levels for long periods.
CLASS B PRODUCT:
ENVIRONMENTAL:
此标识适用于在中华人民共和国销售的电子信息产品 . 标识中间的数字为环保实用期限的年数 .
Este equipamento não tem direito à proteção contra interferência prejudicial e não pode causar interferência
em sistemas devidamente autorizados

8
INTRO TO EON718S
GETTING STARTED
Congratulations on your purchase of JBL Professional EON718s loudspeakers! We know you are anxious to get up and running as
fast as possible, which is why you are reading this section. The following will help you get set up as soon as possible.
Packaging Contents
Your EON718s should include:
• 1 EON718S Subwoofer Cabinet
• 1 6’ (2m) AC Power Cable
• 1 QSG
Unboxing
1. Open packaging
2. Open plastic to expose
cabinet handle on sides (subwoofer)
3. Remove cabinet from box/plastic
4. Plug AC cable into inlet
5. Power up
1
4
2
5
3

9
GETTING ACQUAINTED WITH EON718S
The powered mixer section of the EON718s houses the mixing board and power amplifier. Here, line level sources like
powered speakers and external mixers can be connected.
SETTING UP
How to set up
1. Insert input into desired channel
2. Slowly turn the Main knob to increase your main volume.
How to turn on/off
Press the Power Button for .5 of a second to engage power.
Bottom View Front View Left View Rear View
OVERVIEW

10
APPLICATION EXAMPLES
SMALL PA USING BLUETOOTH INPUTS AND THRU FUNCTION
Bluetooth input to XLR-1/4” Thru

11
APPLICATION EXAMPLES
SMALL PA USING TWO SYSTEMS AS MONITORS WITH SHARED THRU FUNCTION
PA1 and PA2 CH1 XLR-1/4” Combo inputs pass Thru to Sub

12
DJ CONSOLE USING TWO SYSTEMS AS MONITORS USING THRU FUNCTIONS
PA1 and PA2 CH1 XLR-1/4” Combo inputs pass Thru to individual Subs
APPLICATION EXAMPLES

13
CARDIOID
PA1 and PA2 CH1 XLR-1/4” Combo inputs pass Thru to individual Subs
CARDIOID
• Cardioid mode helps subwoofer performance
become more directional and easier to
control. Users can experience +3-5db of low
frequency extension on audience side and up
to -10-17db of reduction on rear/stage side.
• To use cardioid mode with 2 EON718S
subwoofers, place them next to each other or
stacked.
• Adjust the audience firing subwoofer’s preset
to 100HZ
• Adjust the rear-firing subwoofer’s preset to
CARDIOID
• Run BOTH Full range EON700 series speakers
from the pass through to the CH1 and CH2 on
the audience firing EON718S.
• Run THRU each channel of the front firing sub
into each channel of the rear-firing sub.
• Adjust volume accordingly.
MICROPHONE
(presenter or speaker) Subwoofer
positioning distance
Microphone (speaker/presenter)
stands before subwoofer.
To prevent any unnecessary feedback, please:
Position Microphone at least 2m (6ft) from a speaker
Do not stand directly in front of a speaker
>1m
>2m
Audience Facing Sub Rear Facing Sub
APPLICATION EXAMPLES
AudienceFacing Sub RearFacing Sub

14
MIXER PANEL
I
H
G
E
D
F
AC Power Connector
CH2 XLR Male
Loop Thru
CH2 XLR-1/4”
Combo Input
Main /
Menu Navigation
Power
Back Button
C
B
A
LCD Display
CH1 XLR-1/4”
Combo Input
CH1 XLR Male
Loop Thru

15
A. CH 1 XLR Male Loop Thru
This XLR output connector provides a method of sending audio
out to an external source. The XLR male connector will take a
direct feed of the input on its respective channel, and send it out
at the same level.
B. CH1 XLR-1/4” Combo Input
XLR – 1⁄4” combination connector (1 for each input) are used
for the analog audio inputs.
C. LCD Display
The LCD is used to display basic diagnostic information and
allow access to more advanced features through a menu
system. See the LCD GUI specification for more details on
the LCD menu system, features, and navigation. The LCD will
refresh at approximately 4Hz and is not suitable for meters or
any other fast motion items.
D. Power Button
Press the Power Button for .5 second to engage power.
Press the Power Button for .5 second to disengage power.
E. Main Volume / Menu Navigation
Controls LCD Display
• Rotary encoder: In Menu - Clockwise down menu/Anti-
clockwise up menu
• Press to select menu item
• + On Home screen, Main Volume increase by rotating the
knob clockwise.
• + On Home screen, Main Volume decrease by rotating the
knob counterclockwise.
F. Back Button
Press to return to previous menu item
G. CH2 XLR-1/4” Combo Input
XLR – 1⁄4” combination connector (1 for each input) are used
for the analog audio inputs.
H. CH 2 XLR Male Loop Thru
This XLR output connector provides a method of sending audio
out to an external source. The XLR male connector will take a
direct feed of the input on its respective channel, and send it out
at the same level.
I. AC Power Connector
Inlet adapter for A/C power cable
MIXER PANEL FUNCTIONS

16
I/O
MIXER PANEL FUNCTIONS

17
Knobs and Functions
The EON718S comes equipped with push button rotaries to make for easy navigation and hardware usage.
• A single press of the MAIN/MENU knob will open up the main menu.
• Pressing and holding the MAIN/MENU knob for 2s will mute the SUBWOOFER.
Buttons and Functions
• The POWER button turns on/off the speaker. Hold for .5s to turn on the speaker and 2s to turn off the speaker.
• The BACK button will back you out of the current screen you are in without saving changes. This can be thought
of as a “CANCEL” button.
MIXER PANEL FUNCTIONS

18
Main Menu
• Pressing the Main/Menu rotary at any time will take you to the EON718S’ main menu. Here, users can access
the main menu functions of the EON718S.
• DBX Driverack output - DriveRack is a line of hardware products produced by Harman’s dbx brand. These
rack mount signal processors provide detailed control for final processing and crossovers before feeding the
mix to one or more speakers. This DriveRack functionality embedded into EON700 is designed to optimize the
combination of speaker and Pass Thru outputs built into this JBL speaker.
• The Output EQ is a package of filter adjustments on the main mix before the audio feeds to the amp and
speaker. It includes a collection of easy to select preset curves for common subwoofer use cases. Each
preset can also be loaded into the Custom preset for detailed user adjustable of output parametric EQ’s.
The user has adjustments for individual band level, frequency, and width (“Q”).
• “Output EQ” On/Off enables or bypasses the current settings in the output EQ processor.
• “Presets” enables rotation of the Main/Menu knob to view and select from the Output EQ presets.
• Scroll the menu to “Presets” and press the MAIN/MENU knob.
• Rotate the MAIN/MENU knob to view the available presets.
• Click the MAIN/MENU knob to load the currently listed preset.
• Users can load the Custom preset, then double click the MAIN/MENU knob to open the Master
EQ editing page. Inside this graph display page you may rotate the MAIN/MENU knob to a
specific parametric EQ number and click the MAIN/MENU knob again to select to edit the gain
(plus or minus in dB), filter frequency, or “Q” (i.e. adjust the filter width.)
• Users can load any preset as a starting point, then scroll down and adjust any setting to
load the current curve as the Custom preset for further editing. A confirmation dialog will
appear, warning the user that doing this will remove the current Custom preset settings
and load it with the currently viewed settings.
• Flat – a flat tuned subwoofer preset
• 80hz – adjusts the subwoofer crossover point to 80hz
• 100hz – adjusts the subwoofer crossover point to 100hz
• 120hz – adjusts the subwoofer crossover point to 120hz
• Wall – adjusts the tuning for the subwoofer to optimize its placement close to a wall
• Corner – adjusts the tuning for the subwoofer to optimize its placement in the corner of a room
• Cardioid – adjusts the tuning, delay and polarity of the subwoofer to optimize its usage in
cardioid mode. For more on this, please see the Cardioid section of the guide.
• Speaker Delay
• Signal delays are used when multiple speakers are in use but speakers are at different distances from the
audience.
• Examples:
• A subwoofer in front of the stage, while this full range speaker in on the stage. In this configuration,
EASYNAV LCD
Intro to the EasyNav LCD

19
the Pass Thru XLR to subwoofer will need to be slightly delayed to make up for its closer position to
the audience.
• Time Alignment Basics:
• To compensate for different distances’, determine the speaker farthest from the audience and delay
other speakers with the same signal to “time align” with the speaker farthest away from the audience.
• Sound travels through air at average humidity and room temperature at about 1.1 feet per ms.
Measure the difference in distance of each speaker feeding the audience. Feed the speaker farthest
from the audience with no time alignment delay. Set delays for the other closer speakers based on
their distance ahead of the farthest back speaker. Measure the distance difference and enter 1 ms
per 1.1 feet that each speaker is ahead of the farthest back speaker in your configuration. Time
alignment is not perfect as not all audience positions measure the same speaker distance differences.
• The EON718S offers 50ms of speaker delay on it’s input stage.
• Polarity – This inverts the polarity of the subwoofer. OFF indicates the woofer is in standard polarity. ON means
the polarity of the subwoofer is reversed.
Settings
• BT Control Pairing” enables Bluetooth control pairing for up to 30 seconds with the JBL Pro Connect app. This
turns off when a pairing has been made, or after 30 seconds. When pairing with the app, please initiate control
pairing first. Select the speaker in the “Add Speakers” menu. The speaker will send a 4-digit pin back to the LCD.
Confirm this using the MAIN/MENU knob.
• “LCD Contrast” allows the user to adjust the LCD contrast between 0 and 100%.
• “Factory Settings” resets all settings in the speaker to factory default, including Bluetooth communication pairing.
• “Firmware Version” shows the current firmware version loaded onto the speaker.

20
RIGGING DISCLAIMER
Only experienced professionals should attempt to suspend the speakers.
For permanent installation applications utilizing the M10 suspension points, JBL Professional recommends the use of three (3)
M10 x 1.5 thread pitch forged shoulder steel eyebolts with an 18-20mm threaded shaft, along with fender washers, rated for
overhead suspension. Users unfamiliar with safe rigging practices should not attempt to suspend loudspeakers.
Raise the speakers as high as possible.
For best results try to get the high frequency horn at least 2 to 4 feet above the heads of the audience. If the speakers are too
low, the people in the back of the audience will not receive the best quality sound.
Place the speakers between the microphones and the audience.
Feedback occurs when the microphones pick up sound from the speakers and “feed” the sound back through the sound
system. If space is limited, point the speakers away from the microphones to reduce feedback.
Locate the speakers away from turntables.
Low-frequency feedback occurs when the output of the speaker is picked up by the tone arm of the turntable and is re-
amplified. A heavy, solid turntable base and shock mounting can also reduce this type of feedback in DJ applications.
Use more speakers in large or highly reverberant spaces.
Spreading speakers throughout these spaces will produce much better sound than trying to compensate with loudness level or
equalization. For very long distances, the use of another set of speakers with time delay is recommended.
Stand speakers upright for PA - Tilt the speakers back on the side for stage monitoring. Upright stance provides even coverage
over a wide area. EON speakers are also designed with two slanted positions for stage monitoring applications.
Floor Monitor Floor Standing Tripod Stand Stacking Pole Mount
Suspended
Table of contents
Other JBL Subwoofer manuals

JBL
JBL STUDIO L8400P User manual

JBL
JBL ARC SUB 8 User manual

JBL
JBL GRAND TOURING GTO1202D User manual

JBL
JBL SUB150P User manual

JBL
JBL VT4881ADP-AN User manual

JBL
JBL Grand Touring GTO1014 User manual

JBL
JBL 1200GTi Instruction manual

JBL
JBL PSW-D112 User manual

JBL
JBL 1500 ARRAY BG User manual

JBL
JBL GTO1204D Instruction manual