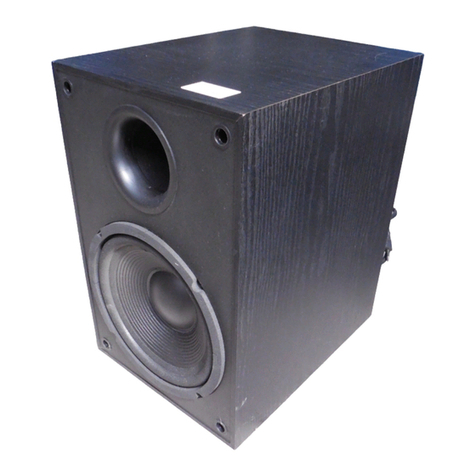
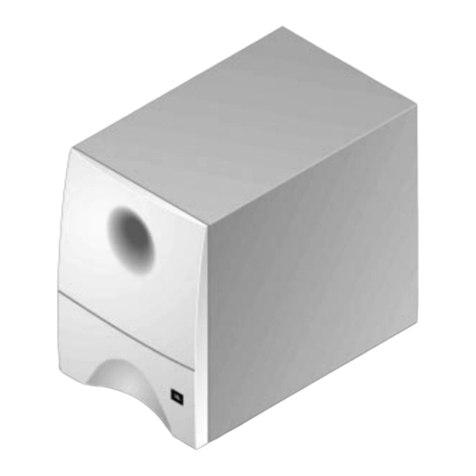
JBL PS100 User manual

PS
PS SERIES
POWERED SUBWOOFERS
OWNER’S
MANUAL
PS100 PS120PS60
PS manual[P].qXp2 7/27/98 3:24 PM Page 2

2
CAUTION
RISK OF ELECTRIC SHOCK
DO NOT OPEN
CAUTION: TO REDUCE THE RISK OF ELECTRIC SHOCK,
DO NOT REMOVE AMPLIFIER BACK.
NO USER SERVICABLE PARTS INSIDE.
REFER SERVICING TO QUALIFIED SERVICE PERSONNEL.
The lightning flash with arrowhead
symbol, within an equilateral triangle,
is intended to alert the user to the
presence of uninsulated "dangerous
voltage" within the product's
enclosure that may be of sufficient
magnitude to constitute a risk of
electric shock to persons.
The exclamation point within an
equilateral triangle is intended to alert
the user to the presence of important
operating and maintenance (servicing)
instructions in the literature
accompanying the appliance.
WARNING - TO REDUCE THE RISK OF FIRE OR ELECTRIC
SHOCK, DO NOT EXPOSE THIS APPLIANCE TO RAIN OR
MOISTURE.
CAUTION: TO PREVENT ELECTRIC SHOCK DO NOT USE
THIS (POLARIZED) PLUG WITH AN EXTENTION CORD,
RECEPTACLE OR OTHER OUTLET UNLESS THE BLADE CAN
BE FULLY INSERTED TO PREVENT BLADE EXPOSURE.
!
!
PS manual[P].qXp2 7/27/98 3:24 PM Page 3

3
INTRODUCTION
Congratulations on choosing JBL
loudspeakers. Their highly
accurate, uncolored and balanced
sound character will greatly
increase your enjoyment of
recorded music. We build JBL
speakers with careful attention to
detail, using only the highest
quality materials. They will provide
many years of excellent
performance.
Our PS Series rivals the
performance of more expensive
powered subwoofers. It gives you
remarkably accurate and pleasing
sound reproduction.
mAmplified Subwoofer:
Your PS Series subwoofer has
both line-level and speaker-
level stereo inputs for versatility
and ease of use. We've also
provided speaker output to let
you hook-up satellite
speakers. Adjustable level and
crossover points let you
balance the subwoofer with
your main speakers.
mHigh Polymer Laminate
/Polypropylene Woofers:
provide tight bass and well-
defined sound reproduction
without harshness, stridency,
or listener fatigue.
mHigh Quality Active
Equalization Amplifier Circuitry:
Integrating the acoustic and
electronic systems into a single
enclosure enable JBL
engineers to employ an
equalizer circuit that extends
the bass response beyond the
limitations of a small enclosure.
mAcoustically Optimized
Enclosure: Optimized to
produce an extended and level
bass response.
mMagnetic Shielding: allows you
to place your subwoofer near
video monitors without creating
interference or distorting the
picture.
PS manual[P].qXp2 7/27/98 3:24 PM Page 6

"Speaker Level Input (from
amplifier)" - Use these inputs
when connecting to the speaker
out (speaker mains) of your
receiver/T.V./source amplifier.
Run speaker wires from the
speaker output terminals (usually
coded red and black) on the rear
of your receiver/T.V./source
amplifier to the red and black input
terminals labeled "Speaker Level
Input (from amplifier)" on the PS
subwoofer. (See Fig. 2)
Preparing the speaker level
hookup wire
Your JBL dealer can recommend
suitable cables, or you can buy
wire at most hardware stores.
High quality connectors and cable
offer consistent performance that
does not deteriorate over time.
We recommend #16 AWG two-
conductor insulated wire as a
minimum size. If your PS
subwoofer is more than 30 feet
(10 m) from your receiver/T.V.
/source amplifier, use larger
diameter wire.
Making the speaker level
hookup
1. First measure the distance
from your receiver/T.V./source
amplifier to your PS subwoofer.
2. Next make two hookup wires
this length.
3. Strip off 3/8" of insulation from
both ends of each conductor
wire.
4. Twist each set of thin wires into
a tightly-bunched spiral.
5. Now find a visual difference
between the two conductors of
each molded pair of speaker
wire.
CONNECTIONS
CAUTION: Before making any
connections to your subwoofer,
make sure the power to your
entire system is OFF .
POWER
Plug the power cord into a
grounded wall outlet or the
accessory outlet on the back of
your amplifier/receiver.
INPUTS
Your PS subwoofer has both line-
level and speaker-level input
connections. Review your
receiver/T.V./source amplifier
instruction manual to see which
outputs your equipment provides,
then follow the appropriate
instructions below.
"Line Input" - Use the RCA
(phono) input jacks labeled "Line
Input" when connecting from a
line-level device, such as a pre-
amp, crossover, signal processor,
or when using any of the line-level
outputs on the rear of your
receiver/T.V./source amplifier. If
your receiver has a single RCA
output for sending the signal to the
subwoofer, you may connect this
output to the R or L input jack on
your PS subwoofer. Or, you may
connect it to both R & L input jacks
by using a "y" adapter. Many
stereo/ large screen T.V.'s have
stereo (R & L) RCA jacks for
sending the signal to external
audio equipment. Your subwoofer
connects to these using both the R
& L input jacks. (See Fig. 1).
4
PS manual[P].qXp2 7/27/98 3:24 PM Page 7

5
SpeakerLevelOutput
(toexternalspeakers)
+
R
+
R
L
+
L
+
L
R
Crossover
Frequency
Level
Min
Max
50
200
(Hz)
Polarity
Reverse
Normal
SpeakerLevelInput
(from amplifier)
Line Input
PS Subwoofer
L
R
+
-
+
-
Receiver, TV, or Amplifie
L
R
FIG. 1: Line Level Input Connectio
RCA Phono
Cables
PS manual[P].qXp2 7/27/98 3:24 PM Page 10

6
SpeakerLevelOutput
(toexternalspeakers)
+
R
+
R
L
+
L
+
L
R
Crossover
Frequency
Level
Min
Max
50
200
(Hz)
Polarity
Reverse
Normal
SpeakerLevelInput
(from amplifier)
Line Input
PS Subwoofer
L
R
+
-
+
-
Receiver, TV, or Amplifie
L
R
FIG. 2: Speaker Level Input Connecti
Speaker
Wire
PS manual[P].qXp2 7/27/98 3:24 PM Page 11

your receiver/T.V. / source
amplifier to produce the low bass
while passing the unaltered signal
source to the external speakers.
"Speaker Level Output (to
external speakers)" - Hook up
the external speakers using two-
conductor insulated wire following
the same procedure described
under Speaker Level Input.
Connect the red (+) terminal of the
PS subwoofer to the red (+)
terminal of the external speaker,
and the black (-) to black.
Connecting the external speakers
this way ensures that they will be
in phase; that is, working together
not in opposition. Connecting the
speakers out of phase won't
damage them, but will result in
less bass and poor imaging. (See
Fig. 3).
NOTE: Connecting your satellite
speakers through your PS
subwoofer won't change their
impedance.
LEVEL
NOTE: when first setting up
your PS subwoofer, set the
Level control counter-clockwise
to "Min" (minimum) before
turning power switch ON.
Turn power switch to On and use
the "Level" knob to add the
appropriate amount of bass to
your main speaker output.
Increase the subwoofer level by
turning level knob clockwise until
you find a setting that is pleasing
to you.
These differences can be a
different color wire (copper or
"silver"); a strand of yarn in one
conductor; thin, raised ribs on one
part of the outer insulation; or a
printed "+" marking on one of the
insulators. It doesn't matter which
of the two strands of wire go to (+)
and (-) on your receiver/T.V.
/source amplifier and PS
subwoofer, just be sure to connect
both left and right hookup wires
identically. Push down on the
button below the terminal and
insert the wire through the hole.
For each channel, connect the red
terminal on the receiver/T.V.
/source amplifier to the red or (+)
loudspeaker connection terminal
on the PS subwoofer, and the
black to the black or (-).
Connecting the PS subwoofer this
way ensures that both channels
will be in phase; that is, working
together not in opposition.
Your PS subwoofer will accept
stereo (left and right) inputs or a
mono input (hooking up to just the
left or right input) using either line
level or speaker level input.
CAUTION: Never attach inputs
to both line level and speaker
level inputs of the same channel
at the same time.
OUTPUTS
Your subwoofer has a speaker
output terminal block to enable the
signal to be sent to your main
speakers or satellites. Your PS
subwoofer can use the signal from
7
PS manual[P].qXp2 7/27/98 3:24 PM Page 12

SpeakerLevelOutput
(toexternalspeakers)
+
R
+
R
L
+
L
+
L
R
Crossover
Frequency
Level
Min
Max
50
200
(Hz)
Polarity
Reverse
Normal
SpeakerLevelInput
(from amplifier)
Line Input
PS Subwoofer
L
R
-
+
+
-
Receiver, TV, or Amplifie
L
R
FIG. 3: Speaker Level Output Connecti
External Speakers
+
-
-
+
Speaker
Wire
8
PS manual[P].qXp2 7/27/98 3:24 PM Page 9

9
begins to play. The LED turns
green. After approximately 3
minutes of non-use (no signal
being received), your PS
subwoofer goes into the auto shut-
off mode. The LED turns RED to
signify this stand-by condition.
AMBER - The LED turns amber
briefly when the amplifier is in the
protection mode. This occurs
when the subwoofer power switch
is turned on while your
receiver/T.V. /source amplifier is
sending a signal to the PS
subwoofer.
NOTE: When the amplifier is in
the stand-by mode it is effectively
turned off. The Red LED tells you
that the PS subwoofer is plugged
into the AC wall power with its
power switch turned on, but the
amplifier circuitry is not engaged.
You do not have to reach to the
back panel and turn the power
switch off after every use. Your PS
subwoofer turns itself off internally.
For extended periods of non-use
(ie, vacations, etc.) you may wish
to turn the PS subwoofer off using
the power switch.
PLACEMENT -
CAUTION: Do not
place your PS subwoofer next to
heaters, furnaces, or any other
heat sources. Be sure not to pinch
or compress the power cord.
Since the low frequencies
produced by your PS subwoofer
are non-directional, the placement
of your subwoofer is not critical.
You may place it under an end
table, next to the wall, next to T.V.,
anywhere you would like.
CROSSOVER FREQUENCY
Use the crossover frequency knob
to adjust the upper end of the
subwoofer's frequency response.
The crossover control determines
the highest frequency your
subwoofer will reproduce. It allows
a seamless transition from
subwoofer to satellite speakers.
When using small satellite
speakers (without much low end),
you want the crossover frequency
more toward the upper end (200
Hz) to fill in the sound your
satellites can't reproduce. When
using larger main speakers, a
setting more towards the 50 Hz
end gives a smoother transition
from your PS subwoofer to your
main speakers. Experiment until
you find a setting that meets your
satisfaction.
MULTICOLOR LED INDICATOR
OPERATION
The LED on the front of the
enclosure signifies the following
operation states of the PS
subwoofer:
RED - When your PS subwoofer
isn't receiving a music or source
signal and the power switch is
turned on, the LED indicator turns
REDtelling you that the unit is
plugged in and ready for
operation. At this time, the
amplifier is in a "stand-by" mode,
effectively turned off and waiting
for a signal from the source
amplifier.
GREEN - When your PS
subwoofer picks up a source
signal, it turns on instantly and
PS manual[P].qXp2 7/27/98 3:24 PM Page 8

Use the POLARITY switch to
maintain proper acoustic
summation with the main
speakers. Listen to your PS
subwoofer and main speakers with
the switch on "Normal" then listen
to the same material with the
switch on "Reverse". Decide
which way sounds better and
leave the switch in this position.
You should repeat this procedure
if you move your PS subwoofer to
another part of the room.
ALC PROTECTION CIRCUITRY
Your PS series amplifier has a
built in Automatic Level Control
circuitry that comes on
automatically when subjected to
high input signal levels. It prevents
the subwoofer driver from being
damaged by accidental miss-use,
assuring you of many years of
excellent performance.
GENERAL CARE
Use a damp cloth for cleaning
your PS subwoofer cabinet. Do
not use detergents or other
cleaners.
TROUBLESHOOTING / SERVICE
Your PS subwoofers should
only be serviced by an
authorized JBL repair station.
Do not attempt to remove the
grille. It is fixed and should only
be removed by qualified
personnel. Removing the grille
may void your warranty.
Woofers are replaceable by
repair station only. Do not
remove the amplifier from the
cabinet. There are no user
serviceable parts inside.
Before seeking service for your PS
subwoofer, please re-check all
connections as outlined in this
manual. Verify that your AC wall
power source is working properly
by checking with another
appliance.
10
PS manual[P].qXp2 7/27/98 3:24 PM Page 5

Specifications PS60 PS100 PS120
Amplifier Power (RMS)* 50 Watts 50 Watts 100 Watts
Low Frequency 6-1/2" 10" 12"
Voice Coil Diameter 1" 2" 2"
Cone Material Polypropylene High High
Polymer Polymer
Laminate Laminate
Inputs Line Level Line Level Line Level
& Speaker & Speaker & Speaker
Level Level Level
Outputs ___________Full Range Speaker__________
Crossover Frequency 50-200 Hz 50-200 Hz 50-200 Hz
(Continuously Variable)
Frequency 32 Hz to 30 Hz to 23 Hz to
Response (-6dB) (62-250 Hz)** (62-250 Hz)** (62-250 Hz)**
External Dimensions (Inches)
Height 11" 13-3/4" 15-1/4"
Width 14" 17-1/8" 19-1/4"
Depth 7-1/4" 9-1/8" 9-7/8"
External Dimensions (mms)
Height 280 mm 349 mm 387 mm
Width 356 mm 435 mm 489 mm
Depth 184 mm 232 mm 251 mm
Weight (each) 21 lbs 34 lbs 40 lbs
9.5 kg 15.5 kg 18 kg
Shipping Weight 25 lbs 38 lbs 44 lbs
11.4 kg 17.3 kg 20.0 kg
*ALC circuit defeated.
**Determined by crossover setting.
JBL continually strives to improve its products. New materials, production
methods and design refinements are introduced into existing models without
notice as a routine expression of our design philosophy. For this reason,
PS Series loudspeakers may differ in some respect from their published
specifications and descriptions, but will always equal or exceed the original
specifications unless otherwise stated.
11
PS manual[P].qXp2 7/27/98 3:24 PM Page 4

P
PO
PS60
JBL Consumer Products, Inc.
240 Crossways Park West
Woodbury, NY 11797
8500 Balboa Blvd.
Northridge, CA 91329
800 645 7484
A Harman International Company
Part No. 75758
PS manual[P].qXp2 7/27/98 3:24 PM Page 1
This manual suits for next models
2
Table of contents
Other JBL Subwoofer manuals

JBL
JBL GT5-12 User manual

JBL
JBL S2-1024SS User manual

JBL
JBL BASSTUBE BTX250 User manual

JBL
JBL Balboa SUB/230 User manual

JBL
JBL W12GTIMKII User manual

JBL
JBL ASB6128 User manual

JBL
JBL MkII automotive User manual

JBL
JBL GTO1202D Instruction manual

JBL
JBL Control 50S/T User manual

JBL
JBL MS-BassPro SQ User manual