2
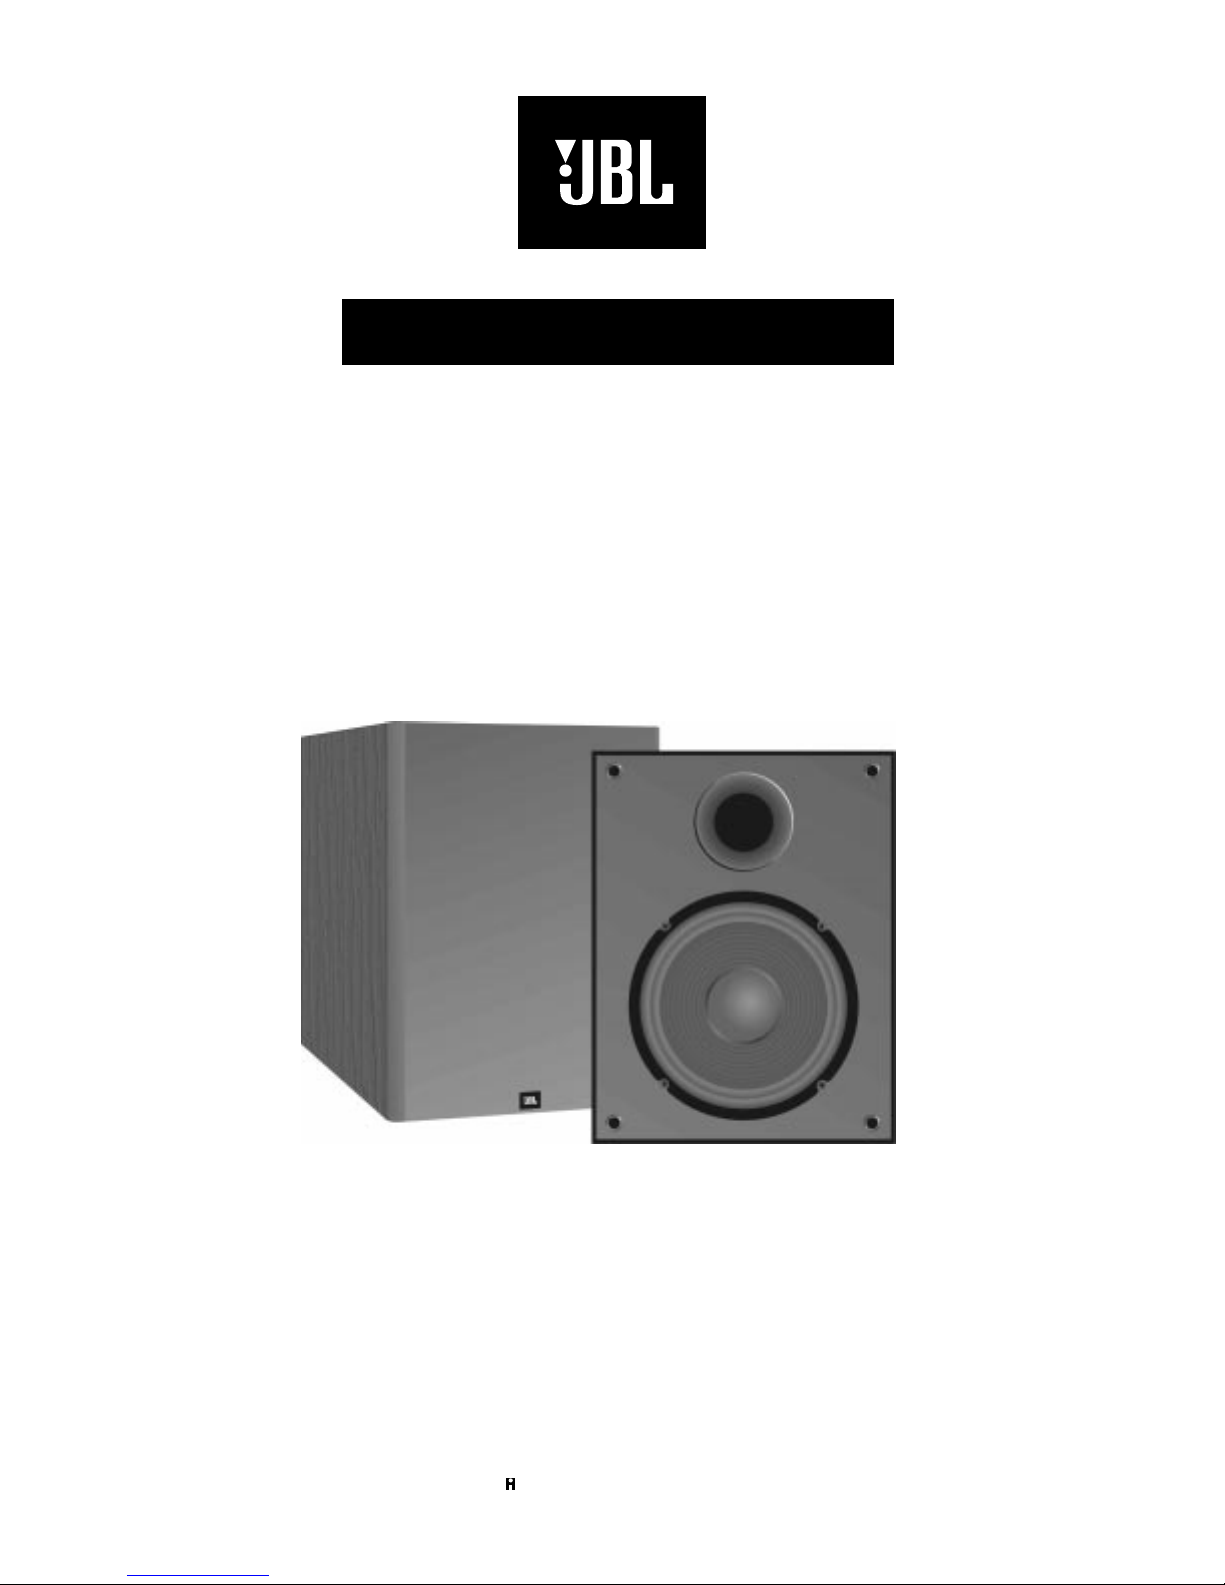
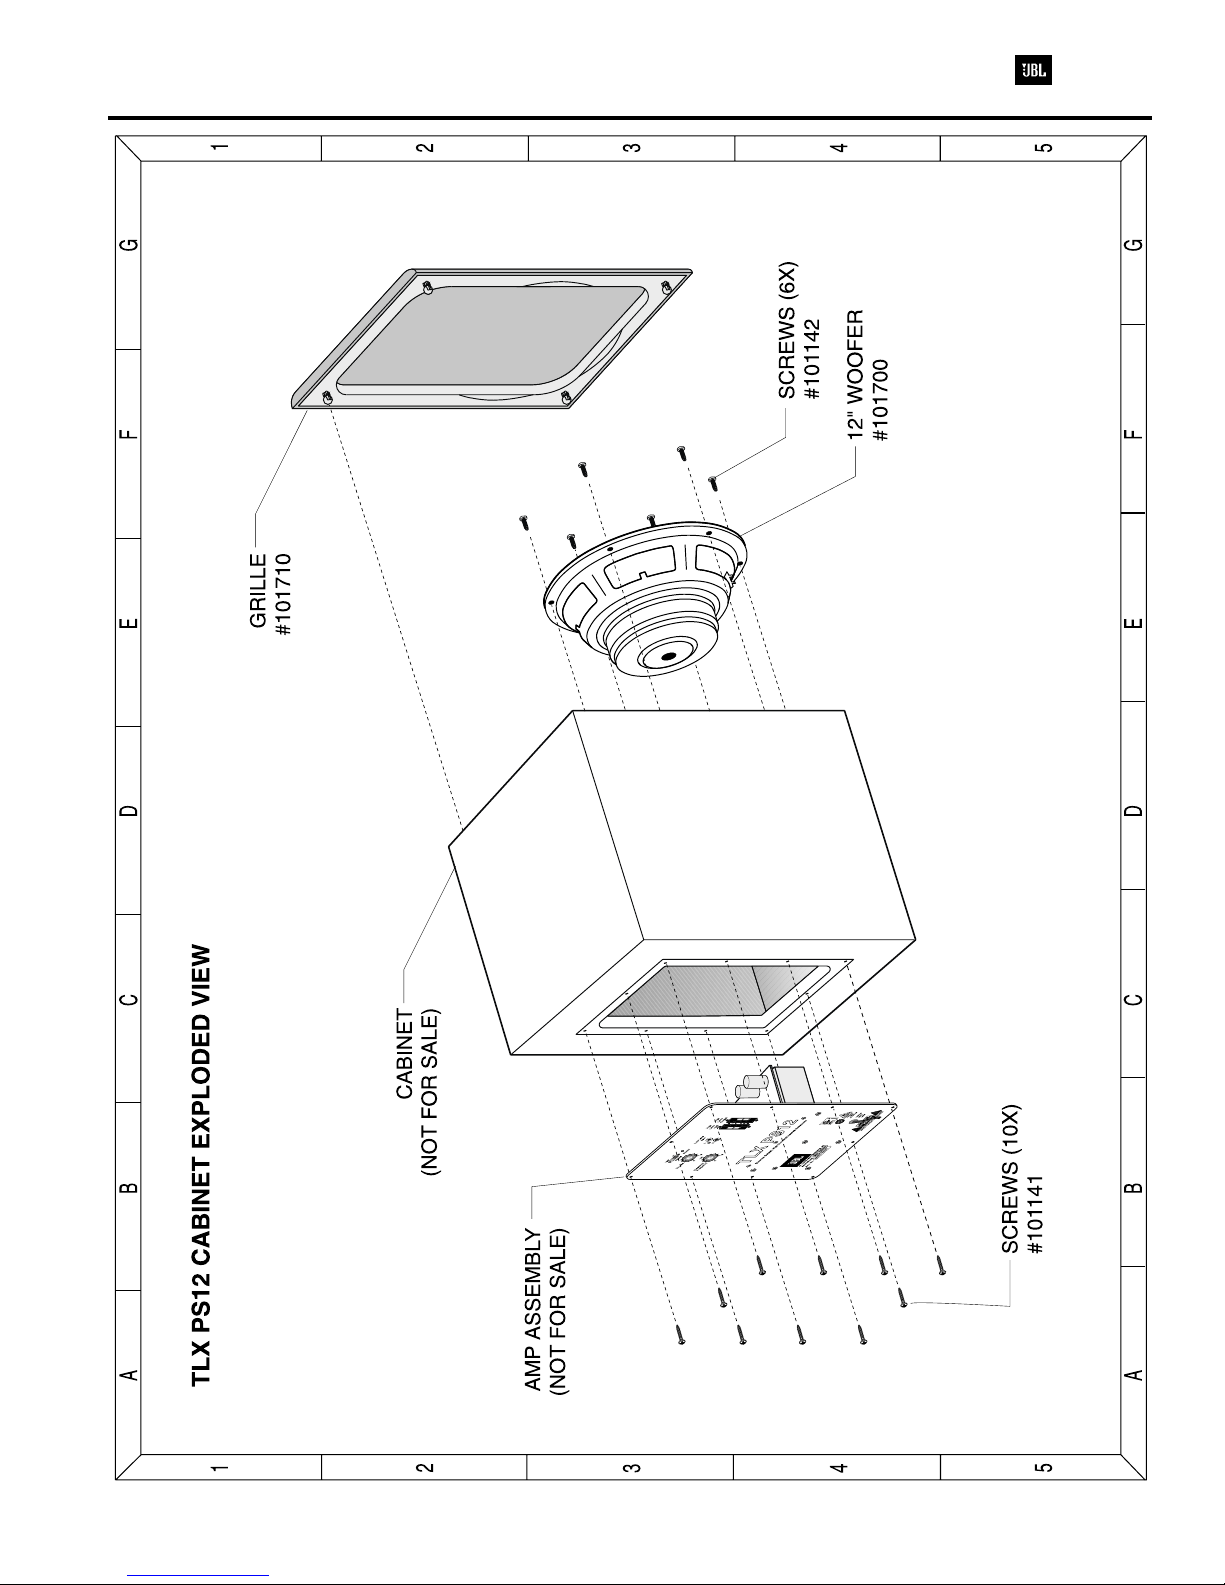
Powered Subwoofer TLX PS12
WARRANTY
This amplifier is warranted against defects in material
and workmanship for a period of one year from date of
shipment, when installed in accordance with the owners
manual in a clean, dry, interior home environment. THIS
AMPLIFIER IS NOT SUITABLE FOR OPERATION
OUTSIDE OR IN HARSH ENVIRONMENTS. During the
warranty period, the manufacturer will, at its option, either
repair of replace products which prove to be defective.
For warranty service or repair, this product must be
properly packed and returned to a service facility
designated by the manufacturer. Buyer shall prepay
shipping charges to the designated facility and the
manufacturer shall pay shipping charges to return the
product to buyer. However, Buyer shall pay all shipping
charges, duties and taxes for products returned to the
manufacturer from another country.
The manufacturer does not warrant that the operation of
the product will be uninterrupted or error-free. The Buyer
must determine the suitability of the product for his or her
purposes.
LIMITATION OF WARRANTY
The foregoing warranty shall not apply to defects
resulting from improper or inadequate maintenance by
Buyer, Buyer-supplied interfacing, unauthorized
modification or misuse, operation outside of the
environment specifications for the product including
inadequate ventilation, or improper site preparation,
installation, or maintenance.
NO OTHER WARRANTY IS EXPRESSED OR
IMPLIED. THE MANUFACTURER SPECIFICALLY
DISCLAIMS THE IMPLIED WARRANTIES OF
MERCHANTABILITYAND FITNESS FOR A PARTICULAR
PURPOSE.
EXCLUSIVE REMEDIES
THE REMEDIES PROVIDED HEREIN ARE BUYERS
SOLE AND EXCLUSIVE REMEDIES. THE
MANUFACTURER SHALL NOT BE LIABLE FOR ANY
DIRECT, INDIRECT, SPECIAL, INCIDENTAL, OR
CONSEQUENTIAL DAMAGES, WHETHER BASED ON
CONTRACT, TORT, OR ANY OTHER LEGAL THEORY.
SAFETY SYMBOLS
The following symbols are used throughout this manual
and in the product. Familiarize yourself with each of the
symbols and its meaning before servicing this amplifier.
Instruction manual symbol. The product will be
marked with this symbol when it is necessary for
the user to refer to the instruction manual in order
to protect the unit against damage.
Indicates dangerous voltages are present. Be
extremely careful.
The
CAUTION
sign denotes a
hazard. It calls attention to a
procedure which, if not correctly
performed or adhered to, could result in damage to or
destruction of the amplifier. Do not proceed beyond a
CAUTION
sign until the indicated conditions are fully
understood and met.
The
WARNING
sign denotes a
hazard. It calls attention to a
procedure which, if not correctly
performed or adhered to could
result in injury or loss of life. Do not proceed beyond a
WARNING
sign until the indicated conditions are fully
understood and met.
GENERAL SAFETY CONSIDERATIONS
THIS UNIT DOES NOT HAVE A POWER SWITCH;
HAZARDOUS VOLTAGES ARE PRESENT WITHIN THE
UNIT WHENEVER IT IS PLUGGED IN.
This still applies
when the over-temperature thermostat opens, as it may
automatically reset at any time.
There are voltages and hot components at many points
in the amplifier which can, if contacted, cause serious injury.
Be extremely careful. Any adjustments or service
procedures that require operation of the amplifier out of its
enclosure should be performed only by trained service
personnel.