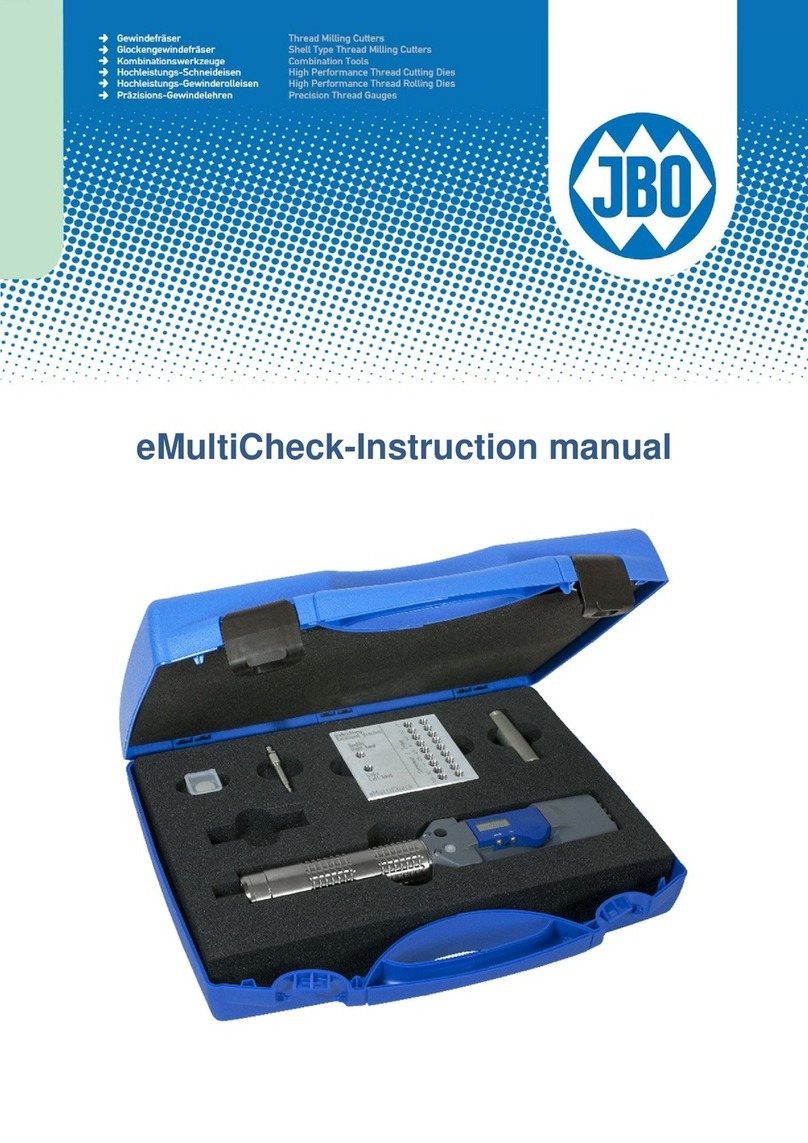
JBO eMultiCheck 2.0 USB User manual

JBO·eMultiCheck2.0USB ENG·1906
eMultiCheck 2.0 USB
Instruction manual

1
JBO·eMultiCheck2.0USB ENG·1906
Table of Contents
1
INTRODUCTION .......................................................................................................... 2
1.1
Starting up ................................................................................................................................................................ 2
1.2
Switching on ............................................................................................................................................................
1.2.1
Maintain mode ................................................................................................................................................................... 3
1.
Switching off ............................................................................................................................................................ 4
1.4
Procedure of inspection for internal threads with gauges .................................................................... 4
2
USING THE EMULTICHECK ........................................................................................... 4
2.1
Screwing in: .............................................................................................................................................................. 4
2.1.1
Saving thread depths ...................................................................................................................................................... 5
2.1.2
Manual mode ...................................................................................................................................................................... 5
2.1.3
Through-holes ................................................................................................................................................................... 5
2.2
Subsequent measurement: ................................................................................................................................ 5
2.
Screwing out: ........................................................................................................................................................... 5
2.3.1
Manual mode ...................................................................................................................................................................... 5
3
DIGITAL DISPLAY WITH INTEGRATED WIRELESS PORT ................................................. 6
.1
Basic Functions ....................................................................................................................................................... 6
.2
Advanced Functions Digital Display with integrated Wireless Device .............................................. 7
................................................................................................................................................................................................... 8
.
LED for battery charge condition ..................................................................................................................... 8
.4
Special note: ............................................................................................................................................................. 8
.5
Measuring depth according to the thread diameter ................................................................................. 9
4
CONFIGURATION SOFTWARE „EMULTICHECK-UI“ ....................................................... 9
4.1
Loading the current configuration ............................................................................................................... 12
4.2
Save a new configuration ................................................................................................................................. 12
4.
Checking thru holes ........................................................................................................................................... 1
4.4
Checking blind holes .......................................................................................................................................... 14
4.5
Adjustment of speeds ........................................................................................................................................ 15
4.6
Permanent rotation mode ............................................................................................................................... 15
4.7
Locking the blue button „C“ ............................................................................................................................. 15

2
JBO·eMultiCheck2.0USB ENG·1906
4.8
Save / load data records as well as export / import data records .................................................... 16
4.8.1
Save data records .......................................................................................................................................................... 16
4.8.2
Load data records .......................................................................................................................................................... 1
4.8.3
Delete data records....................................................................................................................................................... 1
4.8.4
Export / import data records ................................................................................................................................... 18
ASSEMBLING THE BASIC DEVICE / PLUG GAUGE ........................................................ 18
6
CHARGER .................................................................................................................. 19
7
OPTION – OPERATION WITH WALL POWER SUPPLY .................................................. 19
8
INSTRUCTION FOR BATTERY DISPOSAL...................................................................... 20
9
SAFETY INSTRUCTIONS ............................................................................................. 20
1Introduction
The eMultiCheck is the latest development by JBO. The "e" stands for a combination of our well-proven
MultiCheck with a motorised drive which is controlled by a microprocessor.
1.1
Starting
up
Before the device is used for the first time, it should be fully charged in order to ensure a maximum
battery life. To do this, just push the eMultiCheck into the charging station. An indexing system on both
parts ensures that it can only be pushed in the right way round. The first time, the charging time should be
at least one hour. The device is then fully operational.
To remove from the charging station, hold the station tight and pull out the eMultiCheck.

3
JBO·eMultiCheck2.0USB ENG·1906
1.2 Switching on
The device can be switched on by pressing one of the two buttons on its front (button A or B, Fig. 4). The
drag moment of the drive is then automatically calibrated. During calibration, the drive turns for a short
time at a constant speed. This process takes place every time the device is switched on. It is important to
remember this when the device stays screwed into a component for more than 3 minutes.
1.2.1 Maintain mode
During switching on the eMultiCheck is also checked whether the thread plug gauge is freely rotatable or
that, for various reasons (Thread gauges screwed on block, bearing damage, mechanical damage ...)
clamps.
If a defined torque exceeded the device control automatically goes into a maintenance mode. This is
indicated by a pattern of movement of the thread plug gauge (short rotational movements 2x left / 2x
right repeating)
If the device is in this mode, only the white button "A" for the unscrewing active. If the thread plug gauge
screwed in the component it have to be completely unscrewed by pressing the white button "A".
Subsequently, the renewed strength test can be started by pressing the button "C". Join the new
measurement no exceeding the torque to the maintenance mode is automatically canceled.
button A
button B Button for data
transmission
USB Port
button C
LED for battery charge
condition

4
JBO·eMultiCheck2.0USB ENG·1906
1. Switching off
The device switches off automatically after about 3 minutes when none of the buttons are pressed.
1.4 Procedure of inspection for internal threads with gauges
Application of the GO thread plug gauge
The GO thread plug gauge checks the virtual size of the internal thread. This is effected by checking the
minimum limit of the pitch diameter, taking into account pitch errors, errors in the flank angles and
deviations of form, which produce an apparent reduction of the pitch diameter of the workpiece. In
addition it checks the minimum limit of the major diameter and also whether the length of the straight
flank is sufficent, i.e. that the rounding at the root of the profile does not encroach too far upon the flank of
the thread.
!!!!! This gauge does not check the minor diameter of the workpiece !!!!
The GO thread plug gauge screwed by hand, without using excessive force, shall enter the whole length of
the workpiece thread. If entry is not possible, the workpiece thread does not comply with the
specification.
Application of the NoGo thread plug gauge
The NoGo thread plug gauge checks the maximum size of the pitch diameter. It is acceptable to screw in
the NoGo plug gauge into the workpiece without any force two rotations maximum.
Important:
Before starting, the readout has to be zeroed by pressing the SET button on the Electronics. The
DigiMultiCheck is then ready for operation.
Principle:
The zero positon of the gauge is equivalent to the middle of
the truncation of the thread, 0,5xP. This means half of the
pitch between middle of truncation and end face.
(see illustration).
End face of the gauge sleeve aligned with crest of thread at
this point.(middle of the external diameter)
2Using the eMultiCheck
The eMultiCheck is operated with the two buttons on the front of the device. The blue button (button C) at
the side is used for adjustment.
2.1 Screwing in:
To begin the measuring process, press the black button (button B) on the front and the plug gauge GO
eMC begins to turn slowly (phase 1).
The plug gauge GO eMC is placed on the thread that needs checking. If a defined torque is exceeded, the
device assumes that the plug gauge GO eMC is in the component (initial contact or thread found) and
increases the torque and the speed (phase 2).

5
JBO·eMultiCheck2.0USB ENG·1906
During this phase of screwing in, if the plug gauge GO eMC is blocked, it is turned back in the opposite
direction by 180° and phase 2 is started again.
After one more revolution the device accelerates again and the torque is adjusted to the set target torque
(phase 3).
When the thread depth is reached (the end) the device is switched off due to the set torque being reached
(phase 4).
In phase 4, the measured thread depth is stored in the memory and used as a reference for the next
measurement. This can be influenced with the settings (please also see the "Setting“ section).
The measured thread length can now be read off the display (the display must first be switched on by
pressing the button. Please note: the display and the motor/controls are independent of one another, i.e.
no data exchange takes place between these units).
2.1.1 Saving thread depths
If the RPM should be reduced during a subsequent measurement ( see 2.2 ) to ensure a smooth run up
on the thread end the thread depth have to be saved during the first measurement. Therefore you have to
press and hold the blue button “C” for 1 second after reaching the thread depth ( the decive vibrates 1x ).
The thread depth is no saved on the device and the speed is reduced with each subsequent measurement
(same thread depth) 1-2 turns before reaching the final depth.
By pressing the blue button "C" for 2 seconds (device vibrates 2x) the saved thread depth is deleted. In
this configuration, the RPMwill be not reduced.
2.1.2 Manual mode
Pressing and holding down the black button (button B) switches the device to manual mode. Here, the
device is switched over immediately to the fast speed and switched off again when the set torque is
reached.
2.1. Through-holes
To check thru holes the eMultiCheck must be configured with our eMutliCheck software.
The pitch and the length of the thru hole must be specified in the software. When check the thread
measurement is stopped after reaching the programmed depth + 2x the pitch (continuity of the thread is
ensured). Then, the thread plug gauge is as usual unscrewed on the white button "A".
2.2 Subsequent measurement:
In a subsequent measurement, the sequence of phases 1-3 is the same as in the first measurement. Before
the last measured thread depth is reached, however, the speed is reduced, in order to prevent contact at
the end and to move carefully (gently) against the thread. This ideally reduces the load on the component
and the thread plug gauge.
If the thread is deeper, the speed is automatically increased again and is the same as in the normal
measuring sequence.
2. Screwing out:
The plug gauge is unscrewed from the component again by pressing the white button (button A) on the
front of the device. This is done by pressing the button briefly and the device stops automatically when
the plug gauge GO eMC has turned back completely again. If the black button is pressed and held down,
the plug gauge turns until the button is released again. In this mode, the torque is not limited.
2. .1 Manual mode
If the white button is pressed and held down, the device switches to manual mode. In this mode, the
device is set to the maximum torque until the button is released again.

6
JBO·eMultiCheck2.0USB ENG·1906
Digital Display with integrated wireless port
The eMultiCheck 2.0 USB is equipped with a wireless data transmission digital display. The corresponding
USB wireless receiver iStick can transfer the measurement results quickly and easily to a PC.
Technical Data:
Measuring range
4xD
Power
supply
1 Lithium Batterie 3V,
type
CR2032
Resolution
0,01 mm
Battery life
2000
hours
/
year
Error Limit
40 µ
Fr
e
quency band
2403/2439/24 5 MHz
Repeatability
10 µ
C
o
mmunication range
max. 6m
Max. measuring speed
> 2m/s
Operation temperature
+10° bis +40°C
Measurements
/
second
> 3
s
Protection group
IP6 (DIN EN 60529)
3.1 Basic Functions
Switch-On
To switch ON, press the button for a short time
Switch-Off
To switch OFF keep button pressed for more than 3 seconds
Set Zero
To reset to ZERO, press the button

7
JBO·eMultiCheck2.0USB ENG·1906
3.2 Advanced Functions Digital Display with integrated Wireless Device

8
JBO·eMultiCheck2.0USB ENG·1906
. LED for battery charge condition
The LED starts flashing when the battery voltage drops below 10.9V. If the voltage drops below 10.5V, the
LED lights continuously for about 5 minutes. The device then switches off automatically. The battery
should then be charged for at least 30 minutes.
.4 Special note:
- Contaminations of the device could affect the measuring process
- To clean a contaminated device please use a dry towel. If it is not sufficent please use a towel with
a neutral solvent. To prevent any damages don’t use volatile solvent, as it causes damages on
plastic parts.
- At regular intervals please lubricate the plug gauges with a resin free oil. It will prevent the gauge
from corrosion.
- Opening the device will leed to loose the warranty claim.

9
JBO·eMultiCheck2.0USB ENG·1906
.5 Measuring depth according to the thread diameter
thread plug gauge M5 23.00 mm
thread plug gauge M6 26.50 mm
thread plug gauge M7 37.00 mm
thread plug gauge M8 38.50 mm
thread plug gauge M9 38.50 mm
thread plug gauge M10 38.50 mm
thread plug gauges M11 - M14 44.00 mm
thread size M15 and bigger 50.00 mm
4
Configuration software „eMultiCheck-UI“
With our configuration software “eMultiCheck-UI” the eMultiCheck 2.0 USB can be configured quickly and
easily. Therefore the USB connection of the device (Mini USB) connected to a PC. Subsequently, the
software is started on the PC.

10
JBO·eMultiCheck2.0USB ENG·1906
The following settings can be made via the software:
- Direction of rotation (right / left thread)
- Torque depending on thread size / material to be tested
- Lock the blue button "C" (Save / Delete thread depths)
- Configuring through holes (Automatic stop after reaching the depth)
- Configuring blind holes ( fast Start / slow measuring sequence till thread end )
- Save / load data records as well as export / import data sets
- Adjustment of speeds
- Activating and Deactivating the permanent rotation mode
On the home screen, the language (German / English) can be selected or the program can be closed by
clicking the "Stop / Exit"
After selecting the language will appear automatically the user interface

11
JBO·eMultiCheck2.0USB ENG·1906
If the eMultiCheck will be not detected this will be shown on the bottom status bar.
Reasons that eMulticheck was not detected may be:
- USB cable not properly connected
- The eMultiCheck is in standby and must be activated by pressing a button ( see point 1.2 Switching On)
- USB driver has not yet been fully installed (automatically when you first connect the device to the PC)
The renewed search for the eMulticheck takes place via the button "Search for eMutliCheck"
If the the eMultiCheck was then detected this is also shown on the status bar

12
JBO·eMultiCheck2.0USB ENG·1906
4.1 Loading the current configuration
By pressing the button "Load settings from eMultiCheck" the current configuration is loaded from the
eMultiCheck and will be indicated by a colored background of the respective buttons.
4.2 Save a new configuration
If the current configuration of the device should be changed, this is done by activating the respective
buttons (direction of rotation and torque level)
The new configuration is transferred by pressing the button "Save settings to eMultiCheck"

13
JBO·eMultiCheck2.0USB ENG·1906
4. Checking thru holes
Checking thru holes requires no measurement of the thread depth, it only has the be ensured that the
thread runs all over the whole thread length. The function will be activated by pressing the button
"program through hole". This unlock the buttons "Thread pitch" and "Thread length"
Based on the input data the eMultiCheck calculates how far the thread plug gauge must be screwed in until
the automatically stop.
The thread length which is entered is automatically extended by 2x pitch to ensure a secure by screwing
in the thread plug gauge.
Example: pitch 1.5mm, thread length 12mm screw in depth 15mm
After reaching the calculated screw in depth the eMultiCheck will stop automatically and the black button
"B" is disabled to prevent a further screwing in. With the white button "A", the thread plug gauge will be
unscrewed as usual.
Moreover, in addition the Blue button "C" is disabled so that no fixed values can be overwritten during
thru hole measurement.

14
JBO·eMultiCheck2.0USB ENG·1906
4.4 Checking blind holes
In addition to the standard measurement, the option "Program basic hole " can be selected. In this mode,
insertion of the thread gauge is facilitated with certain combinations of material and pitch. In this mode,
the pitch and the thread length must be entered. When starting the measuring process, the thread plug
gauge is not slowly screwed into the component and then accelerated, but the gauge runs quickly, turns so
many turns until the entered thread length is reached (the number of revolutions is calculated thread
length divided by pitch) and then runs with the slow speed down to the thread end.
The fast turning at the beginning of the measurement helps to enter in soft materials such as e.g.
Aluminum or stainless steel. The speeds for screwing in can be controlled via the "Speed 1" and "Speed 2"
fields. However, in this mode, it is first screwed in at speed 2 and then switched to speed 1.

15
JBO·eMultiCheck2.0USB ENG·1906
4. Adjustment of speeds
From software version 1.4.0.1 it is possible to define the start and end speed. This can be defined via the
fields "Speed 1" and "Speed 2"
The speeds are limited between 35 1 / min and 425 1 / min freely selectable
4.6 Permanent rotation mode
The permanent rotation mode refers to the black button B which controls the screwing of the thread
gauge plug. If the setting is "on", the continuous rotation mode is active. This means that you can not only
touch the black button B but also hold it. The eMulticheck then immediately switches to speed 2 and it can
be screwed with the higher speed. However, all torque monitoring as well as the saved thread depth (see
2.1.1 Saving thread depths) are bridged
If the setting is "off", the thread can only be tested in the normal screw-in mode.
4.7 Locking the blue button „C“
Thus a predetermined thread depth ( see 2.1.1 Saving thread depths) can not be changed, it is possible
to disable this function by pressing "Lock adjustment button on eMultiCheck" To activate the button the
current setting of the eMultiCheck have to be loaded first. As long as the button "C" is locked there is no
possibility to save a new thread depth or delete a saved value.

16
JBO·eMultiCheck2.0USB ENG·1906
4.8 Save / load data records as well as export / import data records
From the "eMultiCheck-UI" version (UI stands for User Interface), parameters can be individually saved or
loaded in the software as a data record. It is also possible to export these data records to a file in order to
import them again on another PC.
This option gives you the ability to quickly recall recurring settings without having to make manual
adjustments every time (for example, using an eMultiCheck to test different threads).
4.8.1 Save data records
After all the desired settings have been made, clicking on the "Save record" button saves up to 20 data
records.

17
JBO·eMultiCheck2.0USB ENG·1906
In the input field a freely selectable text can be deposited. After pressing the "OK" button, you will
automatically return to the user interface.
4.8.2 Load data records
Click on the button "Load record" to open the table in which the previously saved settings can be found. By
selecting the appropriate memory location, the settings are loaded automatically.
4.8. Delete data records
To delete a record from the memory table, click on the button
"Save record". In the memory list you then click on the record to be deleted. The following window
appears:
This selection is confirmed with "Yes" and the following window appears again:
Here you have to select "Cancel" and the query appears asking if the data record should be deleted.

18
JBO·eMultiCheck2.0USB ENG·1906
After clicking on "Yes", the data record is deleted and a confirmation of the deletion process appears. After
clicking on "OK" you get back to the user interface.
4.8.4 Export / import data records
If the saved data sets are to be used on several PCs, it is possible to save them on any destination via the
"Export all records" button.
With the button "Import all records" you can load them again accordingly.
5Assembling the basic device / plug gauge
The plug gauge GO eMC is mounted in a specially pre-adjusted fitting. First the sleeve on the basic device
must be pulled back and then the plug gauge GO eMC with fast-change connector can be pushed into the
sleeve (this must click into place with both surfaces). Releasing the sleeve locks the plug gauge GO eMC in
place.

19
JBO·eMultiCheck2.0USB ENG·1906
The measuring sleeve is now pushed over the gauge and screwed in as far as it will go with manual force.
For thread sizes of more than M14, the gauge sleeve must be screwed in first and then the plug gauge. The
sleeve can be pulled back at the opening in the gauge sleeve.
The eMultiCheck is now ready for use.
6Charger
The product is tested for electromagnetic compatibility (EMC) and meets the requirements of the
applicable European and German directives. CE conformity has been verified and the relevant declaration
is available from the manufacturer.
For safety and certification reasons (CE), you must not modify or change the product in any way. If you
use the product for uses other than those described above, the product may be damaged. Incorrect use of
the product can also involve risks, such as short-circuits, fire, electric shocks, etc.
Starting up
1. Plug the 5.5 mm power plug of the power supply unit into the charger.
2. Connect the power supply unit to an electrical socket.
3. Push the eMultiCheck into the charging station.
4. Status display LEDs: each LED represents one cell of the battery pack. The corresponding LED for
each cell lights up red during the charging process and green when the cell is fully charged.
5. The battery is fully charged when all three LEDs light up green. Unplug the power supply unit
from the mains socket and take the eMultiCheck out of the charging station.
Technical data for power supply unit
Input voltage 100 – 240 V/AC, 50/60 Hz
Output voltage 12 V/DC
Output current 1,5 A
Plug size (diameter) 2.1 mm (inner contact), 5.5 mm (outer contact)
Cable length 115 cm
Overload protection 1,25 A
Short-circuit protection 3 A
7Option – operation with wall power supply
Here, the power supply for the eMultiCheck is supplied from a standard household mains socket (100 –
240 V/AC, 50/60 Hz). The wall power supply has short-circuit and overload protection.
For safety and certification reasons (CE) you must not modify or change the product in any way. If you use
the product for uses other than those described above, the product may be damaged. Incorrect use of the
product can also involve risks, such as short-circuits, fire, electric shocks, etc.
Table of contents
Other JBO Test Equipment manuals
Popular Test Equipment manuals by other brands

SMC Networks
SMC Networks PTE-300-V instruction manual

Teledyne
Teledyne LabMaster 10 Zi Series Operator's manual

Agilent Technologies
Agilent Technologies InfiniiVision MSO6102A Programmer's reference

Meatest
Meatest MC641 Operation manual

Spinner
Spinner BN 225312 product manual

ACS
ACS Alcolock WR2 Instruction and compliance manual