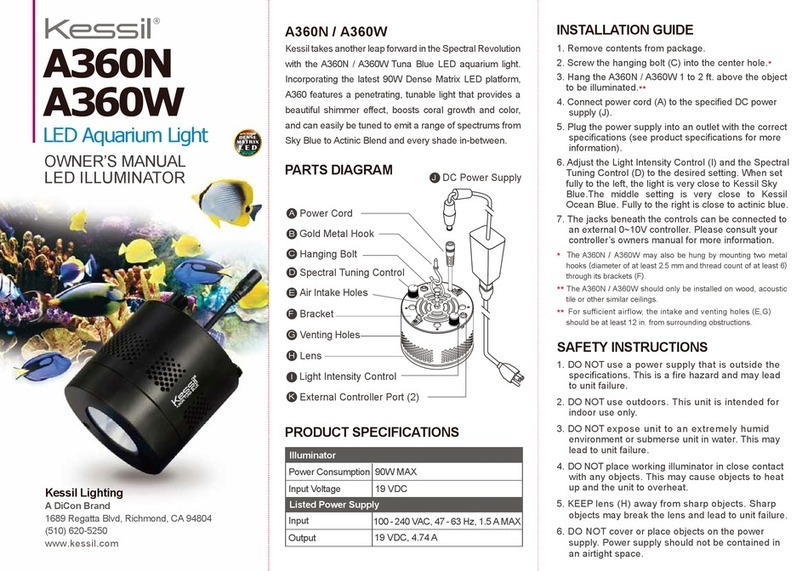
Jen-Ken Kilns TAP Tall Bonnie Glo User manual

Pro-Fusion Kiln Line with TAP
Table Top Versions User Guide
Jen-Ken Kiln Models:
TAP Tall Bonnie Glo 120v 15a MAX temp 1700⁰F
TAP ProFusion 16 120v 15a MAX temp 1700⁰F
Please read the following manual on fiber kilns to help better understand what it can and cannot do
for you. Then if you have questions please call.
This will serve as an overview of the kilns and then there is a section for each kiln with
individual notes and suggestions.
Setting up the kiln:
Your new fiber kiln should be placed on a sturdy non-combustible table or floor. If the table is
all metal, then assemble and place the kiln stand under the kiln. If the table is wood (or steel over
wood), then place one or more ceramic floor tiles down first. A piece of drywall board also makes
a good choice for non-combustible surface. While kilns themselves do not catch fire, it is
important to make sure that the area around the kiln is safe and that nothing flammable is near.
Fiber kilns have much cooler outsides then a brick kiln so the distance to walls and other items
around the kiln can be as little as 12” as long as the walls nearest to the kiln stay cool to the touch.
Safety Note: Remember to never place a kiln directly on a table or solid surface. A kiln stand
provides an air space that is always required beneath a kiln. And make sure there is a safe, non-
combustible surface under the stand (like brick, cement, drywall board or a metal table.)
Overview:
The fiber kilns were all designed for faster fusing. It took several years of thought and testing to
create kilns that defy what the glass companies recommend for their fusing schedules. We wanted
to build kilns that would fit better into our fast paced world. We are not trying to perform
miracles; we just believe that glass can fire quicker in the right firing environment.
Jen-Ken Kilns discovered that glass can fire faster in a kiln that does not have a kiln shelf. When a
shelf is used, the shelf and the glass both absorb heat, and you must slow your firings down to
accommodate the shelf and the glass heating at the same rate. The cool down is also slower,
because the shelf has absorbed a tremendous amount of heat, therefore taking longer to cool. The

glass can tolerate a quicker ramp rate in a fiber kiln, than glass sitting on a thick clay shelf with
posts. Firing on fiber also allows the glass to cool much quicker.
Brick kilns also absorb a tremendous amount of heat and then hold that heat that slows the cooling
of the kiln. This absorption of heat energy takes time and slows the kilns rate on the way up and
then slows the kilns descent back to room temperature. There is nothing wrong with slow,
(however, a fiber kiln can shave hours off a firing and conserve electricity, for those of us who
don't want to wait all day to see our finished glass projects). Fiber kilns absorb little heat, so that
the glass is able to absorb the majority of the heat generated, and get the job done faster!
Another great benefit to fiber: it is extremely LIGHT WEIGHT compared to a brick kiln the same
size. The Bonnie Glo weighs about 25 pounds. It's brick brother (the 15/6) weighs about 70
pounds. If you travel or teach, or just don't want to need help every time you need to move your
kiln, this is the best choice.
Benefit: If a firing can be completed in three hours versus 10-12 hours for some suggested firing
schedules then the electric cost are 75% less, and the wear and tear on the coils and relays is greatly
reduced.
Kiln Wash and Firing on the Kiln Floor
Apply kiln wash to the kiln floor according to the directions included. Do not force it dry with
heat or apply thick coats. Apply it only to the floor, being cautious not to get any on the coils. .
Using shelf paper gives a smoother backing to your glass and to offers the most protection to the
floor of the kiln. The kiln wash that is applied to the floor is a back-up in case a piece of glass pops
in the firing and jumps off the shelf paper. If shelf paper is not to be used, we recommend using,
fiberboard, lava cloth or Kaiser Lee board to help protect your kiln's floor. The kiln wash is the
back-up to the other firing surfaces. If a mishap occurs, the replacement of the kiln bottom is
expensive. A clay shelf and posts can be ordered and used anytime (but you'll need to use slower,
more traditional fusing schedules to accommodate those items).
SAFTY FIRST when removing used shelf paper: Shelf paper is a great product, but the dust
from the used shelf paper is a problem for all of us. We ask that you be cautious and follow the
shelf papers directions for cleanup. Powder residue from kiln wash or shelf paper is not good to
breathe. To minimize dust, we like to lay a wet paper towel over the used shelf paper while gently
and slowly pressing the paper towel down to collect the fibers in the wetness of the towel (trying to
make no dust). Vacuum cleaners with a HEPA filter can work, but may still release these super
fine dust particles into the air right through the filter. Papyrus Shelf paper holds together better
than most and can be reused 2-3 times. You can also re-freshen kiln wash between firings by
sifting a light dry coat of the powder over the dried painted coats of kiln wash using a fine mesh
strainer. Please contact your shelf paper supplier for other safety precautions for their shelf paper
products. Always wear an approved dust mask for fine powders when working with kiln wash and
used shelf papers.

Boron Nitride
Boron nitride is another good product that can work well on the floor of a fiber kiln. It usually is
applied from a spray can that only takes 3 thin coats (not thick coats) to give a slippery non-stick
surface. A lightly sprayed coat is required between firings. You can use this over kiln wash on the
floor or shelf, but you cannot apply kiln wash over Boron Nitride. While applying Boron Nitride
with a spray can, protect the walls of the kiln and the coils from over-spray using paper. Isopropyl
alcohol can be used to remove Boron Nitrate over-spray on some surfaces. While Boron Nitrite is
great for mold slumping firing at about 1280°F, it tends to stick to glass if taken much over 1425-
1450°F. We use it as a backup to the shelf paper that is placed on top.
Controllers
The TAP Controller has been preprogrammed with some regular 90 and 96 COE glass programs,
and also several programs for our Fiber Kilns. The controller will show this programs by name.
Any of these can be changed for your desired effect on the glass.
Note: Never Leave a Firing Kiln Unattended!

Programming the Pro-Fusion Kilns:
This is a common firing schedule recommended by many glass companies:
300° an hour/ 1200°F / Hold 30 min to one hour (bubble squeeze)
500° an hour/1480°F /Hold 10 min
Full / 950°F /Hold 60 min
150° an hour/700°F /Hold 0 min
We are going to speed the fusing up to save time and electricity
Try the slower firing schedule for the fiber kiln for one or two firings for each sized piece, speed it
up every firing as much as the glass will tolerate. The smaller the pieces are, the faster you can go.
Below, are what we have done in our firings, from where we started and what we have achieved
over the years.
Start Here Then Try This Pro Fusion 16 Full Fuse
Brick Kiln Firing
Fiber Slow Firing
Fiber Fast Firing
Good Pro Fusion 16 Program
Ra1 300⁰ per hour
Ra1 500⁰ per hour
Ra1 750⁰ per hour
Ra1 500⁰ per hour
⁰F1 1200⁰ degrees
⁰F1 1500⁰ F
⁰F1 1500⁰ F
⁰F1 1000⁰ F
Hld1 30 minutes
Hld1 10 minutes
Hld1 5 minutes
Hld1 10 minutes
Ra2 500⁰ per hour
Ra2 Full per hour
Ra2 Full per hour
Ra2 Full per hour
⁰F2 1480⁰ degrees
⁰F2 950⁰ degrees
⁰F2 950⁰ degrees
⁰F2 1500⁰ degrees
Hld 2 20 minutes
Hld 2 30 minutes
Hld 2 30 minutes
Hld 2 10 minutes
Ra3 Full
Ra3 0000 Ends Program
RA3 0000 Ends Program
Ra3 Full
⁰F3 950⁰ degrees
⁰F3 950⁰ degrees
Hld3 30 to 1 hour
Hld3 minutes
Ra4 200 per hour
Ra4 0000 Ends Program
⁰F4 700 degrees
*Full for the Bonnie Glo kiln
Hld4 0
***is about 1500⁰F per hour
Ra5 0000 Ends Program
***Using a rate of FULL in the first 1000 degrees of the firing is appropriate only for pieces less
than 3” squared and less than 3 layers thick. Larger pieces can go “FULL” after the first 1000
degrees, or as fast as the piece will tolerate. Taking the time to conduct a few test firings will go a
long way in knowing what your kiln can and cannot do for you.
Annealing is an important step of a firing schedule to reduce stress. On the way down, hold
around 950°F for a length of time relative to the size of the pieces to help reduce internal stress.
(Bullseye's current recommended anneal temp is 900°F.) In a fiber kiln, jewelry sized pieces

generally do not need to anneal. The bigger your pieces are, the longer you'll need to anneal. Your
firing results will give you an indication of annealing times that will work for your size pieces. For
larger pieces start with a 30 minute anneal, then you can work your way down to shorten your
schedules if you like for the smaller ones.
Many calls have come in saying that the glass must be cooled slower that we are recommending. If
glass is on a clay shelf we agree, it should be cooled at the same rate of the shelf which can be 150
to 200F per hour. But on fiber the glass can cool quicker since it is resting on a non heat absorbing
surface. In our challenges that was have received, we started taking fused glass work that was fired
quickly and once cooled put into our freezer overnight. Then the next morning took it from the
freezer to the sink and ran hot tap water over it. If it were to crack then it will need more
annealing, if not then this is a good real work test. At Jen-Ken Kilns no pieces have broken yet.
In addition to this if the fused piece is to be slumped, then the next firing will be slower since the
glass has now been fused and is thicker. The ceramic mold has to be heated slower to prevent
breakage and if annealing is still a concern it can be at the end of is this firing. Just make sure there
is a step to hold at 950°F for a while and then cool from the 950° to about 700° at 150°F per hour.
Thick Glass and Slumping
Ripple glass is thick and thin over the entire surface and will need to heat slower than two or three
layers of single strength glass to accommodate the glass variances.
Double strength glass will also need to fire a little slower (more like 500°F or less and not FULL (as
fast as possible) on the way up.
Remember, a fully fused piece of glass is now 6mm or thicker, and cannot be taken as fast as the
thinner assembled piece in any future firings. You'll need to slow it down for a second firing of
your fused work. Try using a program from the SP mode, if re-fusing the same piece or the slump
program in the SP mode if slumping glass over a ceramic mold.
Small Jewelry Sized Pieces (3” x 3” or less):
These sized pieces can be fired VERY quickly in the fiber kilns with no adverse effects. Full / to
1500°F/0 hold in the Bonnie Glo and Full/1470°F/5min hold in the Pro-Fusion 16 have been
successfully fired schedules in our studio.
The Bonnie Glo Kilns
The Bonnie Glo is a top loading kiln where everything goes in from the top. It is a 15” x 6” deep
kiln and can handle up to a 14” diameter piece or a just about 10”x 10” square 2 layer piece of glass
to be full fused. If thick work is to be full fused it will spread out to be larger as it seeks a ¼”
thickness. It has a lid handle to open and close the lid as well as a lid prop support to vent the kiln
as needed. Some use the lid prop on the lowest setting on the way up to vent the kiln paper fumes
out of the kiln and then close it at 800°F, using a tool (Caution: Hot handles look like cold
This manual suits for next models
1
