Jensen JSCR-50 User manual


1
DEAR JENSEN®CUSTOMER
Selecting fine audio equipment such as the unit you've just purchased is only the start
of your musical enjoyment. Now it's time to consider how you can maximize the fun
and excitement your equipment offers. This manufacturer and the Electronic Industries
Association's Consumer Electronics Group want you to get the most out of your
equipment by playing it at a safe level. One that lets the sound come through loud and
clear without annoying blaring or distortion and, most importantly, without affecting
your sensitive hearing. Sound can be deceiving. Over time your hearing "comfort level"
adapts to higher volumes of sound. So what sounds "normal" can actually be loud and
harmful to your hearing. Guard against this by setting your equipment at a safe level
BEFORE your hearing adapts.
To establish a safe level:
Start your volume control at a low setting.
Slowly increase the sound until you can hear it comfortably and clearly, and
without distortion.
Once you have established a comfortable sound level:
Set the dial and leave it there.
Taking a minute to do this now will help to prevent hearing damage or loss in the future.
After all, we want you listening for a lifetime.
We Want You Listening For a Lifetime
Used wisely, your new sound equipment will provide a lifetime of fun and enjoyment.
Since hearing damage from loud noise is often undetectable until it is too late, this
manufacturer and the Electronic Industries Association's Consumer Electronics Group
recommend you avoid prolonged exposure to excessive noise.
Customer's Record:
The serial number of this product is found on its back cabinet. You should note the
serial number of this unit in the space provided as a permanent record of your
purchase to aid in identification in the event of theft of loss.
Model Number: JSCR-50 Serial Number:

2
COMPLIANCE WITH FCC REGULATIONS
This device complies with Part 15 of the FCC Rules. Operation is subject to the
following two conditions:
(1) this device may not cause harmful interference, and
(2) this device must accept any interference received, including interference that
may cause undesired operation.
NOTE: This equipment has been tested and found to comply with the limits for a Class
B digital device, pursuant to Part 15 of the FCC Rules. These limits are designed to
provide reasonable protection against harmful interference in a residential installation.
This equipment generates, uses and can radiate radio frequency energy and, if not
installed and used in accordance with the instructions, may cause harmful interference
to radio communications. However, there is no guarantee that interference will not
occur in a particular installation. If this equipment does cause harmful interference to
radio or television reception, which can be determined by turning the equipment off
and on, the user is encouraged to try to correct the interference by one or more of the
following measures:
- Reorient or relocate the receiving antenna.
- Increase the separation between the equipment and receiver.
- Connect the equipment into an outlet on a circuit different from that to which the
receiver is connected.
- Consult the dealer or an experienced radio/TV technician for help.
CAUTION: Changes or modifications not expressly approved by the party
responsible for compliance could void the user’s authority to operate the equipment.
FEATURES
● Convert your old mix tapes and cassettes to MP3 format and play them back on any MP3
player, iPod or burn them to a CD.
● The portable design is easy to use and enables you to play and transfer almost anywhere.
● Flexible battery or USB-powered operation.
● Includes Conversion software to guide you through the transfer.
● Audio output enables you to listen on your stereo, headphones or other speaker systems.
Note: You can also use your JSCR-50 as a regular, portable cassette player. Just insert
batteries into the slot under where the cassette goes, and you’re ready to listen to your
cassettes on the go!
INCLUDED ITEMS:
JSCR-50 Tape-To-Digital Converter
Conversion Software on CD
USB Cable
Quick User Guide & User Manual

3
FUNCTIONS OF CONTROLS
1. EJECT: Slide this switch to open the cassette door/holder.
2. VOLUME: Adjusts the volume of the headphones and USB connection.
3. HEADPHONE JACK: Connect 1/8” headphones here.
4. USB port: Use the included USB cable to connect the JSCR-50 to your computer in order
to transfer audio. Software is provided on the included CD to aid in this process.
5. PLAY: Press to play the tape.
6. STOP: Press to stop the tape.
7. FAST FORWARD/REWIND: Press to fast forward or rewind the tape.
Note: The function of these buttons will become “reversed” when the tape changes
direction.
8. DIR: Selects the direction of tape during playback. This is useful if you want to play
the other side of the tape without having to eject it and turn it over.
9. Play Mode:
Selects what the tape does when it reaches the end of a side. When the Play Mode
Switch is set to the “loop” icon position, the tape will continuously switch direction
and begin playing the opposite side automatically when one side has finished.
When the Play Mode Switch is set to the single arrow icon position, the tape will
automatically switch from current side (SideA) to other side (Side B) at end of the
tape (Side A) and stop when the other side (Side B) has finished playing.

4
GETTING STARTED
Your JSCR-50 is designed to operate on 2 pieces of “AA” batteries (Not included),
USB power or an AC adaptor with an output of 3V DC/500mA, center positive “+”
(Not included).
A. INSTALLING BATTERIES
To install the batteries, slide the EJECT Switch (#1) to open the cassette door. Open
the battery compartment and insert 2 x ‘AA’ batteries following the polarity markings
located near the battery compartment. Replace the battery compartment door once the
batteries are correctly installed.
BATTERY CARE
i. Be sure that the batteries are installed correctly. Wrong polarity may damage the unit.
ii. (a) Do not mix old and new batteries.
(b) Do not mix alkaline, standard (carbon-zinc) or rechargeable (nickel-cadmium)
batteries.
iii. If the unit is not to be used for an extended period of time, remove the batteries. Old
or leaking batteries can cause damage to the unit and may void the warranty.
iv. Never attempt to recharge “Non-rechargeable” batteries.
v. Do not dispose of batteries in fire, batteries may explode or leak.
USING USB POWER TO POWER THE PLAYER
Plug in the small end of the included USB cable into the matching USB Port (#4) on the
JSCR-50 and the large end of the USB cable into a matching USB port on your computer.
USING AN ADAPTOR (NOT INCLUDED) TO POWER THE PLAYER
1. Before connecting the adaptor to the player make sure that the AC voltage of the
adaptor corresponds to your local AC outlet voltage. The polarity of the adaptor
must match to the polarity markings next to the DC jack on the player.
2. Plug the AC adaptor into a household AC outlet.
3. Insert the DC plug into the jack on the player.
NOTE: When the adaptor is connected, the batteries will be automatically
disconnected and the player will now operate from the adaptors power. Once
the adaptor is unplugged the player will automatically switch to back to
battery power.

5
SOFTWARE INSTALLATION
1. Insert the included CD into your computer’s CD-ROM drive.
Note: If a warning message pops up asking you to give permission, click “Yes” or “Allow”. If
nothing pops-up automatically, see the FAQ section.
2. Click the “Next” button. If you want to change the destination folder, click the “Browse”
button, make a selection and then click “OK”.
3. Click “Next” and wait until the installation is finished. Click “Finish” to complete the
installation.
USING THE JSCR-50 AND INCLUDED SOFTWARE
1. Opening the Software: Double-click the icon which can be found on your desktop.
A window will pop-up that looks like the one below:
2. Connecting the USB Cord: Plug in the small end of the USB cable into the matching USB
port on the JSCR-50 (#4) and the large end of the USB cable into a matching USB port on
your computer. (The rectangular USB Ports and are usually located on the front or back of
desktop computers, and on the side of laptop computers). If you would like to listen to the

6
tape while it’s recording (recommended), you can plug your headphones into the
HEADPHONE JACK (#3) or monitor it using your computers speakers.
Note:
If another program opens up other than the CassetteMate software when you plug your
JSCR-50 into the computer, click “Cancel” or “Close” to exit and return to the CassetteMate
software. To insure a good quality transfer, make sure all other programs are closed while
recording.
3. Inserting and Preparing the Cassette Tape:
Open the cassette door on the JSCR-50 by sliding the EJECT Switch (#1) down. Insert a
tape into the JSCR-50 and close the door until it clicks.
4. Rewind the tape to the position where you would like to begin recording, making sure to
allow a few extra seconds of silence to minimize unwanted trimming.
5. From the Cassette-Mate software window, click the Tools button. If the icon shows
in the lower right corner of your desktop and there are two green lines visible in the audio
wave box of the software, you are ready to begin converting your tapes to MP3s! If not,
see the FAQ section for additional information.
6. Audio Adjustments:
Adjust the audio level prior to recording by clicking the icon. You can adjust the settings
for file type (wav, MP3 or wma), bit rate 32 kbps – 320 kbps (128kbps default) and record
path (where your files will be saved). On the JSCR-50, you can choose whether or not you
would like the tape to loop over to the other side automatically by setting the PLAY MODE
(#9) to double arrows or single arrow icon.
7. Familiarize Yourself with the Software:
A. Audio Wave: If two green bars are present, the JSCR-50 is connected correctly. If green
bars are moving and showing a wave pattern, playback is being detected.
B.

7
C. Adjust album and track number.
D. Divide Record Type: Choose whether the software will auto-divide tracks. Tracks can be
divided based on time or muting.
E. Album and track information can be recorded or changed.
8. Recording:
To start recording, you must first press the “Play” button on the JSCR-50 and then
immediately click the “Record” button in the CassetteMate software.
9. To stop recording, press the “Stop” button in the software first, and then press the “Stop” on
the JSCR-50.
10. You can separate the tracks by either stopping the recording and re-starting it at the correct
moment, or using the AutoDivide feature. Click the button at the moment where you
would like the software to divide the tracks. See FAQ for additional information on this
feature.
11. Playback:
You can playback the recorded tracks by first pressing the button, then click the track
you want to play and finally press “” to start.
Note: If you cannot hear the tracks you have recorded, see the FAQ section at the end of this
Starts the Recording
Stops the Recording
Creates a break in the recording. Stops the current track and creates a new
one automatically
Pauses the recording (Note: Does not stop playback on the JSCR-50.)
Opens the Record Play Menu: This is where you can listen to and save the
recorded tracks.
Open the tools menu. Adjust language, format, volume, and balance settings

8
guide.
12. Saving Your New MP3s:
Your tracks will automatically be saved to the location that you specified in the Tools menu.
You can also manually save your tracks by clicking the button. It is recommended to
save them in the same directory where the rest of your digital music is stored (i.e.: iTunes,
My Music or other music folder).
13. Deleting Your New MP3s
On the Record Play screen, highlight the track you want to delete and then click the “X”
icon. A message box will pop up. To confirm deletion, click “YES” or “NO” to cancel deletion.
CARE AND MAINTENANCE
1. If the cabinet becomes dusty, wipe the exterior with a soft dust cloth only. Never
use dusting sprays or polishes on the cabinet.
2. If the cabinet becomes dirty or smudged with fingerprints it may be wiped with a
soft cloth that has been slightly dampened with a mild soap and water solution.
Avoid installing the unit in locations described below:
3. Places exposed to direct sunlight or close to heat radiating appliances such as
electric heaters.
4. Places subject to constant vibration.
5. Humid, dusty or moist places.
FREQUENTLY ASKED QUESTIONS (FAQs) WINDOWS OS
Q. Why doesn’t anything pop up automatically when I insert the CD?
A. Locate the CD-ROM drive of your computer by clicking the “Start” button, and then “My
Computer” or “Computer”. Locate the (D:) drive and double-click its contents. You should then
see the image mentioned in Step 1 of the USING THE TAPE-TO-MP3 CONVERTER section.
Double-click on it.
Q. Why doesn’t the audio wave in the CassetteMate software move?
A. The volume dial on the side of the JSCR-50 may be set to minimum. Try turning it to
maximum.
A. The JSCR-50 may not be plugged in correctly, which will be confirmed if you see the in
the desktop taskbar found in the lower right corner of your computer. If you see the
image, it should be connected properly. Make sure that you have properly followed Step
2 of the “USING THE JSCR-50 AND INCLUDED SOFTWARE” section.
Q.Where is the Audio Tab in the Sound and Audio Properties Screen?
A. It varies by operating system, but is generally available via a right-click on the volume icon in
the Windows XP taskbar. In Windows Vista and 7, it is located in the Hardware and Sound
section of the Control Panel.
Q. It appears to record but why can’t I hear any sound when I play it back on my PC?

9
A. Does your sound card play the format you used when recording
(i.e. you recorded it in MP3 format but your PC is only set to play wav files)? Change the
format in the “Tools” menu to suit.
A. Check which default devices are set in the “Sound and Audio Devices “Sound recording”
option to adjust settings. The top option “Sound play back” option should be your original
device type set on the PC prior to installing the CassetteMate. If you have more than one
device showing in the drop down box, try changing it to the other device type.
A. Try to unplug the device from your computer first. Then play the track again or close and re-
start the CassetteMate software. If you want to go back to recording more tracks after you
have unplugged the device, you must first plug it back in to continue recording. If the
computer does not recognize the device, close and re-start the CassetteMate software.
Q.I want to save my files onto a CD, what format do I need to save/write/burn the files in?
A. This depends on your CD player but the MP3 format is a widely used format. Writing/burning
the CD as an audio disc is an option.
Q. What types of tape can I convert?
A. Normal or Chrome format tapes of 45, 60, 90 or 120 minutes in length. Certain types of
super chrome or long-play (LP) tapes may not transfer correctly.
Q. I want to use it as a portable tape player, where do I put the batteries?
A. Two AA type batteries fit inside the player under the area where the cassette goes.
Q. A tape is in the player, why doesn’t it turn when I press play?
A. Your USB port might not be able to output sufficient power. Try putting batteries in the player.
A. Has it reached the end of the tape? If so, open the player and turn the cassette over.
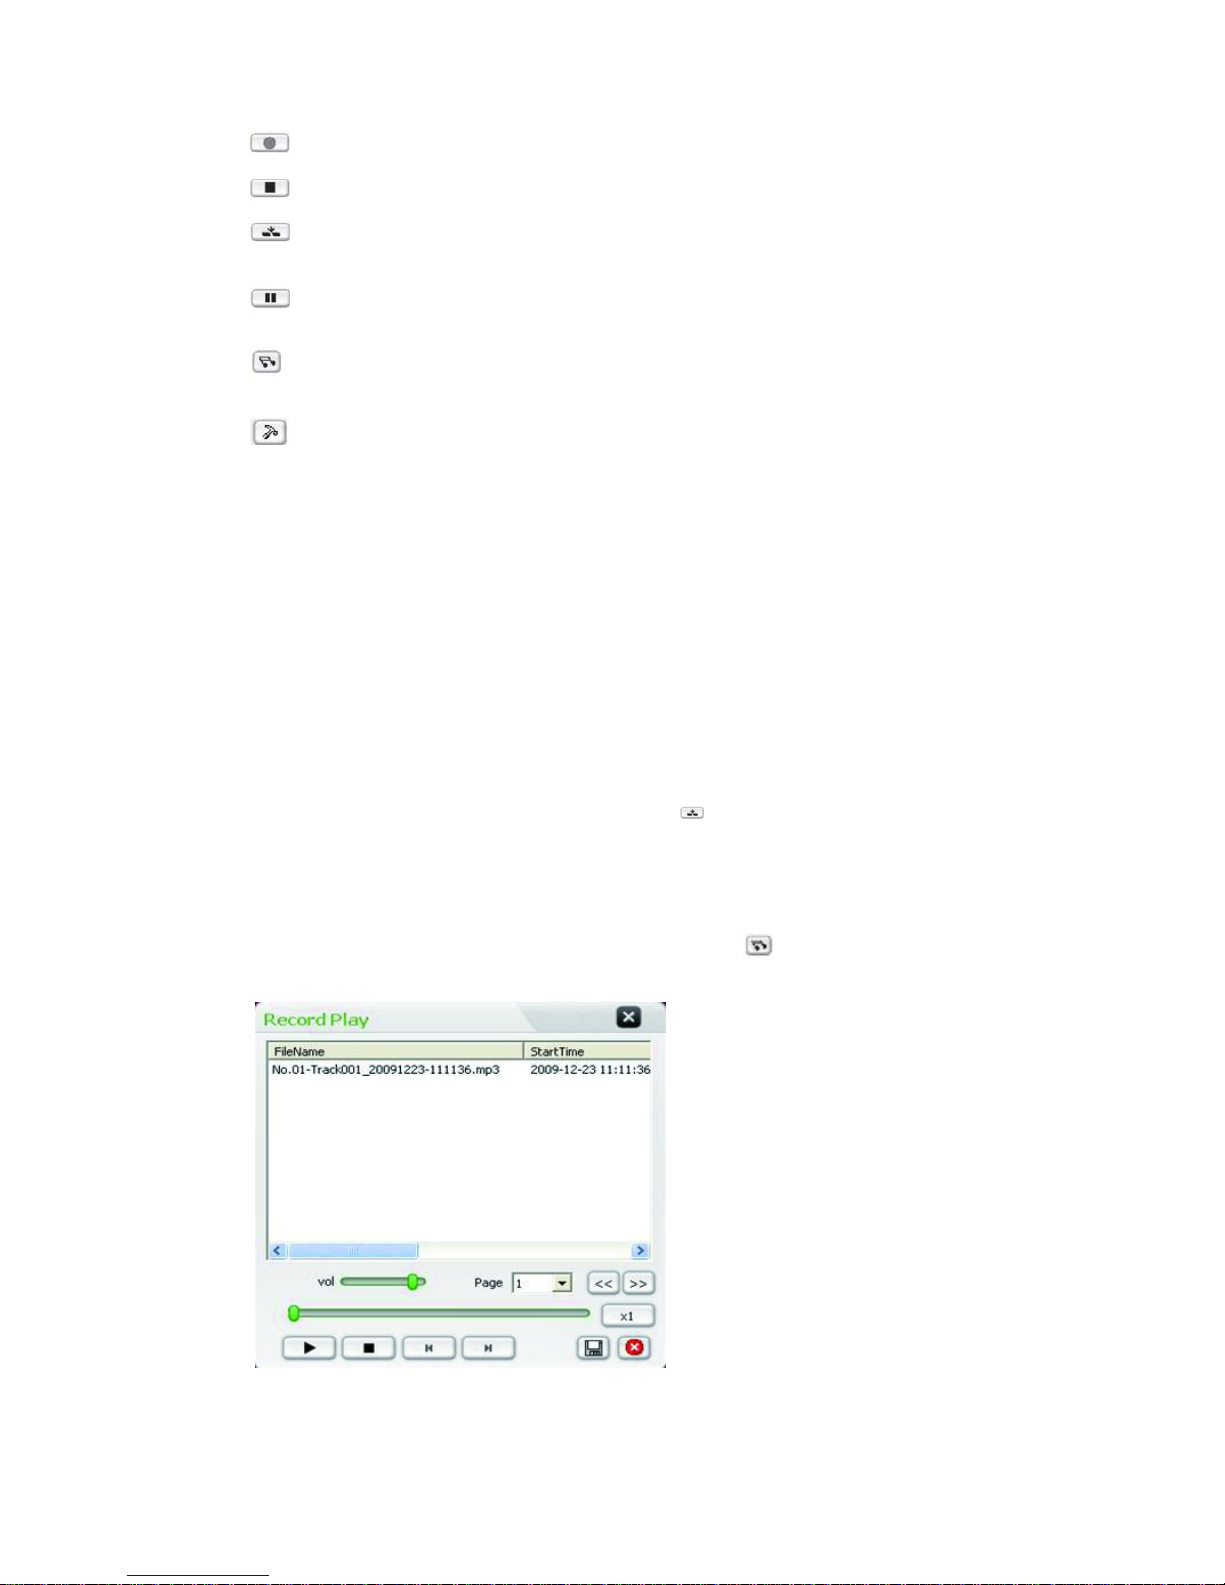
Q. How can I split individual tracks into separate files?
A. To split tracks manually, use the Stop button. For automatic splitting use the “Auto Divide
Record with mute” or “Auto Divide Record with Time” option in the DivideRecord Type drop-
down menu. This will create divisions between tracks based on whether the software detects a
prolonged muting, or based on a specified length of time.
Q. Why isn’t the playback quality as good as I normally get on my PC?
A. The quality of the original tape/sound recording is a key factor in the transfer process. Try
lowering the volume control on the side of the JSCR-50 when recording. Try recording with
different settings in the Sound and Audio device panel (see above questions for more
information).
Q. I have an error message “Run Time Error”.
A. Close and restart the software.
Q. What operating systems is this software compatible with?
A. It is compatible with Windows XP, Vista and Win 7 (official retail release versions only).
Q. Can I use the JSCR-50 files with iTunes?
A. Once you have converted your cassette tape to MP3 format and saved it to your PC, it can
be imported to an iTunes library, uploaded to MP3 players or burned onto an audio CD.

10
At Spectra, environmental and social responsibility is a
core value of our business. We are dedicated to
continuous implementation of responsible initiatives
with an aim to conserve and maintain the environment
through responsible recycling.
Please visit us at http://www.spectraintl.com/green.htm for more information on
Spectra’s green initiatives or to find a recycler in your area.
90 DAY LIMITED WARRANTY AND SERVICE
VALID IN THE U.S.A ONLY
SPECTRA MERCHANDISING INTERNATIONAL, INC. warrants this unit to be free from defective materials or factory
workmanship for a period of 90 days from the date of original customer purchase and provided the product is utilized
within the U.S.A. This warranty is not assignable or transferable. Our obligation under this warranty is the repair or
replacement of the defective unit or any part thereof, except batteries, when it is returned to the SPECTRA Service
Department, accompanied by proof of the date of original consumer purchase, such as a duplicate copy of a sales
receipt.
You must pay all shipping charges required to ship the product to SPECTRA for warranty service. If the product is
repaired or replaced under warranty, the return charges will be at SPECTRA’s expense. There are no other express
warranties other than those stated herein.
This warranty is valid only in accordance with the conditions set forth below:
1. The warranty applies to the SPECTRAproduct only while:
a. It remains in the possession of the original purchaser and proof of purchase is demonstrated.
b. It has not been subjected to accident, misuse, abuse, improper service, usage outside the descriptions and
warnings covered within the user manual or non-SPECTRA approved modifications.
c. Claims are made within the warranty period.
2. This warranty does not cover damage or equipment failure caused by electrical wiring not in compliance with
electrical codes or SPECTRA user manual specifications, or failure to provide reasonable care and necessary
maintenance as outlined in the user manual.
3. Warranty of all SPECTRA products applies to residential use only and is void when products are used in a
nonresidential environment or installed outside the United States.
This warranty gives you specific legal rights, and you may also have other rights which vary from state to state. TO
OBTAIN SERVICE please remove all batteries (if any) and pack the unit carefully and send it freight prepaid to
SPECTRA at the address shown below. IF THE UNIT IS RETURNED WITHIN THE WARRANTY PERIOD shown
above, please include a proof of purchase (dated cash register receipt) so that we may establish your eligibility for
warranty service and repair of the unit without cost. Also include a note with a description explaining how the unit is
defective. A customer service representative may need to contact you regarding the status of your repair, so please
include your name, address, phone number and email address to expedite the process.
IF THE UNIT IS OUTSIDE THE WARRANTY PERIOD, please include a check for $10.00 to cover the cost of repair,
handling and return postage.All out of warranty returns must be sent prepaid.
It is recommended that you contact SPECTRA first at 1-800-777-5331 or by email at custserv@spectraintl.com for
updated information on the unit requiring service. In some cases the model you have may be discontinued, and
SPECTRAreserves the right to offer alternative options for repair or replacement.
SPECTRA MERCHANDISING INTERNATIONAL, INC.
4230 North NormandyAvenue,
Chicago, IL60634, USA.
1-800-777-5331
To register your product, visit the link on the website below to enter your information.
http://www.spectraintl.com/wform.htm
Printed in China

11
CASSETTE PLAYER MP3 ENCODER QUICK USER GUIDE
For Windows XP, Vista, or 7 users
1. Install and open the CassetteMate software using the included Quickstart CD.
2. Select the icon to make sure English is selected from the first drop-down box. Click the
“Record Path” box to verify the file destination. If you want to change this Record Path,
click the icon.
3. Plug the JSCR-50 into the computer USB port using the USB cable provided. Insert a
cassette tape into the Cassette compartment. If the icon shows on your desktop and
there are two green lines visible in the audio wave box of the software, you are ready to
begin converting your tapes to MP3!
4. Make sure the tape is in the correct position to begin recording (you may attach
headphones to the Cassette Player to listen). Press “Play” on the device and then quickly
press “Record” on the computer software. When you have finished recording the track,
press “Stop” on the software and then “Stop” on the device.
5. To listen to the songs you have recorded, go to the “Record Path” location that you
selected in Step 2. If you cannot hear the songs you have recorded when you play them
back, you must change your Control Panel sound settings to use the correct input and
output device.
For troubleshooting Please See FAQ in the User Manual
Printed In China
Table of contents
Other Jensen Cassette Player manuals

Jensen
Jensen CD-550BT User manual

Jensen
Jensen SCR-68B User manual

Jensen
Jensen MCR-100 User manual

Jensen
Jensen MCR-60 User manual

Jensen
Jensen JSCR-75 User manual

Jensen
Jensen SCR-68C User manual

Jensen
Jensen JSCR-75 User manual

Jensen
Jensen SCR-90 User manual

Jensen
Jensen JSCR-75 User manual

Jensen
Jensen SCR-68A User manual