Jensen Groove 310 User manual

Groove
310
6 pce Home Theatre Speaker System.
Congratulations in purchasing one of JENSEN‘s finest Speaker Systems to date.
Read this manual carefully to ensure your system will provide you with many
years of musical enjoyment.
Voltage and fuse. Your Subwoofer has been factory set to 220/240 volts using 1.0 amp
fuse. Fuse compartment is located at power lead input area on amplifier.
Room Placement – Subwoofer: Best positioning for your Subwoofer is against a
wall or better still, across a corner. Do not block or obstruct front Port hole as this Port needs to
“breath” efficiently and provide maximum “acoustic coupling” into your room i.e. more Bass.
Room Placement – Mini speakers: With the 4 x Short Brackets you can choose
to Wall mount with 78mm screw spacing or simply sit on tabletop.
Room Placement – Centre speaker: With this 1 x Long Bracket, look closely
at the ends and you will notice one “C” curve is
longer than the other. This allows you to mount
Your Centre Speaker 3 separate ways:
1. Tabletop –aiming forward:
Peel away adhesive tape on the
25mm Rubber Blocks (supplied)
and by sitting bracket on it will result
in Speaker to aim forward, conversely, by not
using Rubber blocks Speaker will aim upwards.
2. Wall mount –aiming downward:By
wall mounting bracket horizontally and with long
“C curve” at Top will allow Speaker to aim downwards.
Screws supplied and screw spacing is 124.0 mm.
3. Wall mount –aiming forward: By wall
mounting bracket horizontally and with short “C curve”
at Top will allow Speaker to aim level and forward.
Screws supplied and screw spacing is 124.0 mm.

Setup. Connect all Mini and Centre speakers to your Receiver/amplifier ensuring all
connections are in phase. Ie: Positive (+) wires at Receiver/amplifier end connect to Positive wires
(+) at speaker end and vise versa with Negatives (-). See Fig. A. On your Receiver/amplifier, be sure
to select “SMALL” when “telling” your receiver if you are using Large or Small Speakers. For your
X-125 Subwoofer, you will need a 1RCA to 1 RCA lead (not supplied) as these come in varying
lengths of 1 to 20 mtrs). One end connects to your receiver/amplifier and the other into either “L” or
“R” Low Level Inputs on Subwoofer amplifier. There is no need to connect to both “L” and “R” as
these are paralleled internally. See diagram below.
Subwoofer amplifier features. LED on front panel is Blue when active and Red
when on standby (standby mode, like on a TV draws next to no power). Switch the Subwoofer
amplifier switch to “AUTO” and this can be left on indefinitely as the Subwoofer automatically
activates when it senses as incoming signal. LED’s will then turn Blue. After signal has been
removed between 15 and 40 minutes, amplifier will revert to Standby mode and LED will change to
Red.
•Gain Knob is your volume knob. This adjusts the output of your Subwoofer to balance
and harmonize with output of your 5 x Satellite speakers. DO NOT set this on maximum. Be
careful not to advance this control too far as overload may occur causing damage to your
Subwoofer speaker (see below setting recommendations).
•Freq Knob. This control adjusts how low (in frequency) you wish your Subwoofer to
operate at. In other words, 70 Hz is a lower and deeper frequency than 90Hz, so if you set at
70Hz you will be amplifying all music information 70Hz and below and filtering out
everything above which is the ideal intention of a powered Subwoofer. Take care not to
advance this control too far as overloading may occur (see below recommendations).
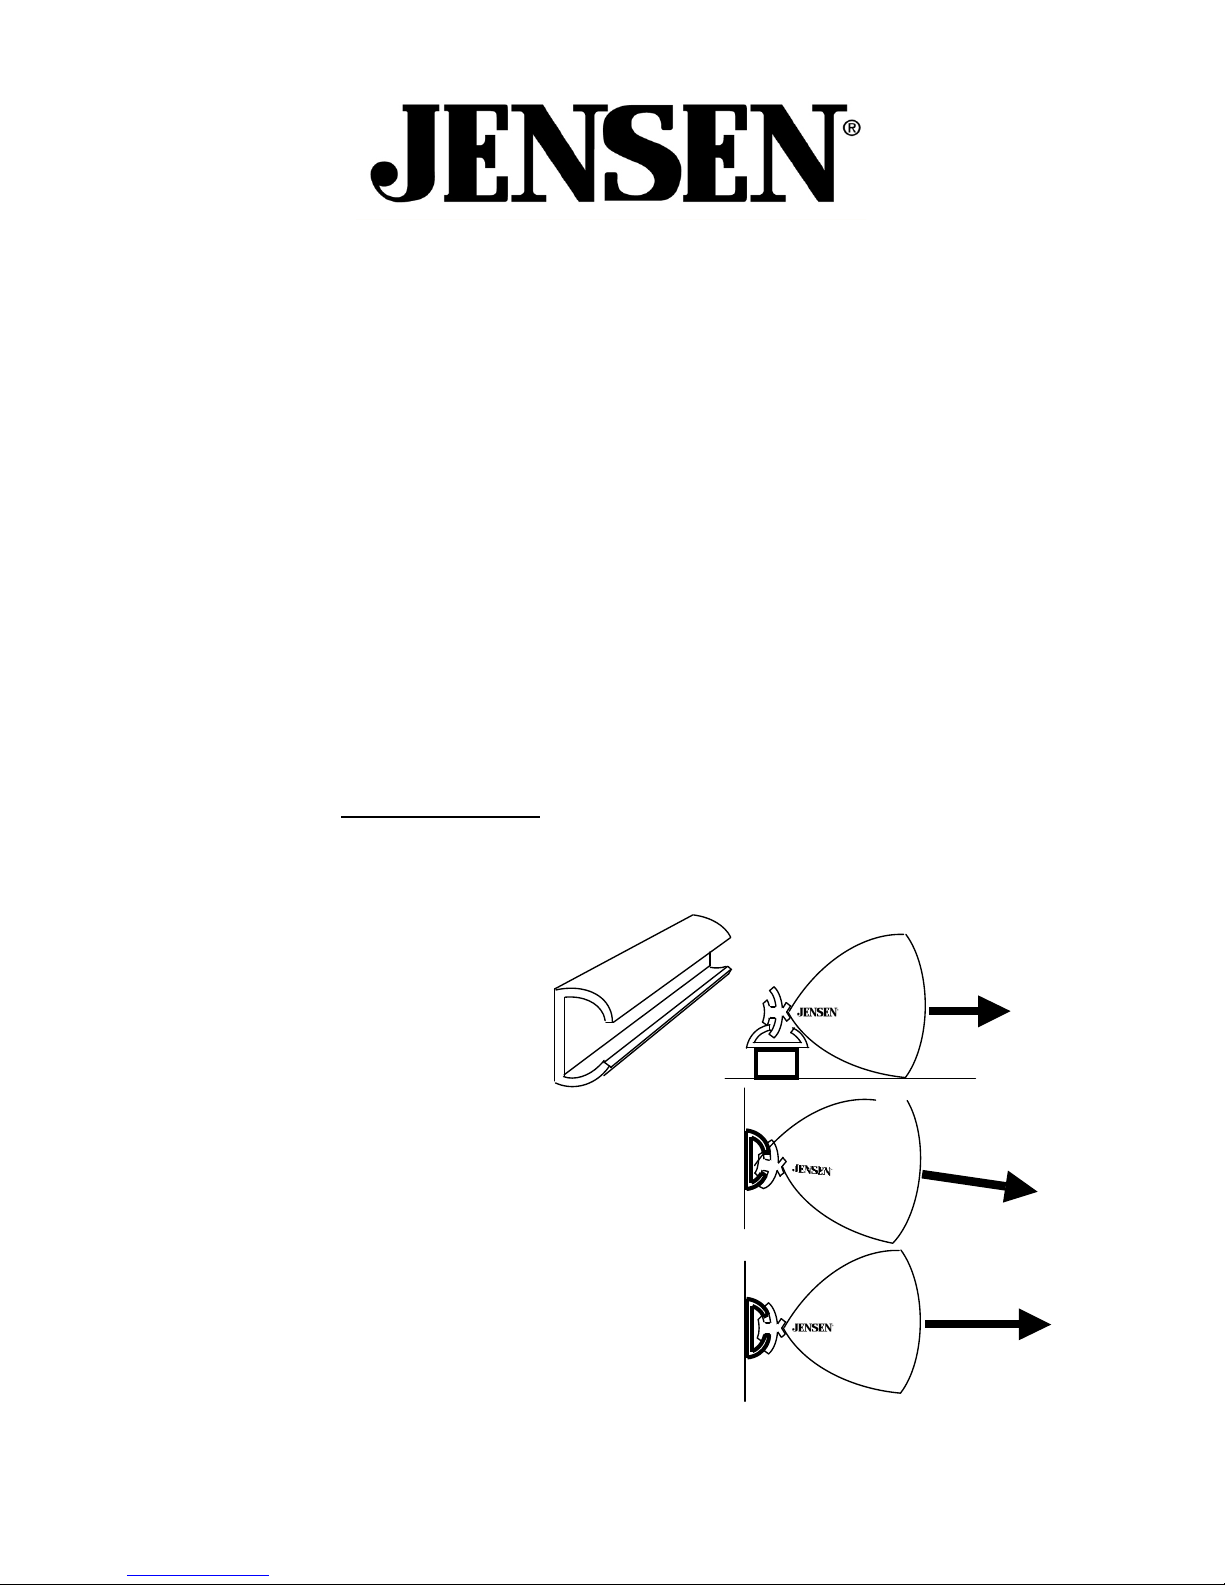
•Phase Switch If you are using one Subwoofer in the room switch this to “NOR”. If you
are game, you can add as many JENSEN Subwoofers as you like within the room all daisy-
chained together. If more than one Subwoofer is used simultaneously, then all Subwoofers
need to be “in Phase” with each other so that “bass canceling does not occur. If you do this,
connect all your subwoofers up and switch each from “NOR” (Normal) to “REV” (Reverse)
and simply leave on setting that provides the most Bass. This will be the best setting and be
correctly “in phase”.
•Line Output sockets are provided for stringing additional subwoofers using an
additional 1RCA to 1 RCA lead. If required, you may “daisy-chain” as many JENSEN
subwoofers together as you like for massively increased Bass performance.
Where should I set Gain & Freq. Control Knobs ??
Once you have your JENSEN X-125 Subwoofer positioned and connected, we suggest
experimenting with the Level Control knob and Frequency Control knob to suit the Volume and
depth of Bass desired. Initially, for Hi-Fi listening, try setting the Gain knob at 1 o’clock and the
Freq. knob at 100Hz. This is the most popular setting. This setting will boost Bass information
100Hz and below – which is deep, deep Bass at a strong (but not overpowering) level. For Home
Theatre listening (movies), increase the Gain knob to 3 o‘clock and lower the Freq. knob to 80Hz.
This will enormously enhance all Bass information 80Hz and below to a boosted Bass setting so
when dinosaurs, earthquakes and explosions kick-in, they kick in !! Refrain from turning Level
Control beyond 4 o’clock as Bass will then overpower all other music. Also, overpowering may
incur amplifier damage, Cone damage or both.
Page 2.

Page 3.
Groove
310
Connections
Sub-out
socket
5.1 Receiver /
amplifier
1 RCA to
1 RCA lead
(not supplied)
WD-120
amplifier
Speaker leads (not supplied)
Connecting from a 5.1, 6.1 or
7.1 channel Receiver/amplifier
Connect from your
Receiver/amplifier, a
1 x RCA to 1 x RCA lead
(not supplied) into either
“L” or “R” Low Level
Input as shown. You do
not need to use both
“L” and “R”.
Fig. A
One Black end cap
is fixed. The other
88removes to
8888reveal input
888888terminals.

Can I buy extra Mini Satellites if my Receiver is 6.1 or 7.1
channels ? Definitely. Your dealer can sell you a single or a pair of Mini’s to add. Note
additional Mini’s come with mounting bracket and hardware. Feel free to contact us directly at
Warranty / On-Line Registration. Your Groove Mini and Centre Satellites are
covered for 10 Years P/L and the X-125 Subwoofer is also 10 Years (amplifier 1 Year). To activate
your 10 Year Warranty it is essential to register On-Line by visiting www.bdimports.com.au and
clicking on “Warranty Registration”. For Warranty claim, please return this product back to your
Troubleshooting: If your Subwoofer develops a hum, Blue light permanently stays on,
volume gradually decreases over time, fuse blows or for any post thunderstorm changes, please visit
our Troubleshooting link on-line www.bdimports.com.au for loads of self help info or contact our
Description
Power
Output
Freq.
Resp.
Drivers
Sizes
Kgs
Colors
Mini
Satellites
Mini Satellite
speakers
w/brackets
100 W
RMS
80Hz –21
KHz
1 x 25mm
Dome + 1 x
3.5” driver
127 (H)
127(W)
121(D)
1.3Kgs
Black
Centre
Satellite
Centre
Satellite
speaker
w/brackets
100 W
RMS
70Hz –21
KHz
1 x 25mm
Dome + 2 x
3.5” drivers
238 (H)
127(W)
121(D)
2.1 Kgs
Black
X-125
Subwoofer
120 Watt, 8”
Monster
Subwoofer
120 W
RMS
30Hz –
200Hz
Monster 8”
driver, 40 oz
magnet, 40mm
V/C
312 (H)
313 (W)
425 (D)
13 Kgs
Black
B.D Imports Customer Support 24/7
info@bdimports.com.au Fax: 03 8668 1023 Ph: 1300-JENSEN
Trouble shooting for this model www.bdimports.com.au
Distributed in Australia by B.D.Imports Pty Ltd., Victoria, under license from Audiovox, USA.
Page 4.
Notes:
“I must not forget to Register On-Line to validate my
10 Year Warranty”www.bdimports.com.au”
Other Jensen Speakers System manuals