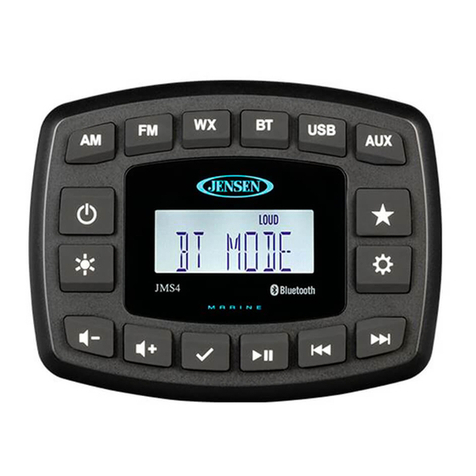
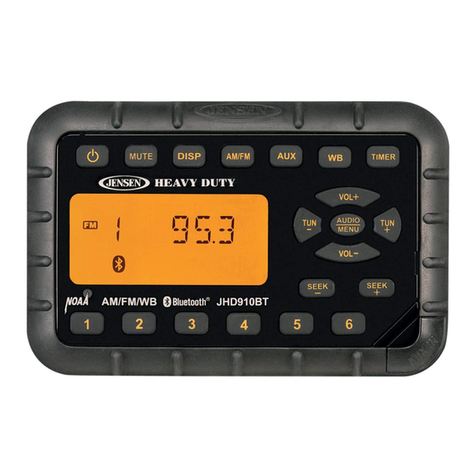
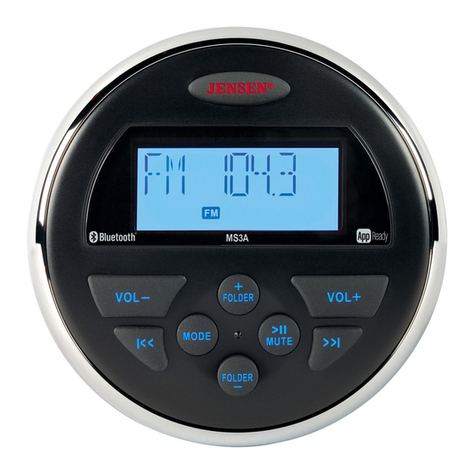
Jensen JMS32 User manual

D E S I G N E D T O M O V E Y O U
[ ]
JMS32
Owner’s Manual

JMS32
CONTENTS
Introduction.....................................................................................................................................................1
Features...................................................................................................................................................1
Box Content..............................................................................................................................................1
Compliance...............................................................................................................................................1
Safety Information.....................................................................................................................................2
Installation......................................................................................................................................................3
Mounting the Radio....................................................................................................................................3
Auxiliary Input...........................................................................................................................................3
Line Output...............................................................................................................................................3
Wiring Diagram.........................................................................................................................................4
Operation........................................................................................................................................................5
Basic Functions.........................................................................................................................................5
Audio Menu...............................................................................................................................................5
System Menu ............................................................................................................................................5
Radio Mode...............................................................................................................................................6
USB Mode.................................................................................................................................................6
Playback Menu (Repeat/Random)...............................................................................................................7
Auxiliary Input Mode..................................................................................................................................7
Bluetooth Operation...................................................................................................................................8
Canada Statement.........................................................................................................................................10
Troubleshooting.............................................................................................................................................11
Specifications................................................................................................................................................11

JMS32
INTRODUCTION
Thank for choosing a Jensen product. We hope you will find the instructions in this owner's manual clear and easy to follow. If
you take a few minutes to look through it, you'll learn how to use all the features of your new Jensen receiver for maximum
enjoyment.
Features
● Waterproof iPx6
● UV and Corrosion Resistant
● Dimmable Backlit LCD Control
● AM/FM Tuner (US/EURO)
● 24 Programmable Presets (12 AM, 12 FM)
● Weather Band Tuner
● Electronic Bass, Treble, Balance and Fader Controls
● USB MP3/WMA Player
● Rear Auxiliary Audio Input (RCA)
● Rear Auxiliary Audio Output (RCA)
● 4-Channel Amplified Audio Output
● Bluetooth (Supports A2DP and AVRCP)
Box Content
● JMS32 Radio
● Radio Mounting Bracket
● Screw Posts (x2)
● Locking Hex Nuts (x2)
● Washers (x2)
Compliance with FCC Rules
Compliance with FCC Rules (U.S.A Only)
This device complies with Part 15 of the FCC rules. Operation is subjected to the following two conditions: (1) This device may
not cause harmful interference, and (2) this device must accept any interference received, including interference that may cause
undesired operation.
NOTICE
This equipment has been tested and found to comply with the limits for a Class B digital device, pursuant to Part 15 of the FCC
Rules. These limits are designed to provide reasonable protection against Harmful interference in a residential installation. This
equipment generates uses and can radiate radio frequency energy and, if not installed and used in accordance with the
instructions, may cause harmful Interference to radio communications.
FCC WARNING
● Changes or modifications to this unit not expressly approved by the party responsible for compliance could void the user's
authority to operate the equipment.
● Proper connections must be used for connection to a host computer and/or peripherals in order to meet FCC emission
limits.
1

2
JMS32
Safety Information
● To ensure full satisfaction with the product, please read the entire instruction manual.
● Keep instructions for future reference.
● Follow all operation guidelines and adhere to all safety warnings and cautions to ensure safe use.
● Do not install near any heat sources such as radiators, heat registers, stoves, or other apparatus (including amplifiers) that
produce heat.
● Only use attachments/accessories specified by the manufacturer.
● Never use harsh cleaning agents. Clean only with a dry cloth.
When Driving
Keep the volume level low enough to be aware of the road and traffic conditions.
Protect from Water
Do not submerge, as this can cause electrical shorts, fire or other damage.
Protect from High Temperatures
Exposure to direct sunlight for an extended period of time can produce very high temperatures inside your vehicle. Give the
interior a chance to cool down before starting playback. Do not mount the radio within close proximity of the engine
compartment.
Use the Proper Power Supply
This product is designed to operate with a 12 volt DC negative ground battery system.
WARNING:
● DO NOT OPEN, DISASSEMBLE OR ALTER THE UNIT IN ANY WAY. Doing so may result in fire, electric shock or product
damage.
● USE THE CORRECT AMPERE RATING WHEN REPLACING FUSE. Failure to do so may result in fire, electric shock or
product damage.
● DO NOT INSTALL IN LOCATIONS THAT MIGHT HINDER VEHICLE OPERATION. Doing so may obstruct vision or
hamper movement which can result in a serious accident.
● INSTALL THE WIRING SO THAT IT IS NOT CRIMPED OR PINCHED BY SCREWS ORSHARP METAL EDGES. Route
the cables away from moving parts or sharp pointed edges. This will prevent crimping and damage to the wiring. If the
wiring must pass through a metal hole, be sure to use a rubber grommet to prevent the wire's insulation from being cut by
the metal edge of the hole. It is also recommended to apply sealing caulk to any opening that may potentially allow water
to enter.
● Be sure to choose a location that is flat and has clearance above the unit to prevent any damage, as well as allow for
ventilation.
● Before drilling any holes, carefully inspect the area underneath and behind the mounting surface where the device will be
mounted to make sure it will not interfere with existing wires, fuel lines, the fuel tank or any other objects that could be
damaged.
● Always disconnect the vehicle negative battery terminal during installation to prevent accidental shorting.

INSTALLATION
Mounting the Radio
1. Choose a mounting location on the dash board or instrument panel that will allow room behind to run radio cables to the
power source. Consider how you will use the AUX IN, LINEOUT and USB connectors and route the appropriate extension
cables to an accessible area.
2. Cut a hole in the dash board using the template provided in the back of this manual. At least 3 ¾”depth is needed to mount
the radio.
IMPORTANT! Do not mount this unit where it can be submerged in water.
3. Slide the included spring washers (B) over the screw posts (A) and attach the screw posts to the back of the radio.
4. Place the radio in front of the dashboard opening so the wiring can be brought through the opening.
5. After completing the wiring connections, turn the radio on to confirm operation (vehicle accessory switch must be on). If the
radio does not operate, recheck all wiring until the problem is corrected. Once proper operation is achieved, turn the
accessory switch off and proceed with final mounting of the radio. Refer to the “Wiring Diagram” on page 4.
NOTE: Before final installation, test the wiring connections to make sure the unit is connected properly and the
system works.
6. Insert the radio into the mounting hole.
7. Place the “U” bracket (C) over the screw posts and secure the radio to the dash using the included hex nuts (D). If
necessary, cut the score marks (E) on either side of the mounting bracket to custom fit the bracket length for your
application. See Figure A.
3
JMS32
Auxiliary Input
Connect a portable audio device to the Audio Input (AUX IN RIGHT/LEFT) on the back of the unit using RCA cables.
Line Output
The Line Out connectors (LINE OUT RIGHT/LEFT) on the back of the unit output a line-level analog signal. Use this output to
connect to an external amplifier.
Figure A - Installation
A
B
C
D
E

4
JMS32
Note: Do not connect the red wire to a
constant power connection. The red wire
should be connected to a vehicle connection
with switched power such as IGN or ACC.
WIRE COLOR
PURPLE
PURPLE/BLACK
GRAY
GRAY/BLACK
WHITE
WHITE/BLACK
GREEN
GREEN/BLACK
RED
BLACK
BLUE
DESCRIPTION
RIGHT REAR SPEAKER(+)
RIGHT REAR SPEAKER(-)
RIGHT FRONT SPEAKER(+)
RIGHT FRONT SPEAKER(-)
LEFT FRONT SPEAKER(+)
LEFT FRONT SPEAKER(-)
LEFT REAR SPEAKER(+)
LEFT REAR SPEAKER(-)
ACC +12V
GROUND
POWER AMP REMOTE
LINE-OUT-RIGHT
LINE-OUT-LEFT
AUX IN-RIGHT
AUX IN-LEFT
USB
ACC +12V
GROUND
FRONT LEFT SPEAKER(-)
FRONT LEFT SPEAKER(+)
REAR LEFT SPEAKER(+)
REAR LEFT SPEAKER(-)
REAR RIGHT SPEAKER(-)
REAR RIGHT SPEAKER(+)
FRONT RIGHT SPEAKER(-)
FRONT RIGHT SPEAKER(+)
POWER AMP REMOTE
GRAY
GRAY/BLACK
BLACK
YELLOW
YELLOW
BLACK
RED
WHITE/BLACK
GREEN
PURPLE
BLUE
GRAY
BLACK
ANTENNA
WHITE
GRAY
GREEN/BLACK
PURPLE/BLACK
FUSE 15A
Wiring Diagram

Basic Functions
Power
Press the power button (1) to turn the unit on.
Press and hold the power button (1) to enter standby mode.
Volume
Press the button (10) to increase the volume.
Press the button (2) to decrease the volume.
Press and hold either button to change the volume level continuously.
Pause/Mute
Press the button (6) to silence the audio output in tuner, AUX or USB mode. Press again to restore the previous volume
level.
Mode
Press the button (3) to select a mode of operation: AM, FM, WX, Bluetooth, AUX IN and USB.
Dimming Control
Press the button (1) to turn the dimmer on (Selected brightness level) and press again to turn the dimmer off (maximum
brightness level)
Audio Menu
Press button (8) to access the audio menu. Press the button repeatedly to adjust the following audio menu settings:
BASS, TREBLE, BALANCE, FADER and LOUD. Use the or buttons (5, 7) to choose a value for each setting.
System Menu
Press and hold button (8) to access the system menu. Press the button (8) once again to adjust the following system
menu settings: BT DEVICE, BT PAIR, DIMMER ON/OFF, DIMMER LEVEL (0 - 8), REGION (USA/EURO), PRESET VOLUME
and RESET. Use the or buttons (5, 7) to choose a value for each setting.
Reset
Press the button (6) to confirm factory default restore. This function will time out after 5 seconds of inactivity and the unit will
resume normal operation. After reset, the unit will default to FM mode.
5
JMS32
1
2
3
4
5
6
9
8
10
7
OPERATION

Radio Mode
USA/Europe (EURO) Tuning Mode Selection
To change from USA to European tuning mode, perform the following steps:
1. Press and hold the button (8) for 3 seconds to access the system menu.
2. Press the button (8) repeatedly to cycle through the menu options (DIM > DIM LEVEL > REGION > PRE VOL >
RESET). The Region setting will display REG USA (if set to USA frequency tuning mode) or REG EUR (if set to European
frequency mode).
3. With the display showing the current tuning mode, Press the or buttons (5, 7) to change between (REG USA /
REG EUR).
Frequency Tuning
Press the or buttons (5, 7) to fine tune the radio frequency.
Channel Seek
Press and hold the or buttons (5, 7) to seek strong radio frequencies.
Preset Channel Store
To manually store a favourite channel to one of the twelve preset channels, perform the following steps:
1. Press the or buttons (5, 7) to tune to the radio frequency you want to store.
2. Press and hole the favourite button (9) to access 12 presets channel list; the favourite icon & channel will be
flashing on display.
3. Press the button (9) repeatedly to select desired favourite preset channel number (1-12).
4. Press the button (6) to save the station to the chosen preset channel and exit preset channel list, the favourite icon will
stop flashing.
Auto Store
Press and hold the button (3) to access the tuner menu list (AUTO STORE & PRESET SCAN). Press button (3)
repeatedly until “AUTO STR” appears on the display. Press the button (6) to begin the Auto Store function and store the
strongest stations to the preset tuning channels.
NOTE: Only stations detected with sufficient signal strength will be stored in the preset channel automatically.
Preset Scan
Press and hold the button (3) to access the tuner menu list (AUTO STORE & PRESET SCAN). Press button (3)
repeatedly until “PRE SCAN” appears on the display. Press the button (6) to begin the Preset Scan function and listen the
strongest stations to the preset tuning channels.
Favourite Preset Channel select
Press the button (9) to select available preset channels.
USB Mode
Insert/Remove USB Device
You can connect a USB device directly to the USB interface at the rear of the radio for playback of compatible files. Playback
begins automatically.
Press the button (3) to switch to USB mode from another source.
Play/Pause (USB)
During USB playback, press the button (6) to play or pause the selected track.
Next/Previous File
Press the or button (5, 7) to select the previous or next track.
Track Select
1. Press and hold the buttons (9) to access the MP3/WMA track navigate mode.
2. Press the volume or button (10, 2) to select the desire track.
3. Press button (6) to confirm to playback the track selected.
Fast Forward/Fast Reverse
Press and hold the or button (5, 7) to fast forward or fast reverse.
6
JMS32
Playback Menu (Repeat/Random)
Press the button (9) to select Repeat All, Repeat One and Random playback.
Repeat Play
Repeat One: to continuous repeat the selected track.
Repeat All: to repeat all tracks.
Random Play
Random Shuffle: To play all tracks in random, shuffle order.
Auxiliary Input Mode
Press the button (3) repeatedly until auxiliary input mode (AUX IN) is selected from any other modes, when a portable
device is connected to the unit.
7
JMS32

Bluetooth Operation
The JMS32 includes built-in Bluetooth technology that allows you to connect this unit to Bluetooth devices for streaming audio
playback.
About Bluetooth Technology
Bluetooth is a short-range wireless radio connectivity technology developed as a cable replacement for various electronic
devices. Bluetooth operates in 2.4 GHz frequency range and transmits voice and data at speeds up to 1 megabit per second.
Bluetooth was launched by a special interest group (SIG) comprised of Ericsson Inc., Intel Corp., Nokia Corp., Toshiba and IBM
in 1998, and it is currently developed by nearly 2,000 companies worldwide. The Bluetooth word mark and logos are owned by
the Bluetooth SIG, Inc. and any use of such marks is under license. Other trademarks and trade names are those of their
respective owners.
Bluetooth Menu Options
NOTE: Please note that some Bluetooth menu options are only available while the unit is in Bluetooth Audio mode.
Press and hold the button (8) to enter the menu adjustment mode. The following additional menu options are available when
the unit is in Bluetooth mode:
● BT PAIR: ON the BT PAIR screen press the button (6) to make pairing available for 120 seconds then connect using
your Bluetooth enabled device.
● BT DEVICE: Press the button (6) to view a list of previously paired mobile phone devices. Press the or
buttons (5, 7) to view devices in the list. When viewing a specific device press button (6) again to enable the
following LOCK/UNLOCK, CONNECT/DISCONNECT, or DELETE functions and press or buttons (5, 7) to cycle
through them.
● CONNECT/DISCONNECT: To disconnect a paired device, press the button (6) to temporarily remove the
Bluetooth connection. The connection can be re-established through your phone menu by selecting the JMS32 for
connection or select the phone device name on pairing list through the radio unit and press button (6) and
select CONNECT for connection.
LOCK/UNLOCK: The JMS32 can store up to 5 devices for Bluetooth connection.The devices are stored in a FIFO ●
(First in First Out) order. To prevent a device from being bumped from the list when more than 5 devices are used,
you can lock the device. To Lock/Unlock a device, press button (6) to change between Lock/Unlock.
DELETE: Deleting a device removes it from the pairing list. To delete a device from the list, press the button (6). ●
To reconnect with a deleted device it must be paired again.
8
…
…
…
JMS32
Use /
to Navigate
the List Press / Press /
Press /
Press /
BT Device
Device 1
Device 1
Device 2
Device 3
Device 4
Device 5
Device 5
Lock/Unlock
Connect/Disconnect
Delete
Lock/Unlock
Connect/Disconnect
Delete
/

Pairing a Bluetooth Device
Before you begin, consult the owner's manual for the Bluetooth device you want to pair with the JMS32.
1. Make sure the device you intend to pair with is on and ready to receive a signal from the JMS32.
2. Press the button (4) to enter Bluetooth mode.
3. Press and hold the button (8) and press repeatedly until the unit display PAIR, then press button (6). The unit
will display PAIR and count down from 120 to o. While the unit counts down, use your mobile device Bluetooth function to
search for a Bluetooth function to search for a Bluetooth device.
4. When your mobile device has completed its search, the mobile device will display the Bluetooth device name (JMS32).
5. Select JMS32. Once connected the Bluetooth Audio icon will appear on the display.
6. Enter the pairing password (0000), if requested.
After connecting successfully, you will be able to listen to audio stored on your Bluetooth enabled device through the radio.
Answering a Call
When answering a call using the connected phone, Bluetooth audio playback will pause. After hanging up from the call, Bluetooth
audio will continue on some phones. It may be necessary to press the button (6) to resume Bluetooth audio playback.
Bluetooth Audio (A2DP)
Selecting Tracks
During playback, press or button (5, 7) to play the previous or next track.
Pausing Playback
During playback, press button (6) to pause the Bluetooth audio playback. “PAUSE” will appear on the LCD. Press button
(6) again to resume playback. If you change to another mode, playback will automatically pause. Press the button (3) to
return to Bluetooth mode and resume audio playback from your Bluetooth enabled device.
NOTE: If a Bluetooth device is disconnected due to the power being turned off or if the device goes out of range, the
unit will automatically search for the matching Bluetooth mobile device when the power is restored.
9
JMS32

10
JMS32
CANADA STATEMENT

11
JMS32
TROUBLESHOOTING
Table 1: Troubleshooting
Problem Solution
No power
No AM/FM Reception
No sound
If the power supply is connected to the vehicle accessory circuits but the engine is not on , switch
the ignition key to “ACC”.
Fuse may be blown. Replace with 15 AMP ATO fuse.
Antenna cable not connected; insert antenna cable firmly.
Check volume level; increase volume if necessary.
Check power; make sure device is on.
Check device; press the play/pause button to ensure unit is not in Pause mode.
SPECIFICATIONS
General
Frequency band(s) ( for Bluetooth)..................................................................................................................2.4~2.4835GHz
Maximum radio frequency power transmitted (for Bluetooth)........................................................................................10 dBm
Power Supply Requirements.....................................................................................................DC 12 Volts, Negative Ground
Operating Voltage...................................................................................................................................................10-16V DC
Unit Dimensions..........................................................................................................................3.602" Diameter, 3.465"Deep
Mounting Dimensions.......................................................................................................................3.866" Wide, 4.465" Deep
Weight.............................................................................................................................................................................1.3lb.
FM Tuner
Tuning Range..............................................................................................................................................87.5 to 107.9 MHz
Sensitivity.........................................................................................................................................................................<5 Vμ
Stereo Separation @ 1 kHz............................................................................................................................................>30dB
AM Tuner
Tuning Range....................................................................................................................................................530-1710 KHz
Sensitivity.......................................................................................................................................................................<63 Vμ
Amplifier
Max Output Power.........................................................................................................160 Watts Total (40 Watts, 4 Channel)
Output Impedance........................................................................Compatible with 4-8 Ohm Speakers, 4 Ohm Load Minimum
Specifications subject to change without notice.

©
ASA Electronics Corporation
www.asaelectronics.com
www.jensenheavyduty.com
2021 ASA Electronics Corporation
v.170921

JMS32
0DQXDOGHXVXDULR
0DQXHOGHO¶XWLOLVDWHXU

CONTENIDO
,QWURGXFFLyQ
&DUDFWHUtVWLFDV
&RQWHQLGRGHOD&DMD
&RQIRUPLGDGFRQODV1RUPDV)&&
,QIRUPDFLyQGH6HJXULGDG
,QVWDODFLyQ
0RQWDMHGHOD5DGLR
(QWUDGD$X[LOLDU
6DOLGDGH/tQHD
'LDJUDPDGH&DEOHDGR
)XQFLRQDPLHQWR
)XQFLRQHV%iVLFDV
0HQ~GH$XGLR
0HQ~GHO6LVWHPD
0RGRGH5DGLR
0RGR86%
0HQ~GH5HSURGXFFLyQ5HSHWLU$OHDWRULR
0RGRGH(QWUDGD$X[LOLDU
)XQFLRQDPLHQWR%OXHWRRWK
5HVROXFLyQGH3UREOHPDV
(VSHFLILFDFLRQHV
TABLE DES MATIÈRES
,QWURGXFWLRQ3
&DUDFWpULVWLTXHV3
&RQWHQXGHODERvWH3
5pJOHPHQWDWLRQV)&&3
,QIRUPDWLRQVVXUODVpFXULWp4
,QVWDOODWLRQ5
0RQWDJHGHODUDGLR5
(QWUpHDX[LOLDLUH5
/LJQHGHVRUWLH5
6FKpPDGHFkEODJH6
)RQFWLRQQHPHQW7
)RQFWLRQVGHEDVH7
0HQXDXGLR7
0HQXV\VWqPH7
0RGHUDGLR8
0RGH86%8
0HQXOHFWXUH5pSpWLWLRQ$OpDWRLUH
9
0RGHG¶HQWUpHDX[LOLDLUH9
)RQFWLRQQHPHQWGX%OXHWRRWK 20
'pSDQQDJH3
6SpFLILFDWLRQV. 4
'HFODUDFLyQGH&DQDGi
'pFODUDWLRQGX&DQDGD 2
-062

INTRODUCCIÓN
*UDFLDVSRUHOHJLUORVSURGXFWRV-HQVHQ(VSHUDPRVTXHHQFXHQWUHODVLQVWUXFFLRQHVGHHVWHPDQXDOFODUDV\IiFLOHVGHVHJXLU
6LVHWRPDXQRVPLQXWRVSDUDOHHUORDSUHQGHUiFyPRXWLOL]DUWRGDVODVIXQFLRQHVGHVXQXHYDUDGLR-HQVHQSDUDVXPi[LPR
GLVIUXWH
Características
,PSHUPHDEOHL3[
5HVLVWHQWHD89\&RUURVLyQ
&RQWUROGH/&'5HWURLOXPLQDGR$WHQXDEOH
6LQWRQL]DGRU$0)0((88(8523$
3UHVHOHFFLRQHV3URJUDPDEOHV$0)0
6LQWRQL]DGRUGH%DQGD0HWHRUROyJLFD
&RQWUROHV(OHFWUyQLFRVGH*UDYHV$JXGRV%DODQFH\$WHQXDGRU
5HSURGXFWRU86%03:0$
(QWUDGDGH$XGLR$X[LOLDU7UDVHUD5&$
6DOLGDGH$XGLR$X[LOLDU7UDVHUD5&$
6DOLGDGH$XGLR$PSOLILFDGDGH&DQDOHV
%OXHWRRWK&RPSDWLEOHFRQ$'3\$95&3
Contenido de la Caja
5DGLR-062
6RSRUWHGH,QVWDODFLyQGHOD5DGLR
7RUQLOORV(VSiUUDJR[
7XHUFDV+H[DJRQDOHVGH%ORTXHR[
$UDQGHODV[
Conformidad con las Normas FCC
Conformidad con las Normas FCC (sólo EE.UU.)
(VWHGLVSRVLWLYRFXPSOHORVUHTXLVLWRVHVWLSXODGRVHQOD6HFFLyQGHODV1RUPDV)&&6XXVRHVWiVXMHWRDODVGRV
FRQGLFLRQHVVLJXLHQWHV(VWHGLVSRVLWLYRQRSXHGHFDXVDULQWHUIHUHQFLDVSHUMXGLFLDOHV\HVWHGLVSRVLWLYRGHEHDFHSWDU
FXDOTXLHULQWHUIHUHQFLDUHFLELGDLQFOX\HQGRLQWHUIHUHQFLDVTXHSXHGDQSURYRFDUXQIXQFLRQDPLHQWRQRGHVHDGR
NOTA
(VWHHTXLSRKDVLGRSUREDGR\GHFODUDGRFRQIRUPHFRQORVOtPLWHVHVWDEOHFLGRVSDUDGLVSRVLWLYRVGLJLWDOHVGH&ODVH%HQ
FXPSOLPLHQWRGHOD6HFFLyQGHODV1RUPDV)&&(VWRVOtPLWHVHVWiQGLVHxDGRVSDUDSURSRUFLRQDUXQDSURWHFFLyQUD]RQDEOH
FRQWUDODVLQWHUIHUHQFLDVSHUMXGLFLDOHVHQODVLQVWDODFLRQHVUHVLGHQFLDOHV(VWHHTXLSRJHQHUDXWLOL]D\SXHGHHPLWLUHQHUJtDGH
UDGLRIUHFXHQFLD\VLQRVHLQVWDOD\XWLOL]DVHJ~QODVLQVWUXFFLRQHVSXHGHSURYRFDULQWHUIHUHQFLDVSHUMXGLFLDOHVSDUDODV
FRPXQLFDFLRQHVGHUDGLR
ADVERTENCIA FCC
/RVFDPELRVRPRGLILFDFLRQHVGHHVWDXQLGDGQRDSUREDGRVH[SUHVDPHQWHSRUODSDUWHUHVSRQVDEOHGHOFXPSOLPLHQWR
SRGUtDQDQXODUHOGHUHFKRGHOXVXDULRDKDFHUXVRGHOHTXLSR
'HEHQXWLOL]DUVHFRQH[LRQHVDGHFXDGDVSDUDODFRQH[LyQDXQRUGHQDGRU\RSHULIpULFRVFRQHOILQGHFXPSOLUORVOtPLWHVGH
HPLVLRQHVGHOD)&&
-0622

Información de Seguridad
Al Conducir una Embarcación
5HFXHUGHPDQWHQHUHOQLYHOGHYROXPHQORVXILFLHQWHPHQWHEDMRFRPRSDUDHVWDUDOWDQWRGHORTXHOHURGHD
Proteja el Dispositivo del Agua
1RVXPHUMDHVWHGLVSRVLWLYR\DTXHHVWRSXHGHFDXVDUFRUWRFLUFXLWRVLQFHQGLRVXRWURVGDxRV
Proteja el Dispositivo de la Intemperie
8WLOLFHODFXELHUWDLQFOXLGDSDUDSURWHJHUHOFRQWURODGRUFDEOHDGRGHODOX]GHOVROHOSROYR\HODJXDPLHQWUDVQRHVWiHQXVR
Proteja el Dispositivo de las Altas Temperaturas
1RPRQWHODUDGLRHQODVSUR[LPLGDGHVGHOFRPSDUWLPHQWRGHOPRWRU
Use la Alimentación Adecuada
(VWHSURGXFWRHVWiGLVHxDGRSDUDIXQFLRQDUFRQXQVLVWHPDGHEDWHUtDGHYROWLRV'&QHJDWLYRDWLHUUD
35(&$8&,Ï1
12$%5$/$6&8%,(57$61,,17(17(5(3$5$5/$81,'$'32568&8(17$5(),(5$/$67$5($6'(
0$17(1,0,(172$817e&1,&2&8$/,),&$'2
$'9(57(1&,$
3$5$5('8&,5(/5,(6*2'(,1&(1',22'(6&$5*$(/e&75,&$(,17(5)(5(1&,$687,/,&(Ò1,&$0(17(/26
$&&(625,265(&20(1'$'26
-062

-062
INSTALACIÓN
Montaje de la Radio
(OLMDXQOXJDUGHLQVWDODFLyQHQHOWDEOHURRSDQHOGHLQVWUXPHQWRVTXHGHMHVXILFLHQWHHVSDFLRGHWUiVSDUDWHQGHUORV
FDEOHVGHUDGLRKDFLDODIXHQWHGHDOLPHQWDFLyQ7HQJDHQFXHQWDFyPRYDDXWLOL]DUORVFRQHFWRUHV$8;,1HQWUDGD
DX[LOLDU/,1(287VDOLGDGHOtQHD\86%\GLULMDORVFDEOHVGHH[WHQVLyQDSURSLDGRVKDFLDXQD]RQDDFFHVLEOH
5HFRUWHXQDJXMHURHQHOWDEOHURGHLQVWUXPHQWRVFRQD\XGDGHODSODQWLOODTXHILJXUDHQHOUHYHUVRGHHVWHPDQXDO6H
QHFHVLWDXQDSURIXQGLGDGGHDOPHQRVô´SDUDLQVWDODUODUDGLR
¡IMPORTANTE! No instale esta unidad donde pueda quedar sumergida en el agua.
'HVOLFHODVDUDQGHODVGHUHVRUWH%LQFOXLGDVVREUHORVWRUQLOORVHVSiUUDJR$\VXMHWHORVWRUQLOORVDODSDUWHSRVWHULRUGH
ODUDGLR
&RORTXHODUDGLRHQIUHQWHGHODDSHUWXUDGHOWDEOHURGHPDQHUDTXHHOFDEOHDGRSXHGDVHUGLULJLGRDWUDYpVGHODDEHUWXUD
'HVSXpVGHUHDOL]DUODVFRQH[LRQHVGHOFDEOHDGRHQFLHQGDODUDGLRSDUDFRPSUREDUHOIXQFLRQDPLHQWRHOLQWHUUXSWRU
DFFHVRULRGHODHPEDUFDFLyQGHEHHVWDUHQFHQGLGR6LODUDGLRQRIXQFLRQDYXHOYDDUHYLVDUWRGRHOFDEOHDGRKDVWDTXH
VHFRUULMDHOSUREOHPD8QDYH]TXHKD\DORJUDGRXQDRSHUDFLyQFRUUHFWDDSDJXHHOLQWHUUXSWRUDFFHVRULR\SURFHGDFRQHO
PRQWDMHILQDOGHODUDGLR&RQVXOWHODVHFFLyQ'LDJUDPDGH&DEOHDGRHQODSiJLQD
NOTA: Antes de la instalación final, pruebe las conexiones de los cables para asegurarse de que la unidad está
conectada correctamente y de que el sistema funciona.
,QVHUWHODUDGLRHQHORULILFLRGHPRQWDMH
&RORTXHHOVRSRUWHHQ8&HQORVWRUQLOORVHVSiUUDJR\ILMHODUDGLRHQHOWDEOHURFRQODVWXHUFDVKH[DJRQDOHV'
LQFOXLGDV'HVHUQHFHVDULRFRUWHODVPDUFDVGHLQFLVLyQ(TXHKD\DFDGDODGRGHOVRSRUWHGHPRQWDMHSDUDDGDSWDUOD
ORQJLWXGGHOVRSRUWHDVXDSOLFDFLyQ&RQVXOWHODILJXUD$
Entrada Auxiliar
&RQHFWHXQGLVSRVLWLYRGHDXGLRSRUWiWLODODHQWUDGDGHDXGLRDX[LOLDU$8;,1'&+$,='$GHODSDUWHSRVWHULRUGHODXQLGDG
XWLOL]DQGRFDEOHV5&$
Salida de Línea
/RVFRQHFWRUHVGHVDOLGDGHOtQHD/,1(287'(5(&+$,=48,(5'$VLWXDGRVHQODSDUWHSRVWHULRUGHODXQLGDGHPLWHQXQD
VHxDODQDOyJLFDGHQLYHOGHOtQHD8WLOLFHHVWDVDOLGDSDUDFRQHFWDUXQDPSOLILFDGRUH[WHUQR
)LJXUD$,QVWDODFLyQ

-062
Diagrama de Cableado
&2/25'(/
&$%/(
'(6&5,3&,Ï1
025$'2 $/7$92=75$6(52'(5(&+2
025$'21(*52 $/7$92=75$6(52'(5(&+2±
*5,6 $/7$92=)5217$/'(5(&+2
*5,61(*52 $/7$92=)5217$/'(5(&+2±
%/$1&2 $/7$92=)5217$/,=48,(5'2
%/$1&21(*52 $/7$92=)5217$/,=48,(5'2±
9(5'( $/7$92=75$6(52,=48,(5'2
9(5'(1(*52 $/7$92=75$6(52,=48,(5'2±
52-2 $&&9
1(*52 7,(55$
$=8/ $03327(1&,$5(0272
Nota: No conecte el cable rojo a una conexión de
alimentación constante. El cable rojo debe
conectarse a una conexión de embarcación con
alimentación interrumpible, como IGN o ACC.
Table of contents
Other Jensen Stereo System manuals

Jensen
Jensen JBS-215 User manual

Jensen
Jensen JWM9A User manual

Jensen
Jensen JWM9A User manual

Jensen
Jensen Heavy Duty JHD40BT User manual

Jensen
Jensen SMPS-628 User manual

Jensen
Jensen JWM10A User manual

Jensen
Jensen JWM22 User manual

Jensen
Jensen JTA-980 User manual

Jensen
Jensen JWM6A User manual

Jensen
Jensen JMC-255 User manual

Jensen
Jensen JWM990 User manual

Jensen
Jensen MS3ABK User manual

Jensen
Jensen JWM6A User manual

Jensen
Jensen JWM990 User manual

Jensen
Jensen JCR-390 User manual

Jensen
Jensen JWM40 Installation instructions

Jensen
Jensen Media PRO 5000 User manual

Jensen
Jensen Heavy Duty JHD40BT User manual

Jensen
Jensen JWM40 User manual

Jensen
Jensen CD-565 User manual