Jinbei HD601 User manual

Knox Photographic Society
Jinbei HD601 Monolight System
Operating Instructions
ritten by Noel Butcher
(with annoying but ultimately useful additions, suggestions, hints and thoughts by Richard Kelly).
Updated February 4 2019
Page 1 of 26

elcome.
Please read these instructions carefully
before using these lights. KPS has spent a
considerable sum of money purchasing this
equipment for the benefit of all KPS
members.
Please treat all KPS equipment with the
utmost care and respect.
e realise that sometimes things go wrong.
If you find something isn’t working as it
should please let us know ASAP so that it
can be rectified before another KPS
member uses the equipment.
This manual goes into excruciating detail but in reality operation is fairy simple,
particularly if the previous user has left the lights on the KPS default settings which will
be explained further in this document.
In essence, after setting up the lights on their stands etc, choose the correct remote,
turn it and the monolights on, adjust the light output and you are ready to go.
Page 2 of 26

If you are not familiar with the operation of our Jinbei lights, please
READ THIS MANUAL CAREFULLY before attempting to use the lights.
Just need a refresher in how to use them? Here’s a summary
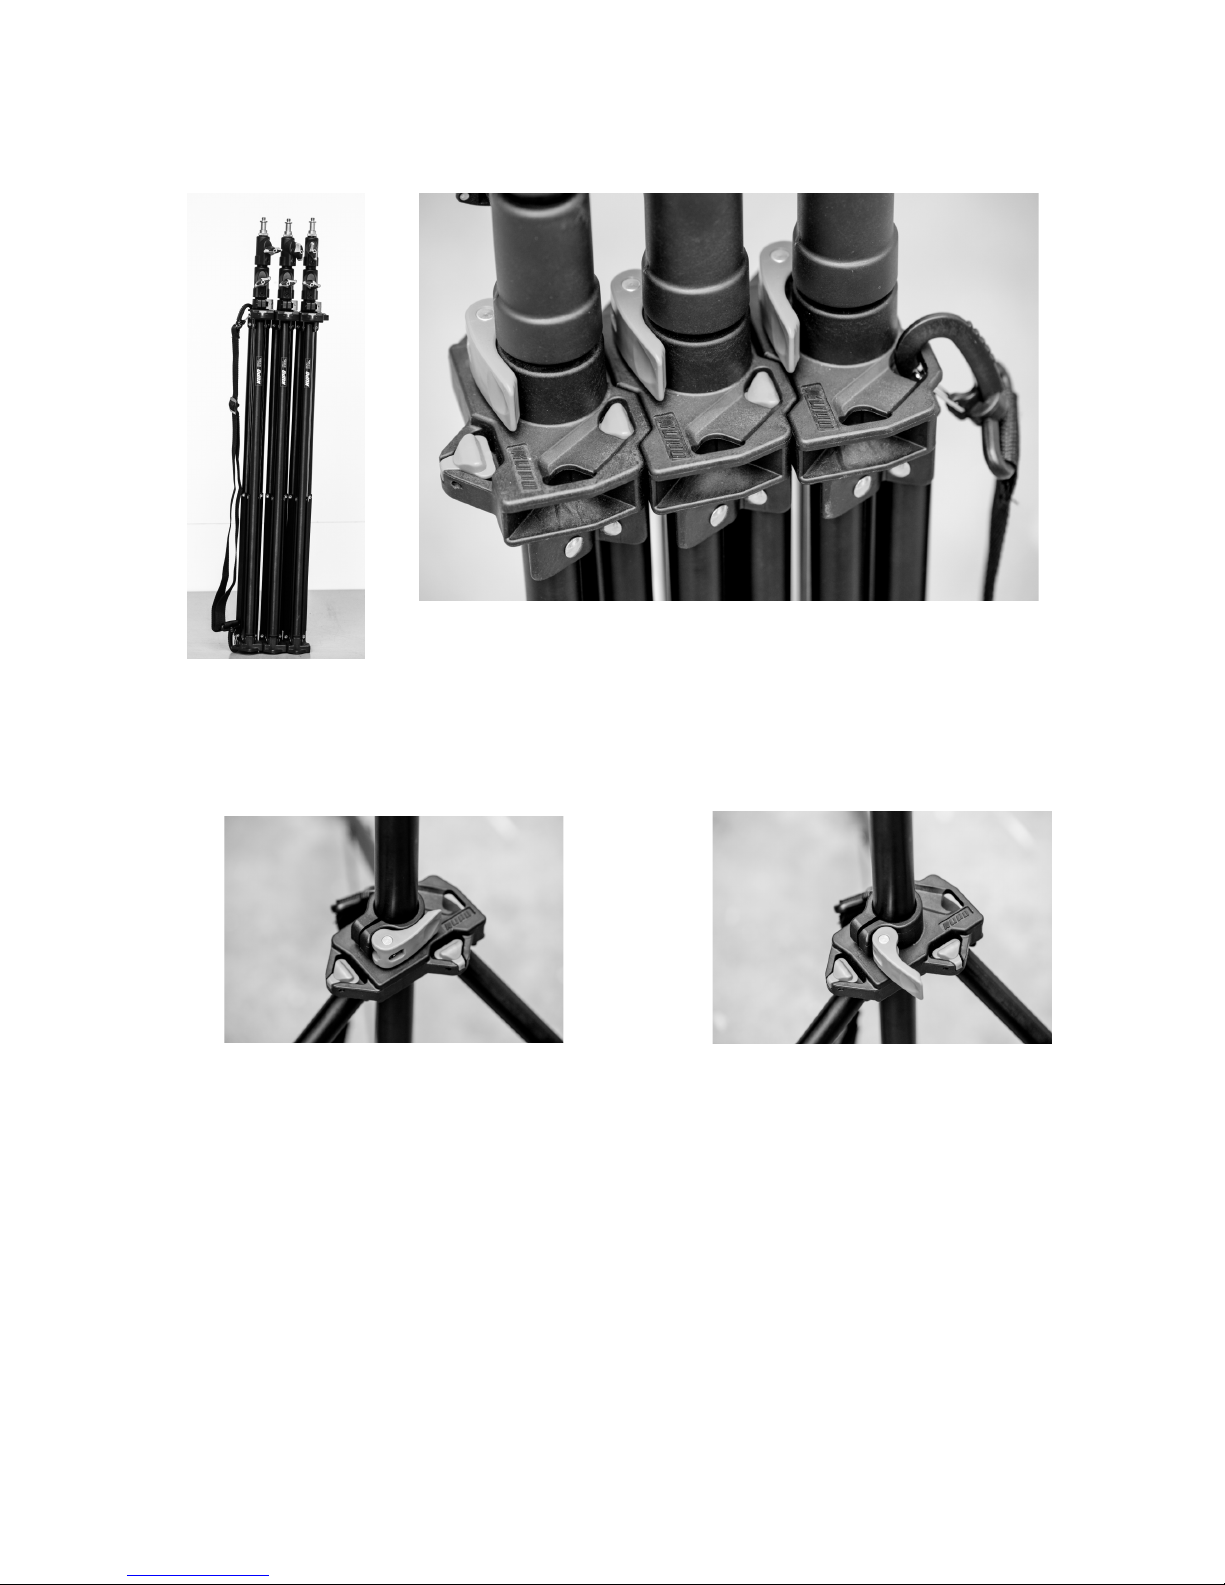
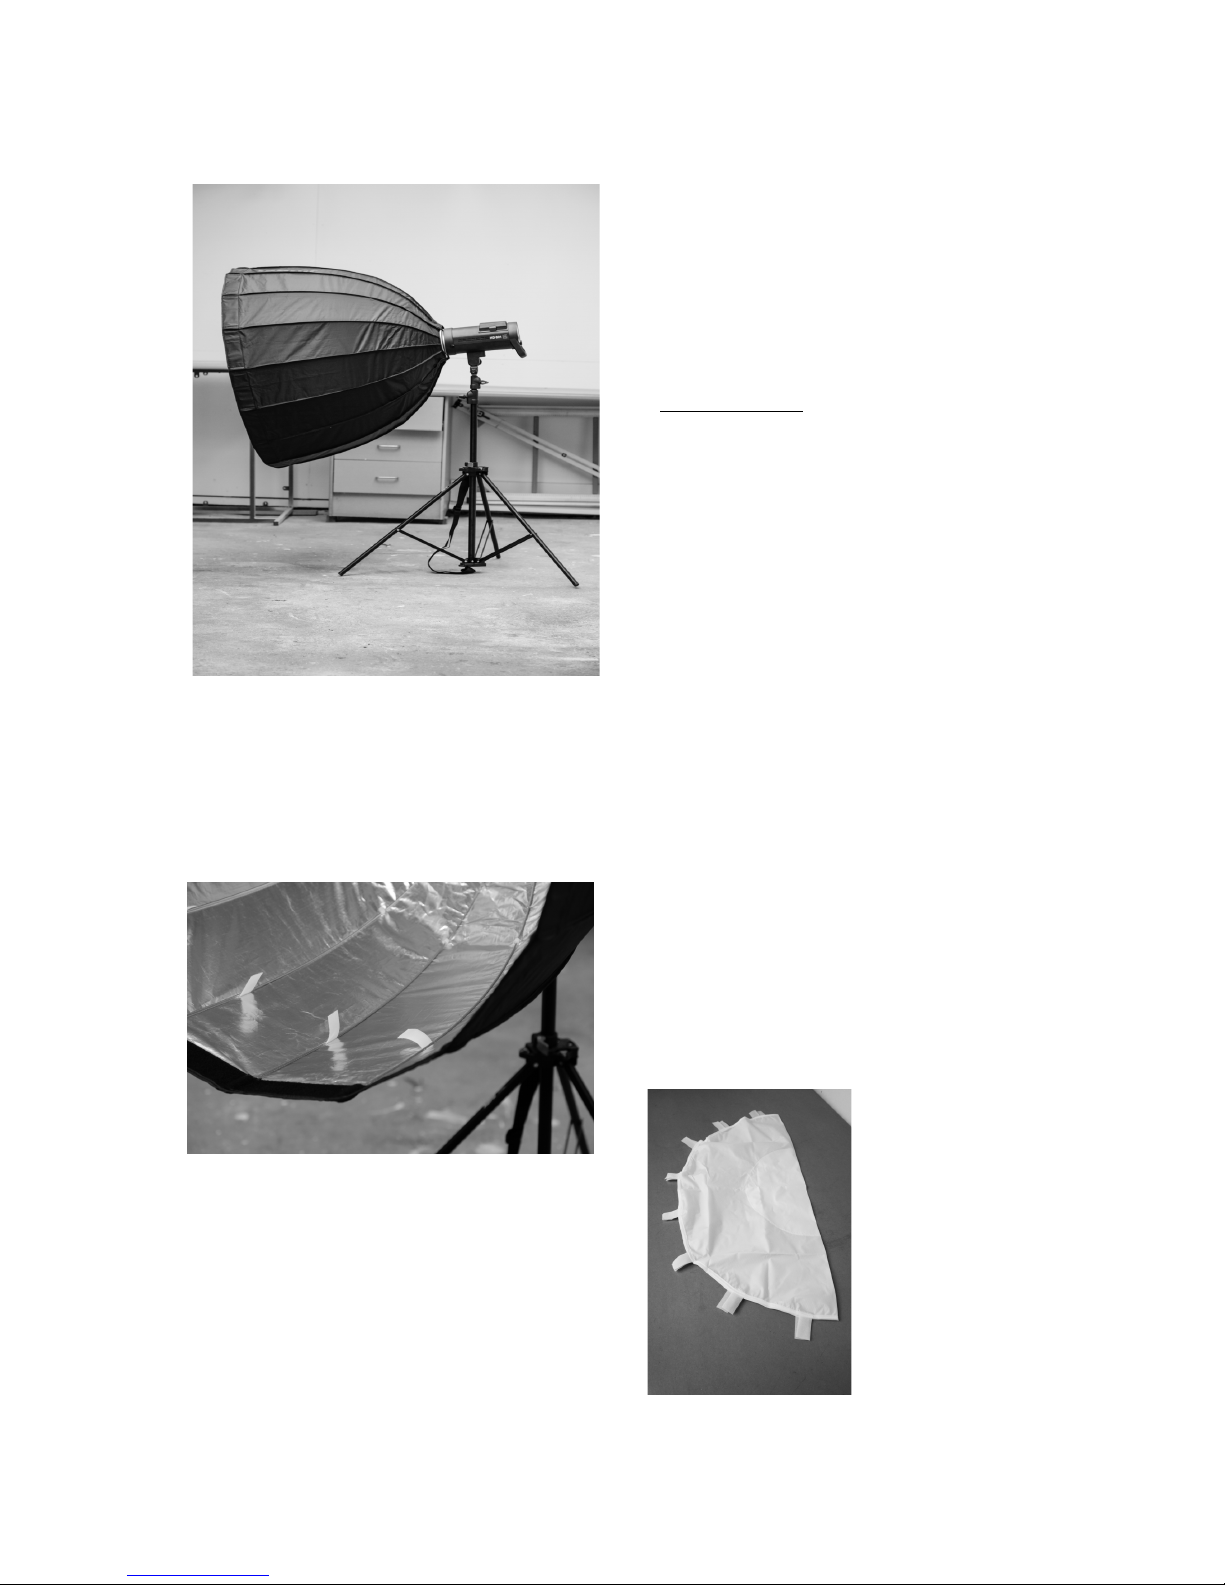
•Set up the stands
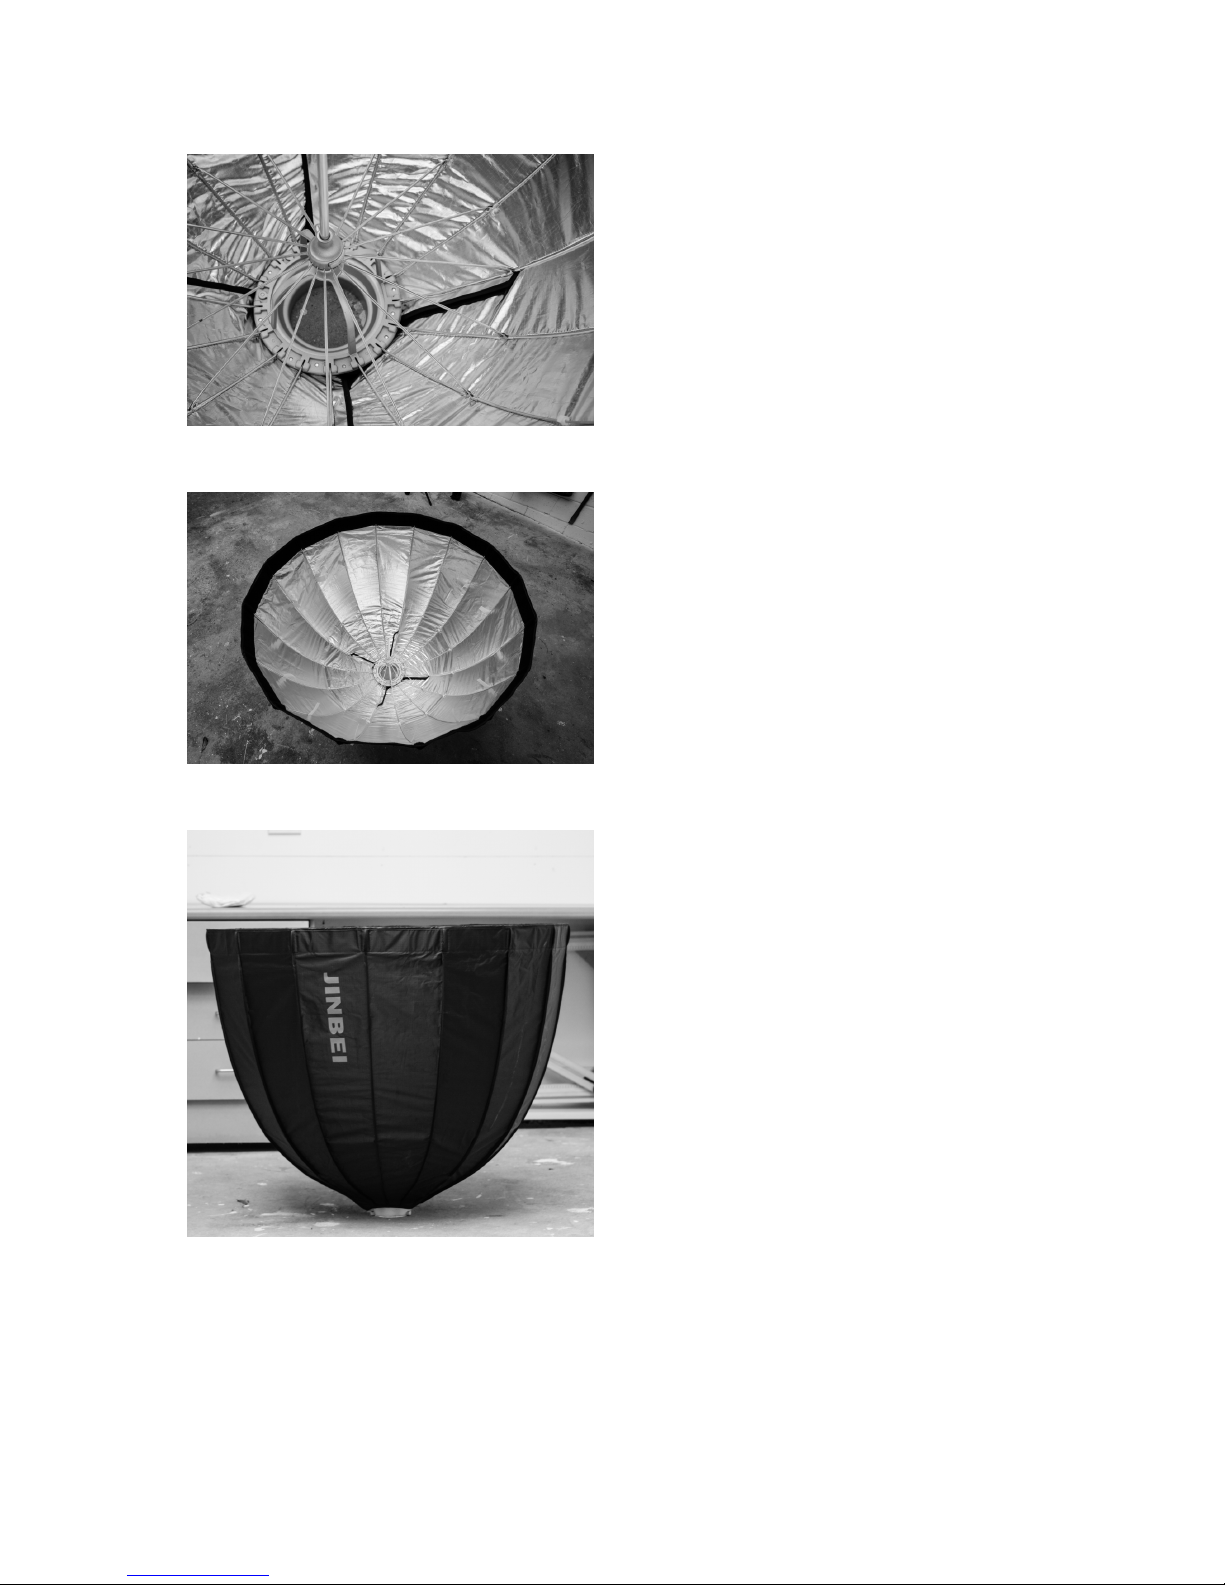
•Set up the softbox(s)
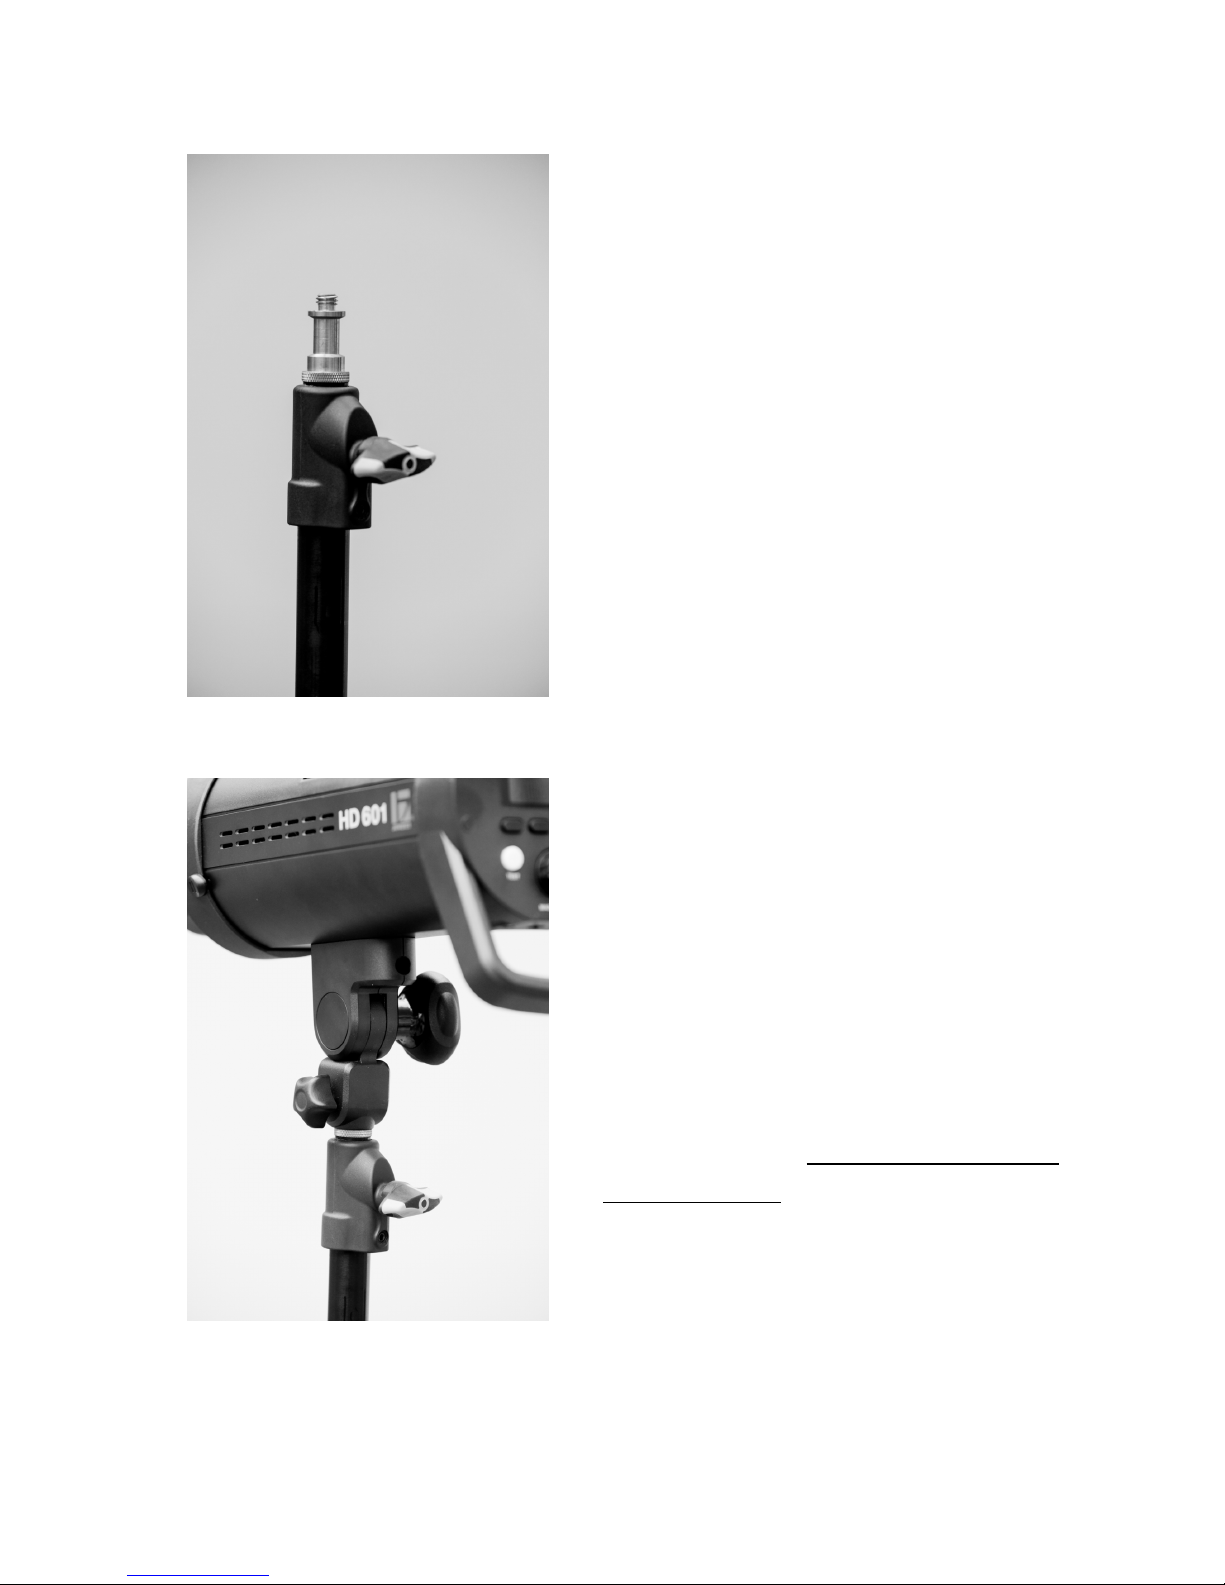
•Attach the monolight)s) to the softbox(s) being careful to NOT DAMAGE THE
FLASHTUBES!
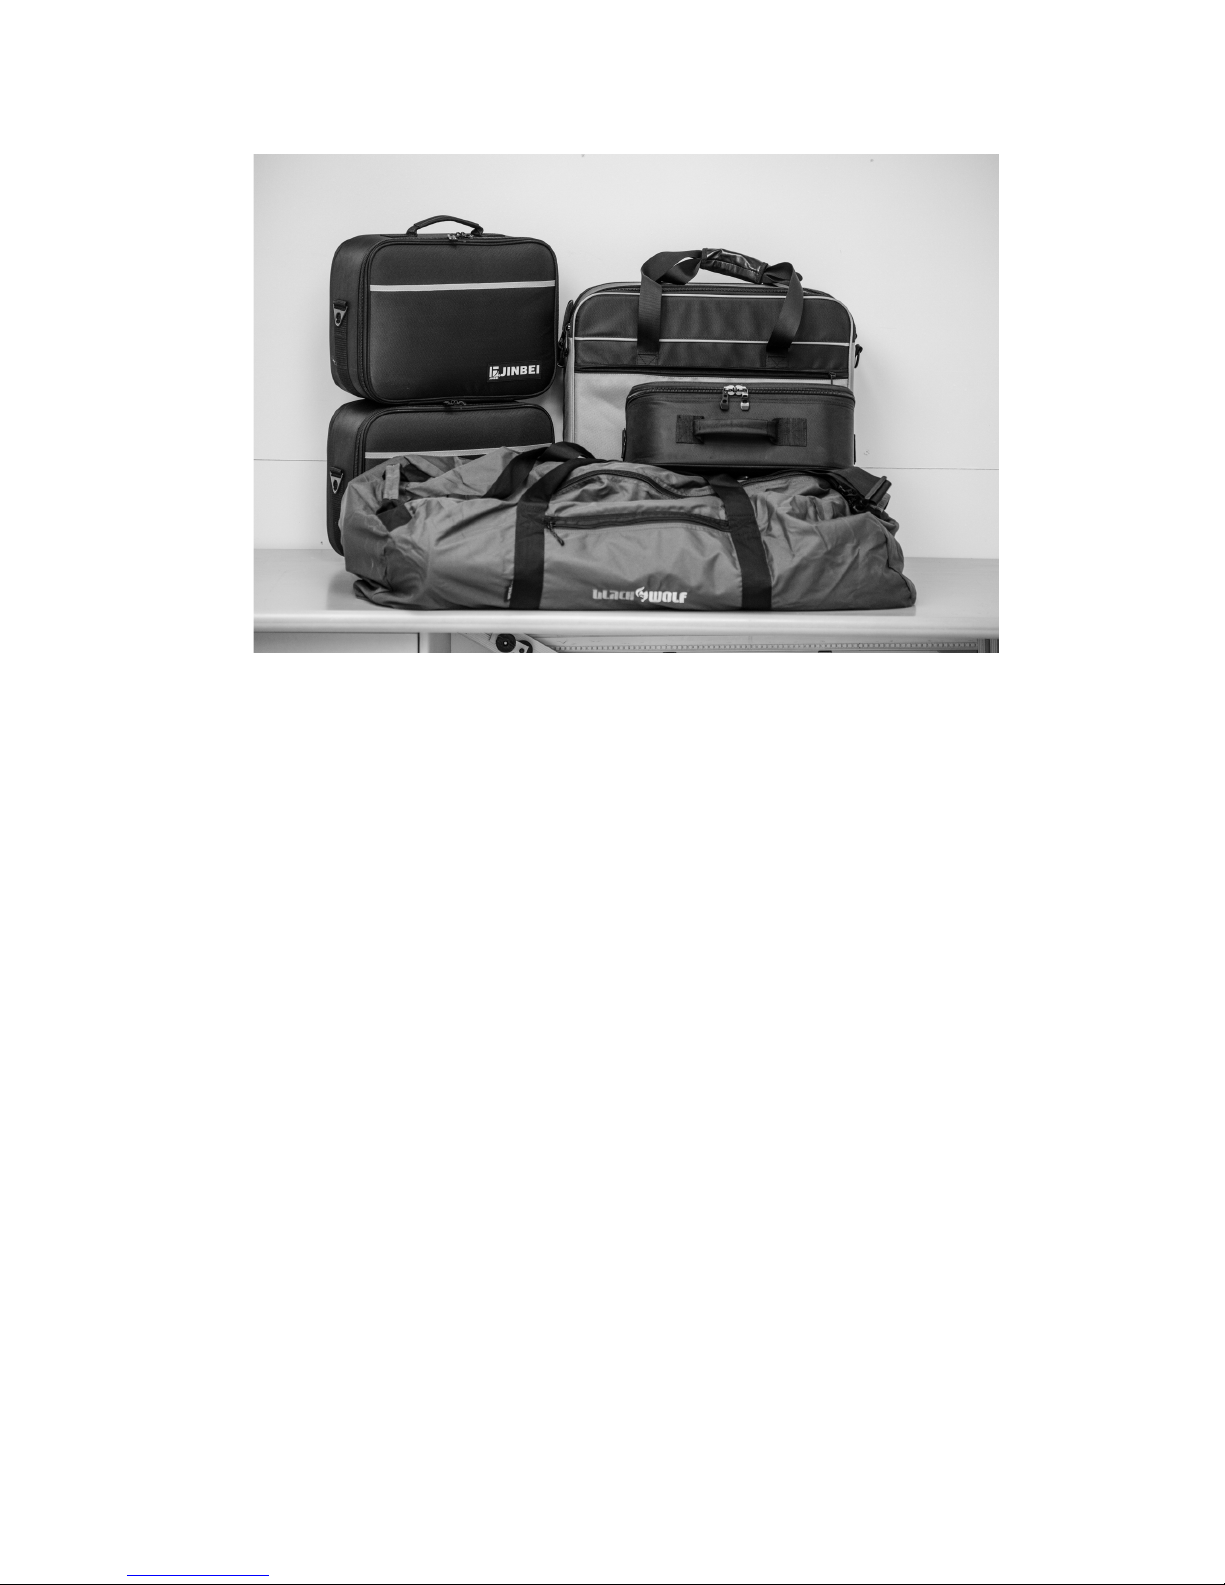
•Use the weighted bags to stabilise the stands.
•Check that the monolights are on Channel 6.
•Mode is M
•Sync is Bluetooth. Look for this symbol:
•Select which group (normally Group A) or groups you want to use.
•Set the monolights to ‘talk’ either Nikon, Canon, Sony or Fuji.
•Attach the correct remote for your camera.
•Remember the remote settings will override settings on the monolights.
•Set your camera to Daylight hite Balance and Manual for best results
•Ensure that you are using an appropriate shutter speed ie your flash synch
speed or slower. All cameras should sync at 1/125th of a second if you are
unsure.
A few tips:
•Remember that the lights will take a second or two to power up again after
shooting and that higher power flashes will result in longer refresh times.
•The modelling lights will obviously use battery power but are also handy to help
your camera focus in dark situations as well as check the play of the light prior to
shooting.
•Check that ALL your lights are working as you want as it is easy to miss one not
firing if the others are working.
•If using a mirrorless camera with YSI YG turned on in a dark area, turn it off
(otherwise your viewfinder will appear dark).
Page 3 of 26

Equipment List (as at December 2 17)
Jinbei HD601 Monolights (includes battery, charger and leads, case with strap) x3
Monolight Serial Numbers: HD601AH030297, HD601AH030466 and HD601AE230295
Charger Serial Numbers: EV201705008971, EV201706017408 and EV2017060176908
Jinbei TR-Q6 C Smart Bluetooth Transmitter for Canon x1
Jinbei TR-Q6 N Smart Bluetooth Transmitter for Nikon x1
Jinbei TR-Q6 S Smart Bluetooth Transmitter for Sony x1
Jinbei Quickfold Octagonal Umbrella Softbox 120cm x 2 (includes 2 diffusers each soft
box)
Grid for Jinbei Octagonal Softbox 120cm x 2
Jinbei 90cm Deep Softbox (Quickfold) (includes 2 diffusers for soft box) x1
90cm Grid for Deep Umbrella Softbox x1
Jinbei Conical Snoot with removable grid x 3
Jinbei 55 Degree Standard Reflector x1
Reholder2 - Reflector Holder Multi Clamp and Arm x1
Kupo KS041711 Stackable 240cm Air cushioned click stand x 3
Kupo Shoulder Strap for click stands x1
5 in 1 107 cm Round Photographic Reflector x1
Jinbei 3 Head Case (including removable strap) x1
Black olf 150L Duffel Pak x 1
Page 4 of 26

Setting Up
Setting up the light stands is very easy.
Unclip the top of a stand from its neighbour by pushing down on the triangular blue
button near the blue locking lever. Pull the stand away from its neighbour.
Unlock the locking lever.
Pull out the bottom of the legs as far as they will go (may require separating from the
bottom), place the stand on the floor, push down on the central column to ensure it is
fully spread and re-lock the stand. Once you have the light stand in the correct position
use one or more of the KPS weight bags to stabilise the stand.
Page 5 of 26
Locked Unlocked

hen you attach a monolight to the stand
please ensure that the brass attachment at
the top of the stand is completely hidden from
view (apart from the knurled section at the
very bottom).
You may need to ‘jiggle’ the head into position
or undo the locking screw on the monolight a
little more to achieve this.
Once you have the head placed on the stand
properly ensure that you have tightened the
small locking nut on the monolight to prevent
the light crashing to the floor and you having
to pay for the repairs.
Once attached, the monolight should hide the
bulk of the brass attachment of the stand as
per our picture at left.
If it doesn’t, you haven’t fitted it properly.
If you are planning to use a
soft box/umbrella please fit the
monolight to the soft
box/umbrella before attaching
to the stand.
Snoots are OK to fit once the
monolight is on the stand.
Page 6 of 26

Monolights should always have the
protective cover over the flash tube
whenever the lights are not in use.
Flashtubes are delicate and expensive so
please be careful when removing and
replacing the flash tube covers.
Allow lights to cool for a few minutes
before fitting protective cover
The protective covers and softboxes,
snoots etc are attached using a bayonet
mount and a slight twist is needed to fit
them to the monolight.
It should click into position.
If it hasn’t clicked, you haven’t done it
properly.
Just as with your camera there is a
button to press to release the bayonet
mount (arrow at left).
The bayonet mount has three lugs as per
the image at left that fit into the slots on
the monolight.
Remove the soft box from its bag and
place it on a clean floor as at right.
Page 7 of 26

Carefully pull out the edges of the soft
box so that it looks like the image at right.
IMPORTANT!
Please check that the soft box splines are
NOT showing as per our image at right
If any splines are misaligned please
carefully place them into the velcro pouch
as per our image at left.
You cannot do this once the soft box is
assembled.
The mechanism is a standard umbrella
mechanism (albeit one on steroids).
It requires a fair bit of pressure to push
the centre hub down to engage the
locking mechanism.
Be careful as it can bite.
Page 8 of 26

Pushing the hub down will eventually
engage the lock.
Again, be careful doing this as it can
bite.
Don’t say you haven’t been warned.
ith the lock engaged the soft box
should look like this. The fabric should be
taut.
This is the 90cm Deep Softbox but the
120 cm softboxes will look similar.
The 90cm deep soft box gives a slightly
more concentrated light than the 120cm
softboxes.
Page 9 of 26

Once the soft box is firmly assembled it can be placed onto the monolight.
DO NOT TRY TO ASSEMBLE
SOFTBOX TO MONOLIGHT ON A
STAND.
Please be careful in attaching the soft
box to the monolight. Remember it is a
bayonet mount that requires a slight twist
.Carefully align the lugs on the softbox
with the slots on the monolight so as to
NOT break the expensive flashtube.
You will hear a soft click when the two
pieces are correctly connected.
Push the release button to remove.
hen you have placed your lights in the correct position for photography please ensure
that you use the weighted bags to stabilise the lights.
This is important as the assembly is top heavy and naturally unstable.
Fit the bags over the support struts of the light stands. e have ample bags so please
use them for safety.
Our softboxes each have two diffusers.
The inner diffuser is attached using the
Velcro tabs as illustrated in the image at
left. Use of a diffuser is optional.
The diffusers are the thin pieces of
translucent material packed with the
softboxes.
There is an inner and an outer diffuser with
each soft box.
Page 10 of 26

The inner diffusers have tabs as per our image above.
The outer diffusers do not have tabs but continuous Velcro around the edges which
attaches to the Velcro edges of the softboxes.
Here’s a hint for fitting the diffusers.
Start at the top of the soft box unless
you like making things difficult for
yourself.
It is easiest to attach diffuser once the
softbox and monolight are attached to
the stand.
Once fitted, the inner diffuser should look like
our image at left.
The tabs do not have to pulled tight, nor do you
have to engage all the Velcro on each tab.
The front diffuser attaches using the Velcro edge of
the soft box.
The diffusers are delicate so please be careful
handling them.
Page 11 of 26

Once attached the diffuser should look
like the image at left.
Again, fitting from the top is easiest.
Again, please be careful fitting/removing
the diffusers as the material is delicate.
e have fabric grids for all softboxes which can be used to help prevent light spreading
too wide. These are fitted with Velcro as per the diffusers.
e also have a five in one reflector and expandable holding arm which can be fitted to
our light stands.
Page 12 of 26

The five in one reflector contains a black, white, silver, gold and translucent reflector
suitable for different purposes. They need to be twisted into shape to return them to the
bag. These reflectors can also be used to amuse young children or easily amused
adults by having the reflector snap into shape as it comes from the bag.
e have three snoots which can be fitted to the monolights.
Snoots are used to direct concentrated light to specific
parts of a subject.
Each snoot comes with a push on-pull off grid that can
further restrict the spread of the light.
Page 13 of 26

There is also one standard reflector which could be used for a hard light onto the
subject or perhaps when bouncing light from a monolight onto a ceiling or other surface.
Monolights
Each monolight comes in its own case with battery and charger.
Please remove the batteries from the monolights for transport.
Please ensure that the protective cap is placed and locked onto the
monolight for transport.
Page 14 of 26

Before use, you will need to fit the battery to the monolight. Each monolight has a
groove within the battery compartment for the corresponding lug on the battery.
The battery is held in place by the clip activated by the
button as shown at left.
Slide the battery lugs into the slots on the monolight as
shown in the pictures below.
Swivel the battery on the lugs until it clicks firmly in
place.
Please remove the batteries from the monolights for transport.
As the batteries have a finite life and a finite number of recharge cycles we don’t want
to be charging them needlessly so if the charge indicator is showing two or more lights
don’t worry about charging them. One light or less, please recharge them.
This may take a number of hours depending on the level of charge.
Anecdotally, you should get nearly 4 full power shots from a fully
charged battery!
Page 15 of 26

Each battery has a check button which is
on the underside of the battery.
Should you need to charge the batteries
the set-up needs to be as shown at left.
There is a tiny light on the charger to
indicate whether or not charging is
complete. Orange indicates charging,
green indicates completion.
Page 16 of 26

OK!
Batteries firmly in place on the monolights, monolights. firmly in place on the stands and
any softboxes or other accessories firmly in place on the monolights and you are nearly
ready to go.
Different brands of cameras have different hot shoe mounts with different pin
configurations as per our examples below.
It is for this reason that we have four different remote triggers, one each for Nikon,
Sony, Canon and Fuji. Note they are identical apart from the final letter in the name
which designates which camera systems they are designed for.
In case it isn’t blatantly obvious it’s N for Nikon, S for Sony, C for Canon and F for
Fuji.It has been suggested that N actually stands for Novice, C for Cool Dudes, S for
Snob and F for Fantastic.
Page 17 of 26

The remote units fit to the hot shoe atop your
camera just like a regular flash unit.
Important! Ensure the remote is attached to
your camera and switched on before setting
your camera flash controls.
Just like your flash there is an unlock
button to release the locking pin so don’t
try to remove the remote controller
without depressing the unlock button,
particularly if there are other KPS
members nearby as you don’t want to be
seen as a dill.
The Sony remote comes with a special cover to protect the somewhat delicate contacts
on the remote. Don’t lose the cover! Put it back after use!
The other units appear far more sturdy so if you use a Sony, please be especially
careful with the KPS remote. The Sony remote only works with modern Sony
bodies.
At 2019 prices it will cost you $99.00 to replace it if damaged.
For users of cameras other than Nikon, Sony, Canon and Fuji, your camera may be
compatible with either the Nikon, Canon or Fuji remotes (but not HSS). For example,
Fuji X cameras work (but not with HSS) with the Nikon and Canon remotes.
Once you have chosen a suitable remote all you need do now is get the remote to talk
with the monolights.
Page 18 of 26

The remotes only speak their own language i.e. Nikon, Sony, Canon or Fuji but the
monolights are multi-lingual – but only if you set them correctly, which easy to do.
The remotes have Channels and Groups. The monolights have Channels, Groups
and ‘Language’ settings. KPS has decided, in a completely arbitrary way, to use
Channel 6. In reality, it doesn’t matter which channel we use as long as all remotes and
lights are set to the same channel. Standardising on Channel 6 simply means that we
remove one variable from the mix when setting up the lights.
Why do these lights have channels?
Simply so that two different users can use two different channels in the same area
without interfering with the others flashes. There are fifteen channels available so in
theory, fifteen photographers could all set up their lights in the same venue and not
upset their neighbours. How cool is that?
So, if you need to change the channel, please change it back to 6 before packing up the
lights.
As per our image above this remote is set to channel 06.
What are Groups?
Groups enable different lights to be adjusted individually via the remotes.
In the picture above, Group A is the currently selected group and is set to 1.6 (which is
the power or light output of the monolight, but more of that later).
Page 19 of 26

Group B is set to 2.5 while Group C is set to 1.3.
hat use are groups? Groups are very handy if you want to adjust one or more lights
without affecting the ouptut of another light or group of lights.
In our sample above, the main light could be in Group B with its output of 2.5, the
backlight could be in Group A, set at 1.6 and the Group C light, set at 1.3 could be
lighting the background.
If, for example, after taking a few shots we decided to increase the light output on the
background (which is the Group C light), we simply need to make Group C the currently
selected group and increase the power.
To turn a remote on, push and hold for a
second or so, the switch button – top left in
our image.
The display should light up brightly but will
become dull after a few seconds to conserve
battery power.
Take a look at the Channel setting. Is it
correct? If not, push the CH button then the
plus or minus button to adjust the channel up
or down. Once you have set it to your
preferred channel it will flash a few times then
settle down.
Check the Mode by pushing the Mode button.
There are only two mode settings TTL and M
(for manual). Our monolights are not TTL
enabled so there is no point getting excited
about TTL because it doesn’t work with our
lights. Make sure it is set to M.
Sync: Front curtain the Sync Mode is blank, Rear shows arrows and HSS shows a
lightning symbol and H. These will change depending on how you have set your
camera’s flash sync settings. See Page 25 for HSS (High Speed Sync)
A two second push on the sync button will enable Bluetooth so that you can use the
Jinbei app on your phone to control the lights.
Link: http://www.goldenshell.com.cn/en/Home/Download/upgrade.html (You will need a
QR Scanner to access the download – lots of free ones available from Google and
probably Apple) – No idea if this all works.
Lamp turns the modelling lamps on or off.
Page 20 of 26
Table of contents
Other Jinbei Camera Accessories manuals
Popular Camera Accessories manuals by other brands

Hama
Hama Ramble II Duo Carbon 160 Ball operating instructions

Photon Beard
Photon Beard PhotonBeam 800 Instructions for use & installation

Berlebach
Berlebach Minitripod quick start guide

Nauticam
Nauticam NA-D700 instruction manual

Otto Bock
Otto Bock 757Z184-1 Instructions for use

Moog Videolarm
Moog Videolarm PurgeDome PDW7CN-9 user guide