manuals.online logo
Brands
  1. Home
  2. •
  3. Brands
  4. •
  5. JL Audio
  6. •
  7. Automobile Accessories
  8. •
  9. JL Audio 94512 User manual

JL Audio 94512 User manual

INSTALLATION GUIDE
for the
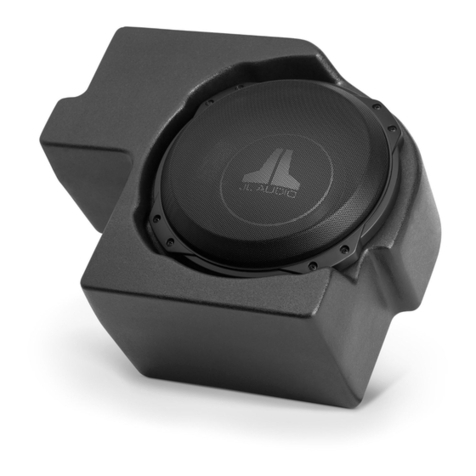
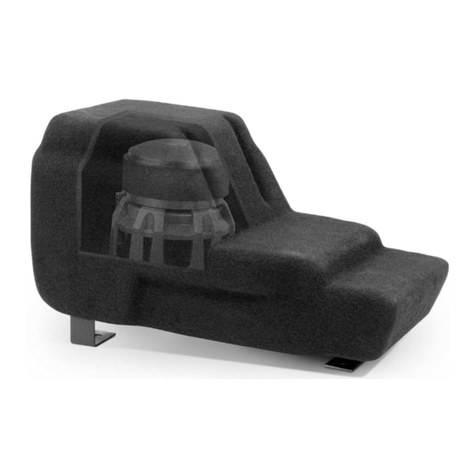
SB-J-JK2DR/10W1v3
SKU# 94512 - 94513
2007-2017 Jeep Wrangler 2 Dr
Thank you for choosing a JL Audio Stealthbox®for your automotive sound system. With proper installation, your new vehicle-
specific enclosed subwoofer system will deliver years of listening pleasure.
We strongly recommend that you have your new Stealthbox®installed by your authorized JL Audio dealer. The installation
professionals employed by your dealer have the necessary tools and experience to disassemble and reassemble your vehicle
properly. Also, keep in mind that your warranty coverage extends to 2 years if your system is installed or approved by your
authorized JL Audio dealer. If you prefer to perform your own installation, please read this installation guide completely
before beginning the process.
If you choose to perform the installation yourself, it is absolutely vital that
the Stealthbox®be properly mounted to the vehicle according to these
instructions. Failure to mount the enclosure properly presents two problems:
1) The sub-bass performance will suffer due to the movement of the enclosure
caused by the force exerted by the woofer(s).
2) A loose enclosure presents a serious safety hazard in the event of a collision
or sudden deceleration.
STEP 1
Empty out the cargo area so that you have a clean area to
work in.
Continued on Next Page
STEP 2
Fold the rear seat forward, and remove the floor panel.
STEP 3
Position the floor panel clip as pictured to allow it to fit in the
void in the bottom of the Stealthbox®.
SB-J-JK2DR/10W1v3 INSTR_SKU# 011322
INSTALLATION
DIFFICULTY:
15
OUT
OF
ESTIMATED TIME:
1 HOUR
SB-J-JK2DR/10W1v3 INSTR_SKU# 011322
STEP 7
CONGRATULATIONS!
You have completed the installation for this model!
Enjoy your new Stealthbox®!
Please refer to the Power Recommendation section for an
amplifier recommendation and basic set-up help.
STEP 6
Attach speaker wire to the terminal cup on the back of
the enclosure, and route the wire as necessary. Slide the
Stealthbox® into the vehicle, allowing the Brackets to slide
under the factory floor mounting points, and the enclosure
to drop into the well.
STEP 5
Pictured is the Stealthbox® with the Brackets mounted.
STEP 4
Apply a Velcro Strip to each Bracket as shown. Using a 1/4” -
20 x 1 Bolt, a 1/4” Lock Washer, and a 1/4” Flat Washer, attach
each Bracket to the Stealthbox® as shown, and firmly tighten.
Page 2 • JL Audio, Inc 2018
INCLUDED HARDWARE
(2) Bracket (2) 1/4” Lock Washer (2) Velcro Strip
(2) 1/4” Flat Washer (2) 1/4” - 20 x 1 Bolt
SPECIFICATIONS
Enclosure Type: Acoustic Suspension (sealed)
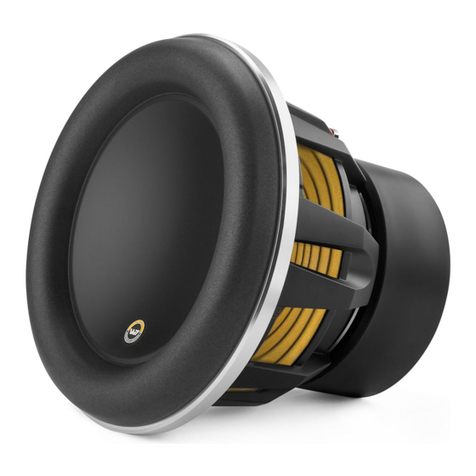
Driver Type: 10W1v3-2
Nominal Impedance: 2 ohm
Continuous Power Handling: 300 watts
POWER RECOMMENDATION
JL Audio recommends high quality amplifiers such as the JL Audio XD300/1v2. The diagram below shows the
recommended crossover settings for the XD300/1v2. If another amplifier is being used, please reference this
illustration and use similar settings on that amplifier.
All JL Audio amplifiers are very versatile audio components. Please consult the owner’s manual for even more
detailed information about installing and tuning your amplifier.
CONNECTIONS
Using quality power, signal and speaker wire is essential in ensuring the performance of your Stealthbox®.
JL Audio recommends using an 8 AWG power kit such as the XD-PCS8-1B for your Stealthbox® amplifier, other
kits are available should you be using more than one amplifier. Signal wire such as the JL Audio Premium
Audio Interconnect Cables should be used that will provide signal for both channels of the amplifier. JL Audio
recommends using 12AWG speaker wire for subwoofers such as our XC-BCS12-25.
MID/HIGH FREQUENCY DRIVER FITMENT
A variety of JL Audio coaxial and component systems will fit in the factory speaker locations of you vehicle.
Front Speaker Size / Location: 6-1/2”- Dash
Fits JL Audio Models: C1-650, C1-650x, C2-650, C2-650x,
C3-650, C5-650, and C5-650x
Rear Speaker Size / Location: 6-1/2”- Sound Bar
Fits JL Audio Models: C1-650, C1-650x, C2-650, C2-650x,
C3-650, C5-650, and C5-650x
All specifications are subject to change without notice. “JL Audio®” and the JL Audio logo, “Stealthbox” and the Stealthbox logo are registered
trademarks of JL Audio, Inc.“Ahead of the Curve” and its respective logo is a trademark of JL Audio, Inc.
JLA-SKU# 011322 05.22.2018 • Printed in USA • ©2018 JL Audio, Inc.
For more detailed information please visit us online at www.jlaudio.com.
(954) 443-1100
www.jlaudio.com
10369 NORTH COMMERCE PARKWAY • MIRAMAR, FLORIDA • 33025 • USA

This manual suits for next models

2

Other JL Audio Automobile Accessories manuals

JL Audio Stealthbox SB-H-PIO7/10TW3 User manual

JL Audio

JL Audio Stealthbox SB-H-PIO7/10TW3 User manual

JL Audio Stealthbox SB-F-SUPRCNSL/8W7 User manual

JL Audio

JL Audio Stealthbox SB-F-SUPRCNSL/8W7 User manual

JL Audio Stealthbox SB-J-JK2DR/10W1v2 User manual

JL Audio

JL Audio Stealthbox SB-J-JK2DR/10W1v2 User manual

JL Audio Stealthbox SB-GM-VETC6/10W3v2 User manual

JL Audio

JL Audio Stealthbox SB-GM-VETC6/10W3v2 User manual

JL Audio Stealthbox SBA-POL-RZG2-DK-MM50 User manual

JL Audio

JL Audio Stealthbox SBA-POL-RZG2-DK-MM50 User manual

JL Audio 13W7-D1.5 User manual

JL Audio

JL Audio 13W7-D1.5 User manual

JL Audio Stealthbox SB-T-TACACG3/10TW3 User manual

JL Audio

JL Audio Stealthbox SB-T-TACACG3/10TW3 User manual

JL Audio Stealthbox SBA-J-JLU-UAR User manual

JL Audio

JL Audio Stealthbox SBA-J-JLU-UAR User manual

JL Audio Stealthbox SBA-J-JKU-UAR User manual

JL Audio

JL Audio Stealthbox SBA-J-JKU-UAR User manual

JL Audio Stealthbox SB-J-JL4DDRV/10TW1-2 User manual

JL Audio

JL Audio Stealthbox SB-J-JL4DDRV/10TW1-2 User manual

JL Audio Stealthbox SB-J-JTGLAD/10TW1 User manual

JL Audio

JL Audio Stealthbox SB-J-JTGLAD/10TW1 User manual

JL Audio Steathbox SB-GM-SLVD/10TW1 User manual

JL Audio

JL Audio Steathbox SB-GM-SLVD/10TW1 User manual

Popular Automobile Accessories manuals by other brands

Thule 95 Mounting & installation

Thule

Thule 95 Mounting & installation

Tuff Tonneaus 221 FITTING INSTRUCTION

Tuff Tonneaus

Tuff Tonneaus 221 FITTING INSTRUCTION

Corbin H-RUNE-BAG manual

Corbin

Corbin H-RUNE-BAG manual

Clam RUNNER KIT quick start guide

Clam

Clam RUNNER KIT quick start guide

Kargo Master 4A943 installation guide

Kargo Master

Kargo Master 4A943 installation guide

Parrot PMK5800 user manual

Parrot

Parrot PMK5800 user manual

Sunsky BT67 user manual

Sunsky

Sunsky BT67 user manual

Navistar NavKal user guide

Navistar

Navistar NavKal user guide

SportRack A25375CS instruction sheet

SportRack

SportRack A25375CS instruction sheet

Metra Electronics 99-9109B installation instructions

Metra Electronics

Metra Electronics 99-9109B installation instructions

cam Totus 40113 Mounting instructions

cam

cam Totus 40113 Mounting instructions

BASETech Head Up Display X5 operating instructions

BASETech

BASETech Head Up Display X5 operating instructions

Jarv JRV-CC2000-BLK user guide

Jarv

Jarv JRV-CC2000-BLK user guide

Porsche 7PP.971.675.J manual

Porsche

Porsche 7PP.971.675.J manual

INDRA Smart Series installation guide

INDRA

INDRA Smart Series installation guide

Hamron 012452 operating instructions

Hamron

Hamron 012452 operating instructions

Cruz Cargo SPro Assembly instructions

Cruz

Cruz Cargo SPro Assembly instructions

Yakima Landing Pad 15 installation instructions

Yakima

Yakima Landing Pad 15 installation instructions

manuals.online logo
manuals.online logoBrands
  • About & Mission
  • Contact us
  • Privacy Policy
  • Terms and Conditions

Copyright 2025 Manuals.Online. All Rights Reserved.