manuals.online logo
Brands
  1. Home
  2. •
  3. Brands
  4. •
  5. JL Audio
  6. •
  7. Controllers
  8. •
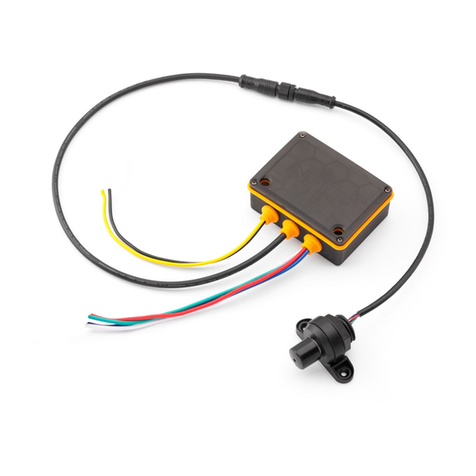
  9. JL Audio MediaMaster NMEA 2000 MMR-5N2K User manual

JL Audio MediaMaster NMEA 2000 MMR-5N2K User manual

Other JL Audio Controllers manuals

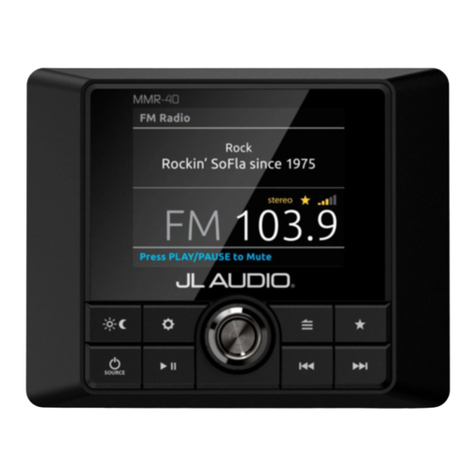
JL Audio MMR-40 User manual

JL Audio

JL Audio MMR-40 User manual

JL Audio MMR-40 User manual

JL Audio

JL Audio MMR-40 User manual

JL Audio MBT-CRX v2 User manual

JL Audio

JL Audio MBT-CRX v2 User manual

JL Audio MMR-40 User manual

JL Audio

JL Audio MMR-40 User manual

JL Audio MLC-RW User manual

JL Audio

JL Audio MLC-RW User manual

Popular Controllers manuals by other brands

Sunricher SR-ZV9003T3-RGBW-US Installation

Sunricher

Sunricher SR-ZV9003T3-RGBW-US Installation

Ksenia intro Installation and configuration manual

Ksenia

Ksenia intro Installation and configuration manual

Inovance CAN200 Series manual

Inovance

Inovance CAN200 Series manual

Gauzy LC6 FLEX Controller Installation and operation guide

Gauzy

Gauzy LC6 FLEX Controller Installation and operation guide

Viking SLP-1 Technical practice

Viking

Viking SLP-1 Technical practice

CKD KBX-30E-U Series instruction manual

CKD

CKD KBX-30E-U Series instruction manual

Sharp Energy Sun Flux User manual & installation guide

Sharp Energy

Sharp Energy Sun Flux User manual & installation guide

Yamaha RCX40 user manual

Yamaha

Yamaha RCX40 user manual

AB Quality PowerFlex 400 Frames D-H Service bulletin

AB Quality

AB Quality PowerFlex 400 Frames D-H Service bulletin

Yamaha MJC8 owner's manual

Yamaha

Yamaha MJC8 owner's manual

AL-KO ATC operating instructions

AL-KO

AL-KO ATC operating instructions

Savant SmartControl 2 Deployment guide

Savant

Savant SmartControl 2 Deployment guide

GameSir T3S user manual

GameSir

GameSir T3S user manual

Kostal inveor operating manual

Kostal

Kostal inveor operating manual

Emerson Yarway 20-55 Operating and safety instructions

Emerson

Emerson Yarway 20-55 Operating and safety instructions

CoCo ACM-LV24 Quick installation guide

CoCo

CoCo ACM-LV24 Quick installation guide

Brooks SLA5810/20 Installation and operation manual

Brooks

Brooks SLA5810/20 Installation and operation manual

SIGMA TEK SR 011 Technical manual

SIGMA TEK

SIGMA TEK SR 011 Technical manual

manuals.online logo
manuals.online logoBrands
  • About & Mission
  • Contact us
  • Privacy Policy
  • Terms and Conditions

Copyright 2025 Manuals.Online. All Rights Reserved.

MediaMaster® NMEA 2000®
Volume Controller
Product Description
The MMR-5N2K is a wired remote designed
to add auxiliary volume control to compatible
MediaMaster® source units*. Featuring
certified NMEA 2000® connectivity and
a water-resistant (IPX7 rated) design, the
MMR-5N2K connects directly to vessel
networks using applicable NMEA 2000®
cables and connectors (sold separately).
*Refer to www.jlaudio.com for compatibility info.
Note:
- The MMR-5N2K should only be used with a
single MediaMaster® source unit, connected
via a NMEA 2000® network or MMC-PN2K
powered network cables (sold separately).
- Functionality of the MMR-5N2K is solely derived
from the host MediaMaster® source unit.
MMR-5N2K
IPX7
WATER
RESISTANT
MMR-5N2K_MAN_040120 • Printed in Taiwan
2-Year Limited Warranty (U.S.A.)
Visit www.jlaudio.com for warranty details.
For Service Information in the U.S.A.
please call JL Audio customer service:
(954) 443-1100 during normal business hours (Eastern Time)
JL Audio, Inc • 10369 N Commerce Parkway, Miramar, FL 33025
International Warranties:
Products purchased outside the United States
of America are covered only by that country’s
distributor and not by JL Audio, Inc.
Volume Adjustments
The MMR-5N2K is designed to detect and
control the volume functionality of the host
source unit, with the following commands.
Command Function Note
Rotate
Volume
Knob
Clockwise
Increase
Source
Unit Volume
• Level control mode of
each audio zone must
be set to Relative
or Variable.
• All zones will adjust
simultaneously.
Rotate Volume
Knob Counter-
Clockwise
Decrease
Source Unit
Volume
Press Volume
Knob Once
Mute/
Unmute
Audio
When muted, the
status LED ring
will pulse slowly.
LED Status Reporting
A white LED ring located behind the volume
knob displays status and mode of the
MMR-5N2K. Refer to the table below for the
meaning of each behavior.
LED Ring
Behavior Status/Mode
ON On; Compatible audio source detected.
Two Flashes,
Pause, Repeat
(30 seconds
after booting)
On; No compatible audio
source detected.
Slow Pulsing Source unit volume is muted.
Adjusting LED Ring Brightness
Follow these steps to adjust and set the intensity
of the LED ring:
1. To enter program mode, press and hold
the Volume Knob of the MMR-5N2K for 3
seconds, until the LED ring ashes 3 times.
2. Rotate the Volume Knob to adjust the LED
ring’s brightness to the desired intensity.
Command Function
Rotate Volume
Knob Clockwise Increase LED Ring Brightness
Rotate Volume
Knob Counter-Clockwise Decrease LED Ring Brightness
3. To save the LED setting and exit program
mode, press the Volume Knob once (LED ring
will ash 3 times). Program mode will also
exit automatically after 15 seconds
of inactivity.
What’s Included
(1) MMR-5N2K Main body
(1) Volume knob
(1) Trim ring
(1) Flat gasket (preinstalled)
(2) Mounting screws
(1) User Manual
Safety Considerations
• Do not mount in areas of extreme heat.
• Ensure this product is securely installed so
that it does not come loose in the event
of a collision/sudden jolt or from repeated
vibrations during normal operation.
• Do not run system wiring outside or
underneath the vehicle/vessel. This is an
extremely dangerous practice, which can
result in severe damage/injury.
• Check before drilling to make sure that you
will not be drilling into a fuel tank, gas/brake
line, wiring harness, or other vital system.
• Secure all wiring as needed, using cable ties
or wire clamps to protect them from moving
parts and sharp edges.
Make sure to carefully plan the routing of the
remote’s connection cables prior to cutting
or drilling any panels.
4. Connect the cables and place the
MMR-5N2K into the opening.
Secure the MMR-5N2K using the two (2)
supplied mounting screws.
5. With the JL AUDIO logo of the trim ring
positioned at the top (12 o’clock), press the
trim ring onto the front of the MMR-5N2K.
6. Align the keyed opening of the
volume knob with the shaft of the
MMR-5N2K and press on firmly.
Mounting & Installation
The MMR-5N2K is designed for front-mounting
in flat panels, requiring just a single, 1.5-inch
(38 mm) hole for installation. Desired mounting
locations should have at least 2.35-inches (60
mm) square of flat surface area, along with
adequate rear space for the controller body and
access to make connections.
1. Select a suitable mounting location and cut
a 1.5-inch (38 mm) hole using an appropriate
tool/hole saw.
2. Place the MMR-5N2K into the opening, with
the alignment arrow pointing up (12 o’clock)
and mark the surface for drilling pilot holes.
3. Drill two (2) appropriately sized pilot holes in
the mounting surface at the pilot hole marks.
Flat Gasket
(preinstalled)
Trim
Ring
Main
Body
Volume
Knob
IPX7 Water Resistance Rating
This product has been tested to withstand immersion in water, up to
1 meter (3.28 ft.) deep, for up to 30 minutes (when properly installed).
Note: While designed to be water resistant, this product should never be
submerged under water for prolonged periods or subjected to activity
that creates pressure on it that exceeds its depth rating.