JOBO 3012 User manual

Typ Format Menge Chemie
FilmDrum
3012 6 x 9 12 330 ml
9 x 12 6 330 ml
FilmDrum
3013 4 x 5" 5 330 ml
FilmDrum
3018 13 x 18 4 330 ml
Film Drum
3020 40 x 50 1 470 ml
EBVDrum*
3021 13 x 18 3 210 ml
FilmDrum
3024 18 x 24 2 330 ml
FilmDrum
3025 8 x 10" 2 330 ml
JOBO Filmdrums der Serie 3000 wurden für
diePlanfilmentwicklung,fürdenEinsatz,auf
Colorprocessoren mit JOBO Lift und Auto-
lab, konzipiert.
Je nach Drumtyp ist die Verarbeitung von
Planfilmen ab Format 6x9 cm bis 8x10"
möglich.
Die Bestückung erfolgt ohne Ladehilfe. Für
sicheren Sitz der Filme sorgen flache Profil-
leisten, die entsprechend dem jeweiligen For-
matangeordnet sind.
Verarbeitungshinweis:
DieRotationsgeschwindigkeitauf JOBO Color-
processorensollte 50 U/min. betragen.
BeiS/W- Filmen empfehlenwireine5Min.Vor-
wässerungmit temperiertemWasser.Generell
gelten die vom Chemiekalienhersteller vorge-
gebenen Verarbeitungszeiten, Temperaturen
und Bäderkapazitäten. Zur Bestimmung der
genauen Verarbeitungszeiten empfehlen wir
eineTestentwicklung.
Filme mit matter Rückschicht können in den
Filmdrums3012bis 3025 nichtverarbeitet wer-
den.
Achtung: Netzmittel und Stabibad nicht in die
Drum einfüllen! Hierfür separates Gefäß ver-
wenden.
Öffnen der Drums
Drumdeckelvon Hand abziehen
oder mit Fußpumpe Art.Nr.3360.(außerTank
3021)
Schließen der Drums (außer Drum 3021)
Zahnkranzdeckel aufsetzen und rundum fest
aufdrücken.
Wichtig! Für Übertragung der Rotation und
gleichmäßigenLauf der Drum.
Bestücken der Drums
BeiDunkelheitFilme, mit derSchichtseitenach
innen,einlegen.
JOBO Labortechnik GmbH + Co. KG
Kölner Str. 58
D-51645 Gummersbach (Derschlag) Made in Germany Technische Änderungen vorbehalten. 01098 (86 329)
oder
Schließen der Drum 3021
Tank 3021*
DieserTank ist für den Einsatz auf ATL 1000 /
1500konzipiert. Dieim Lieferumfangenthalte-
ne rote Dichtung darf für den ATL 1000 / 1500
Betrieb nicht eingesetzt werden. Zahnkranz-
deckelmiteingesetzterDichtungführen zu Fehl-
entwicklungenund beschädigen das Gerät.
Achtung:
BeiVerwendung auf Liftprocessoren oder ATL
mußdierote Dichtung inden Zahnkranz einge-
drücktwerden.
FilmDrums3012-3025
Sonderanfertigungen, fürdoppelte bis dreifache Kapazität sowiespezielleFormate,auf Anfrage.

JOBO's 3000 Series Film Drums are de-
signedforsheetfilmprocessingon Autolabs
and CPP-2 or CPA-2 processors with JOBO
Lift. Sheet film in sizes from 6x9 cm to 8x10"
can be processed in this range of drums.
Loaders are not needed to properly insert the
filmintothesedrums.Low-profile ribs and guides
holdthefilm in place. Positionsarepermanently
set for specific sheet film formats in each drum
forproper development.
Processingrecommendation:
Rotationspeed on JOBOprocessors should be
setat50 rpmon Autolabs,andapproximately4-
5 on the speed control dial of CPP-2 or CPA-2
manualprocessors.
Forblackandwhite film we recommend a5min.
pre-rinse with tempered water. In general the
standard processing times, temperatures,
capacitiesand process steps are otherwise the
sameasusedinmanualprocessingtechniques,
followingchemical manufacturers' instructions.
As always, it is best to make a test run prior to
processingvaluableimages.Films with matback
coatingscannotbeprocessedintheFilm Drums
3012- 3025.
Note: Do not pour wetting agents or stabilizer
intothe film drum. Use a separate container for
thesefinal steps.
Opening the drums
Removethe drum lid manually
orwith footpump no. 3360.
(Excepttank 3021)
Closing the drums (except drum 3021)
Place the cog lid on top and press down firmly
to be sure the lid is securely and evenly
attached. This is important for reliable and
smoothrotation of the drum.
Loading the drums
In the dark, load the sheets of film with the
emulsionside facing the center of the drum.
or
Closing drum 3021
Tank 3021*
This tank has been designed for use on
ATL 1000 / 1500.The red sealing ring (cog lid
washer) must not be used with the ATL 1000 /
1500.Itcandamage the processorand/orcause
processingflaws.
Note:
Whenoperating the tankno. 3021 on a manual
JOBO Lift or an ATL, the red sealing ring (cog
lidwasher)mustbeused in the coglidtoprevent
chemicalleakage.
FilmDrums3012-3025
Type Size Quantity Solution
FilmDrum
3012 6 x 9 12 330 ml
9 x 12 6 330 ml
FilmDrum
3013 4 x 5" 5 330 ml
FilmDrum
3018 13 x 18 4 330 ml
Film Drum
3020 40 x 50 1 470 ml
EBVDrum*
3021 13 x 18 3 210 ml
FilmDrum
3024 18 x 24 2 330 ml
FilmDrum
3025 8 x 10" 2 330 ml
Customversions upon request.
JOBO Labortechnik GmbH + Co. KG
Kölner Str. 58
D-51645 Gummersbach (Derschlag) Made in Germany Specifications subject to change without notice. 01098 (86 329)

> Home D
> Home GB
> Service
> Back
| E-Mail Formular | Webmaster | Impressum | ©JOBO AG
Service Analog
How to Load Film on JOBO Plastic Reels
From time-to-time, we hear of customers having difficulty loading our #1501 and
#2502 walk-in plastic reels. They are actually quite easy to use, but there are a few
tips, which can make the process easier.
1. Snip the lead corners of the film. Right angles on the corners of the film can
snag on the radiating arms of the reels. By snipping the corners to about a 45-
degree angle, the film will slide into the reel more easily.
2. On the right side of the reel, you will find a red clip, attached near the center of
the reel, and pressed in between the spirals about halfway through the reel.
Gently pry the red clip out of the middle of the spirals to allow film to pass by
it.
3. Pull the film into the mouth of the reel (the opening on the outer layer of the
reel) and then continue to pull it about half way around the reel. This will make
it easier to advance the film in the next step. The mouth of the reel will be
facing you for the rest of the procedure.
4. One of the pie-wedge shaped sections of the reel, is cut more deeply than the
rest, allowing the film to poke out slightly. We refer to this section as "the
window". Hold your hands flat on both sides of the reel, and place your index
fingers on the edge of the film appearing out the window. Now press the film
with your right index finger, and move it forward and away from you. Now
release your right index finger and press against the film with your left index
finger, and move it forward and away from you. Repeat this continuously until
all of your film is on the reel, just barely inside the mouth of the reel. (Left,
right, left, right, etc.)
If you are loading 120 or 220 film there are a couple more helpful points.
1. When you remove the film from the paper backing, tear the tape right at the
end of the film. You want to leave the tape stuck to the film to add a little more
rigidity, but you don’t want excess tape flapping around. It might get in the way
of even processing.
2. Sometimes the film waiting to be loaded onto the reel will be rolled up in a tight
coil, which can make it difficult to feed it into the mouth of the reel. If this
causes any problem for you, try using your thumbs to move the coil an inch or
two away from the mouth of the reel. This allows the film to enter the reel
mouth at a lower angle, closer to parallel to the outer spiral, causing less
interference.
3. If you want to load two rolls of 120 film on the reel, continue as described
above, but load the film all the way into the reel, until you are no longer able to
advance the two sides of the reel alternately. Press the red clip back into the
reel. Now move the film backward about 3 strokes (left, right, left). This will
allow you to continue advance the second roll into the reel.

Now load a second roll of film into the mouth of the reel, just as you did
the first, but concentrate on pressing the film just on the outer layers of
the reel. (You don’t want to advance the inner roll any further.) Continue
to advance the film into the reel, until the trailing end of the film is just
barely inside the mouth of the reel. You’re done.
JOBO’s plastic reels and our stainless steel reels made for JOBO Fototechnic by
Hewes, produce essentially identical results. We have measured the density
characteristics of the 1501 reels versus both of the stainless steel reels (the
traditional versions plus our new ones that fit on our plastic center cores) and we can
find no measurable difference, across the film nor along the length of the film. So
your decision to select either the plastic or the stainless steel reels can be made
simply on your preference for loading styles. The results will be the same with either
version.

> Home D
> Home GB
> Service
> Back
| E-Mail Formular | Webmaster | Impressum | ©JOBO AG
Service Analog
Cogs and Magnets
Introduction
To use a tank or drum on the processor (without the JOBO Lift attached) a magnet must be
mounted on its bottom. You must have a cog installed on a tank or drum lid to allow coupling with
the accessory JOBO Lift or Autolab processor.
Some tanks and drums come with a magnet or cog already installed, some do not. At least one of
these mounting systems must be present to use a tank or drum on the processor. See the
instructions below to determine if you need to obtain a magnet or cog for the tanks or drums you
own, or intend to purchase.
The mounting procedures below will prepare your tank or drum for use on your JOBO rotary
processor.
Mounting a Magnet On a Tank or Drum
To use a tank or drum on a manual processor (without the JOBO Lift attached), a magnet must be
mounted on its bottom. A magnet is not required for any of the Autolabs.
The Magnet, part number 1504, will allow you to use 1500, 2500, and 2800 series
tanks or drums on a magnet drive processor. (The 3000 series drums are too large in
diameter to use a magnet coupling.) This magnet is permanently attached to the tank
or drum in the following sequence. You will need one magnet for each tank or drum
you wish to use.
1. Remove the lid from the tank or drum.
2. Note the location of the four pins on the magnet. Note also the four short raised tubes on
the bottom of the tank or drum.
3. Place the tank or drum upside down on a smooth, hard surface.
4. Align the four pins with the raised tubes, and press the magnet down vigorously.
5. Check that there is no gap between the magnet and the bottom of the tank or drum.
When the magnet is properly mounted, it should not come off. If the magnet
does not stay securely on the tank or drum, follow this procedure. After doing
the above steps, turn the tank or drum right side up. Place a piece of wood
(such as a 2x4") slightly longer than the depth of the tank or drum, into the

(such as a 2x4") slightly longer than the depth of the tank or drum, into the
bottom of the tank. Center the piece of wood in the tank. Rap the top end of
the wood with a hammer. Inspect the mounted magnet for gaps. Repeat if
necessary.
WARNING: Do not try and mount the magnet on the tank by pounding on the
magnet. This will likely damage the magnet or split the tank.
To use a magnet-equipped tank or drum on a JOBO Lift equipped processor or Autolab, simply
add a Cog (#1505) to the lid. Do not remove the magnet when using the tank or drum on the
JOBO Lift or Autolab.
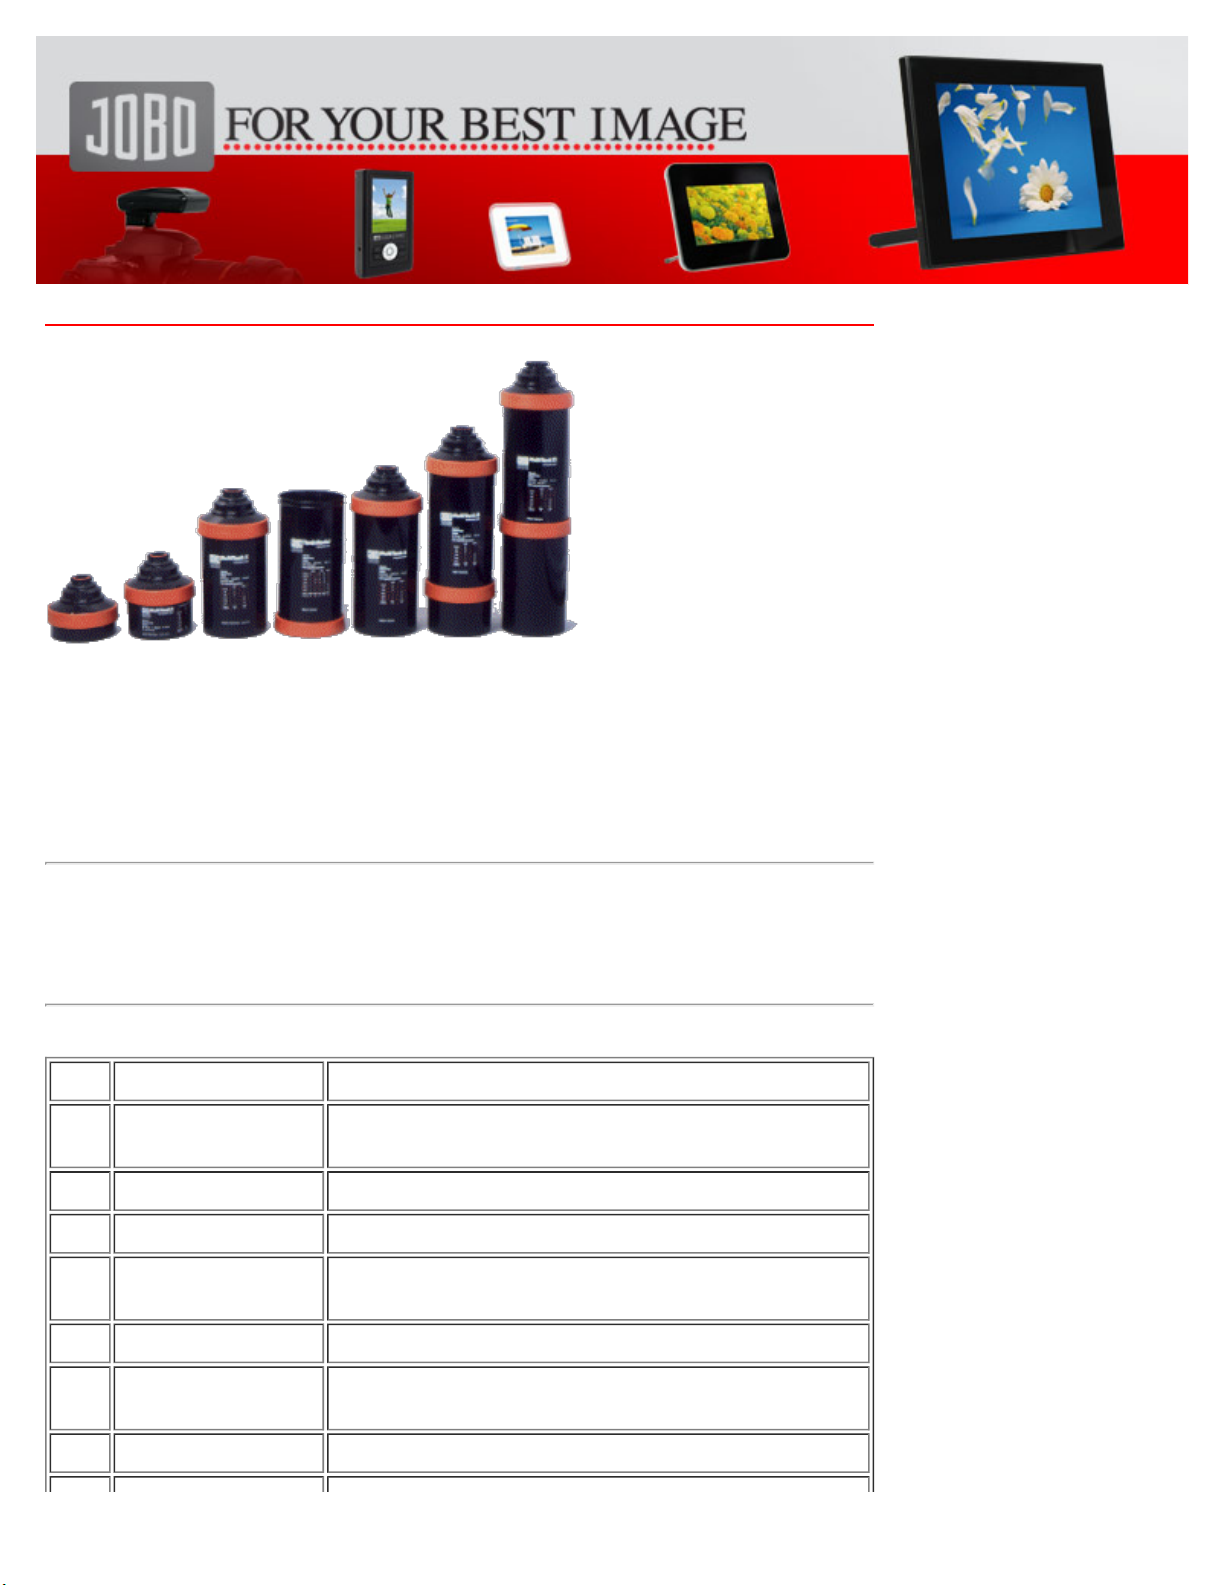
If you are purchasing a tank or drum, note its four-digit part number. If the part number ends in '1'
(such as 2521 or 2551, etc.), it already has a magnet attached. All other tanks and drums do not
come equipped with a magnet. Tanks that have the last number of '3', have cog type lids. These
lids would have to be replaced to use them with a magnet drive processor. Replacement lids
(without cap, funnel, or beaker) are available as parts from JOBO. The 1500 series requires
#91034, and both the 2500 and the 2800 series require a #91036 lid. (There is no non-cog lid
available for the 3000 series drums.) The #03046 membrane cap is needed by all three series lids.
Back to Top
Mounting a Cog On a Lid
You must have a cog installed on a tank or drum lid to allow coupling with the JOBO Lift or
Autolab. Some tanks come with the cog already installed. If you are purchasing a tank, check the
JOBO part number of the tank. If the first or last digit of the four digit code is a '3' (3010, 2523,
etc.), then there is already a cog installed in the lid. If the first or last digit is not a '3', then you will
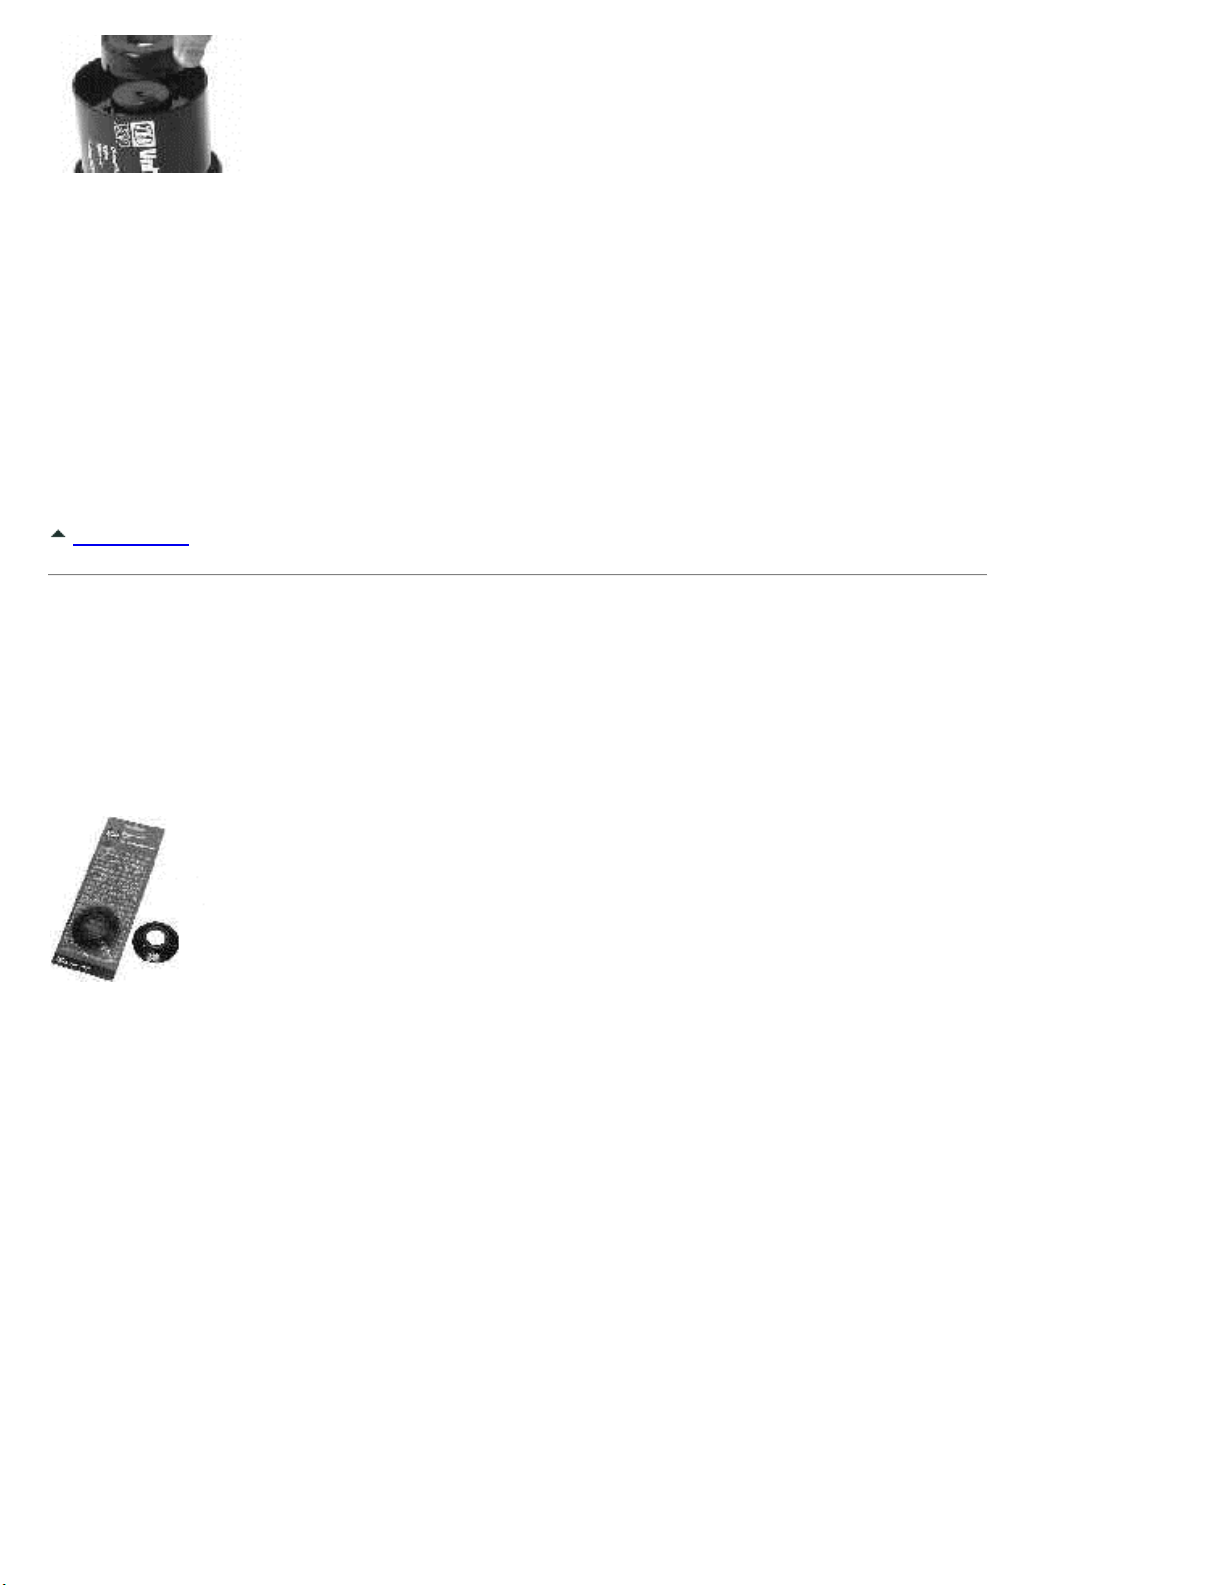
need to purchase a Cog (#1505) for the tank or drum.
One cog for each tank or drum is required, as they are permanently mounted into
the lid, and cannot be removed. If you wish to keep the lid for hand or magnet
processing, get a replacement cog lid. The JOBO part number for the
replacement cog lid in the 1500 series is #1503. Both the 2500 series and the
2800 series use the same replacement lid, #2503. This replacement lid comes
with a funnel and a stopper. (The stopper is placed in the funnel only when
replacing the beaker. The stoppered funnel is used exclusively for print
processing with a lift.) The 3000 series of drums cannot be used with the magnet drive. 3000
series lids are always supplied with a cog.
You may use the lift with a tank or drum having a magnet attached on the bottom. The daylight
loading tank #2400, or the discontinued series 1000, 2000, and 4000 tanks or drums cannot be
equipped with a cog.
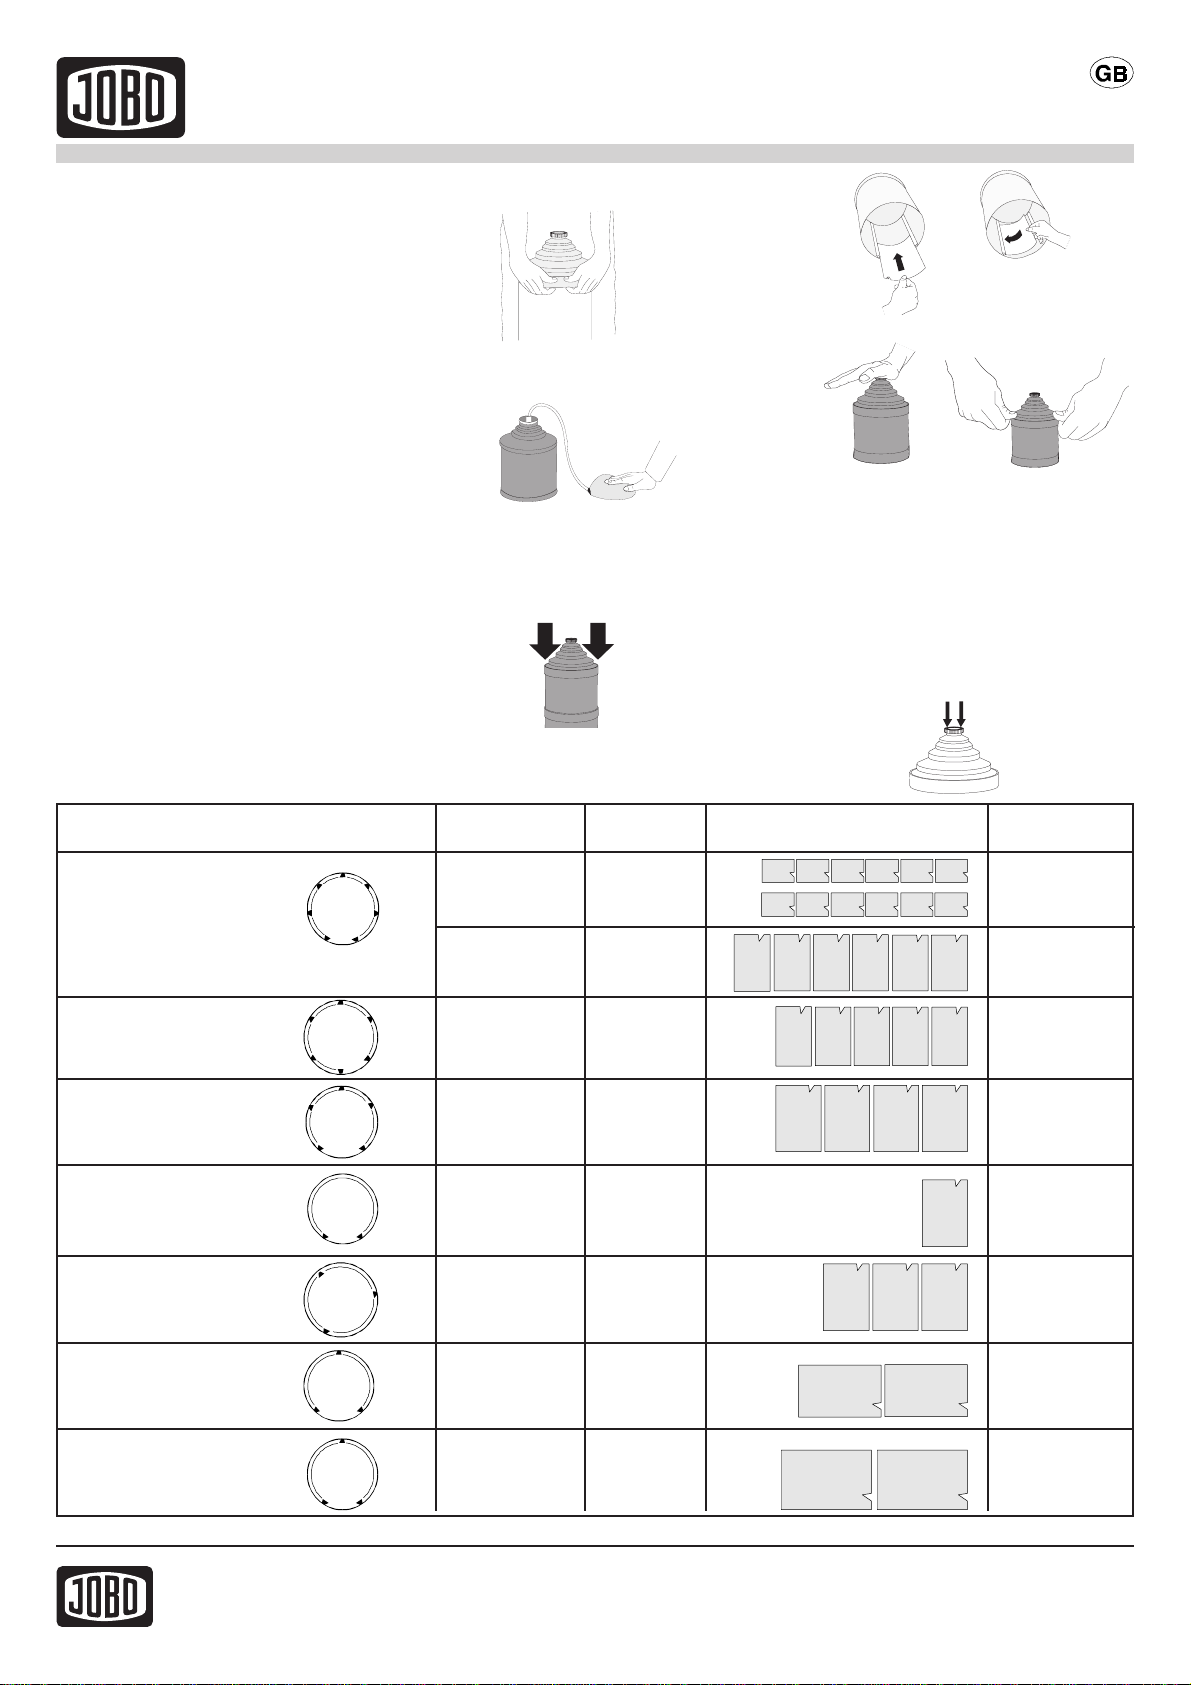
The procedure for mounting a cog is the same for all tank or drum lids.
1. Remove the lid from the tank or drum. Remove the red membrane cap and funnel or
beaker.
2. Place the lid, red ring down, on a hard and smooth surface.
3. Place the cog, wide side down, into the opening for the cap, at a slight angle.
4. Press the cog down with your hands. (You may find it helpful to lean towards the lid to apply
a firm pressure.)
5. Examine the seam between the cog and the lid for gaps. When seated correctly, there will
be no gap between the cog and lid. (If you can place a fingernail between them, the cog is
not seated fully.)

If you cannot seat the cog fully, by hand, use this procedure. Seat the cog as far
as you can by hand. Place a flat piece of wood, on top of the cog. Rap the board
smartly (centered over the cog) with a hammer. Repeat as necessary until the cog
is fully seated.
If the cog comes off the lid during processing, it was not completely seated. Re-
seat the cog.
The cog has a small (1 1/2" or 35 mm) red ring that functions as a washer and
seal between the lid and lift. It is located just inside the gear ring. This ring will
wear with long, heavy use, and may need replacement. If you find the washer is staying on the lift
when you remove the tank or drum, replace it. The cog lid washer's part number is #07095. The
tank lids that come with the ATL-1000 processor do not have a washer installed in the lid. If you
wish to use one of these lids, be sure to place a washer in the lid. If you use a lid without a washer,
the junction of the JOBO Lift and tank will leak.
Never try to remove an installed cog from its lid, as you will break either the cog or the lid.
Back to Top

1500 Tank System
Product Summary:
The motto of the 1500 series line of tanks is "price them so hobbyists can afford them, but make them
provide lab-quality processing". (In case you're wondering, it wasn't easy.) 1500 series tanks are used
for inversion (hand) processing and rotary processing on anything from a small CPE-2 Plus
processor, all the way up to a full-blown ATL-2500.
Key Features
Crack resistant
They're made of flexible plastic -- it makes them crack resistant (we can't say crack "proof" because if you
threw one against the wall hard enough on a cold Winter morning it might crack).
You CAN take it with you
Many, many people have come to appreciate the modularity of JOBO tanks and drums. Unlike other
manufacturers, if you want to add more developing capacity, you have to buy a whole new tank (the most
expensive part). With JOBO tanks, if you have a two-roll tank #1520 and you want to increase the capacity all
you need to buy is an extension module #1530.
Also, if you ever want to move up to a rotary processor like the CPE-2 Plus, you'll be able to use the same
tanks you used for hand processing.
Save money!
You save money in three ways: The 1500 series tanks use very little chemicals to process film, the 1500
series allow you to process two rolls 120 film per reel (not loaded back-to-back), and the third way you save
money is if you move up to a rotary processor, you use a little over half the chemicals you use by hand
processing.
Technical Specifications/Capacities:
Item# Description Special Features
1510 One-Reel Film Tank Comes complete with one #1501 reel
1520 Two-Reel Film Tank Comes complete with one #1501 reel
1530 Three-Reel Extension
Module
Add this module to the #1510 or #1520 tank to increase the
per run capacity

1540 Four-Reel Film Tank Comes complete with one #1501 reel (is actually a #1510 and
#1530 combined.
1526 Combo Drum Designed to process one 8x10" print or five rolls of film.
1501 Adjustable Film Reel
(35mm/120/220)
The #1501 reel has a clip that separates two 120 films from
each other.
1500 System - Film Quantity and Chemical Volumes
Reel # 1502 1501 Chemical Volume
Tank / Film 110 35mm 120 220 Rotary Inversion
1510 4 1 n/a n/a 140ml 250ml
1520 8 2 2 1 240ml 485ml
1530 (module) 12 3 4 2 330ml 725ml
1540 (1510 & 1530) 16 4 4 2 470ml 975ml
1520 & 1530 20 5 6 3 570ml 1210ml
1510 & 1530 & 1530 26 7 8 4 800ml 1700ml
1520 & 1530 & 1530 32 810 5 900ml 1935ml
Acessoires and spareparts
Magnet
Item No. 1504
Allows use of all tanks and drums on processors without a Jobo
Lift (magnet drive). The magnet upgrades all inversion tanks to
rotary tanks. All tanks and drums (except the 3000 system and
Expert) have holding pins on the bottom to which the magnet is
at-tached.
CogLid
Item No. 1503
With a separate 1503 cog lid, you can keep the original inversion
lid that came with your tank instead of converting it with a 1505
cog. This allows you to use your tank for inversion with the
original lid or as a rotary tank with the 1503 cog lid. Fits all 1500
series tanks.
Cog
Item No. 1505
For upgrading tanks and drums for operation with the JOBO Lift.
The cog is pushed into the original lid of the tank/drum and can
be used on all processors equipped with a JOBO Lift (except ATL

2500 Tank System
2500 Series Tanks
Product Summary:
The 2500 series tanks are used for roll film and 4x5" sheet film. They are not designed for traditional
inversion (hand) processing because they would use too much chemistry if they weren't used
horizontally.
The 2500 series tanks are designed to be used with JOBO rotary processors
Key Features
Roll and sheet-film processing with one system
Develop you color or black and white film with one system.You'll save money on chemicals, and you'll save
money on the hardware (the actual tanks and drums).
Technical Specifications/Capacities:
Item# Description Special Features
2513 One-Reel Film Tank Includes the cog gear needed to make it work with a JOBO rotary
processor.
2523 Two-Reel Film Tank Includes cog gear. Also available with magnet drive under #2521.
2553 Five-Reel Film Tank Includes cog gear. Also available with magnet drive under #2551.
2560 Six-Reel Extension
Module
Add this module to the #2513, #2523, or #2563 tanks to increase
the per run capacity.
2563 Six-Reel Film Tank Includes cog gear. Also available with magnet drive under #2561.
2502 Adjustable Film Reel
(35mm/120/220)
The #2502 reel has a clip that separates two 120 films from each
other.
2509N 4x5" Sheet Film Reel Holds up to 6 sheets of 4x5" film
Used with #2512 (the reason they're not included together is

2508 4x5" Loader Base Used with #2512 (the reason they're not included together is
there are other guide sizes available).
2512 4x5" Loader Guide Used with #2508
2519 APS Reel Used to develop the new APS format film.
4341 Sheet Film Kit, One-Reel Includes #2521 and #2509N
4342 Sheet Film Kit, Two-Reel Includes #2551 and 2x #2509N
2500 System - Film Quantity / Chemical Volume Chart
Tank Number 35mm/36exp 1x 120 2x 120 220 70mm/5' 4x5"
2513 1 / 170ml n/a n/a n/a n/a n/a
2523 or 2521* 2 / 270ml 1 / 170ml 2 / 270ml 1 / 270ml 1 / 330ml 6 / 270ml
2553 or 2551* 5 / 640ml 3 / 330ml 6 / 640ml 3 / 640ml 2 / 730ml 12 / 560ml
2560 (module) 6 / 850ml 4 / 400ml 8 / 850ml 4 / 850ml 3 / 1000ml 12 / 730ml
2563 or 2561* 6 / 850ml 4 / 400ml 8 / 850ml 4 / 850ml 3 / 1000ml 12 / 730ml
2583 8 / 1250ml 5 / 620ml 10 / 1250ml 5 / 1250ml n/a 18 / 1000ml
2593 12 / 1500ml n/a 14 / 1500ml 7 / 1500ml n/a 24 / 1250ml
* Note: A #1505 Cog Gear is installed on all tanks beginning or ending with the number 3. A #1504
Magnet is installed on any tank ending with the number 1.

2800 Series Print Drums
Product Summary:
The 2800 series print drums are designed to allow you to be able to process prints in the daylight,
regardless of whether or not you're using a JOBO processor (by using them with the Roller Base).
Also, like JOBO film tanks, they are a modular system which save you money.
There are two other print drums not shown here (#3062 and #3063). They are not the same modular
design.
Key Features
Modular
When you need to move to a larger format print, simply add an extension piece. The same tank you use for
test strips can be used for larger prints.
Daylight operation
Whether or not you decide to purchase a JOBO processor, you still get the benefits of the tanks being light-
tight.
Technical Specifications/Capacities:
Item# Description Special Features
2820 Test Drum
1526 Combo Tank
2830 Print Drum, 2x 8x10"
2840 Print Drum, 11x14" (Is actually a #2820 drum with a #2870 extension module).
2850 Print Drum, 16x20" (Is actually a #2830 drum with a #2870 extension module).
2870 Extension Module
3063 Print Drum, 20x24"

Print Drum Chart - Quantity
Drum Number 4x5"* 5x7" 8x10" 11x14" 16x20" 20x24" Min Chem Vol
2820 Test Drum 2 n/a n/a n/a n/a n/a 40ml
1526 Combo 4 n/a 1n/a n/a n/a 40ml
2830 Drum 8 4 2 n/a n/a n/a 100ml
2840 Drum 8 4 2 1 n/a n/a 120ml
2850 Drum 16 8 4 1 1 n/a 200ml
2870 Module 8 4 2 n/a n/a n/a 100ml
3063 Drum 24 12 6 2 1 1 300ml
* Note: Quantities reflected are using the #6810 Varioformat Easel

JOBO Drum Expert
Product Summary:
The 3000 series Expert Drums are designed to process sheet film with the highest quality possible.
(Please read that sentence again, it's the most important sentence on this page). It doesn't matter
what system of development you're contemplating; hand processing, rotary processing, hanger
processing, or any other method -- using the Expert Drums will yield beautifully even edge-to-edge
development.
Key Features
Utterly random
It normally isn't a good idea for a company who sells photographic equipment to declare that their stuff
provides random processing. After all, we all want consistency while developing our film. The reason we
state that processing with the Expert Drums is "utterly random" is because the unique design of the drums
dares the chemistry to try to develop a pattern. It can't! What this means is you won't get streaks or spots,
and the density will be completely uniform.
How can I start using the Expert Drums!?
The Expert Drums fit on the JOBO CPA-2, CPP-2, and ATL-2x00 (they don't fit on the CPE-2 or ATL-
1000/1500). (One interesting point about the Expert Drums: We hear time and time again that people
purchase a processor to get to use the Expert Drums. We understand that's like saying people buy a luxury
car because the like the tires that fit it. But it's true!)
Technical Specifications/Capacities:
Item# Description Special Features
3005 8x10" Expert Drum, 5
Sheets Also processes 5x7" sheet film
3006 5x7" Expert Drum, 6
Sheet Also processes 4x5" sheet film
3010 4x5" Expert Drum, 10
sheets Easily the most popular
3360 Foot Pump Needed accessory to open the tanks after processing.

3007 Sponge Rod Used for drying the #3006 and #3010 Expert Drums. (Included
with drum).
3008 Sponge Rod Used for drying the #3004 and #3005 Expert Drums. (Included
with drum).
Expert Sheet Film Drums
Drum # Film and Print Capacities Min/Max Chem Vol
3005 5 - 8x10", 5x7" 270ml - 630ml
3006 6 - 4x5", 5x7" 210ml - 342ml
3010 10 - 4x5" 210ml - 330ml

> Home D
> Home GB
> Service
> Back
| E-Mail Formular | Webmaster | Impressum | ©JOBO AG
Service Analog
JOBO Expert Drums: 3004, 3005, 3006 and
3010
Introduction
[Expert 3010, Expert 3006, Expert 3005, Expert 3004]
JOBO Expert Drums permit the processing of film and prints in the following sizes:
Drum #3004
4 pieces of 5 x 7" to 8 1/2 x 12" film or paper
Solution required
Minimum 270 ml
Maximum 1500 ml
Drum #3005
5 pieces of 5 x 7" to 8 x 10" film or paper
Solution required
Minimum 270 ml
Maximum 1500 ml

Drum #3006
6 pieces of 4 x 5" to 5 x 7" film or paper
Solution required
Minimum 210 ml
Maximum 1000 ml
Drum #3010
10 pieces of 4 x 5" film or paper
Solution required
Minimum 210 ml
Maximum 1000 ml
Back to Top
Index
This Page:
Introduction
Index
The Drums
Opening the Drum
Loading the Drum
Closing the Drum
Processing With the Drums
Filling Quantity
Film Processing
Basic Film Table
Paper Processing
Basic Prints Table
Detailed Tables
Expert Drum Chemistry Usage for E-6, C-41
Expert Drum Chemistry Usage for Most B/W Film Developers
Post Processing
Cleaning the Drum
Drying the Drum
Links to Related Pages:
Loading Sheet Film or Prints With Expert Drums
Instructions Misc. Tank and Drum Capacities
Instructions Process Introduction
Back to Top

The Drums
[Drying Rod, Cog Lid with Light Trap, Drum Body, Film]
Back to Top
Opening the Drum
[Foot Pump #3360]
The lid is most easily removed with foot pump #3360. Firmly grasp the lid while pumping up the pressure inside the
Drum. Do not place any portion of your body over the lid.
If you are removing the lid by hand, grip the lid around its edges not through the center fill opening.
Danger: Never blow in the lid to remove!
Back to Top
Loading the Drum

[Inserting Film Into the Expert Drum #3010]
Films must be inserted straight and not turned at an angle.
While loading the Drum, leave about 1/2 inch (12 mm) of film protruding up out of the cylinder as a "flag" to identify the
cylinders which already have film loaded in them. Before closing the lid, push the film down to its final position.
When loading 4 x 5 inch film, push the material into the cylinder only until it is flush with the top of the cylinder. When
loading the Drum with films of sizes 8 1/2 x12", 8x10" or 5x7", push the material to the bottom of the Drum cylinder.
Caution: The inside of the Drum and lid must be dry!
Back to Top
Closing the Drum
Put on the cog lid and press firmly all around its edges to assure an even fit. This is necessary for proper rotation.
Back to Top
Processing With the Drums
1. Set the lift arm coupling to "System 3000". (Upper connection)
2. Adjust water level in upper trough to approximately 1/4" (6 mm) above the bottom edge of the Drum.
3. Preheat or pre-rinse the Drum in the trough for five (5) minutes.
4. Set rotation speed for 50 rpm on ATL-2 or 3. (Approximately speed 4 on ATL-1, CPP-2 or CPA-2.)
Caution: Do not use the intermittent lift (rocking motion or lateral agitation) on any of the older ATL
processors, which offer this function.
Caution: The Expert Series of Drums will fit on JOBO CPA-2 and CPP-2 manual processors. Care must
be taken! A loaded Expert Drum can be very heavy and strain both the rotation motor and lift of manual
processors. Use both hands to help the lift when raising it, and observe the motor speed. You may need
to increase the rotation speed control setting to obtain desired speed. (Measure speed with reversing
switch set for one direction of rotation for testing only. Reset to reversing directions before processing.)
Back to Top

Filling Quantity
The actual amount of chemicals needed will depend on three factors; the amount of film surface being processed, the
chemicals being used and the minimum solution level required by the Drum for proper solution coverage. The tables
below provide a concise way to select the minimum chemical requirements for most processes. But some processes
(particularly dilute black and white developers) may require higher solution levels in order to have sufficient active
chemicals for the surface area to be processed. Use these tables as a starting point. If the initial test results indicate
chemical exhaustion, increase the solution levels.
Note: For intermediate filling quantities on ATL processors, select the next higher quantity on the ml dial.
Back to Top
Film Processing
For each film size we recommend the following quantities of chemistry as a basic guideline for practical use.
Back to Top
Basic Film Table
Film Size E-6 / C-41 B & W
4 x 5" 33 ml 50 ml
5 x 7" 57 ml 85 ml
8 x 10" 126 ml 200 ml
81/2 x 12" 162 ml 240 ml
Caution: Never use a quantity of chemicals less than the Expert Drum minimum quantity. It must have at
least the minimum quantity to properly cover the films or prints in the drum.
Back to Top
Paper Processing
The #3004, #3005 and #3006 Expert Drums are easily used for paper processing. Papers should be loaded, the same
as film with the emulsion to the inside of the tube and away from the tube wall.
Minimum Chemical quantities as listed on the table should be maintained. Apply the following quantities of solution per
8x10" print, and use either the minimum chemical quantity listed for the specific Drum you are using, or the quantity
computed from this list, whichever is higher.
For each print size we recommend the following quantities of chemistry as a basic guideline for practical use.
Back to Top
Basic Prints Table
This manual suits for next models
6
Table of contents
Other JOBO Laboratory Equipment manuals
Popular Laboratory Equipment manuals by other brands

Labconco
Labconco FreeZone 7750000 user manual

Benchmark
Benchmark Orbi-Shaker CO2 Operation manual

VERDER
VERDER Carbolite Gero HTMA 4/28 Installation, operation and maintenance instructions

Thermo Scientific
Thermo Scientific 88870001 user manual

LAIA
LAIA Cute Thermal user manual

caron
caron 7001-10 quick start guide