SELF-POWERED FEATURES
0706
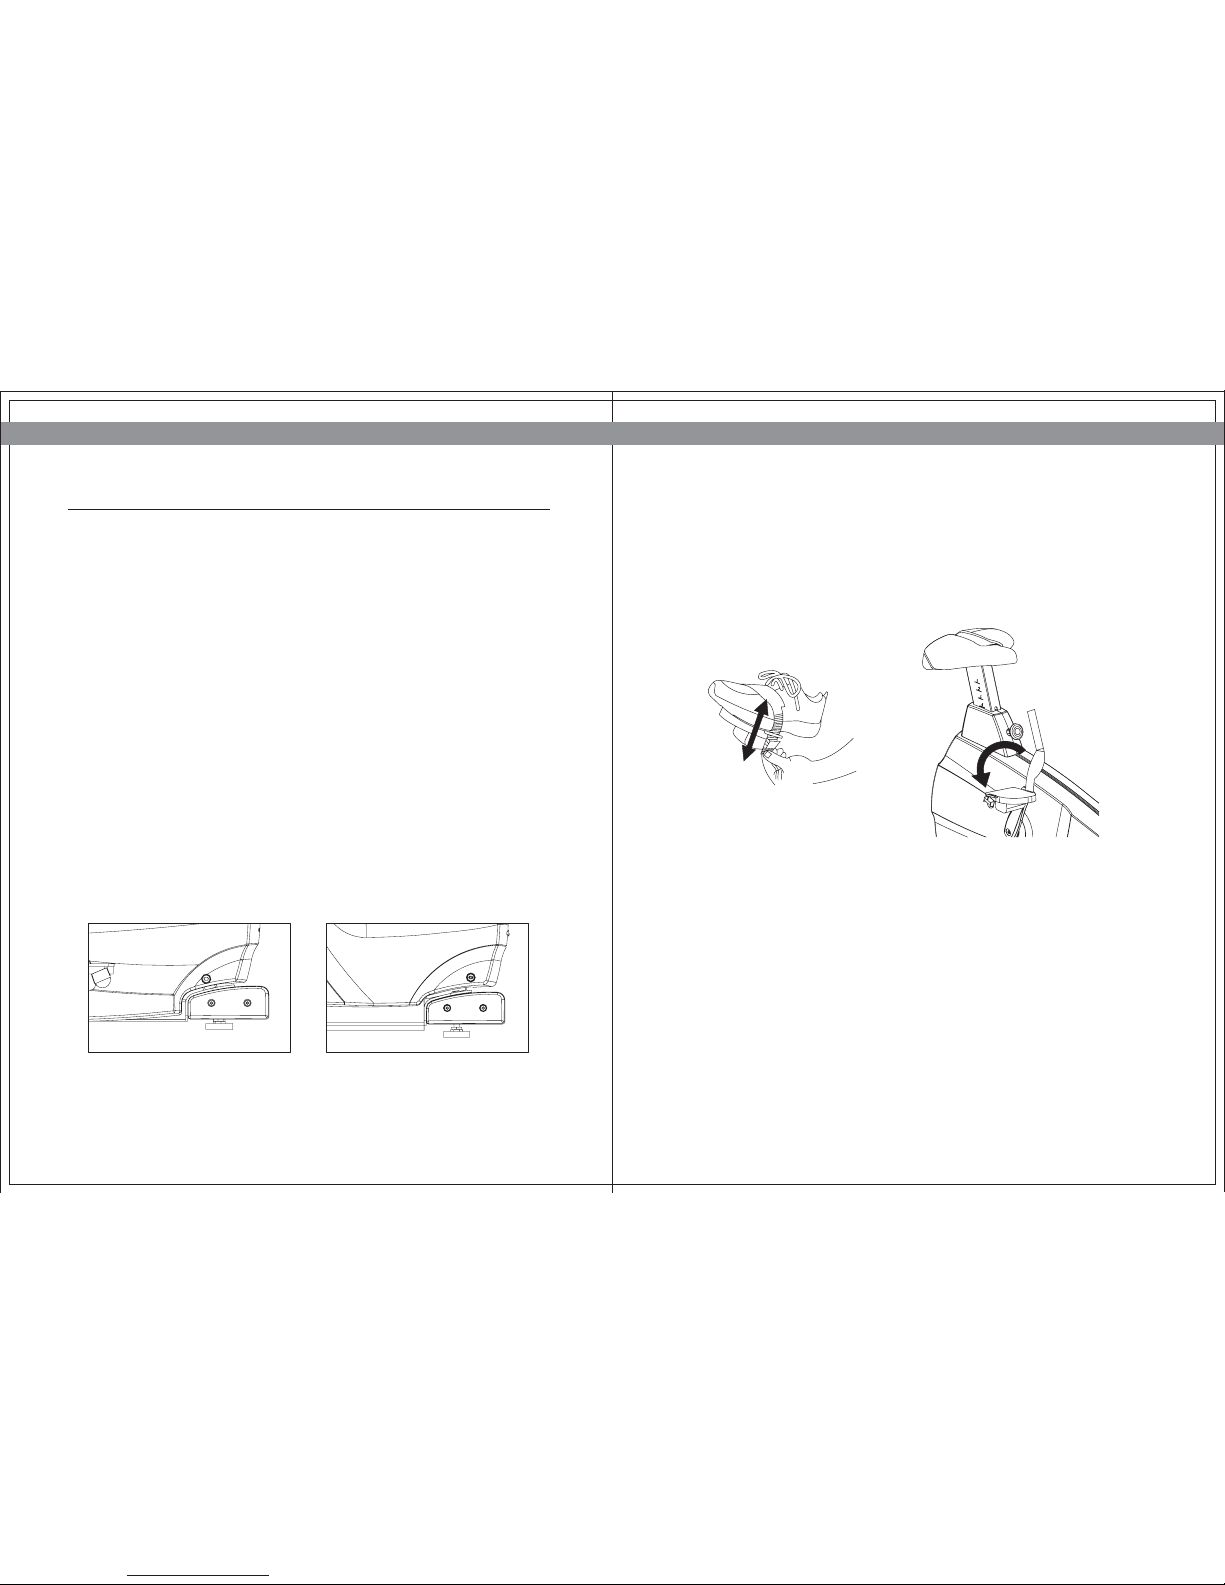
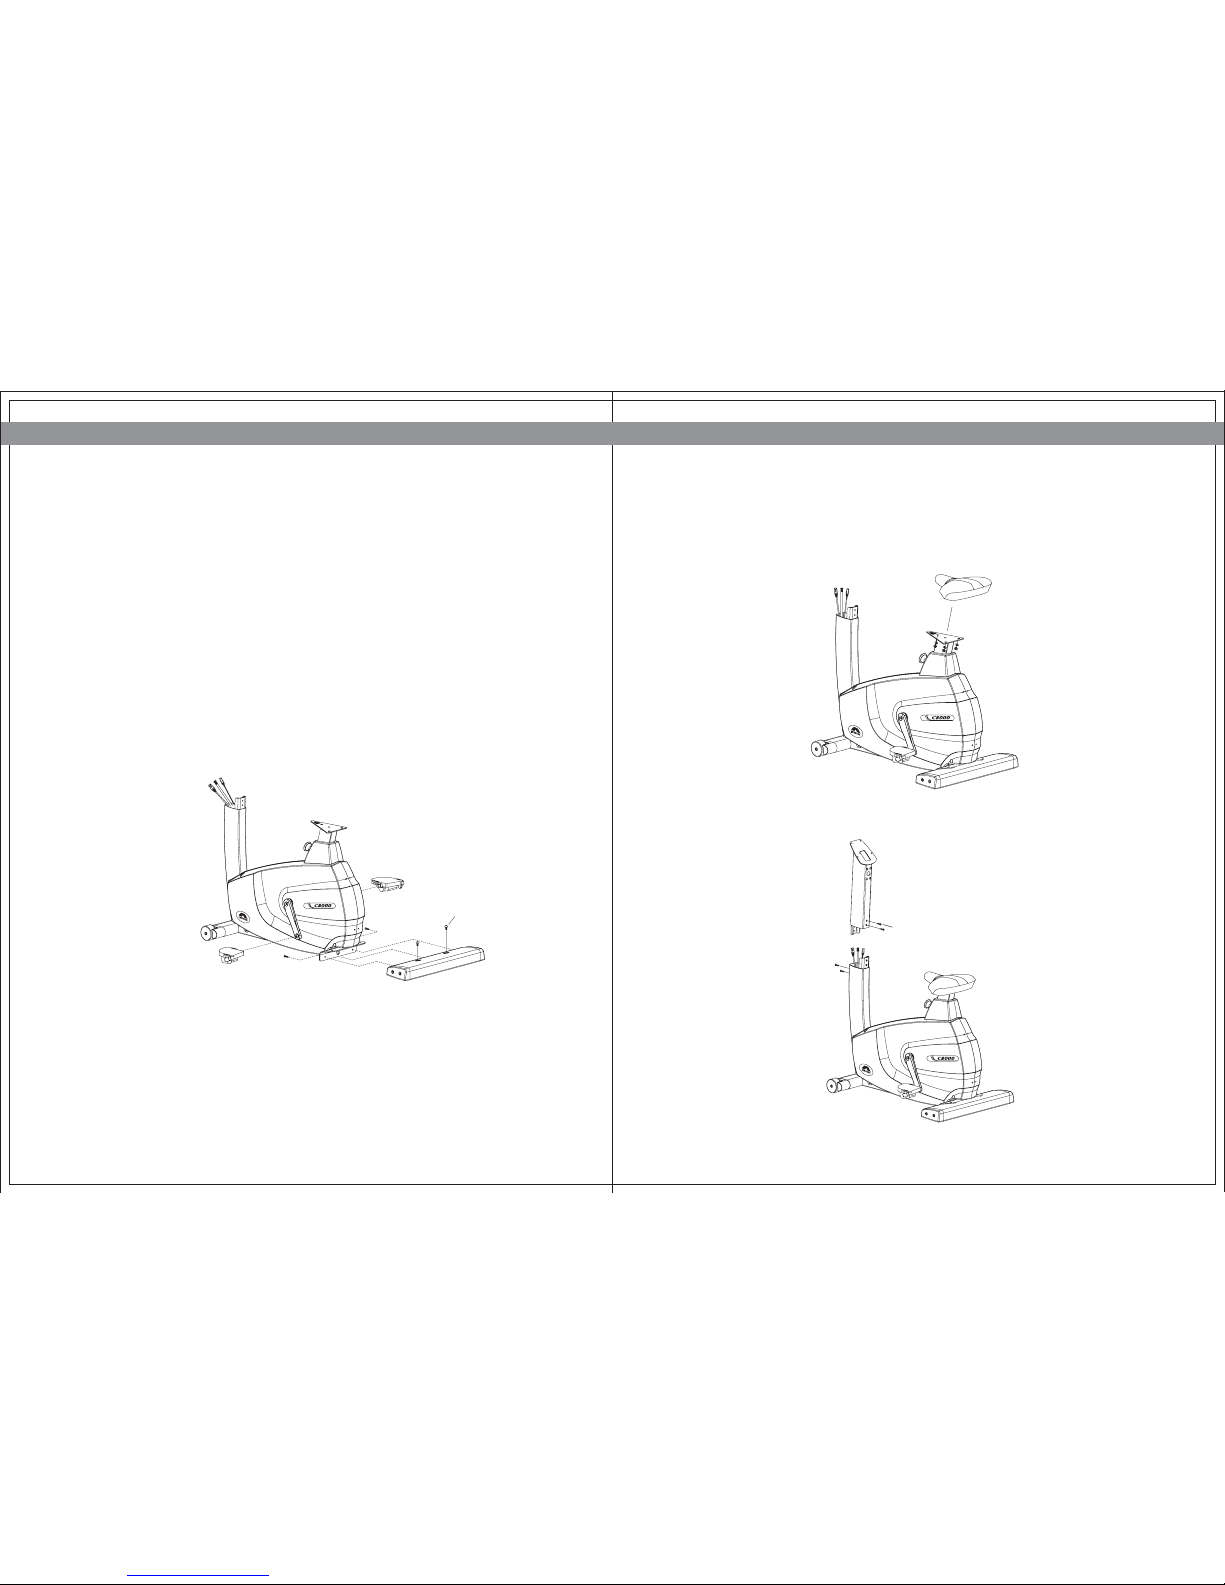
ADJUSTING THE SEAT
JOHNSON BIKE C8000 / R8000 JOHNSON BIKE C8000 / R8000
To determine whether or not the seat requires adjustment, sit on it and place the foot ankle
on the pedals. The knee should bend slightly when the pedal is at the lowest point of its
rotation. It should be possible to pedal without locking the knees or shifting in the seat. The
C8000 features a vertical ratchet seat adjustment system, which makes it easy and safe to
change the height of the seat quickly.
To raise the seat, pull the seat upward to the desired
height, and let it lock in place. Test and re-adjust the
seat height as necessary.
To lower the seat, first get off the bike. Holding the
seat, pull out the yellow seat post knob. Let the seat
slide down to the desired height and release the
yellow seat post knob. Test and re-adjust the seat
height as necessary.
RECUMBENT BIKE R8000
While seated on the R8000, an optimum position will allow movement through the bottom
of the stroke without locking the knees or shifting in the seat. The knees should have a
slight bend at the point of fullest leg extension.
If the seat needs to be adjusted, lift the spring-loaded seat lever on the right side of the seat
to make adjustments. Slide the seat forward or backward to desired location. Release the
spring-loaded seat lever and gently attempt to rock forward and backward to assure it is
locked in place. Check the seat distance again and re-adjust it if necessary.
On the C8000 and R8000, the user’s pedaling generates the power to initialize and display
information on the monitor. A minimum of 15 RPM (revolutions per minute) is required to
start and maintain enough power to keep the monitor functional. If the minimum RPM is
not maintained, the monitor will begin to shutdown. The C8000 and R8000 are able to
extend time to display the monitor, at the minimum RPM not maintained, if the bikes are
equipped with the battery. The bike saves its battery charge by moving into a shutdown
mode whenever PEDAL FASTER appears on the display.
NOTE: The battery is not equipped with the bike for a standard specification.
If your bike equipped with the battery receives inconsistent use, or long time periods
between use, the battery may require recharging. The adapter is an optional accessory for
recharging the unit. To purchase the optional battery and adapter please contact Johnson
Fitness or your local dealer.
SYMPTOMS OF A LOW BATTERY
If the bike has not been used for an extended period of time, the battery may require
recharging. Symptoms of a low battery can include:
• A “LOW BATTERY” message will appear on the monitor
• Backlighting on the LCD display will be disabled
• No one uses the bike for an extended period of time.
If the battery must be recharged, use the optional power adapter charging unit. The charger
should be connected to the bike for a minimum of eight hours to ensure a thorough
charge. If LOW BATTERY still appears on the display after full charging, the battery could be
extinct. Please check with an authorized service technician for replacing the battery.
UPRIGHT BIKE C8000
REPLACING THE BATTERY
The unit’s battery is built to last for a long time. However, if
you feel that the battery may need replacing, check with an
authorized service technician.
CAUTION:
The battery stored inside the unit contains hazardous
materials to the environment. Proper disposal of the battery
is required by the local law.
C-SAFE
CARDIO
BATTERY


 Service manual")