8
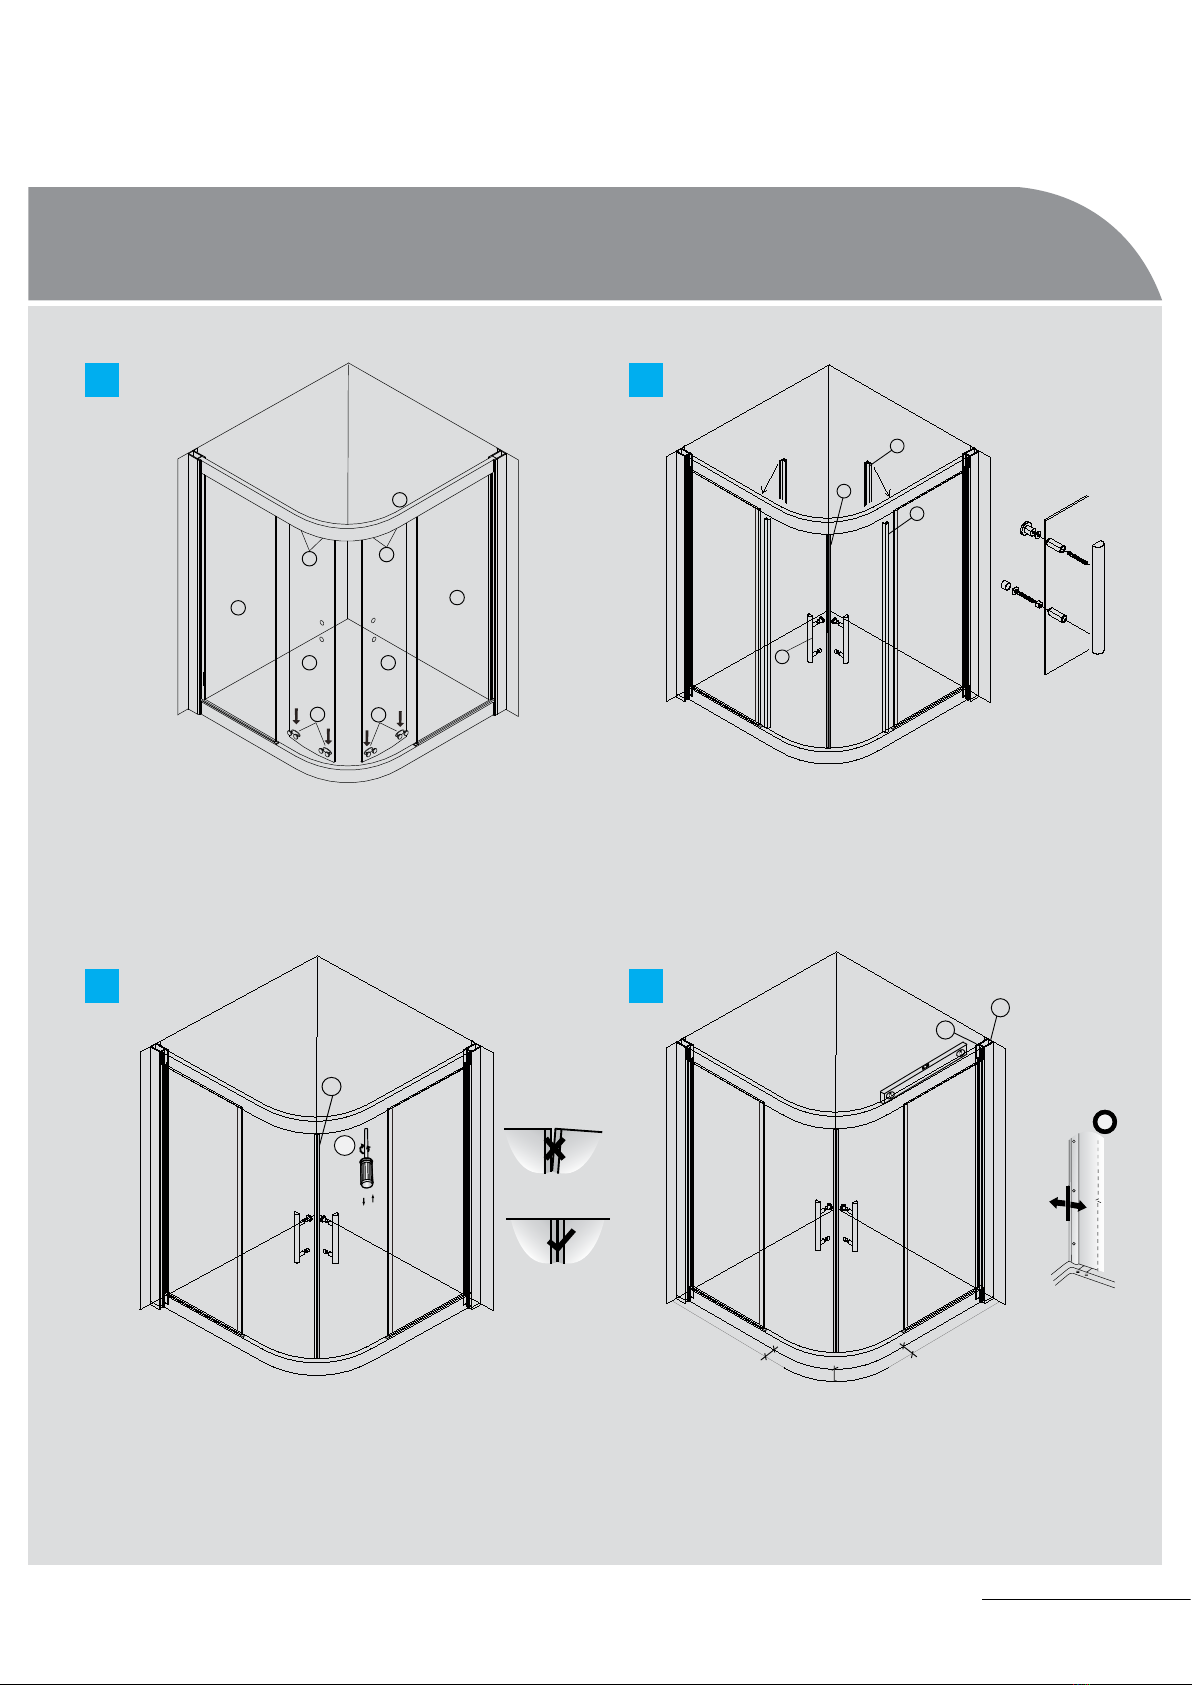
daintree curved shower screen
JohnsonSuisse
www.gemini-industries.net
FOR FURTHER INFORMATION PLEASE
CONTACTYOUR NEAREST GEMINI OFFICE:
HEAD OFFICE (SYDNEY)
2/97 Banksia St, Botany, NSW 2019
T 1300 717 717 F 1300 746 480
MELBOURNE
31 Koornang Rd, Scoresby,VIC 3179
T 1300 717 717 F 1800 225 315
BRISBANE
1/477 Newman Rd, Geebung, QLD 4034
T 1300 717 717 F 1300 746 480
PERTH
27 Harris Rd, Malaga,WA 6090
T 1300 717 717 F 1800 225 315
ADELAIDE
Rep:Terry Hayes
T 0499 221 201 F 1800 225 315
HOBART
Rep: Bob Moore
T 0428 223 116 F 1800 225 315
DUBBO
Rogers Agencies
6 Richard Ryan Pl, Dubbo NSW 2830
T 1300 717 717 F 1300 746 480
WARRANTY INFORMATION
This warranty is provided by:
Gemini Industries Pty Ltd
(ABN 87 079 297 617)
2/97 Banksia St
Botany NSW 2019
P 1300 717 717
F 1300 746 480
Gemini Industries provides a 1 year parts and labour product warranty, subject to correct installation procedure and a 2
year product replacement warranty.
Visit www.gemini-industries.net to view full warranty terms.
Our goods come with guarantees that cannot be excluded under the Australian Consumer Law. You are entitled to a
replacement or refund for the major failure and for compensation for any other reasonably foreseeable loss or damage.
You are also entitled to have the goods repaired or replaced if the goods fail to be of acceptable quality and the failure
does not amount to a major failure.
ENDUROSHIELD® WARRANTY
To activate your warranty for EnduroSheild®, enter the code affixed to the door panel, at www.enduroshield.com/
warranty.