Journey ComfyWheels User manual

PRODUCT MANUAL
®

2
I. INTRODUCTION AND NOTES
READ THIS MANUAL COMPLETELY BEFORE RIDING YOUR COMFYWHEELS SCOOTER.
SAFETY WARNING: THE COMFYWHEELS SCOOTER IS NOT A TOY AND SHOULD NOT BE
OPERATED BY ANYONE UNDER 16 YEARS OLD.
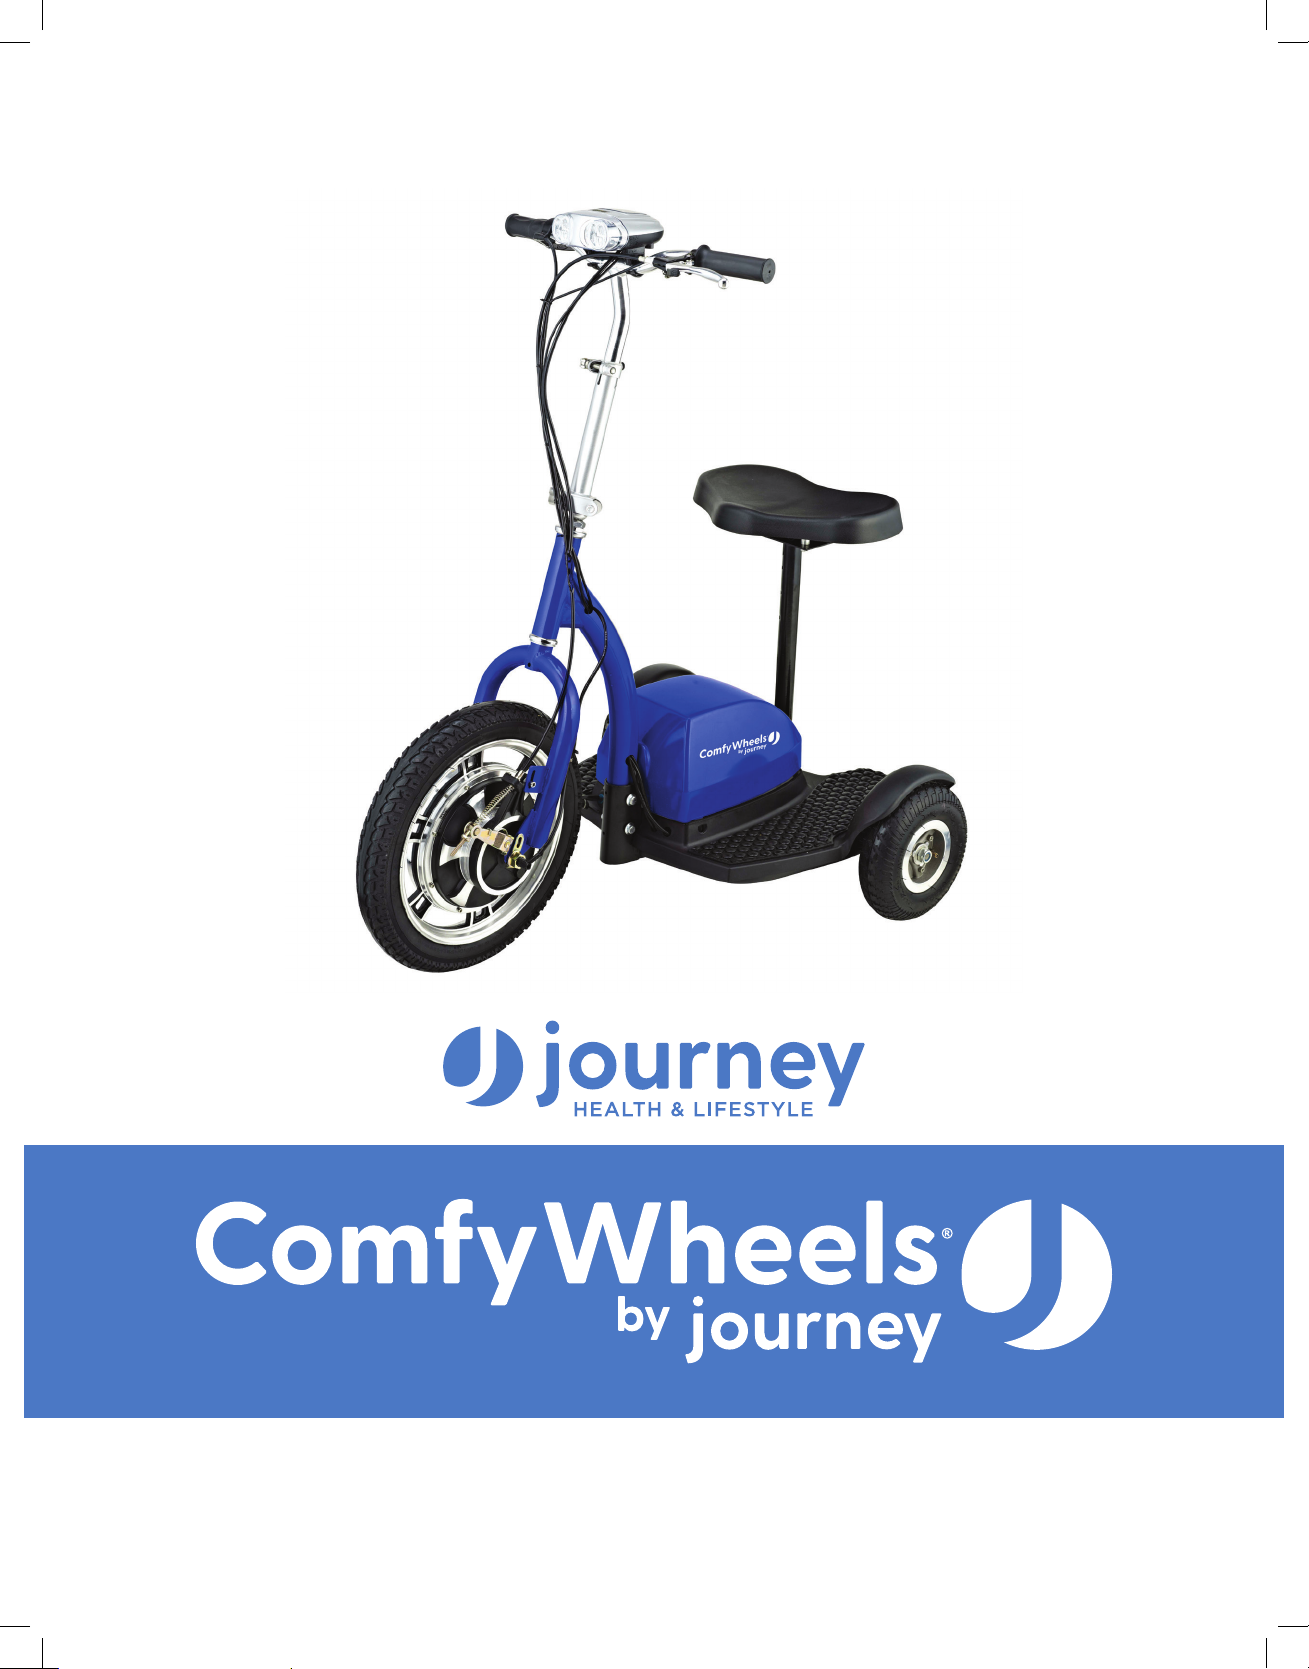
Welcome to Journey Health & Lifestyle!
Thank you for purchasing a ComfyWheels Scooter by Journey. Our hope is that your
electric 3-wheel scooter will get you where you’re going while you look good, feel good
and have some fun!
Please take the time to familiarize yourself with this product manual. Proper use of your
3-wheel scooter will maximize your performance and enjoyment.
Safety Instruction (Please take note of the following before each ride)
• Only one person at a time should ride
• Before riding be sure to check that all pivot points, locking buttons, quick releases, and
latches are secured properly
• Do not place the battery near heat or fire
• Do not expose the charger to water or any moisture
• Check if battery is properly charged and installed
• Charge battery after each use
• Always ride on dry paved surface. Gravel, wet and uneven surfaces are a hazard. Avoid
sand and loose impediments
• Do not exceed the speed you are comfortable with

3
• Charger
• Manual
• Seat
• Tool Kit
• Fuse
• Battery
II. INSTRUCTIONS FOR USE
PARTS LIST
ASSEMBLY
Step 1
Unpack the ComfyWheels scooter and inspect all the parts to insure all are included.
Please contact Journey Health & Lifestytle immediately if any parts are missing or
damaged when shipped.
Step 2
Remove the bolts and nuts from
the connecting tube clamp. Place
the connecting tube into the top
opening. Align the bolt holes.
Step 3
Slide the two bolts through the
holes connecting tube and neck.
Twist the bolts to secure.
Step 4
Tighten bolts, nuts, and the six screws in the two corners using the wrench included in the
free tool kit.

4
II. INSTRUCTIONS FOR USE
MOUNTING HANDLE
Step 5
Extend the handle bar tube to full upright position and insert it into the connection hole on
the front forks.
Step 6
Ensure the handle bars are facing forward, with the brake on the left and the throttle on
the right. Then tighten the handle bar hex bolt securely. Fold handlebar down to the left-
hand side and tighten hex bolt.
Step 7
The height of the handle bars can be adjusted by opening the quick clip release. Raise the
handle bars by pulling or pushing on the crossbar, then firmly close the quick release clip.

5
II. INSTRUCTIONS FOR USE
Step 8
Install the foot grips by placing one on each side of the scooter’s rear section as
shown below.
Step 9
Install the seat cushion and tread and fasten the buttons.
Step 10
Then the seat lift pipe is installed with the seat tube.
FOOT GRIP INSTALLATION
SEAT INSTALLATION

6
II. INSTRUCTIONS FOR USE
Step 11
Install the basket, open the velcro, fix the iron shelf with velcro, and thread it on the
front handle.
Step 12
Connect the 3 waterproof power supply lines. Please ensure the pins are straight before
connecting. (Pay attention to the position of the connector)
SEAT INSTALLATION

7
II. INSTRUCTIONS FOR USE
Charging matters
Please charge the battery completely before the first ride.
To charge the battery, insert the charger into the socket on the back of the battery box
(as shown), then plug the charger into the wall. When the battery is charging, the charger
indicator light shows red, when the battery is full, the charger indicator light shows green.
Ensure that the charger is properly connected to the scooter.

8
II. INSTRUCTIONS FOR USE
WARNING:
TO ENSURE THAT THE BATTERY LIFE IS MAXIMIZED, PLEASE CHARGE IT AT A MINIMUM
EVERY 2 MONTHS. WHEN THE BATTERY IS FULLY CHARGED, UNPLUG THE CHARGER.
Vehicle maintenance
Your ComfyWheels scooter requires maintenance to give you years of service. Always
follow these simple procedures before your ride.
1. Make sure the battery is fully charged. It takes 6-8 hours to fully charge the battery.
2. The battery needs to be charged fully every 45-60 days if you are not charging
consistently. If you allow the battery to die often within charge, it can hinder the
battery performance.
3. Inspect all connections each time you ride to insure nothing is loose and wires are not
frayed or damaged.
4. Please make sure tires are inflated to their proper pressure as indicated on the tires.
5. Test brakes before you accelerate to make sure they are properly used.
6. Don’t leave your scooter in the rain. It is not waterproof. Water damage will void the
ComfyWheels warranty.

9
III. SPECIFICATIONS AND WARRANTY
Product Specifications
Maximum Forward Speed 19-25 mph
Maximum Climbing Grade 10 degrees
Load Capacity 350 lbs
Charging Time 6-8 hours
Brake Front, Drum brake
Charging Voltage AC 110-220/240, 50-60HZ
Motorpower 36V250-500W/48V 500-800W brushless motor
Warranty
Journey Health & Lifestyle warrants the ComfyWheels scooter frame, motor, controller,
tires, throttle and brakes to be free from defects in materials, workmanship and assembly
for twelve (12) months from the original purchase date. Journey Health & Lifestyle war-
rants the ComfyWheels scooter battery to be free from defects for six (6) months from the
original purchase date.
*NOTE: Speed and distance may vary depending upon the terrain and weight load.

If you have any questions, call us at our toll free number:
or visit www.shopjourney.com
1-800-958-8324
®
Table of contents