Joyetech eGo-C User manual

Ego-C E-Cigarette User's Guide
The instructions that come with an Ego-C e-cigarette starter kit are so bad, we don't even include them in
the packages anymore. Instead, we provide the following user's guide that we created, which we think
e plains things in a much clearer and more detailed way:
Charging the Batteries of your Ego-C E-Cigarette
Although many people think that a brand new Ego-C e-cigarette battery should be completely charged
before it is ever used, this is not based upon any known sound electronic theory as it relates to lithium ion
batteries. Lithium ion batteries do not have a "memory" so there is no reason to follow the charging
practices of old with e-cigarette batteries.
The fact is, when you first get an Ego-C e-cig battery, you will not be the first person to charge it anyway;
the factory always puts either a full or partial charge in batteries to test them before bo ing them up and
shipping them out. Keep in mind, however, that if the factory just charged the battery enough to test it, it will
not produce quite as much vapor as a fully charged battery will and, of course, it will not last very long
before needing to be recharged. You really should charge your batteries before using them when you first
get your kit but if you absolutely must play with your new toy, go ahead and take a few puffs using one of
the batteries before putting it on the charger to get its first good charge.
When an eGo e-cigarette battery loses its charge completely it will blink a dozen times or more. Any further
attempts at using the battery will be futile. When that happens, it's definitely time to charge your eGo
battery as follows:
1. Attach the USB charger's cord to the USB port in the AC wall plug. You can also skip this step and plug
your eGo charger's cord directly into a computer or any other device's powered USB port. Keep in mind,
however, that it will take considerably more time to charge an eGo battery from the lower powered USB
port than it does from an AC wall outlet.
2. Plug the cord into a working AC outlet (obviously, you don't need to do this if you are going to be charging
your eGo battery from a computer or other USB device). The light on your eGo charger should turn green,
indicating that it is getting power.
3. Take your battery (the longest component of your eGo e-cigarette that has a button on it) and screw the
threaded side into the charger, turning clockwise. DO NOT SCREW YOUR EGO BATTERY IN TOO
TIGHTLY. Stop when there is resistance and you see the light change from green to red. If you screw your
eGo battery onto the charger too tightly, you may force the post down into the battery where it will no longer
be able to make proper contact with the charger or an atomizer.
4. Charge the battery until the light on the charger turns from red to solid green. Sometimes, you may see the
light on the charger flickering between red and green. This means that your battery is only partially
charged. It should take somewhere between 3 and 4 hours to charge acompletely drained 650 mAh eGo
battery and an additional couple of hours for an 1,100 mAh battery.
WARNING: The following precautions MUST be e ercised when charging your eGo batteries:
•Only recharge eGo batteries with the manufacturer's battery charger. Using chargers with incorrect voltage
or current can cause a fire or permanent failure.
•Never leave a charging eGo battery unattended.
•Never charge an eGo battery overnight while you sleep.
•Never charge an eGo battery longer than necessary. When it is fully charged, remove thebattery. Leaving a
battery on charge when it is full may degrade it s performance and couldresult in a fire.
Assembling Your Ego-C Electronic Cigarette
All eGo batteries are now lockable and are frequently shipped in the "locked" state. Being able to lock a
battery is an important new safety feature that allows you to carry an assembled eGo e-cigarette in your
pocket without having to fear that it will turn on if you bend over the wrong way. You can lock or unlock an
eGo battery by pressing the button rapidly 5-7 times. When you do this, the battery will flash several times,
indicating that you have either locked or unlocked it.

If your eGo battery's button is not glowing when you press it, the battery is probably locked and you will
need to unlock it. If your eGo battery does not flash after rapidly pressing the button 5-7 times, you
probably are not pressing the button fast enough or it is a completely uncharged battery. It is easy to tell if
an eGo battery is not charged; the light on the charger will turn red when the battery is screwed into it.
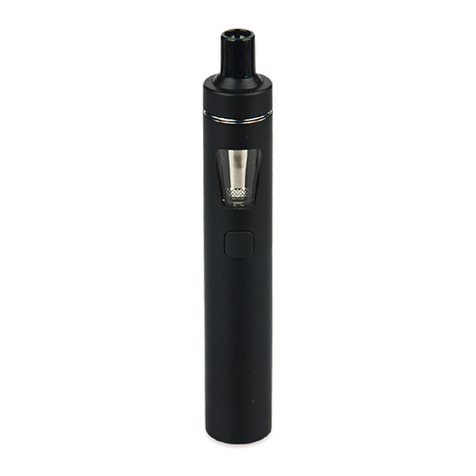
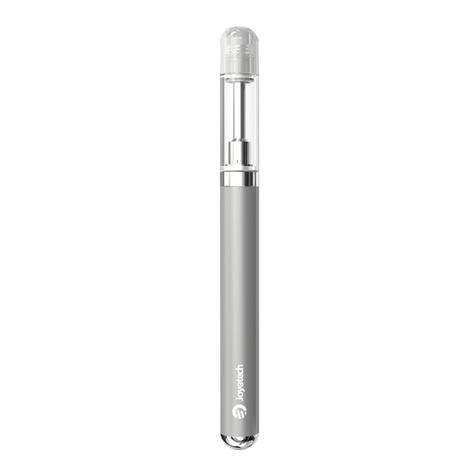
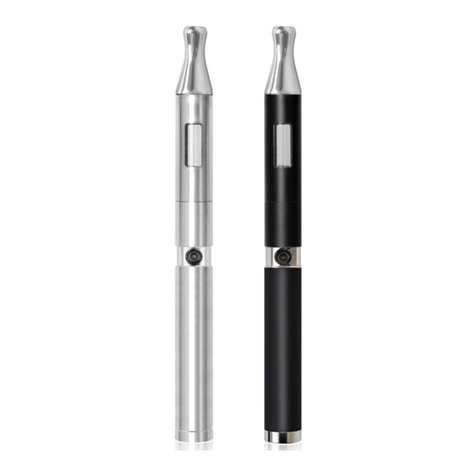
An Assembled Ego-C ele troni igarette has five pie es:
1. eGo Battery: It is the longest piece and has a button on it.
2. Type-C Atomizer Head: It is metal, silver, appro imately of an inch long, and is pointy on one side with a
flat cylindrical shape on the other end.
3. Type-C Cone: This is metal, cone-shaped, hollow and appro imately 1½ inches long. When you first get
your eGo-C Starter Kit, the silver Adapter Ring will be screwed onto the bottom threads of the Type-C cone.
4. Type-C Atomizer Cap: This is a silver, metal piece that has screw threads on both ends (female-
female). When you first get your Joye eGo-C Starter Kit, the silver Atomizer Cap will be screwed onto the
bottom threads of the Type-C cone.
5. Type-C Tank Cartridge: It is plastic, relatively clear in color, about 1½ inches long and has a wide flat
mouthpiece.
Assembling an eGo-C Starter Kit isn't all too difficult once you know how all of the parts fit together. Here's
how it's done:
1. When you receive your eGo-C Starter Kit, the silver atomizer cap is already screwed onto the cone.
Unscrew the silver atomizer cap off of the bottom (widest end) of the cone.
2. Screw the silver atomizer cap onto your your eGo battery. There's only one way these two parts can screw
together (you'll figure it out).
3. Remove one of the Type-C atomizer heads from its hermetically sealed package and place the flat side of
the atomizer head into the silver atomizer cap, which should now be on top of your eGo battery. It should
seat perfectly in the center of the atomizer cap with the pointy side of the atomizer head sticking up.
4. Place the widest part of the Type-C cone over the atomizer head and screw it onto the silver atomizer cap.
This will lock the atomizer head into place.
5. Unwrap one of the three Type-C tank cartridges that came with your eGo Starter Kit. All of our eGo-C
Starter Kits come with unfilled cartridges and a bottle of e-liquid that you use to fill the tank cartridges.
Please see the section, below, about how to fill your eGo-C cartridges. Once you have filled your cartridge,
simply push it onto the open end of the cone (the other end should already be screwed onto the battery).
IMPORTANT: You should always take five drags from your assembled eGo-C e-cigarette without pressing
the button when using a new eGo-C atomizer head in order to prime it. After taking the five "dry" puffs, you
can press the button and use your e-cigarette.
Filling Your Ego-C Cartridges with E-Liquid
E-Liquid (also commonly referred to as "e-juice" or "liquid nicotine") is what creates the vapor that you
inhale. When you receive an Ego-C starter kit, there is no e-liquid in any of the cartridges, regardless of the
type of starter kit that you purchased. Because we think everyone should be able to select whatever flavor
and nicotine strength that they like, you will need to order e-liquid in addition to your Ego-C Starter Kit
(hopefully you heeded our advice and did so).
There's nothing too complicated about using eGo-C Tank Cartridges. They are a bit different from standard
510 or Mega cartridges, though. Since you can vape every last drop of e-liquid before needing to refill your
eGo-C Tank Cartridge, there is no difference between filling a brand new eGo-C Tank Cartridge and refilling
one. How you fill them depends on the type of tip that your e-liquid bottle has.
Filling an eGo-C Tank Cartridge with a Needle Tip Bottle

If you have an e-liquid bottle with a thin, needle tip, you don't have to remove the tank cartridge's cap at all.
Simply insert your bottle tip into the hole in the cap, fill the cartridge almost all the way to the top (for an
eGo-C atomizer head to function properly, it is important that you leave a little bit of an air pocket) and push
the cap end down onto your eGo-C atomizer cone.
Filling an eGo-C Tank Cartridge with a Standard Tip Bottle
If your bottle of liquid has a standard tip, you will not be able to insert it into the hole in the cap, so you will
have to remove the cap. Simply hook a fingernail or thumbnail in the seam between the cap and the main
tube part of the cartridge and pop the cap off. Fill the eGo-C tank cartridges almost all the way (leave a little
bit of an air pocket) and snap the cap back on. Then, push it onto your eGo-C cone, cap side toward the
cone, and you are good to go!
What are the Soft Caps For?
All of the eGo-C tank cartridges are packaged with a hard cap attached, but we also include a packet with
three soft caps. Many people claim that the soft caps seal better, although we have not found that to
necessarily be the case. The soft caps are definitely easier to remove and re-attach to the tank cartridges,
though. Unfortunately, they also tear quite easily, so you should not only be very careful as you remove and
re-attach them, but you should probably hold onto your hard caps, just in case you tear all of the soft caps!
Using Your Ego-C E-Cig
All of our eGo e-cigs come with manual, push button batteries. When you push the button, it supplies
power to the atomizer (the "heating element" part of your e-cigarette). As long as you hold the button down,
the atomizer coil will be activated and provide heat to vaporize the e-liquid in the cartridge. When you let go
of the button, the vapor will no longer be generated.
Please keep in mind that you can hold the button down for too long. If you hold the button for longer than 5-
7 seconds, an automatic cutoff will occur that is built into every eGo battery's circuit board to prevent you
from burning up your atomizers and overburdening your batteries. When this happens, the battery will flash
several times and stop working temporarily. If you release the button and press it again, the battery will
start powering the atomizer again.
When using your eGo electronic cigarette, it should always be held at a slight angle, with the battery side
tilting toward the floor. If the battery end is higher than the mouthpiece side, it is quite possible that you will
get e-juice in your mouth. This is nothing more than the process of gravity!
Since all people smoke cigarettes differently, it only stands to reason that different people will use their e-
cigarette in different ways. The method we have found that gives the ma imum amount of vapor for the
majority of people is to draw as lightly as you can on your eGo while pressing the button. This permits the
airflow to have the ma imum amount of time heating the liquid. If you inhale too hard, the air rushes past
the liquid in the cartridge faster than the atomizer can heat it, causing very little vapor to be produced.
In no time at all, you will be accustomed to the amount of suction (for lack of a better term) that will produce
the most vapor for you!
© BeatNicVapor.com - All Rights Reserved
Table of contents
Other Joyetech Electronic Cigarette manuals

Joyetech
Joyetech eRoll User manual

Joyetech
Joyetech eGo-CC User manual

Joyetech
Joyetech Joye eGo User manual

Joyetech
Joyetech eGo AIO User manual

Joyetech
Joyetech eGrip OLED User manual

Joyetech
Joyetech eGo ONE User manual

Joyetech
Joyetech eGo AIO User manual

Joyetech
Joyetech eGo Pod User manual

Joyetech
Joyetech e-Vic VTC Mini User manual

Joyetech
Joyetech eVic VTwo User manual