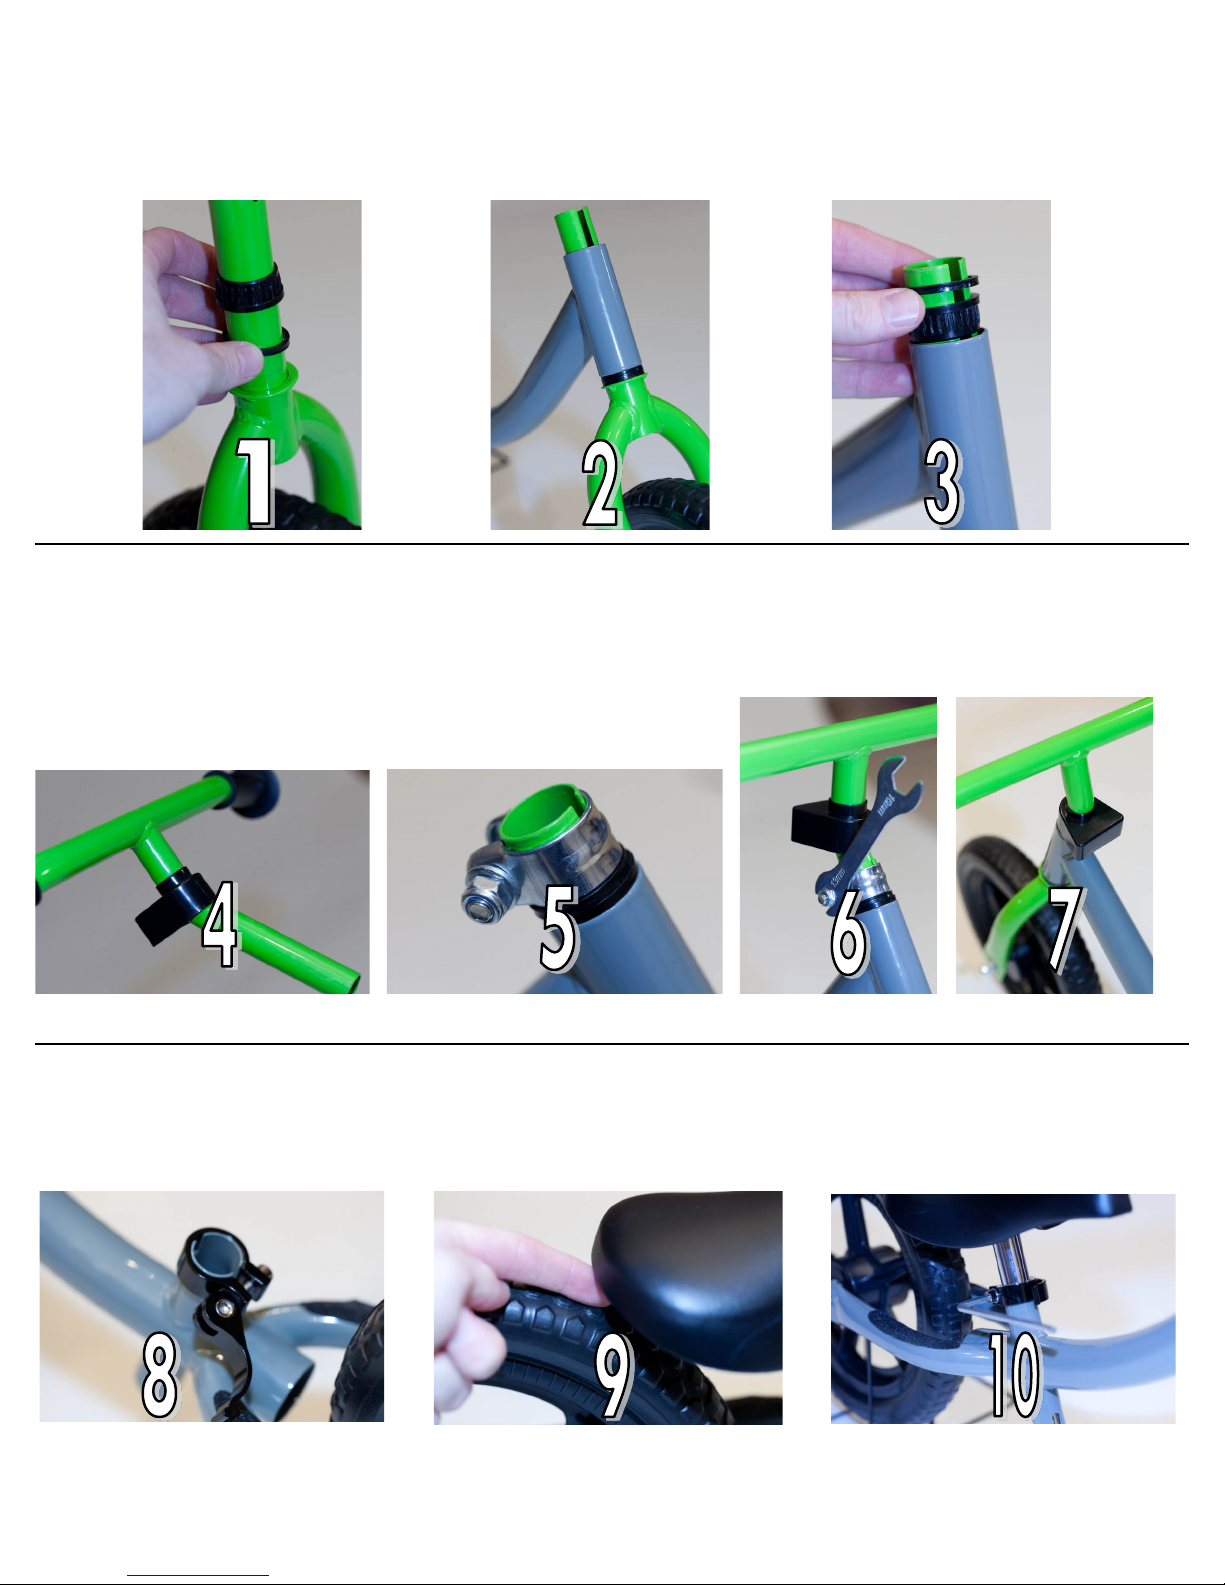
FRONT FORK ASSEMBLY:
1) Hold the fork assembly (B) and place the rst thin o-ring (G) on followed by the thick cap (H).
2) Insert the fork assembly (B), into the frame assembly (A).
3) Insert the second thick cap (H) onto the fork, followed by the thin o-ring (G).
HANDLEBAR ASSEMBLY:
4) Place the cover (I) on the handlebar (C).
5) Set the camp (E) over the fork assembly.
6) Insert the handlebar into the frame fork assembly and ghten the bolt with the enclosed wrench. Handlebars should be angled for-
ward. Ensure the bolt is suciently ght. Under ghtening may result in a safety hazard.
7) Slide the cover (K) down to cover the bolt.
SEAT ASSEMBLY:
8) Insert the seat clamp (F) over the frame.
9) Insert the seat assembly (D) into the frame allowing for sucient clearance for the rear re. Safety Note: The seat bar is marked with
the minimum inseron depth. Insert the seat to ensure the minimum mark is not visible.
10) With the seat clamp open, use the enclosed allen wrench tool to ghten the bolt, then close the side clamp for nal install.
DECALS:
Your balance bike includes a single sheet of decals with various color opons. Install the preferred race plate decal and “JUBILANT” frame
logos as desired.


